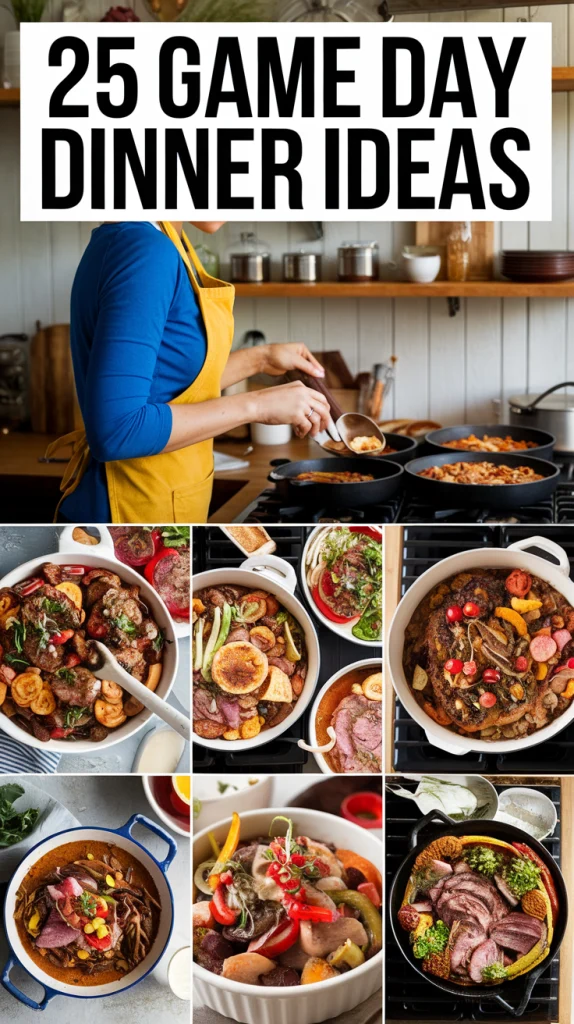
Game day is all about good food and great company, and planning the perfect dinner is key to setting the mood. Here are 25 tasty ideas that will keep your guests satisfied and cheering for more, whether you’re hosting a backyard BBQ or a cozy couch gathering. Get ready to turn your game day into a food fiesta!
Affiliate Disclosure: "As an Amazon Associate I earn from qualifying purchases made from the images and links in this post. We are a participant in the Amazon Services LLC Associates Program, an affiliate advertising program designed to provide a means for us to earn fees by linking to Amazon.com and other affiliated sites."
Smoky Chipotle Chicken Tacos
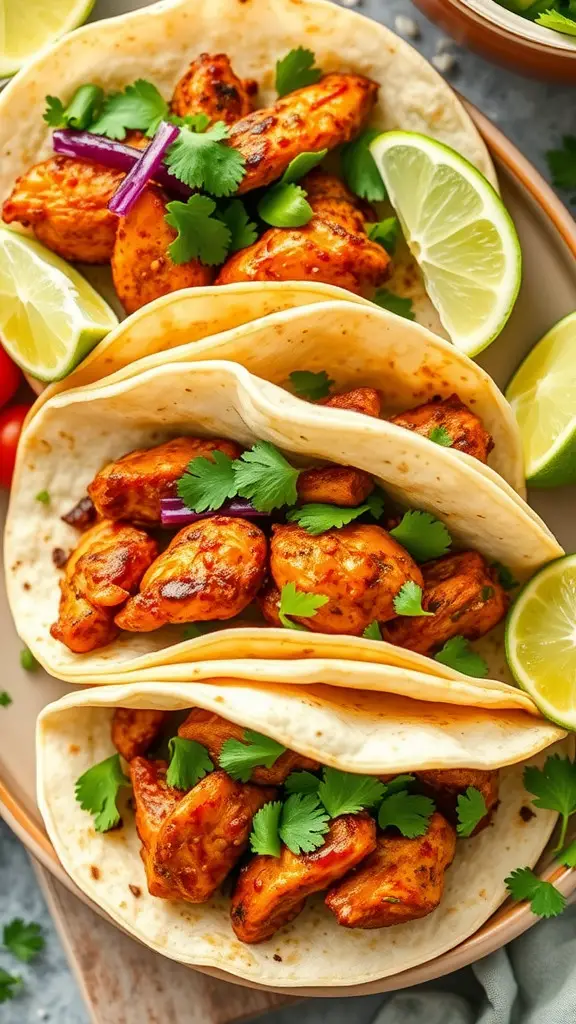
These Smoky Chipotle Chicken Tacos are a feast for the eyes and the taste buds! Picture warm tortillas filled with juicy, spiced chicken chunks, topped with fresh cilantro and vibrant purple onions. Each taco is a mini celebration, perfect for any occasion.
Pairing these tacos with lime wedges adds a refreshing zing that brightens up each bite. Imagine hosting a watch party or a game night, where these tacos steal the show. They’re not just food; they’re the ultimate crowd-pleasers!
To whip up these delightful treats, gather your ingredients: chicken, chipotle seasoning, tortillas, cilantro, and onions. Cook the chicken until it’s smoky and tender, then pile it high in the tortillas. Don’t forget the lime for that extra kick! These tacos are sure to be a hit at your next sports event feast or championship cookout.
Ingredients:
- 1 lb boneless, skinless chicken breasts or thighs, cut into small chunks
- 2 tsp chipotle seasoning or chipotle chili powder
- 1 tsp smoked paprika
- 1 tsp ground cumin
- 1 tsp garlic powder
- 1 tsp onion powder
- Salt and pepper, to taste
- 1 tbsp olive oil (for cooking)
- 8 small corn or flour tortillas
- 1 small red onion, thinly sliced
- Fresh cilantro leaves, chopped
- 2 limes, cut into wedges
- Optional toppings: sour cream, salsa, or crumbled queso fresco
Instructions:
- Season the Chicken: In a mixing bowl, toss the chicken chunks with chipotle seasoning, smoked paprika, cumin, garlic powder, onion powder, salt, and pepper until evenly coated.
- Cook the Chicken: Heat the olive oil in a large skillet over medium-high heat. Add the seasoned chicken and cook for 6-8 minutes, stirring occasionally, until the chicken is cooked through and nicely browned.
- Warm the Tortillas: While the chicken is cooking, warm the tortillas by lightly heating them in a dry skillet or wrapping them in foil and placing them in a warm oven.
- Assemble the Tacos: Divide the cooked chicken among the warm tortillas. Top each taco with sliced red onion, fresh cilantro, and a squeeze of lime.
- Serve and Enjoy: Arrange the tacos on a serving platter with extra lime wedges and your favorite toppings on the side.
Serving Tips:
- Customize It: Add your favorite taco toppings like avocado slices, pickled jalapeños, or a dollop of guacamole.
- Make It Ahead: Prep the chicken mixture a day before and cook when ready to serve.
- Presentation Idea: Serve on a rustic wooden board for a festive, party-ready vibe.
These Smoky Chipotle Chicken Tacos are guaranteed to bring bold flavors and smiles to your next gathering. Enjoy every smoky, spicy, and citrusy bite!
Crispy Parmesan Zucchini Fries
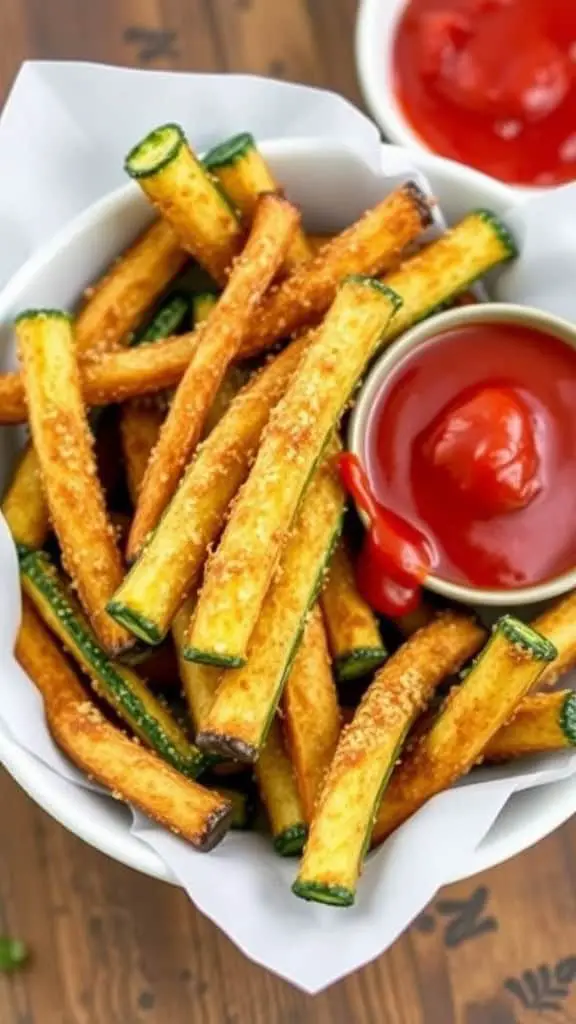
These crispy parmesan zucchini fries are the perfect addition to your game day spread. They come out golden brown and deliciously crunchy, making them a fan-favorite at any gathering.
To whip these up, you’ll need fresh zucchini, parmesan cheese, breadcrumbs, and a few simple spices. Slice the zucchini into fry shapes, coat them in your mix of cheese and breadcrumbs, and bake until crispy. Pair them with your favorite dipping sauce for the ultimate snack.
Whether you’re hosting a watch party, a championship cookout, or a casual get-together, these fries will surely be a hit. Serve them alongside your usual game-time eats for a winning dinner recipe. They’re a tasty option for anyone looking to impress guests without much fuss.
Ingredients:
- 2 medium zucchinis, cut into fry-shaped sticks
- 1 cup panko breadcrumbs
- 1/2 cup grated parmesan cheese
- 1 tsp garlic powder
- 1 tsp paprika
- 1/2 tsp salt
- 1/2 tsp black pepper
- 2 large eggs, beaten
- Cooking spray
- Dipping sauces: ketchup, ranch, or your favorite dip
Instructions:
- Preheat the oven to 425°F (220°C). Line a baking sheet with parchment paper and lightly coat with cooking spray.
- In a shallow dish, combine panko breadcrumbs, parmesan cheese, garlic powder, paprika, salt, and pepper.
- In another shallow dish, beat the eggs.
- Dip each zucchini stick into the beaten eggs, letting the excess drip off, then coat evenly in the breadcrumb mixture.
- Place the coated zucchini sticks in a single layer on the prepared baking sheet. Lightly spray the tops with cooking spray for extra crispiness.
- Bake for 20-25 minutes or until golden brown and crispy, flipping halfway through for even cooking.
- Remove from the oven and let cool slightly before serving.
- Serve hot with your favorite dipping sauces.
Serving Tips:
- Extra Crunch: For even crispier fries, place the baking sheet on the top rack of the oven.
- Make Ahead: Bread the zucchini sticks ahead of time and refrigerate until ready to bake.
- Presentation: Serve in a fun, game-day themed basket or bowl with dipping sauces in small cups.
These crispy parmesan zucchini fries are a guilt-free snack that delivers big on flavor and crunch. They’re sure to be the star of your party spread. Enjoy every crispy bite!
Loaded Nacho Skillet
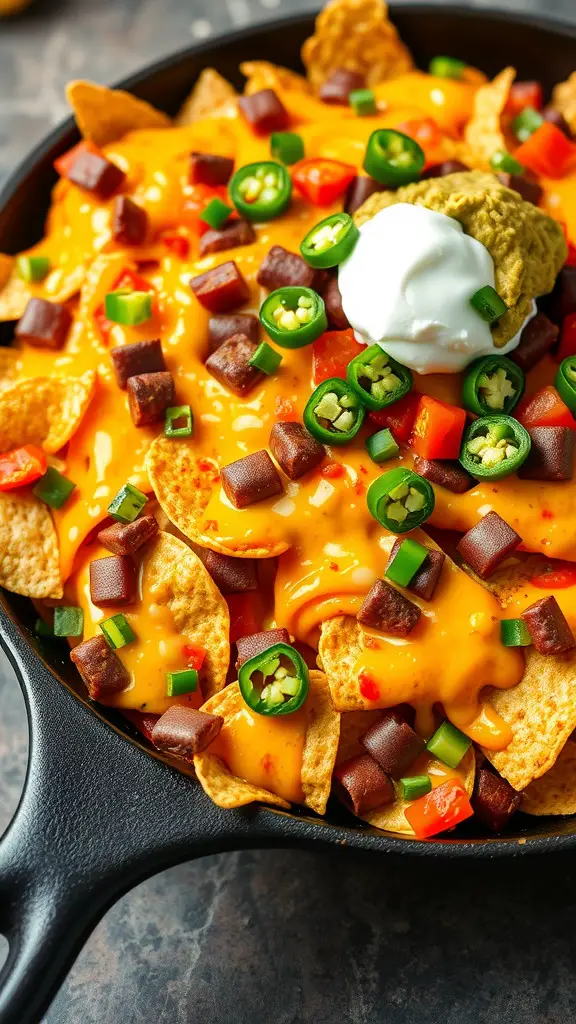
Nothing screams game day like a Loaded Nacho Skillet. This dish is a crowd favorite, perfect for any gathering, whether it’s a big game or a cozy movie night.
Imagine crispy tortilla chips layered with gooey cheese, hearty toppings, and a burst of fresh flavors. This skillet is topped with diced peppers, jalapeños, and a dollop of sour cream for the ultimate finish.
The ingredients are simple: tortilla chips, melted cheese, chopped veggies, and your choice of protein. You can go classic with ground beef or get creative with chicken or beans. This dish is a hit for any occasion!
When you’re planning your next watch party, consider this Loaded Nacho Skillet for your game time eats. It’s not just a meal; it’s an experience. Gather your friends, serve up some drinks, and dig into this delicious victory meal menu!
Ingredients:
- 1 bag (10 oz) tortilla chips
- 2 cups shredded cheese (cheddar, Monterey Jack, or a blend)
- 1 pound ground beef, chicken, or black beans (for a vegetarian option)
- 1 packet taco seasoning
- 1 cup diced tomatoes
- 1/2 cup diced red onion
- 1/2 cup sliced jalapeños (optional for extra heat)
- 1/2 cup chopped bell peppers (any color)
- 1/4 cup sliced black olives (optional)
- 1 cup sour cream
- 1/2 cup guacamole (optional)
- 1/4 cup chopped fresh cilantro (for garnish)
Instructions:
- Preheat the Oven: Preheat your oven to 400°F (200°C).
- Cook the Protein: In a large skillet over medium heat, cook ground beef or chicken until browned and cooked through. Drain any excess fat. Add taco seasoning and stir until well combined. If using black beans, season and heat them through.
- Layer the Nachos: Spread half of the tortilla chips evenly in an oven-safe skillet or baking dish. Sprinkle half of the cheese over the chips. Add the seasoned protein, followed by half of the diced tomatoes, onions, bell peppers, jalapeños, and olives.
- Repeat the Layers: Add another layer of tortilla chips, cheese, and toppings, ensuring even distribution.
- Bake: Place the skillet in the oven and bake for 10-15 minutes or until the cheese is melted and bubbly.
- Serve: Carefully remove from the oven. Add sour cream, guacamole, and a sprinkle of chopped cilantro on top.
Serving Tips:
- Custom Toppings: Add extras like pickled jalapeños, green onions, or hot sauce.
- Family-Style Serving: Serve directly from the skillet for a fun and interactive dining experience.
- Make It Your Way: Swap out ingredients based on your taste preferences, such as adding corn or extra beans.
Loaded Nacho Skillet is the ultimate comfort food that’s perfect for sharing. With layers of savory toppings and gooey melted cheese, every bite is a flavor-packed experience. Enjoy with friends, family, and plenty of napkins!
Spicy Buffalo Chicken Sliders
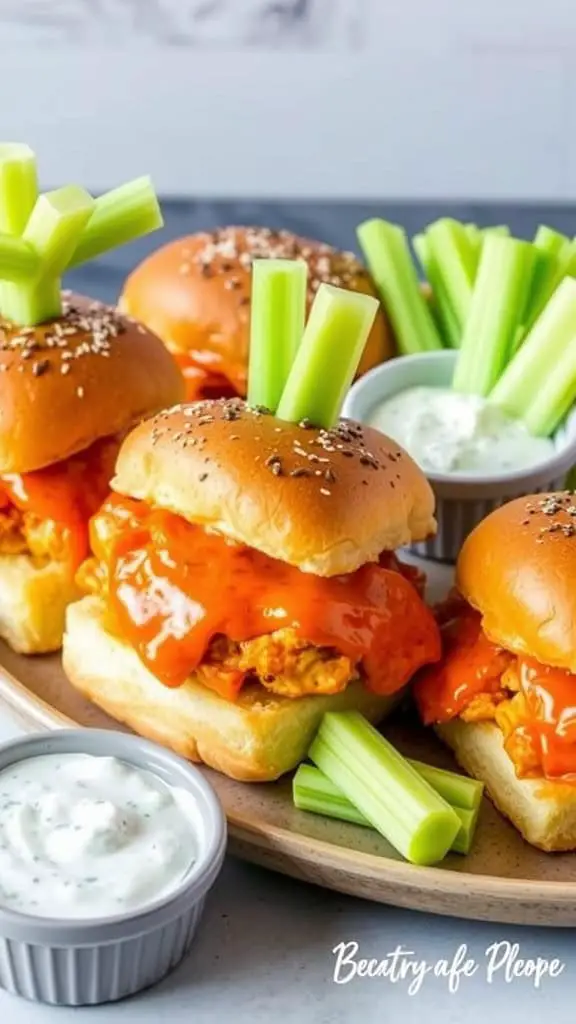
These Spicy Buffalo Chicken Sliders are the perfect treat for any gathering. Picture soft, fluffy buns stuffed with crispy, spicy chicken drizzled in a tangy buffalo sauce. They are not just a meal; they are a crowd-pleaser, ideal for game nights or watch parties. The vibrant orange sauce contrasts beautifully against the golden buns, making them irresistible.
Each slider is topped with a fun celery garnish, adding a pop of color and a crunchy texture. A side of creamy dipping sauce sits ready for those who like to add a little extra flavor. This spread is perfect for your next competitive night cuisine, turning any meal into a celebration.
To whip up these tasty bites, you’ll need some basic ingredients. Start with chicken breasts, buffalo sauce, and slider buns. Don’t forget the celery for that signature touch! Simply cook the chicken, toss it in the sauce, and assemble your sliders. Serve them up for your next sports viewing supper, and watch them disappear!
Ingredients:
- 2 large chicken breasts, cooked and shredded
- 1 cup buffalo sauce (adjust to your spice preference)
- 12 slider buns or small dinner rolls
- 1/2 cup ranch or blue cheese dressing (for serving)
- 2 celery stalks, thinly sliced (for garnish)
- 2 tablespoons unsalted butter, melted
- 1 teaspoon garlic powder
- 1 teaspoon onion powder
- Salt and pepper to taste
- Optional: crumbled blue cheese for topping
Instructions:
- Preheat the Oven: Set your oven to 350°F (175°C).
- Prepare the Chicken: In a large mixing bowl, combine the shredded chicken with buffalo sauce. Mix well until the chicken is evenly coated.
- Toast the Buns: Split the slider buns and place them cut-side up on a baking sheet. Lightly toast in the oven for 5-7 minutes or until warm.
- Assemble the Sliders:
- Spread a spoonful of buffalo chicken on the bottom half of each bun.
- Top with a few slices of celery for crunch.
- Optionally, sprinkle with crumbled blue cheese for extra flavor.
- Prepare the Topping: In a small bowl, mix melted butter, garlic powder, onion powder, salt, and pepper. Brush the tops of the buns with this mixture.
- Bake the Sliders: Place the assembled sliders back in the oven for 10-12 minutes, allowing the cheese (if used) to melt and the buns to brown slightly.
- Serve: Arrange the sliders on a serving platter with extra celery sticks and a bowl of ranch or blue cheese dressing for dipping.
Serving Tips:
- Keep Warm: Cover with foil to keep them warm until serving.
- Make Ahead: Prepare the chicken mixture ahead of time and assemble just before baking.
- Presentation Idea: Use a fun party platter or football-themed serving tray for extra flair.
These spicy buffalo chicken sliders are the perfect combination of heat and flavor. Whether you’re hosting a watch party or looking for a satisfying snack, these sliders will be a sure hit. Enjoy the bold taste and watch them disappear in no time!
Cheesy Garlic Pull-Apart Bread
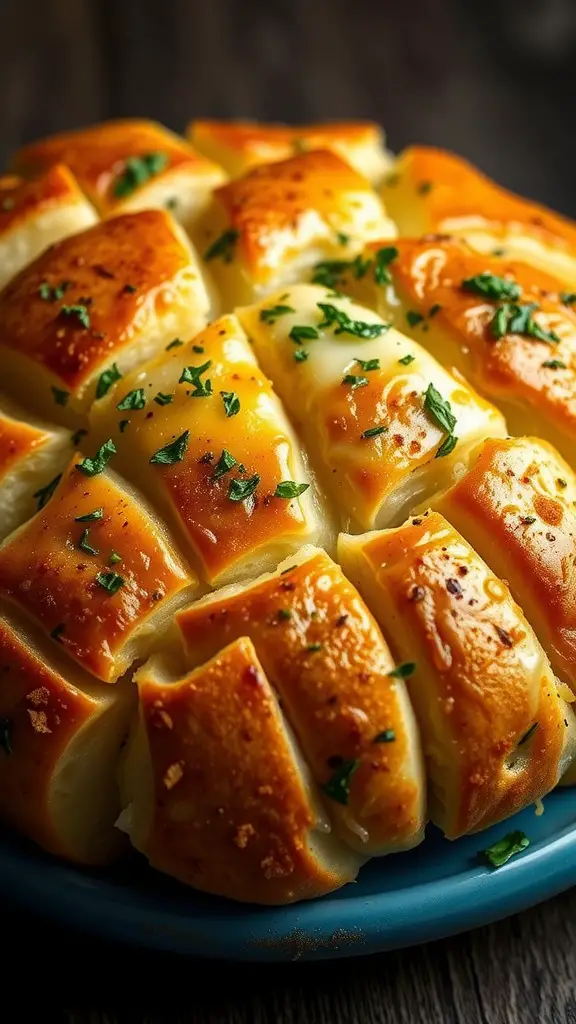
This Cheesy Garlic Pull-Apart Bread is a showstopper for any gathering. Picture a golden-brown loaf, perfectly baked, with edges that are crusty and inviting. Each piece is buttery soft, waiting to be pulled apart, revealing gooey cheese inside. The sprinkle of fresh parsley adds a pop of color and a hint of freshness.
This dish is perfect for your next watch party or game night. It fits right in with other game-time eats, making it a fan favorite. Whether it’s a big game supper or a tailgating food idea, this bread is sure to keep everyone satisfied.
To make this delightful treat, you’ll need bread, cheese, garlic, butter, and herbs. Start by slicing the bread into cubes, but don’t cut all the way through. Then, stuff the cracks with cheese and mix melted butter with garlic to brush over the top. Bake until golden and bubbly. It’s that easy!
Serve it warm and watch it disappear. This pull-apart bread pairs wonderfully with your favorite dips, making it a versatile addition to any sports viewing supper. Get ready to impress your guests with this winning dinner recipe!
Ingredients:
- 1 large loaf of crusty bread (sourdough or Italian)
- 2 cups shredded mozzarella cheese
- 1 cup shredded cheddar cheese
- 1/2 cup unsalted butter, melted
- 4 cloves garlic, minced
- 2 tablespoons fresh parsley, chopped (plus extra for garnish)
- 1 teaspoon dried Italian seasoning
- Salt and pepper to taste
Instructions:
- Preheat Oven: Preheat the oven to 375°F (190°C). Line a baking sheet with parchment paper.
- Prepare the Bread: Place the bread on the prepared baking sheet. Use a sharp bread knife to cut diagonal slices across the loaf, about 1 inch apart, making a crisscross pattern. Be careful not to cut all the way through.
- Stuff with Cheese: Gently separate the bread pieces and stuff mozzarella and cheddar cheese into the cuts, ensuring even distribution.
- Make Garlic Butter: In a small bowl, combine melted butter, minced garlic, parsley, Italian seasoning, salt, and pepper.
- Brush the Bread: Use a pastry brush to generously coat the top of the bread with the garlic butter mixture, letting it seep into the cracks.
- Bake: Cover the bread loosely with foil and bake for 15-20 minutes. Remove the foil and bake for another 10-15 minutes, or until the cheese is melted and bubbly and the bread is golden brown.
- Serve: Sprinkle additional parsley on top before serving. Place the bread on a large serving platter and let everyone pull apart their cheesy, garlicky pieces.
Serving Tips:
- Dips to Pair: Serve with marinara sauce, ranch dressing, or a creamy cheese dip for extra flavor.
- Make Ahead: Prep the bread a few hours in advance and bake just before serving.
- Party Ready: Present on a rustic wooden board for a game-day-ready look.
This Cheesy Garlic Pull-Apart Bread is guaranteed to be the star of your next gathering. Each piece is loaded with buttery garlic goodness and oozing with melted cheese. It’s easy, impressive, and totally irresistible!
BBQ Bacon-Wrapped Meatballs
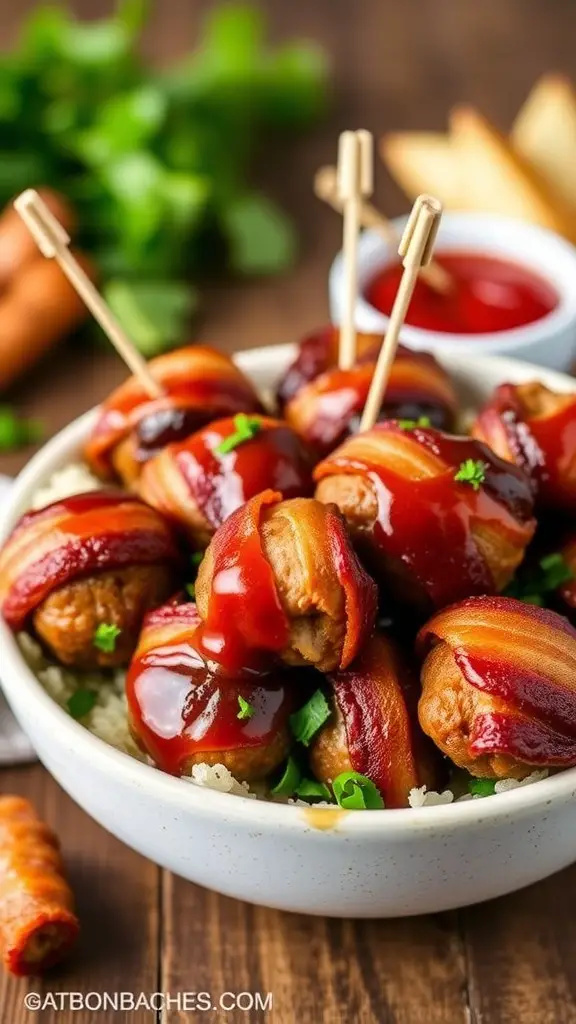
These BBQ bacon-wrapped meatballs are the perfect choice for any sports event feast. Loaded with flavor, they’re sure to be a hit at your next watch party food spread. Each meatball is wrapped in crispy bacon, giving it a mouthwatering crunch that pairs beautifully with tangy BBQ sauce.
To make these crowd-pleasers, you’ll need ground meat, bacon, BBQ sauce, and a few spices. Start by mixing the ground meat with your favorite seasonings. Then, wrap the seasoned meatballs in bacon and secure them with toothpicks for easy serving.
Bake them until the bacon is golden and the meatballs are cooked through. Drizzle some extra BBQ sauce on top right before serving for that finishing touch. These tasty bites make excellent game-night family feast options and are perfect for celebrating victories during playoff nights.
Serve these meatballs on a platter alongside some fresh veggies or crispy chips for a complete sports viewing supper. The combination of flavors and textures makes them a winning recipe for kickoff dinner specials or any competitive night grub.
Ingredients:
- 1 pound ground beef or pork (or a mix of both)
- 1 cup breadcrumbs (plain or seasoned)
- 1 large egg
- 1/4 cup milk
- 1 teaspoon garlic powder
- 1 teaspoon onion powder
- 1 teaspoon smoked paprika
- 1/2 teaspoon salt
- 1/2 teaspoon black pepper
- 1 pound bacon (thin-sliced works best)
- 1 cup BBQ sauce (your favorite brand)
- Fresh herbs for garnish (optional)
- Toothpicks for securing
Instructions:
- Preheat Oven: Preheat the oven to 400°F (200°C). Line a baking sheet with foil and place a wire rack on top.
- Make Meatball Mixture: In a large mixing bowl, combine ground meat, breadcrumbs, egg, milk, garlic powder, onion powder, smoked paprika, salt, and black pepper. Mix gently until combined; avoid overmixing.
- Form Meatballs: Roll the mixture into 1-inch meatballs. You should get about 24-30 meatballs depending on size.
- Wrap in Bacon: Cut bacon strips in half. Wrap each meatball with a half-strip of bacon, securing it with a toothpick.
- Arrange on Rack: Place the bacon-wrapped meatballs on the wire rack, making sure they’re evenly spaced for even cooking.
- Bake: Bake for 20-25 minutes, or until the bacon is crispy and the meatballs are fully cooked (internal temperature of 165°F/74°C).
- Add BBQ Sauce: Remove from the oven and brush each meatball with BBQ sauce. Return to the oven for another 5 minutes until the sauce is caramelized.
- Serve: Transfer to a serving platter, drizzle with more BBQ sauce if desired, and sprinkle with fresh herbs.
Serving Tips:
- Appetizer Tray: Arrange on a tray with a mix of dipping sauces like extra BBQ sauce, ranch, or ketchup.
- Game Day Spread: Pair with veggie sticks, chips, or even mac and cheese bites for the ultimate party platter.
- Make Ahead: Prep the meatballs and wrap them in bacon ahead of time. Refrigerate until ready to bake.
These BBQ bacon-wrapped meatballs are crispy, savory, and perfectly saucy—ideal for game day celebrations or any fun gathering!
Sweet and Spicy Pork Tenderloin Bites
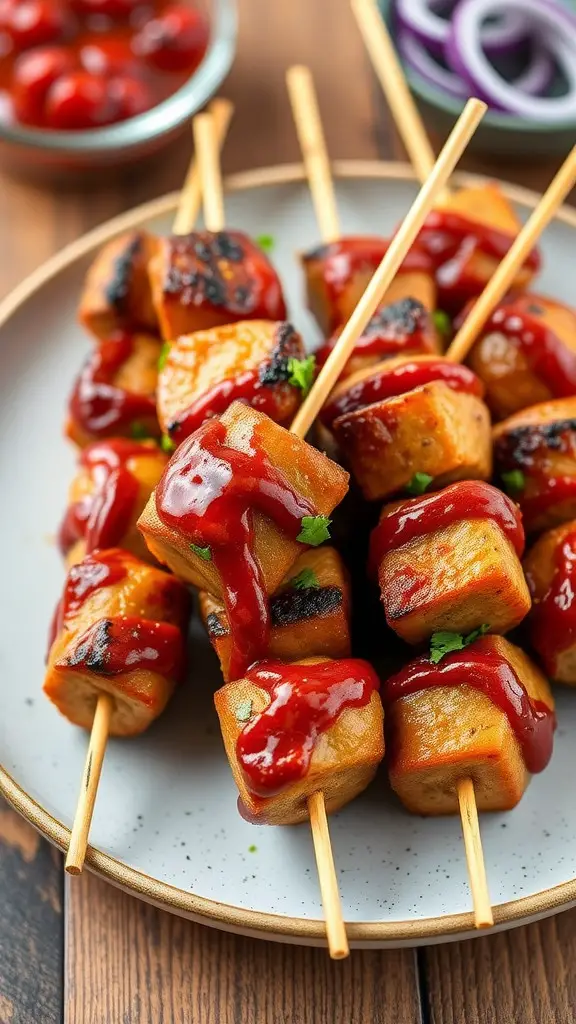
Picture this: juicy chunks of pork tenderloin, grilled to perfection and drizzled with a vibrant sweet and spicy sauce. These bites are not just a delight for the taste buds; they are the perfect addition to your Game Night Family Feast. Each skewer is packed with flavor, making them a hit at any gathering.
The dish shines when you’re hosting a Competitive Night Cuisine or a Championship Cookout. They’re easy to prepare, ensuring you can focus on the game while your taste testers enjoy the delicious bites. Serve these at your next Tailgate Party Bites, and watch as they disappear from the plate!
For a superb spread, pair these pork bites with some fresh veggies and a tangy dipping sauce. They fit right in with your Ultimate Sports Feast or Victory Meal Menu. Trust me, these Sweet and Spicy Pork Tenderloin Bites will be the star of your table during any sports viewing supper or watch party meal ideas.
To whip up this crowd-pleasing dinner idea, you’ll need pork tenderloin, spices for seasoning, and your favorite sweet and spicy sauce. Simply cut the pork into bite-sized pieces, season them, and grill until they’re tender and charred. Drizzle with sauce and serve hot. They’re simple and utterly satisfying!
Ingredients:
- 1 lb pork tenderloin, trimmed and cut into bite-sized pieces
- 2 tbsp olive oil
- 1 tbsp soy sauce
- 1 tbsp honey
- 1 tbsp sriracha or your favorite hot sauce
- 2 tsp brown sugar
- 1 tsp smoked paprika
- 1 tsp garlic powder
- 1 tsp onion powder
- 1/2 tsp ground black pepper
- 1/2 tsp salt
- Fresh herbs (like cilantro or parsley) for garnish (optional)
- Skewers (if using)
Instructions:
- Prepare the Pork: Place the pork tenderloin pieces in a large bowl. Drizzle with olive oil, soy sauce, honey, and sriracha.
- Season the Pork: In a small bowl, combine brown sugar, smoked paprika, garlic powder, onion powder, salt, and pepper. Sprinkle the seasoning mix over the pork and toss until evenly coated.
- Marinate: Cover the bowl with plastic wrap and let the pork marinate for at least 30 minutes or up to 2 hours in the refrigerator for deeper flavor.
- Preheat the Grill: Heat the grill to medium-high heat. If using skewers, thread the pork pieces onto skewers for easy grilling.
- Grill the Pork: Place the pork skewers on the grill and cook for 8-10 minutes, turning occasionally, until the pork is cooked through and has a nice char on the edges.
- Glaze the Pork: Brush any remaining marinade over the pork during the last few minutes of grilling to enhance the glossy finish.
- Serve and Garnish: Remove from the grill and let rest for a few minutes. Garnish with fresh herbs if desired.
Serving Tips:
- Appetizer Idea: Serve with toothpicks for easy grabbing at parties.
- Meal Pairing: Pair with a crisp green salad or roasted veggies for a complete meal.
- Extra Heat: Add a sprinkle of red pepper flakes if you like it extra spicy.
These Sweet and Spicy Pork Tenderloin Bites are sure to be a hit with their bold flavors and satisfying texture. Enjoy them hot off the grill or serve them as part of a hearty game-night feast!
Grilled Shrimp Skewers with Lime Butter
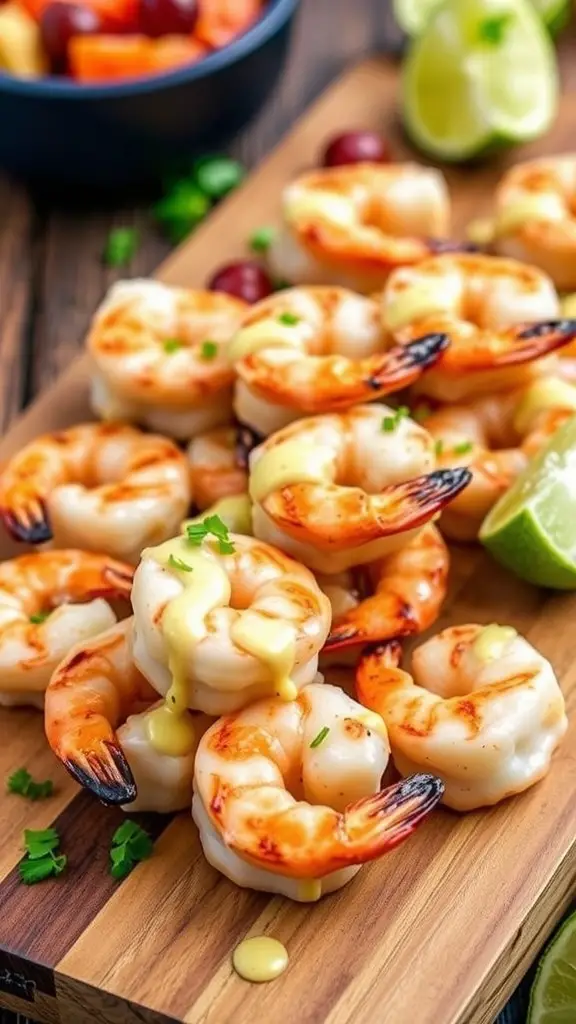
Grilled shrimp skewers topped with lime butter make for a delightful treat. These skewers are not just easy to prepare but also packed with flavors that will impress your guests.
To make these shrimp skewers, start with fresh shrimp, which are the star of the dish. Toss them in a marinade of olive oil, garlic, and lime juice for that zesty kick. Skewer them up, grill until they turn a beautiful shade of pink, and then drizzle with homemade lime butter.
These skewers are perfect for your next watch party or tailgating event. They fit right in with a ‘Game Time Eats’ theme and are sure to be a hit among your friends. Pair them with a fresh fruit salad for a refreshing side, and you have a winning dinner recipe that everyone will love.
Ingredients:
- 1 lb large shrimp, peeled and deveined
- 2 tbsp olive oil
- 2 cloves garlic, minced
- Zest and juice of 2 limes (reserve some zest for garnish)
- 2 tbsp unsalted butter, melted
- Salt and pepper, to taste
- Fresh herbs (like cilantro or parsley), chopped, for garnish
- Lime wedges, for serving
- Wooden or metal skewers (if using wooden, soak them in water for 30 minutes prior to grilling)
Instructions:
- Prepare the Shrimp:
- In a large bowl, mix olive oil, garlic, lime juice, lime zest, salt, and pepper.
- Add the shrimp and toss to coat evenly. Let marinate for 15-20 minutes while preparing the grill.
- Preheat the Grill:
- Heat the grill to medium-high heat (about 400°F/200°C). Lightly oil the grates to prevent sticking.
- Skewer the Shrimp:
- Thread the shrimp onto skewers, ensuring they lie flat for even cooking.
- Grill the Shrimp:
- Place the shrimp skewers on the grill. Cook for 2-3 minutes per side or until the shrimp turn pink and opaque.
- Make the Lime Butter:
- In a small bowl, combine the melted butter and reserved lime juice. Stir well.
- Serve:
- Remove skewers from the grill and immediately drizzle with lime butter.
- Garnish with fresh herbs, reserved lime zest, and lime wedges.
Serving Tips:
- Pairing Ideas: Serve with a side of grilled veggies, rice, or a fresh garden salad.
- Make Ahead: Marinate the shrimp a few hours in advance for more intense flavor.
- Presentation Tip: Serve skewers on a rustic cutting board with extra lime wedges for a casual, inviting look.
These grilled shrimp skewers with lime butter will bring a burst of fresh, citrusy goodness to your table. Easy to make and packed with mouthwatering flavor, they’ll quickly become a favorite at any gathering!
Crispy Fried Pickle Chips
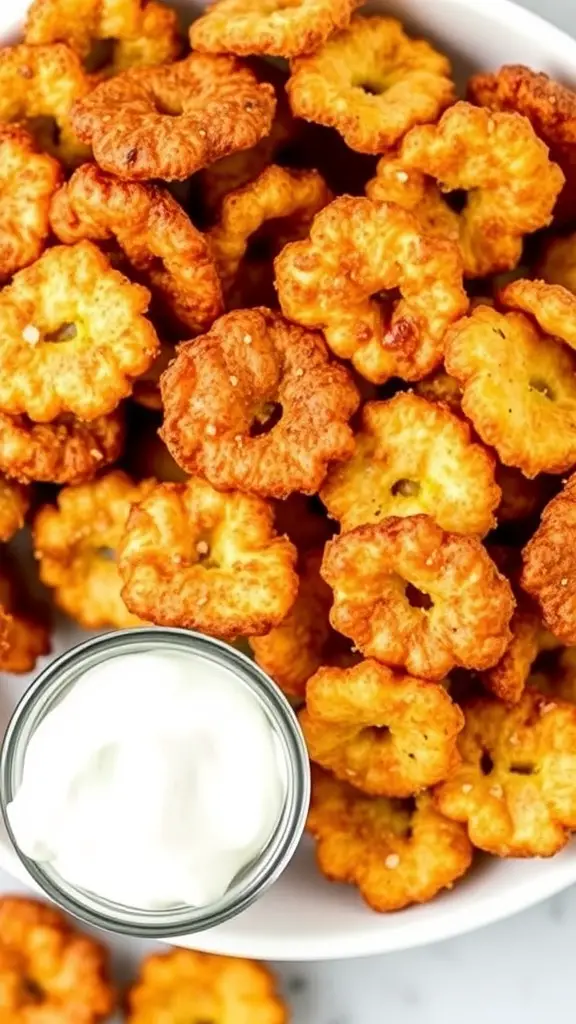
Who doesn’t love crispy fried pickle chips? These little bites are a perfect addition to any game-day spread. They’re crunchy, tangy, and oh-so-satisfying. Whether you’re hosting a watch party or just looking for a crunchy snack, these chips are a crowd-pleaser.
To whip up a batch of these tasty treats, you’ll need some sliced pickles, flour, cornmeal, and your favorite spices. Dip the pickle slices in a seasoned batter and fry until golden brown. Serve them up with a side of ranch dressing for dipping, and you’ve got yourself a winning dish!
These crispy delights fit right into any tailgate party bites menu or sports viewing supper. They make great kickoff dinner specials and are sure to impress guests at your championship cookout. Next time you’re planning a fan-favorite dinner, don’t forget to include these fried pickle chips as part of your game-night family feast!
Ingredients:
- 1 jar (16 oz) dill pickle chips, drained and patted dry
- 1 cup all-purpose flour
- 1/2 cup cornmeal
- 1 tsp garlic powder
- 1 tsp onion powder
- 1 tsp smoked paprika
- 1/2 tsp cayenne pepper (optional for extra heat)
- 1 tsp salt
- 1/2 tsp black pepper
- 2 large eggs
- 1/2 cup buttermilk (or regular milk)
- Vegetable oil, for frying
- Ranch dressing or your favorite dipping sauce
Instructions:
- Prepare the Coating: In a large bowl, whisk together the flour, cornmeal, garlic powder, onion powder, smoked paprika, cayenne pepper, salt, and black pepper.
- Make the Batter: In a separate bowl, whisk together the eggs and buttermilk until smooth.
- Heat the Oil: Pour vegetable oil into a deep skillet or fryer, filling it about 2 inches deep. Heat the oil to 375°F (190°C).
- Coat the Pickles: Working in batches, dip each pickle chip into the flour mixture, shaking off any excess. Then dip it into the egg mixture, allowing any extra to drip off. Finally, coat it again in the flour mixture for extra crispiness.
- Fry the Pickles: Carefully place the coated pickle chips into the hot oil, frying in batches to avoid overcrowding. Fry for 2-3 minutes or until golden brown and crispy.
- Drain and Serve: Use a slotted spoon to transfer the fried pickle chips to a paper towel-lined plate to drain excess oil.
- Serve Hot: Arrange the crispy fried pickle chips on a platter with a side of ranch dressing or your preferred dipping sauce.
Serving Tips:
- Stay Crispy: Serve immediately for the best crunch.
- Flavor Boost: Add extra seasoning to the flour mix for more flavor variety.
- Make Ahead: Prep the pickle slices and coating mix in advance, then fry just before serving.
These crispy fried pickle chips are irresistible! The tangy pickle slices paired with the seasoned crunch make a snack that disappears fast. Serve them up, dip them in ranch, and watch them become the MVP of your game-day spread!
Tangy Honey Mustard Wings
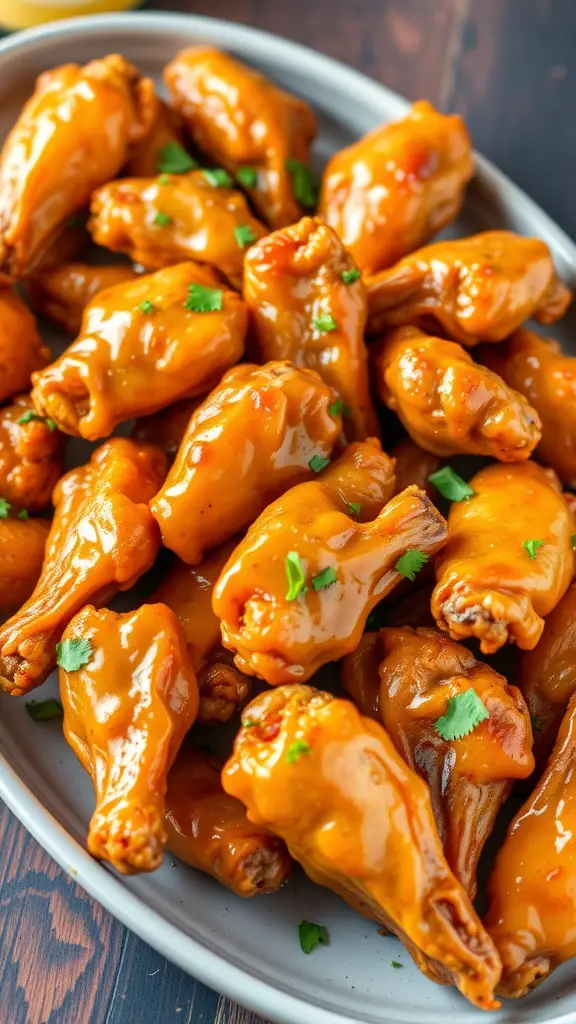
When it comes to Game Time Eats, nothing beats a platter of Tangy Honey Mustard Wings. These wings shine with a glossy, sticky glaze that promises to deliver a mouthwatering experience with every bite.
The vibrant orange color, complemented by a sprinkle of fresh cilantro, makes these wings not just tasty, but visually appealing too. Perfect for any Sports Night Feast, they bring a burst of flavor that can elevate your watch party meal ideas.
To make these delicious wings, you’ll need chicken wings, honey, Dijon mustard, garlic powder, and a touch of salt and pepper. Simply toss the wings in the honey mustard mixture and bake until crispy. It’s that easy!
These wings are a fan-favorite and will surely impress your guests, making them a highlight of any Championship Meal Ideas. Serve them up at your next tailgate or celebration night bites for a dish that combines sweetness with a tangy kick. Trust me, your taste buds will thank you.
Ingredients:
- 2 lbs chicken wings, separated into flats and drumettes
- 1/2 cup honey
- 1/4 cup Dijon mustard
- 2 tbsp whole-grain mustard (optional for added texture)
- 2 tbsp soy sauce
- 1 tbsp apple cider vinegar
- 1 tsp garlic powder
- 1 tsp smoked paprika (optional for extra depth)
- Salt and pepper, to taste
- Fresh cilantro, chopped (for garnish)
Instructions:
- Preheat the oven: Set the oven to 400°F (200°C). Line a baking sheet with foil and place a wire rack on top. Spray the rack lightly with cooking spray to prevent sticking.
- Prep the Wings: Pat the chicken wings dry with paper towels. Season with salt, pepper, and a sprinkle of smoked paprika if using.
- Make the Glaze: In a mixing bowl, whisk together honey, Dijon mustard, whole-grain mustard (if using), soy sauce, apple cider vinegar, garlic powder, and smoked paprika.
- Coat the Wings: Toss the wings in half of the glaze, ensuring each wing is evenly coated. Reserve the remaining glaze for basting.
- Bake the Wings: Arrange the wings in a single layer on the prepared rack. Bake for 40-45 minutes, flipping halfway through, until crispy and golden brown.
- Baste and Finish: During the last 10 minutes of baking, brush the wings with the reserved glaze for extra flavor and a sticky finish.
- Serve and Garnish: Transfer the wings to a serving platter. Sprinkle freshly chopped cilantro on top for a pop of color and extra freshness.
Serving Tips:
- Dipping Sauce: Serve with a side of extra honey mustard dipping sauce or a creamy ranch.
- Make Ahead: Prepare the glaze ahead of time and marinate the wings for deeper flavor.
- Presentation: Arrange the wings on a football-themed platter for a festive game day look.
These Tangy Honey Mustard Wings are the perfect blend of sweet and savory, with just the right amount of tanginess. The sticky glaze will have everyone reaching for seconds. Enjoy the game and these irresistible wings!
Classic Loaded Potato Skins

Classic loaded potato skins are the ultimate comfort food, perfect for sharing during game nights or any gathering. They are crispy, cheesy, and packed with flavor, making them a hit at any table.
This image showcases potato skins topped with a delicious mix of melted cheddar cheese, crispy bacon bits, and fresh green onions. The vibrant colors make them not only tasty but also visually appealing, enhancing your watch party meal spread.
To make these scrumptious snacks, you’ll need some simple ingredients: russet potatoes, shredded cheese, bacon, and green onions. First, bake the potatoes until they’re soft, then scoop out a bit of the filling to create space for your toppings. Load them up with cheese, bacon, and a sprinkle of green onions before popping them back in the oven until everything is melted and bubbly.
These potato skins are a crowd favorite at any sporting event or watch party. They fit perfectly into any theme, be it a championship cookout or a tailgate party. So next time you’re planning a celebration night, don’t forget to include these loaded potato skins on your menu!
Ingredients:
- 4 large russet potatoes
- 1 cup shredded cheddar cheese (or your favorite cheese blend)
- 6 slices bacon, cooked and crumbled
- 2 green onions, finely chopped
- Sour cream (optional, for serving)
- Salt and pepper, to taste
- Olive oil or cooking spray
Instructions:
- Preheat the oven to 400°F (200°C). Line a baking sheet with parchment paper.
- Scrub the potatoes clean and pat them dry. Pierce each potato a few times with a fork.
- Rub the potatoes with olive oil or spray with cooking spray. Season with salt and place them directly on the oven rack.
- Bake for 45-60 minutes or until tender when pierced with a knife. Remove from the oven and let them cool slightly.
- Cut each potato in half lengthwise. Carefully scoop out the inside, leaving about 1/4 inch of potato on the skin.
- Increase the oven temperature to 450°F (230°C).
- Arrange the potato halves on the baking sheet, skin-side down. Lightly brush with olive oil and season with salt and pepper.
- Bake for 10 minutes, then flip the skins and bake for another 10 minutes until crispy.
- Turn the skins right-side up. Sprinkle cheese evenly into each potato skin, followed by crumbled bacon.
- Return to the oven and bake for 5-7 minutes or until the cheese is fully melted and bubbly.
- Remove from the oven and sprinkle with chopped green onions.
- Serve hot with a dollop of sour cream, if desired.
Serving Tips:
- Make Ahead: Bake the potatoes and prep the toppings ahead of time. Assemble and bake just before serving.
- Customize It: Add toppings like diced tomatoes, jalapeños, or even pulled pork for a twist.
- Party Ready: Arrange on a large platter with extra sour cream and hot sauce on the side.
These crispy, cheesy loaded potato skins are sure to be the star of your next gathering. Easy to customize and irresistible, they’ll have everyone reaching for more!
Cajun Chicken Alfredo Pasta Bake
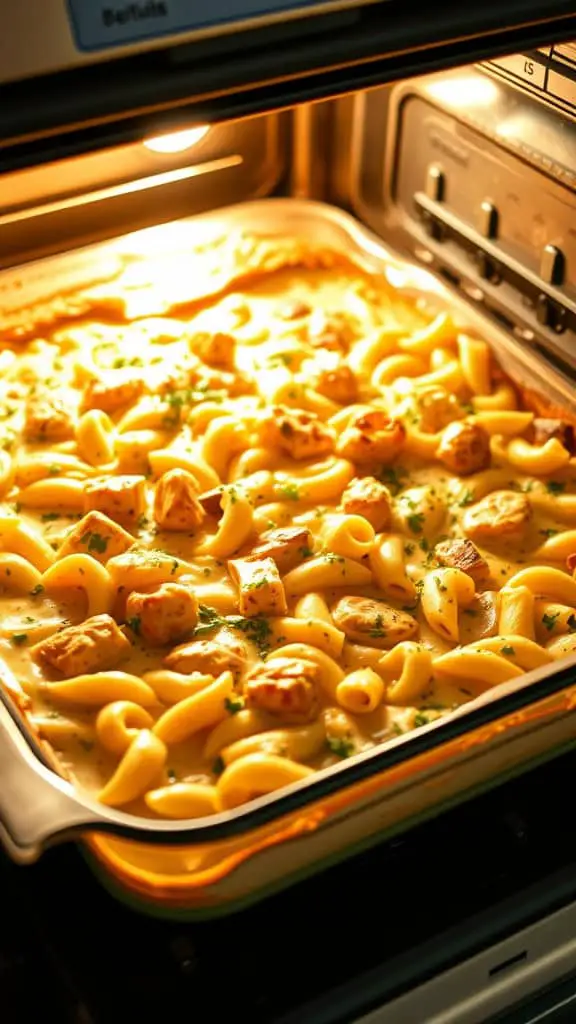
This Cajun Chicken Alfredo Pasta Bake is a great choice for any gathering. The creamy sauce blends perfectly with the pasta and chicken, making it a comforting dish that everyone will love.
Looking at the image, you can see a bubbling casserole filled with tender pasta and juicy Cajun-seasoned chicken pieces. The golden-brown top hints at a crispy texture that adds a delightful crunch to each bite.
This recipe is perfect for a Game Day Grub Fest or a casual family dinner. It’s a crowd-pleaser that fits right in with your watch party food spread. Serve it up for a big game supper, and watch your guests enjoy every bite!
To make this dish, you’ll need ingredients like pasta, chicken, heavy cream, and Cajun spices. Simply cook the pasta, sauté the chicken, and mix it all together with the creamy sauce. Bake until bubbly, and you’ve got a winning dinner recipe.
Whether it’s for a championship cookout or just a cozy night at home, this pasta bake is sure to be a hit. It’s one of those fan-favorite dinners that brings everyone together, filling the room with delicious aromas and team spirit.
Ingredients:
- 12 oz penne pasta (or your favorite pasta)
- 2 large chicken breasts, diced
- 1 tbsp Cajun seasoning (plus more for garnish)
- 2 tbsp olive oil
- 2 tbsp unsalted butter
- 3 cloves garlic, minced
- 2 cups heavy cream
- 1 cup whole milk
- 1 1/2 cups freshly grated Parmesan cheese (plus extra for topping)
- 1 cup shredded mozzarella cheese
- 1 tsp paprika (optional for extra color)
- Salt and pepper, to taste
- Fresh parsley, chopped (for garnish)
Instructions:
- Cook the Pasta: Bring a large pot of salted water to a boil. Cook the penne pasta until al dente according to the package instructions. Drain and set aside.
- Season the Chicken: In a bowl, toss the diced chicken with Cajun seasoning, ensuring all pieces are evenly coated.
- Sauté the Chicken: Heat the olive oil in a large skillet over medium-high heat. Add the seasoned chicken and cook until golden brown and fully cooked, about 6-8 minutes. Remove from the skillet and set aside.
- Make the Sauce: In the same skillet, lower the heat to medium. Add the butter and minced garlic, cooking until fragrant (about 1 minute). Pour in the heavy cream and milk, stirring constantly.
- Add Cheese: Slowly stir in the Parmesan cheese until melted and the sauce is smooth. Season with salt, pepper, and a pinch of paprika if using.
- Combine: Add the cooked pasta and chicken to the skillet, tossing to coat everything in the creamy sauce.
- Assemble the Bake: Preheat the oven to 375°F (190°C). Transfer the pasta mixture to a greased 9×13-inch baking dish. Sprinkle mozzarella cheese and extra Parmesan on top.
- Bake: Bake for 20-25 minutes, or until bubbly and golden brown on top.
- Garnish and Serve: Remove from the oven and let cool for a few minutes. Sprinkle with additional Cajun seasoning and fresh parsley before serving.
Serving Tips:
- Add Veggies: Mix in spinach or bell peppers for added nutrition and color.
- Make Ahead: Prep the pasta bake in advance and refrigerate. Bake when ready to serve.
- Customize the Heat: Adjust the Cajun seasoning level to suit your spice preference.
This Cajun Chicken Alfredo Pasta Bake is a rich, satisfying dish perfect for feeding a hungry crowd. Its creamy, cheesy goodness combined with bold Cajun flavors will have everyone coming back for seconds!
Korean BBQ Beef Sliders
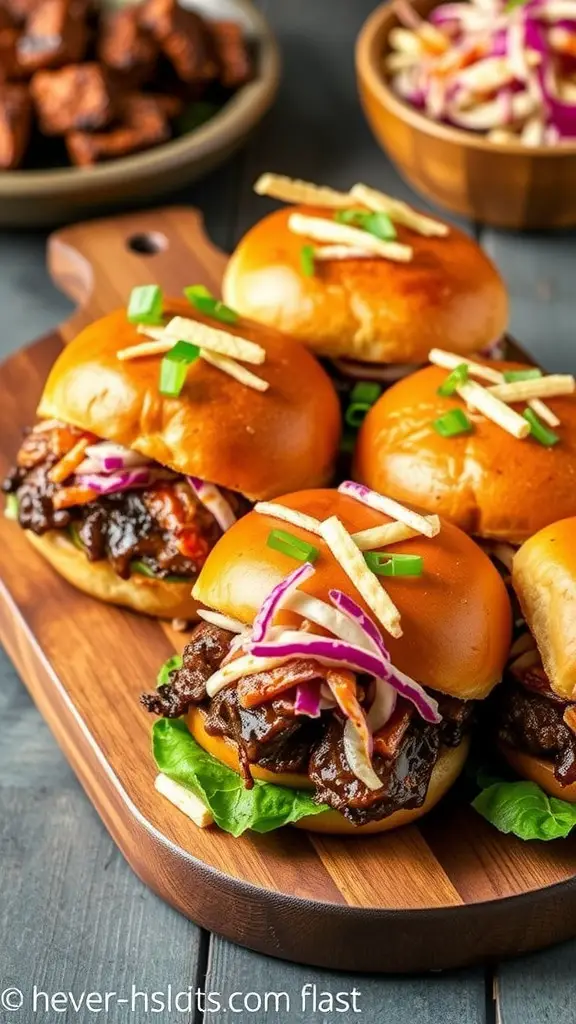
These Korean BBQ beef sliders are a delightful twist on a classic favorite. The juicy beef, marinated in a rich Korean BBQ sauce, is piled high on soft, pillowy buns. Each slider is topped with crunchy veggies, adding a fresh texture to every bite.
Perfect for any gathering, these sliders shine at watch parties and tailgate events. They’re easy to pick up and eat, making them ideal for celebrating with friends. Pair them with a side of sweet and tangy coleslaw for the ultimate game-time meal.
To make them, you’ll need tender beef, your favorite Korean BBQ sauce, slider buns, and toppings like green onions and crunchy slaw. Once assembled, these sliders not only look great but taste amazing, bringing a kick to your sports night feast.
These beef sliders are sure to become a fan-favorite dinner option. Whether for a big game or a casual get-together, they fit right in with any scoreboard snacks and meals you plan. Enjoy them as part of your game day grub fest!
Ingredients:
- 1 1/2 lbs ground beef (80/20 blend for juiciness)
- 1/2 cup Korean BBQ sauce (store-bought or homemade)
- 12 slider buns (soft and slightly sweet)
- 1 cup kimchi (drained and chopped, optional for extra tang)
- 1 cup coleslaw mix (pre-shredded cabbage and carrots)
- 1/4 cup mayonnaise
- 1 tablespoon rice vinegar
- 2 green onions (thinly sliced for garnish)
- 1 tablespoon sesame seeds (optional for garnish)
- Salt and pepper to taste
Instructions:
- Make the Coleslaw: In a mixing bowl, combine coleslaw mix, mayonnaise, rice vinegar, salt, and pepper. Toss well and set aside in the fridge to chill.
- Prepare the Beef: In a large bowl, mix the ground beef with 1/4 cup of the Korean BBQ sauce, salt, and pepper until just combined. Do not overmix.
- Shape the Patties: Form the beef mixture into 12 small slider-sized patties, about 2 inches wide.
- Cook the Patties: Heat a large skillet or grill over medium-high heat. Cook the patties for 3-4 minutes per side or until fully cooked (internal temperature of 160°F).
- Toast the Buns: While the patties cook, lightly toast the slider buns on the grill or in a skillet until golden brown.
- Assemble the Sliders: Spread a small amount of remaining Korean BBQ sauce on the bottom half of each bun. Place a beef patty on each bun, followed by a spoonful of chilled coleslaw and a sprinkle of chopped kimchi (if using).
- Garnish: Top with green onions and sesame seeds for added flavor and presentation.
- Serve: Place the assembled sliders on a serving platter and enjoy immediately.
Serving Tips:
- Make Ahead: You can prep the patties and coleslaw a few hours in advance for easy assembly.
- Custom Toppings: Add spicy mayo, sliced jalapeños, or even crispy fried onions for extra flavor.
- Pairing Ideas: Serve with sweet potato fries or a side of pickled vegetables for a complete meal.
These sliders are guaranteed to be a hit. Their perfect balance of savory, sweet, and tangy flavors will have everyone reaching for seconds. Enjoy every bite!
Smoky Pulled Pork Quesadillas
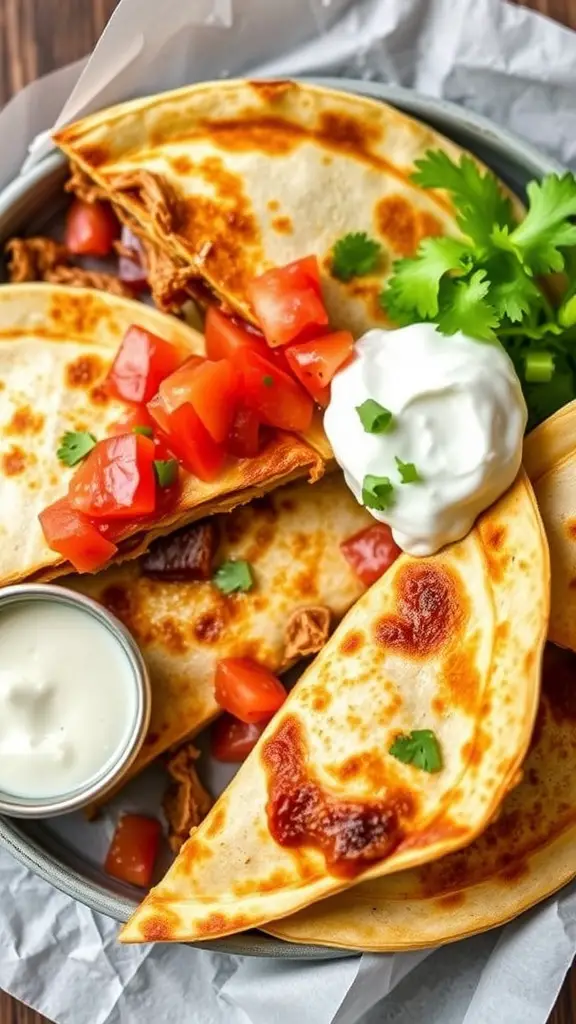
Smoky pulled pork quesadillas are perfect for any occasion, especially when you’re hosting a sports viewing supper. These golden, crispy delights bring a hearty twist to classic quesadillas. The pulled pork inside is tender and packed with flavor, making it a fan-favorite dinner option.
The image shows a mouthwatering plate of quesadillas, perfectly cooked to a golden brown. They are stuffed with smoky pulled pork and topped with fresh tomatoes and cilantro for that extra burst of freshness. A side of creamy sour cream adds just the right amount of richness, making every bite even better.
For a winning dinner recipe, you’ll need tortillas, pulled pork, cheese, diced tomatoes, and fresh cilantro. Simply fill the tortillas with a generous amount of pulled pork and cheese, then grill until crispy. Serve with a side of salsa or your favorite dipping sauce to enhance the game-day experience.
These quesadillas are a great addition to any watch party meal ideas or big game supper. They can easily feed a crowd, making them ideal for a competitive night grub. So gather your friends, cheer for your team, and enjoy these delicious smoky pulled pork quesadillas!
Ingredients:
- 2 cups cooked smoky pulled pork (store-bought or homemade)
- 8 large flour tortillas
- 2 cups shredded cheese (cheddar, Monterey Jack, or a blend)
- 1 cup diced tomatoes
- 1/2 cup chopped fresh cilantro (optional)
- 1/2 cup sour cream (for serving)
- 1/2 cup salsa or your favorite dipping sauce (optional)
- Cooking spray or a drizzle of oil (for cooking)
Instructions:
- Preheat the Skillet: Heat a large skillet or griddle over medium heat and lightly spray with cooking spray or add a small amount of oil.
- Assemble the Quesadillas: Lay out four tortillas on a clean surface. Evenly spread a layer of cheese on each tortilla.
- Add the Pulled Pork: Spoon a generous amount of smoky pulled pork over the cheese layer.
- Top with More Cheese: Sprinkle another layer of cheese over the pulled pork to help the quesadilla stick together.
- Close the Quesadilla: Place another tortilla on top of each prepared tortilla.
- Cook Until Crispy: Transfer the quesadillas to the hot skillet. Cook for 3-4 minutes on each side or until the tortillas are golden brown and crispy, and the cheese is melted.
- Slice and Serve: Remove from the skillet and let cool slightly. Cut each quesadilla into wedges.
- Garnish and Enjoy: Serve warm, topped with diced tomatoes, chopped cilantro, and sour cream on the side.
Serving Tips:
- Customize the Fillings: Add sautéed onions, bell peppers, or black beans for extra flavor and texture.
- Make Ahead: Assemble the quesadillas a few hours before cooking and refrigerate until ready to cook.
- Crowd-Friendly: Keep cooked quesadillas warm in a low oven (around 200°F) while making additional batches.
These smoky pulled pork quesadillas are sure to be a crowd-pleaser. The combination of tender pulled pork, gooey cheese, and crispy tortillas will make your sports viewing party unforgettable!
Chili Cheese Dog Casserole
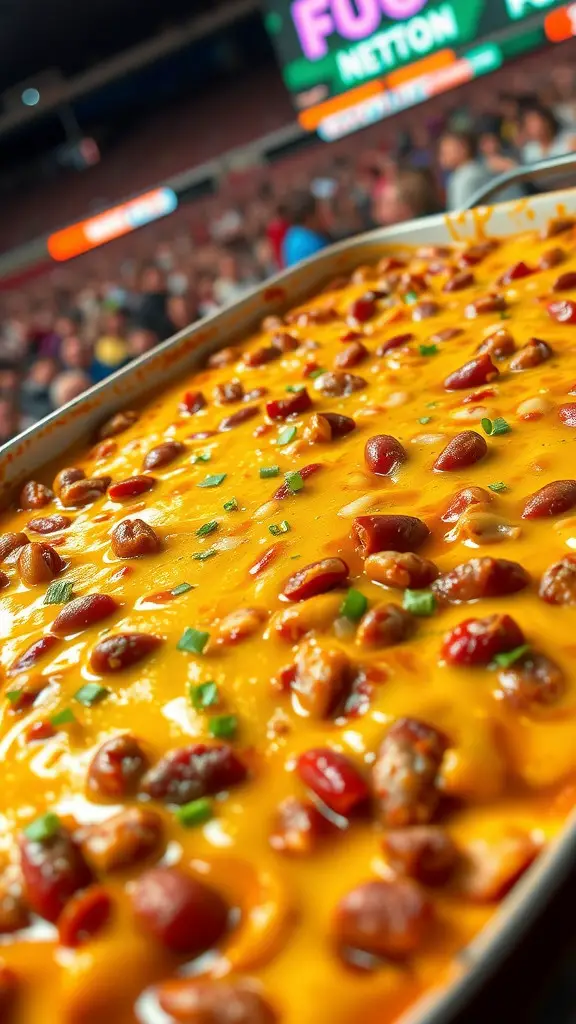
This Chili Cheese Dog Casserole is a crowd-pleaser at any watch party. The sizzling mix of chili, cheese, and hot dogs creates a hearty dish that fills everyone with joy. Just look at that cheesy goodness bubbling away!
Perfect for game day or any sporting event, this casserole is designed to keep your fans fueled and happy. It’s the ultimate in game-time eats, making it a fantastic choice for your next big game supper.
To make this delightful dish, you’ll need ingredients like hot dogs, chili, cheese, and some spices. Layer them in a baking dish and pop them in the oven. In no time, you’ll have a winning dinner recipe that will impress everyone.
This meal pairs perfectly with your favorite snacks for a full watch party food spread. Whether it’s playoffs, a championship cookout, or just a fun family game night, this casserole will always score big!
Ingredients:
- 1 package (8 hot dogs) of your favorite hot dogs
- 1 can (15 oz) of chili with beans (or homemade chili if preferred)
- 1 cup shredded cheddar cheese (or your favorite cheese blend)
- 1 package (8 count) refrigerated crescent roll dough
- 1/4 cup diced green onions (optional for garnish)
- 1 tablespoon melted butter (optional for extra browning)
- Cooking spray or parchment paper (for the baking dish)
Instructions:
- Preheat the oven to 375°F (190°C). Lightly grease a 9×13-inch baking dish with cooking spray or line with parchment paper.
- Unroll the crescent roll dough and separate into individual triangles.
- Roll each hot dog in a crescent roll triangle, starting at the wide end and rolling to the pointed tip. Place the wrapped hot dogs seam-side down in the prepared baking dish.
- Pour the chili evenly over the wrapped hot dogs.
- Sprinkle shredded cheese generously over the top, covering the entire dish.
- Bake for 25-30 minutes or until the cheese is melted, bubbly, and the crescent dough is golden brown.
- Remove from the oven and let the casserole rest for 5 minutes before serving.
- Garnish with diced green onions if desired for extra flavor and color.
Serving Tips:
- Customize the Flavor: Add jalapeños, chopped onions, or extra chili seasoning for a spicy twist.
- Make Ahead: Assemble the casserole up to a day in advance, cover, and refrigerate. Bake when ready to serve.
- Perfect Pairings: Serve with tortilla chips, a green salad, or coleslaw for a complete meal.
This chili cheese dog casserole is the ultimate comfort food, combining hearty chili, melty cheese, and buttery crescent rolls into one mouthwatering dish. It’s sure to be a winner at your next game day gathering or family dinner!
Maple-Glazed Sausage Bites
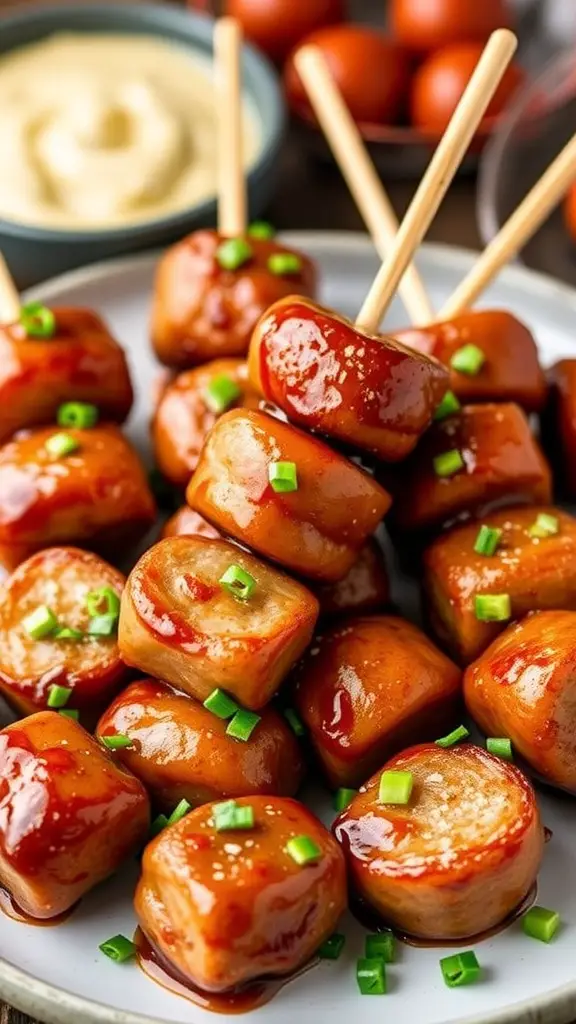
These maple-glazed sausage bites are the perfect addition to any game night or watch party. They are bite-sized, making them easy to enjoy while cheering for your favorite team. The shiny, sweet glaze makes them irresistible!
Each sausage piece is coated in a delicious maple syrup glaze, giving it a hint of sweetness that balances perfectly with savory flavors. Topped with fresh green onions, they not only look great but add a nice crunch too.
For a tasty treat that everyone will love, these sausage bites are a crowd-pleaser. Whether you’re hosting a big game supper or just looking for some fun finger foods, these bites will fit right in. They’re also excellent as part of a fuller sports viewing supper spread.
Ingredients:
- 1 pound smoked sausage or kielbasa, sliced into bite-sized pieces
- 1/2 cup maple syrup (preferably pure maple syrup)
- 2 tablespoons Dijon mustard
- 1 tablespoon soy sauce
- 1/2 teaspoon garlic powder
- 1/4 teaspoon black pepper
- 2 green onions, thinly sliced (for garnish)
- Optional: Toothpicks for serving
Instructions:
- Preheat oven to 400°F (200°C). Line a baking sheet with parchment paper or foil for easy cleanup.
- In a mixing bowl, whisk together the maple syrup, Dijon mustard, soy sauce, garlic powder, and black pepper until smooth.
- Add the sliced sausage pieces to the bowl and toss until they are well coated with the glaze.
- Arrange the glazed sausage bites in a single layer on the prepared baking sheet, making sure they are not touching for even caramelization.
- Bake for 20-25 minutes, flipping halfway through, until the sausages are browned and caramelized.
- Remove from the oven and let cool slightly.
- Transfer the sausage bites to a serving dish and sprinkle with sliced green onions for a fresh pop of color and added flavor.
- Serve with toothpicks for easy grabbing and your favorite dipping sauce on the side.
Serving Tips:
- Make Ahead: You can prepare the glaze and slice the sausage ahead of time. Just toss and bake when ready.
- Dipping Sauce Ideas: Try honey mustard, spicy mustard, or a smoky barbecue sauce for extra flavor.
- Presentation: Use a decorative platter or serving board for a festive look.
These maple-glazed sausage bites are sweet, savory, and absolutely irresistible. With a caramelized coating and a hint of fresh green onions, they are the perfect snack for game day or any gathering. Enjoy every bite!
Southwest Chicken Dip
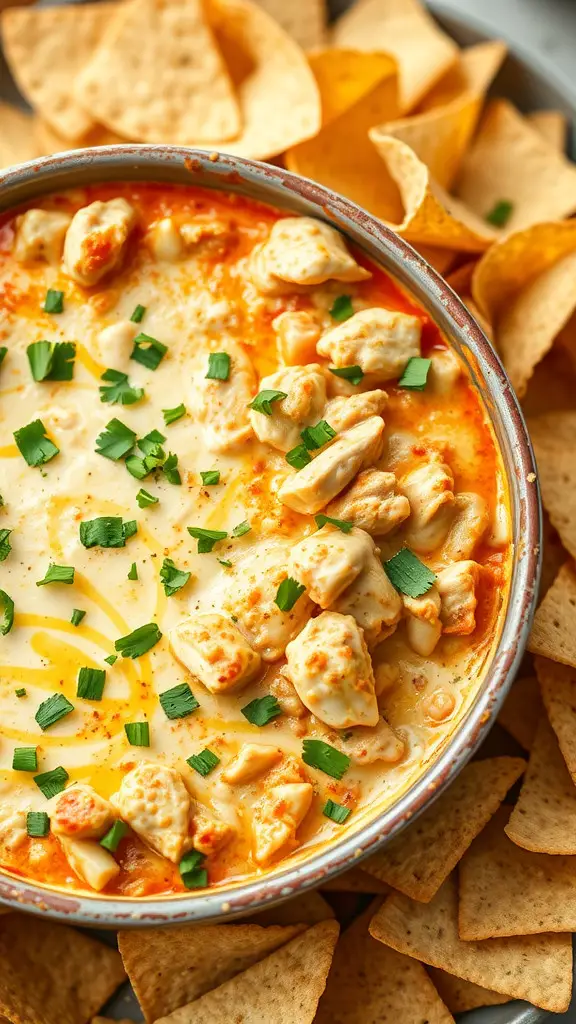
Southwest Chicken Dip is a game-day favorite that never fails to impress. This creamy, cheesy dip is packed with shredded chicken, zesty spices, and warm flavors. It’s perfect for any sports event, whether you’re cheering from home or tailgating with friends.
In the image, you see a generous portion of this dip bubbling in a bowl, surrounded by crunchy tortilla chips. The green onions sprinkled on top add a pop of color and freshness. The combination of textures and flavors makes it a hit for any gathering.
To make this crowd-pleaser, gather some cooked chicken, cream cheese, shredded cheese, and your favorite Southwest seasonings. Mix it all in a baking dish, pop it in the oven until bubbly, and serve it warm. It’s a simple recipe that guarantees smiles all around.
This dip is a must-have for your Kickoff Dinner Specials or Game Watch Dinner Ideas. Whether it’s for a Championship Cookout or just a casual watch party, it fits perfectly on any Victory Meal Menu. Get ready to dig in!
Ingredients:
- 2 cups cooked, shredded chicken (rotisserie works great)
- 8 oz cream cheese, softened
- 1 cup sour cream
- 1 cup shredded Mexican cheese blend (plus extra for topping)
- 1 cup canned corn, drained
- 1 cup black beans, rinsed and drained
- 1 can (10 oz) diced tomatoes with green chilies, drained
- 1 packet taco seasoning mix
- 1 tsp garlic powder
- 1 tsp onion powder
- 1/2 tsp smoked paprika (optional for extra smokiness)
- Salt and pepper to taste
- Green onions and chopped cilantro for garnish
- Tortilla chips for serving
Instructions:
- Preheat the oven to 375°F (190°C). Grease a medium baking dish.
- In a large mixing bowl, combine softened cream cheese, sour cream, taco seasoning, garlic powder, onion powder, and smoked paprika. Mix until smooth and well blended.
- Stir in the shredded chicken, corn, black beans, diced tomatoes, and 1 cup of shredded cheese.
- Transfer the mixture to the prepared baking dish. Spread it evenly.
- Sprinkle extra shredded cheese on top for a gooey finish.
- Bake for 25-30 minutes or until the dip is hot and bubbly.
- Remove from the oven and let cool slightly. Garnish with chopped green onions and cilantro for extra freshness.
- Serve warm with tortilla chips on the side.
Serving Tips:
- Make Ahead: Prepare the dip mixture up to a day ahead. Cover and refrigerate, then bake when ready.
- Slow Cooker Option: Transfer the prepared dip to a slow cooker on low heat. Keep warm throughout the party.
- Customization Ideas: Add diced jalapeños for extra heat or a squeeze of lime juice for added zing.
This Southwest Chicken Dip is sure to be a crowd-pleaser. Its creamy, cheesy, and slightly spicy flavors pair perfectly with crunchy tortilla chips. Enjoy the game and the snacks!
Baked Jalapeño Popper Dip
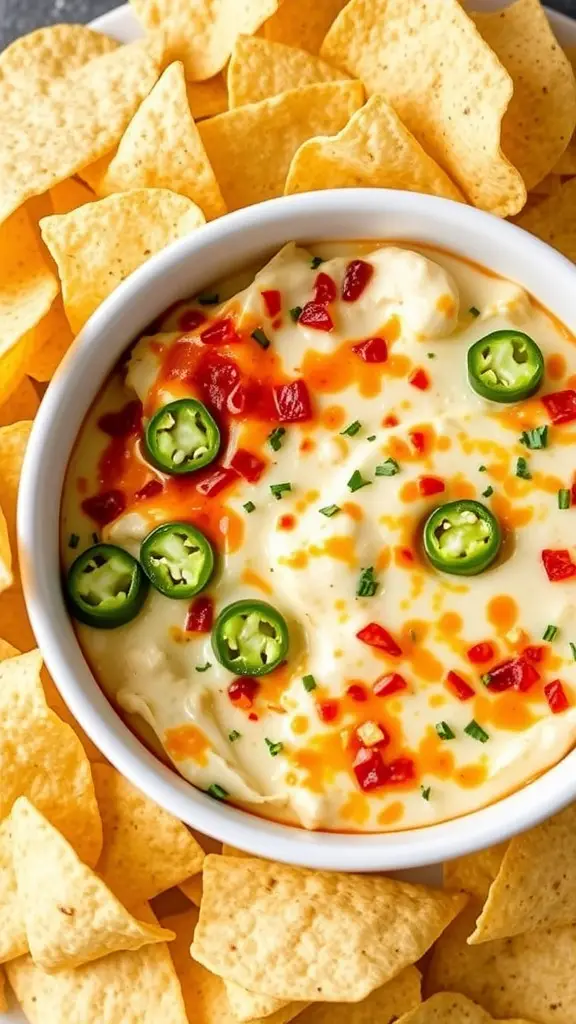
This Baked Jalapeño Popper Dip is the perfect addition to your game night spread. Creamy, cheesy, and packed with a kick, it pairs wonderfully with crispy tortilla chips. The vibrant colors from the toppings—fresh jalapeños and red peppers—make it visually appealing too!
Making this dip is super easy. Just mix cream cheese, cheddar, jalapeños, and some seasonings, then bake until bubbly. Serve it right out of the oven for a warm delight that everyone will love. It’s a great choice for any sports event feast or watch party food spread!
If you’re planning a tailgate or a big game supper, this dip will surely be a fan-favorite. It’s one of those winning dinner recipes that never disappoints. Whether it’s playoff night dishes or casual hangouts, this dip will keep spirits high and tastes satisfied.
Ingredients:
- 8 oz cream cheese, softened
- 1 cup sour cream
- 1 cup shredded cheddar cheese
- 1 cup shredded Monterey Jack cheese
- 1/2 cup chopped pickled jalapeños (adjust for spice level)
- 2-3 fresh jalapeños, sliced (for garnish)
- 1/4 cup diced red bell pepper (optional, for color)
- 1 tsp garlic powder
- 1 tsp onion powder
- 1/2 tsp smoked paprika (optional, for added depth)
- Salt and pepper to taste
- 1/2 cup panko breadcrumbs (optional, for crispy topping)
- 2 tbsp melted butter (if using breadcrumbs)
Instructions:
- Preheat the oven to 375°F (190°C). Grease a baking dish or cast-iron skillet lightly with cooking spray.
- In a large mixing bowl, combine the softened cream cheese, sour cream, cheddar cheese, Monterey Jack cheese, chopped pickled jalapeños, garlic powder, onion powder, smoked paprika (if using), salt, and pepper.
- Mix until smooth and fully combined.
- Transfer the mixture into the prepared baking dish, spreading it evenly.
- If using the panko topping, mix panko breadcrumbs with melted butter and sprinkle evenly over the dip.
- Bake for 20-25 minutes or until the dip is bubbly and the edges are golden brown.
- Switch the oven to broil for an additional 2-3 minutes to crisp up the top if desired.
- Remove from the oven and let cool slightly.
- Garnish with fresh jalapeño slices and diced red bell pepper for extra flavor and color.
- Serve warm with tortilla chips, pita chips, or your favorite dipping snacks.
Serving Tips:
- Spice Control: Adjust the number of jalapeños based on your preferred heat level.
- Make Ahead: Assemble the dip a day in advance, cover, and refrigerate until ready to bake.
- Pairing Idea: Serve alongside a fresh veggie platter to balance the rich, cheesy dip.
This Baked Jalapeño Popper Dip is creamy, cheesy, and perfectly spicy. With its golden bubbly top and irresistible kick, it’s sure to become a favorite at every game day gathering!
Teriyaki Glazed Meatball Skewers
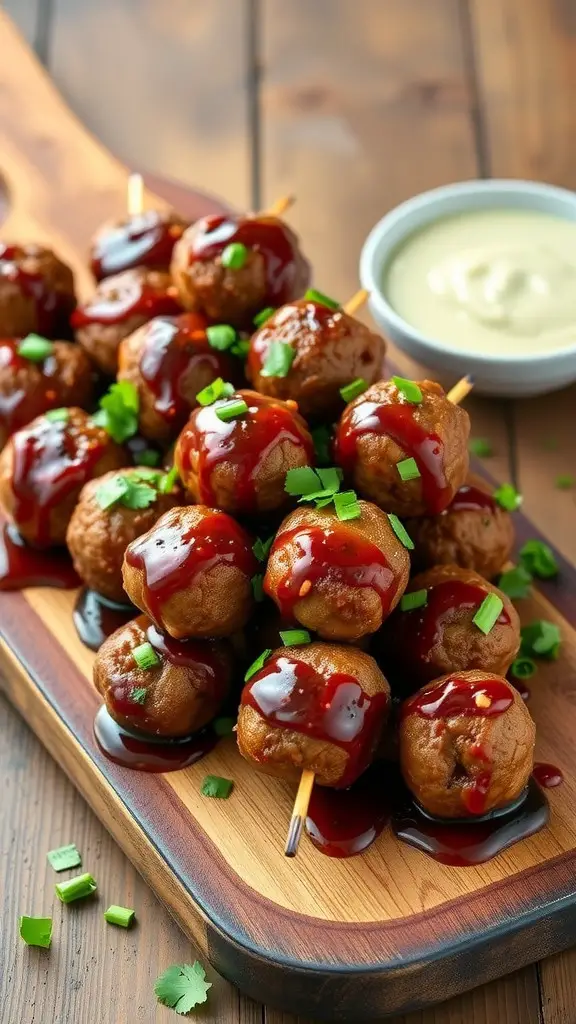
These teriyaki glazed meatball skewers are a perfect addition to any sports viewing supper. Each meatball is glazed with a sweet and savory teriyaki sauce, making them irresistible. The skewers make them easy to grab, perfect for cheering on your favorite team during game time.
To make these tasty treats, you’ll need ground meat, soy sauce, brown sugar, garlic, and ginger for the glaze. Combine everything to form meatballs, then skewer them for easy serving. Grill or bake until they’re cooked through, and drizzle with extra sauce for flavor.
Serve with a side of dipping sauce, like creamy ranch or spicy mayo, to elevate your watch party food spread. These meatball skewers will surely be a hit on your victory meal menu, making them a crowd-pleasing dinner idea for any big game.
Ingredients:
- 1 lb ground beef, pork, or chicken
- 1/2 cup breadcrumbs
- 1 large egg
- 2 green onions, finely chopped (plus extra for garnish)
- 2 garlic cloves, minced
- 1 tsp grated ginger
- Salt and pepper to taste
For the Teriyaki Glaze:
- 1/2 cup soy sauce (low sodium preferred)
- 1/4 cup brown sugar
- 2 tbsp rice vinegar
- 1 tbsp honey
- 1 tbsp sesame oil
- 1 tsp cornstarch mixed with 1 tbsp water (for thickening)
Instructions:
- Make the Meatballs: In a large bowl, combine ground meat, breadcrumbs, egg, green onions, garlic, ginger, salt, and pepper. Mix until just combined; avoid overmixing.
- Shape and Skewer: Roll the mixture into 1-inch meatballs. Thread 3-4 meatballs onto each skewer, leaving some space between them.
- Prepare the Glaze: In a small saucepan, combine soy sauce, brown sugar, rice vinegar, honey, and sesame oil. Bring to a simmer over medium heat. Stir in the cornstarch mixture and cook until thickened, about 2-3 minutes.
- Cook the Skewers:
- Grill Method: Preheat the grill to medium heat. Grill skewers for 10-12 minutes, turning occasionally, until cooked through.
- Oven Method: Preheat oven to 400°F (200°C). Place skewers on a baking sheet lined with parchment paper. Bake for 18-20 minutes, turning halfway.
- Glaze and Serve: Brush the meatballs with the teriyaki glaze during the last few minutes of cooking. Reserve some glaze for drizzling.
- Garnish and Enjoy: Transfer skewers to a platter, drizzle with extra glaze, and sprinkle with chopped green onions.
Serving Tips:
- Dipping Sauce Pairing: Serve with creamy ranch, spicy mayo, or extra teriyaki sauce on the side.
- Make Ahead: Prepare meatballs and sauce in advance; assemble and cook just before serving.
- Presentation Tip: Arrange skewers on a decorative serving tray for an eye-catching game-day snack.
These teriyaki glazed meatball skewers are packed with savory-sweet flavor. Perfectly seasoned, tender meatballs with a sticky glaze will make them the MVP of your game day spread!
Savory Spinach Artichoke Flatbread
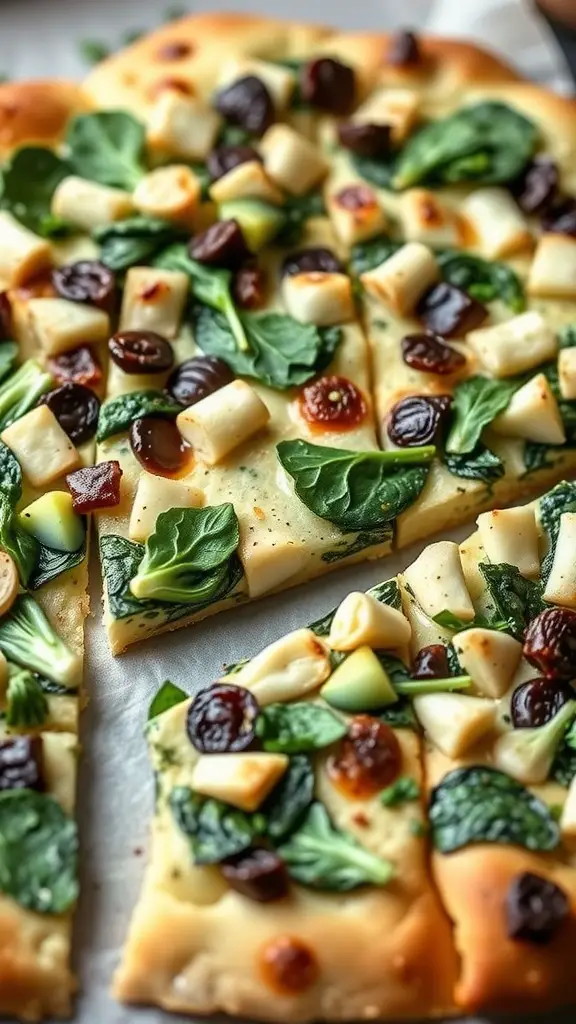
Spinach artichoke flatbread is a crowd-pleaser that shines during any sports event. This dish is perfect for a game night family feast or a tailgate party. The vibrant greens mix beautifully with the cheese, creating a dish that’s as tasty as it is colorful.
This flatbread is topped with fresh spinach, creamy cheese, and sun-dried tomatoes, making it a great option for any celebration night bites. It’s simple to prepare and sure to impress your friends during the big game. Plus, it’s a fun way to add some veggies to your game-day grub fest!
To make this delicious flatbread, you’ll need flour, yeast, water, olive oil, fresh spinach, mozzarella cheese, and sun-dried tomatoes. Roll out your dough, sprinkle on the toppings, and bake until golden and bubbly. Slice it up, and you have a winning dinner recipe that everyone will enjoy!
Ingredients:
- 1 pre-made flatbread or pizza crust
- 1 cup fresh spinach, chopped
- 1/2 cup marinated artichoke hearts, chopped
- 1 cup shredded mozzarella cheese
- 1/2 cup grated Parmesan cheese
- 1/4 cup sun-dried tomatoes, chopped
- 2 cloves garlic, minced
- 1/2 cup cream cheese, softened
- 2 tablespoons olive oil
- 1 teaspoon Italian seasoning
- Salt and pepper to taste
Instructions:
- Preheat the oven to 400°F (200°C). Line a baking sheet with parchment paper.
- In a small bowl, mix softened cream cheese, minced garlic, and Italian seasoning until smooth.
- Place the flatbread on the prepared baking sheet and brush lightly with olive oil.
- Spread the cream cheese mixture evenly over the flatbread, leaving a small border around the edges.
- Layer chopped spinach and artichoke hearts evenly across the flatbread.
- Sprinkle shredded mozzarella and grated Parmesan cheese on top.
- Add chopped sun-dried tomatoes for a pop of flavor and color.
- Season with a pinch of salt and pepper.
- Bake for 12-15 minutes, or until the cheese is melted and bubbly, and the edges are golden brown.
- Remove from the oven and let cool for a few minutes before slicing.
Serving Tips:
- Cut for Sharing: Slice into squares or wedges for easy party sharing.
- Add Freshness: Garnish with fresh basil or a sprinkle of red pepper flakes for extra flavor.
- Pairing Idea: Serve alongside a light salad or a bowl of marinara for dipping.
This savory spinach artichoke flatbread is a delicious blend of cheesy, garlicky goodness with bursts of sun-dried tomato tang. It’s perfect for game nights, cozy family dinners, or anytime you want a satisfying and flavorful bite!
Crispy Lemon Pepper Wings
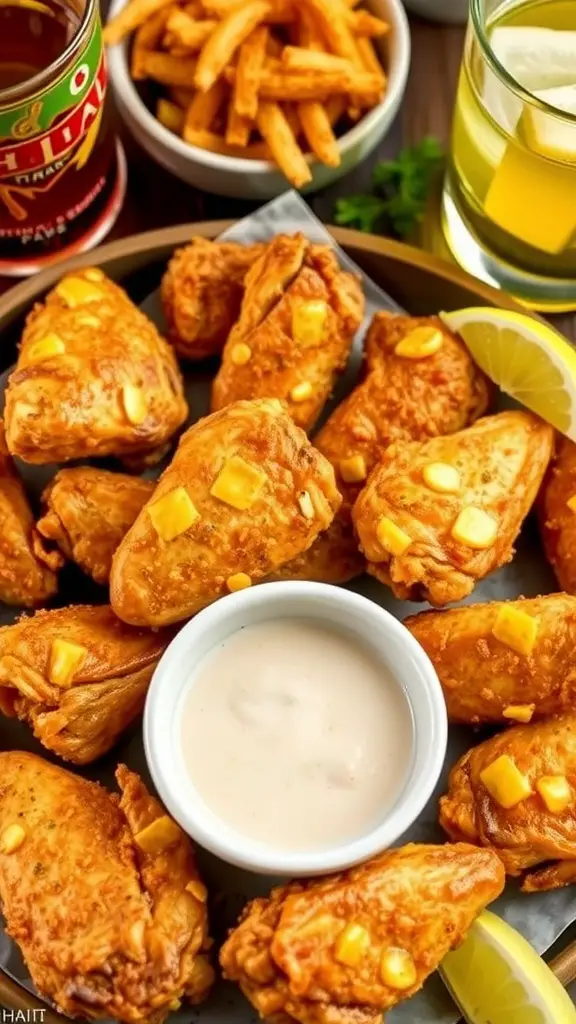
These crispy lemon pepper wings are the perfect addition to any game night. Their golden-brown exterior hints at the crunch awaiting you, while the zesty lemon pepper seasoning adds a delightful kick. This dish is not just a snack; it’s a crowd-pleaser that can turn any gathering into a winning moment.
Served alongside a creamy dipping sauce, these wings are ideal for sharing during your next sporting event supper. Pair them with some crispy fries and a refreshing drink, and you have the ultimate sports feast right at your fingertips. Whether you’re hosting a watch party or just enjoying a casual night in, these wings are sure to elevate your game-day grub fest.
To whip these up at home, you’ll need chicken wings, lemon pepper seasoning, and your favorite dipping sauce. Start by seasoning the wings, then fry or bake them until they’re crispy. Serve them hot, and watch everyone cheer as they dig in. These lemon pepper wings are not just a dish; they’re a celebration of team spirit and tasty bites.
Ingredients:
- 2 lbs chicken wings (split into drumettes and flats)
- 2 tbsp lemon pepper seasoning
- 1 tsp garlic powder
- 1 tsp onion powder
- 1 tsp smoked paprika (optional for extra flavor)
- 1 tsp salt
- 1/2 tsp black pepper
- 2 tbsp olive oil (for baking) or cooking oil (for frying)
- Dipping sauces: ranch, blue cheese, or your favorite sauce
Instructions:
- Prep the Wings: Pat the wings dry with paper towels. This step is essential for achieving crispy skin.
- Season the Wings: In a large bowl, combine the lemon pepper seasoning, garlic powder, onion powder, paprika (if using), salt, and black pepper. Toss the wings in the seasoning mix until fully coated.
- Choose Your Cooking Method:
- Baking: Preheat the oven to 400°F (200°C). Line a baking sheet with parchment paper or foil and place a wire rack on top. Arrange the wings in a single layer on the rack. Brush them lightly with olive oil. Bake for 45-50 minutes, flipping halfway through, until golden brown and crispy.
- Frying: Heat cooking oil in a deep fryer or large skillet to 375°F (190°C). Fry the wings in batches for 8-10 minutes or until crispy and fully cooked. Drain on paper towels.
- Final Touch: If desired, sprinkle extra lemon pepper seasoning over the wings while they’re still hot for an extra burst of flavor.
- Serve: Arrange the crispy wings on a platter with dipping sauces on the side. Pair with fries or a fresh veggie tray for a complete game-day feast.
Serving Tips:
- Keep Warm: Place cooked wings on a baking sheet in a 200°F oven if serving later.
- Make Ahead: Season the wings in advance and refrigerate until ready to cook.
- Presentation: Garnish with lemon wedges and fresh parsley for a pop of color.
These crispy lemon pepper wings are guaranteed to be the MVP of your game-night spread. With bold flavors and a satisfying crunch, they’ll have everyone reaching for seconds. Enjoy every crispy, zesty bite!
BBQ Chicken Stuffed Sweet Potatoes
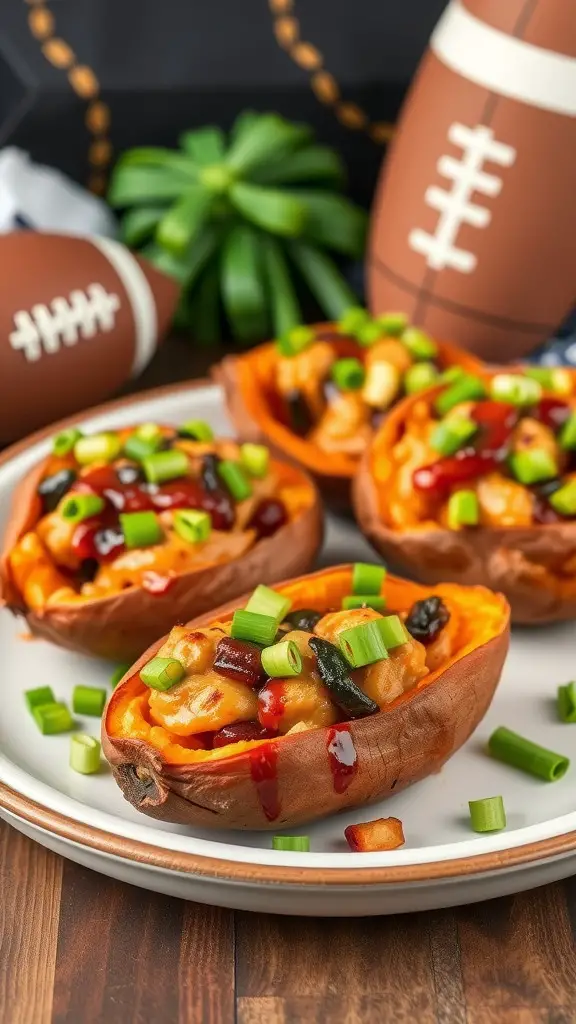
These BBQ chicken stuffed sweet potatoes are a perfect fit for your next big game night. They’re not just tasty but also super easy to whip up. The sweet potatoes are baked until tender and then packed with flavorful BBQ chicken, making them a crowd-pleaser.
Top them off with a drizzle of BBQ sauce and some fresh chopped green onions for that extra kick. Serve these as a part of your Victory Meal Menu or as a fun addition to your Game Day Grub Fest. Everyone will love these delicious and filling bites!
For making these, you’ll need sweet potatoes, shredded BBQ chicken, and your favorite toppings. Simply bake the potatoes, scoop out some of the flesh, and mix it with the chicken. Stuff it back in, add toppings, and enjoy! Perfect for a Watch Party Food Spread!
Ingredients:
- 4 medium sweet potatoes
- 2 cups cooked, shredded chicken
- 1 cup BBQ sauce (plus extra for drizzling)
- 1 cup shredded cheese (cheddar or mozzarella)
- 2 green onions, thinly sliced
- Salt and pepper, to taste
- Optional toppings: sour cream, diced jalapeños, chopped cilantro
Instructions:
- Preheat the oven to 400°F (200°C). Wash and dry the sweet potatoes.
- Pierce each sweet potato several times with a fork. Place them on a baking sheet and bake for 45-60 minutes or until tender when pierced with a knife.
- While the sweet potatoes are baking, mix the shredded chicken with BBQ sauce in a bowl. Season with salt and pepper if needed.
- Once the sweet potatoes are done, let them cool slightly. Cut them open lengthwise, being careful not to cut all the way through.
- Gently scoop out some of the sweet potato flesh, leaving a sturdy shell. Mix the scooped-out flesh with the BBQ chicken mixture.
- Stuff the BBQ chicken mixture back into the sweet potato shells.
- Top with shredded cheese and return to the oven for 10-15 minutes, or until the cheese is melted and bubbly.
- Remove from the oven and sprinkle with sliced green onions and any additional toppings you like.
- Serve immediately with extra BBQ sauce on the side for drizzling.
Serving Tips:
- Meal Prep Friendly: Prep the BBQ chicken and bake the sweet potatoes ahead of time. Stuff and bake just before serving.
- Customizable: Swap the chicken for pulled pork or black beans for a different twist.
- Presentation Idea: Serve on a large platter with fun football-themed decorations for game day flair.
These BBQ chicken stuffed sweet potatoes are a delicious and hearty dish that will keep everyone satisfied. They’re easy to customize, fun to eat, and perfect for sharing during your next game night!
Loaded Cheeseburger Tater Tots
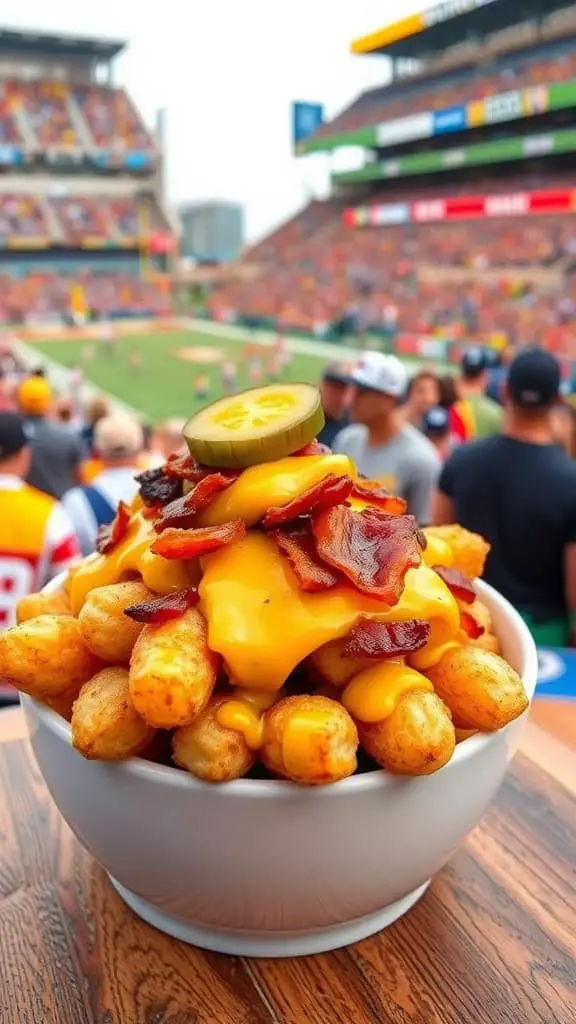
Picture this: A stadium packed with fans, excitement in the air, and a delicious bowl of loaded cheeseburger tater tots right in front of you. These crunchy, golden tater tots are topped with gooey melted cheese, crispy bacon, and a tangy pickle slice, making them the perfect snack for any sporting event. Whether you’re at a game or hosting a watch party, this dish is sure to be a hit.
These loaded tater tots are not just tasty; they are also incredibly easy to prepare. Simply fry or bake your tater tots until golden brown, then pile on the cheese and bacon. Pop them in the oven just long enough for the cheese to melt beautifully. Top with pickles for that extra zing. This is a crowd-pleaser for any celebration night bites or a game-day grub fest!
For anyone looking to elevate their game time eats, this dish is a must-try. It fits perfectly into a sports viewing supper, bringing the flavors of a classic cheeseburger right to your fingertips. So grab your friends and dig into this tasty treat that’s sure to score big at your next tailgate party or playoff night dishes!
Ingredients:
- 1 bag (32 oz) frozen tater tots
- 2 cups shredded cheddar cheese
- 6 slices cooked bacon, crumbled
- 1/2 cup diced pickles (or pickle slices for garnish)
- 1/4 cup diced red onion (optional)
- 1/2 lb ground beef
- 1 tablespoon Worcestershire sauce
- 1 teaspoon garlic powder
- 1 teaspoon onion powder
- Salt and pepper to taste
- Sour cream and ketchup for dipping (optional)
Instructions:
- Preheat Oven: Preheat your oven to 425°F (220°C). Line a large baking sheet with parchment paper.
- Cook Tater Tots: Spread the tater tots in a single layer on the prepared baking sheet. Bake according to package instructions, usually 25-30 minutes, until crispy and golden.
- Prepare the Beef: While the tater tots are baking, heat a large skillet over medium heat. Add the ground beef and cook until browned, breaking it into crumbles as it cooks.
- Season the Beef: Stir in Worcestershire sauce, garlic powder, onion powder, salt, and pepper. Cook for another 2-3 minutes until well combined. Remove from heat.
- Assemble the Dish: Transfer the crispy tater tots to a large oven-safe serving dish or keep them on the baking sheet. Sprinkle half of the cheese over the tots.
- Add Toppings: Spread the cooked beef evenly over the cheese layer, followed by the remaining cheese and crumbled bacon.
- Melt the Cheese: Return the dish to the oven for 5-7 minutes or until the cheese is fully melted and bubbly.
- Garnish: Remove from the oven and top with diced pickles, red onions (if using), and any additional toppings you like.
- Serve: Serve immediately with sour cream and ketchup on the side for dipping.
Serving Tips:
- Custom Toppings: Add jalapeños, diced tomatoes, or even shredded lettuce for a cheeseburger-style twist.
- Make Ahead: Cook the beef and prep the toppings ahead of time, so you can assemble and bake when ready.
- Party Presentation: Serve in a fun stadium-themed bowl for extra game-day flair.
These loaded cheeseburger tater tots are guaranteed to be a fan-favorite. Every bite is a winning combination of crispy, cheesy, savory goodness!
Spicy Buffalo Cauliflower Bites
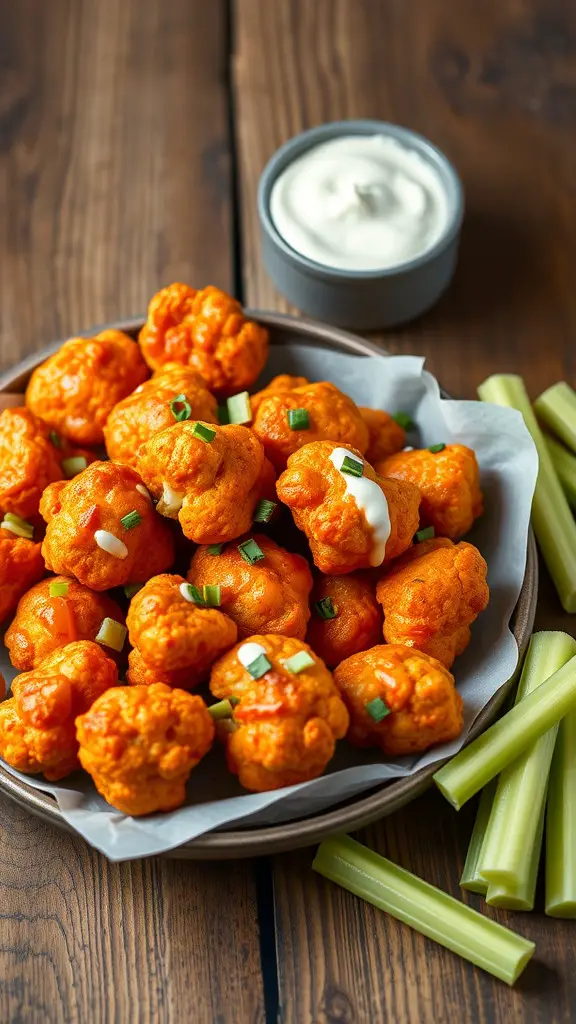
These Spicy Buffalo Cauliflower Bites are the perfect addition to any game night feast. They are crispy, spicy, and packed with flavor, making them a great choice for your playoff night dishes.
Imagine a platter overflowing with bright orange, saucy cauliflower bites, ready to be devoured. Each piece is perfectly coated in a spicy Buffalo sauce, complemented by a drizzle of creamy ranch and a sprinkle of green onions. They look delicious and inviting!
Serve these at your sports viewing supper, and watch them disappear in no time. Pair them with crunchy celery sticks on the side for a classic touch, perfect for any tailgate party bites.
To make these, all you need are cauliflower florets, hot sauce, olive oil, and a few seasonings. Roast them until crispy, then toss in the sauce. It’s that easy! They’ll be a crowd-pleasing hit at your next watch party food spread.
Ingredients:
- 1 large head of cauliflower, cut into bite-sized florets
- 1/2 cup hot sauce (like Frank’s RedHot)
- 2 tbsp olive oil
- 1 tbsp melted unsalted butter
- 1 tsp garlic powder
- 1 tsp smoked paprika
- 1/2 tsp onion powder
- 1/2 tsp salt
- 1/4 tsp black pepper
- Cooking spray
- Optional garnishes: chopped green onions, sesame seeds, parsley
Instructions:
- Preheat the oven to 425°F (220°C). Line a baking sheet with parchment paper or lightly grease it with cooking spray.
- In a large mixing bowl, toss the cauliflower florets with olive oil, garlic powder, smoked paprika, onion powder, salt, and pepper until evenly coated.
- Spread the cauliflower evenly on the prepared baking sheet. Ensure the pieces aren’t touching for maximum crispiness.
- Roast for 20-25 minutes, flipping halfway through, until the cauliflower is golden brown and crispy on the edges.
- While the cauliflower is roasting, prepare the Buffalo sauce. In a small saucepan over medium heat, combine the hot sauce and melted butter. Stir until smooth and heated through.
- Remove the roasted cauliflower from the oven and transfer it to a large mixing bowl.
- Pour the Buffalo sauce over the cauliflower and toss until fully coated.
- Return the coated cauliflower to the baking sheet and roast for an additional 5-8 minutes to set the sauce.
- Remove from the oven and let cool for a few minutes before serving.
Serving Tips:
- Classic Pairing: Serve with celery sticks and ranch or blue cheese dressing for dipping.
- Presentation Tip: Sprinkle with chopped green onions or parsley for added freshness and visual appeal.
- Make Ahead: Roast the cauliflower ahead of time and toss in the sauce just before serving.
These Spicy Buffalo Cauliflower Bites are guaranteed to spice up any game night or gathering. Crispy, saucy, and bursting with bold flavors, they’ll quickly become a favorite on your party snack menu!
Sweet and Tangy BBQ Riblets
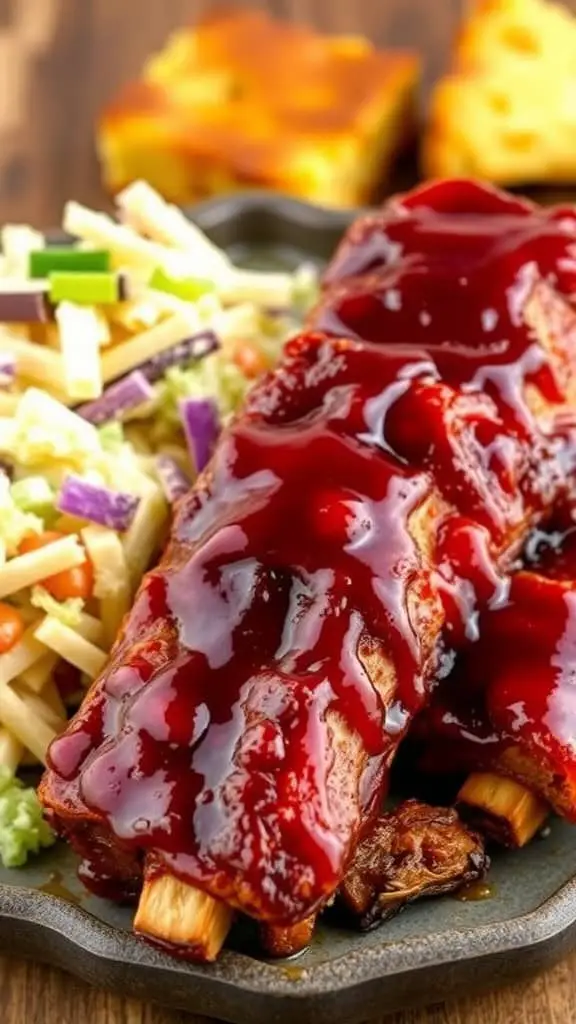
These sweet and tangy BBQ riblets are a perfect choice for any gathering. They look delicious with a glossy BBQ sauce drizzled generously on top. The riblets are tender and packed with flavor, making them a hit for any meal.
Serving these riblets brings that delightful barbecue experience right to your table. Pair them with a vibrant side salad to balance the richness of the meat. This meal fits right into any ‘Game Day Grub Fest’ or ‘Tailgate Party Bites’ theme, sure to please everyone.
For the full experience, consider incorporating some classic sides. Cornbread or potato salad works beautifully. These dishes complement the riblets perfectly for a ‘Victory Meal Menu’ that celebrates any occasion!
Whether it’s a casual dinner or a ‘Championship Cookout’, these riblets will be the star of the show. Get ready to enjoy some ‘Fan-Favorite Dinners’ that will have everyone coming back for more!
Ingredients:
- 2 lbs pork riblets
- 1 cup BBQ sauce (your favorite brand or homemade)
- 1/4 cup honey
- 2 tbsp apple cider vinegar
- 1 tbsp Worcestershire sauce
- 1 tsp smoked paprika
- 1 tsp garlic powder
- 1/2 tsp onion powder
- 1/2 tsp black pepper
- 1/2 tsp salt
- Cooking spray (optional)
Instructions:
- Preheat the Oven: Set your oven to 350°F (175°C). Line a baking sheet with aluminum foil for easy cleanup.
- Prepare the Riblets: Pat the riblets dry with paper towels. Season them with salt, pepper, garlic powder, onion powder, and smoked paprika.
- Make the Sauce: In a mixing bowl, combine BBQ sauce, honey, apple cider vinegar, and Worcestershire sauce. Stir until well blended.
- Coat the Riblets: Place the riblets on the prepared baking sheet. Brush them generously with the BBQ sauce mixture on all sides.
- Bake the Riblets: Cover the riblets with foil and bake for 60 minutes, basting with sauce every 20 minutes.
- Caramelize the Sauce: Remove the foil, increase the oven temperature to 425°F (220°C), and bake for an additional 15-20 minutes, turning occasionally until the sauce is caramelized and the riblets are tender.
- Serve and Enjoy: Transfer the riblets to a serving platter. Garnish with fresh herbs if desired and serve with your favorite sides like cornbread and a fresh salad.
Serving Tips:
- Make Ahead: You can marinate the riblets in the BBQ sauce overnight for deeper flavor.
- Grill Option: For extra smokiness, finish the riblets on a hot grill for 5-7 minutes per side.
- Party Presentation: Serve them on a rustic wooden board for a backyard BBQ vibe.
These sweet and tangy BBQ riblets are guaranteed to be a crowd-pleaser. The perfect combination of smoky, sweet, and savory flavors will leave everyone asking for seconds. Enjoy your feast!
