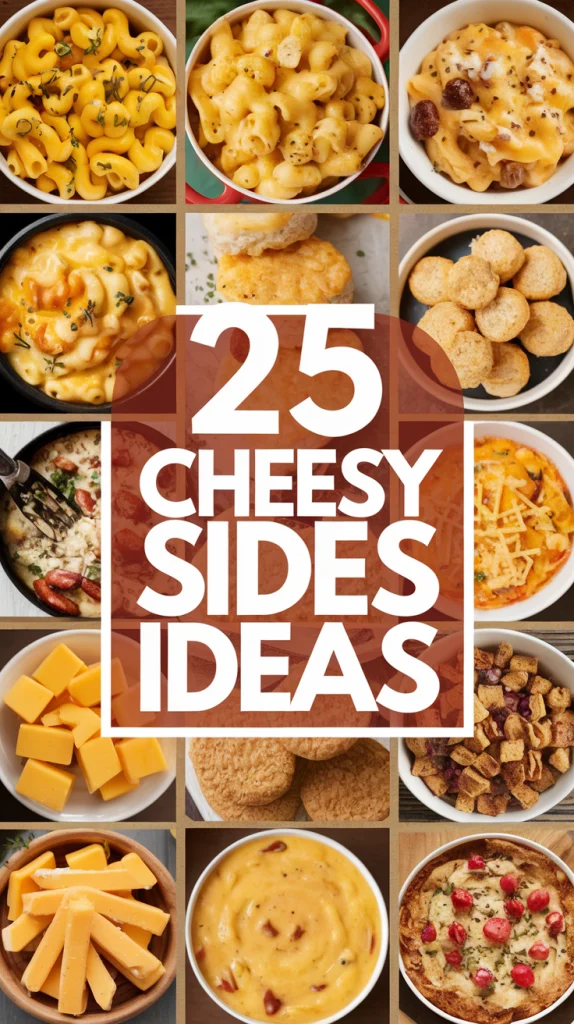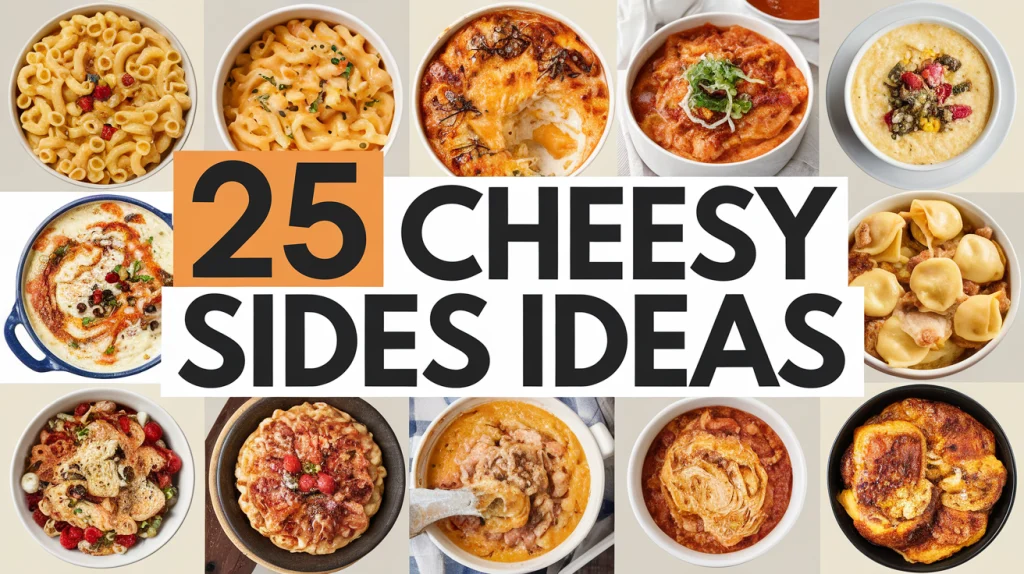
Christmas dinner often revolves around the main course, but let’s not forget the sides! This season, it’s time to make those cheesy accompaniments the star of the show with 25 irresistible sides that promise to bring joy and flavor to your holiday table. From creamy casseroles to cheesy breads, these dishes will have everyone asking for seconds!
Affiliate Disclosure: "As an Amazon Associate I earn from qualifying purchases made from the images and links in this post. We are a participant in the Amazon Services LLC Associates Program, an affiliate advertising program designed to provide a means for us to earn fees by linking to Amazon.com and other affiliated sites."
Cheddar and Chive Biscuit Bites

Cheddar and Chive Biscuit Bites
A plate of golden Cheddar and Chive Biscuit Bites topped with fresh chives.
These Cheddar and Chive Biscuit Bites are the perfect addition to your meal lineup. Soft, fluffy, and bursting with cheesy goodness, they make a fantastic side dish. Each bite is a delightful mix of cheddar cheese and fresh chives, adding a touch of flavor that pairs well with a variety of dishes.
Ingredients
- 1 cup all-purpose flour
- 1 teaspoon baking powder
- 1/4 teaspoon baking soda
- 1/4 teaspoon salt
- 2 tablespoons unsalted butter, cold and cubed
- 1/2 cup grated sharp cheddar cheese
- 2 tablespoons fresh chives, finely chopped (plus extra for garnish)
- 1/2 cup low-fat buttermilk
Instructions
- Preheat the Oven
Preheat your oven to 400°F (200°C). Line a baking sheet with parchment paper or lightly grease it to prevent sticking. - Mix the Dry Ingredients
In a medium bowl, whisk together the all-purpose flour, baking powder, baking soda, and salt until well combined. - Cut in the Butter
Add the cold, cubed butter to the flour mixture. Using a pastry cutter or your fingers, blend the butter into the flour until the mixture resembles coarse crumbs. This step ensures the biscuits turn out light and fluffy. - Add the Cheese and Chives
Stir in the grated cheddar cheese and chopped chives until they are evenly distributed throughout the mixture. - Mix in the Buttermilk
Pour in the buttermilk and stir until the dough just comes together. Be careful not to overmix; it’s okay if the dough is slightly sticky. - Shape the Biscuit Bites
Scoop tablespoon-sized portions of the dough onto the prepared baking sheet, spacing them about an inch apart. You should get around 12 small biscuit bites from this recipe. - Bake
Place the baking sheet in the preheated oven and bake for 10-12 minutes, or until the biscuit bites are golden brown on the edges and cooked through. - Garnish and Serve
Remove the biscuit bites from the oven and let them cool slightly on the baking sheet. Garnish with extra fresh chives before serving for a fresh pop of color and flavor.
Nutritional Information
Each serving of Cheddar and Chive Biscuit Bites is under 250 calories, making them a delightful but lighter accompaniment to your meal. The combination of cheddar cheese and chives adds flavor without being overly indulgent, and using low-fat buttermilk helps keep the calorie count in check.
Tips for Variation
- Add Some Spice: For a kick, add 1/4 teaspoon of cayenne pepper or paprika to the dry ingredients.
- Different Cheeses: Swap out cheddar for other types of cheese, such as pepper jack or mozzarella, to change the flavor profile.
- Make it Whole Wheat: Use whole wheat flour instead of all-purpose flour for a more rustic, hearty biscuit bite.
These biscuit bites are also great for gatherings. Whether it’s a holiday meal or just a weekend get-together, they’re sure to impress. Serve them alongside your favorite casseroles or as a tasty snack on their own. If you’re looking for easy cheesy recipes, this one is a must-try!
Quick Options…

- Knorr Pasta Sides Cheesy Cheddar Rotini is a pasta side dish that enhances meals with amazing flavor.
- Cheesy Cheddar Pasta Sides expertly combines rotini pasta with our scrumptious cheddar cheese flavored sauce.
- Knorr Pasta Sides are quick and easy pasta side dishes — this creamy, cheesy pasta cooks in just 10 minutes.

- Knorr Pasta Sides Cheesy Cheddar Rotini is a pasta side dish that enhances meals with amazing flavor
- Cheesy Cheddar Pasta Sides expertly combines rotini pasta with our scrumptious cheddar cheese flavored sauce
- Knorr Pasta Sides are quick and easy pasta side dishes, this creamy, cheesy pasta cooks in just 10 minutes

- CHEESY TWIST: Old El Paso Cheesy Mexican Rice is a soft and fluffy blend of rice, spices, and cheesy flavor
- PERFECT RICE COMBO: Can be used for tacos, enchiladas, and other Mexican inspired dishes
- QUICK AND EASY: Have Old El Paso Mexican Style Rice ready in minutes with easy cooking directions for stovetop or microwave

Gooey Spinach and Artichoke Dip

Gooey Spinach and Artichoke Dip
A bowl of gooey spinach and artichoke dip surrounded by crackers.
This gooey spinach and artichoke dip is a crowd-pleaser, perfect for parties or cozy nights in. The warm, cheesy goodness of this dip makes it a go-to favorite. It’s loaded with fresh spinach, artichokes, and a mix of melty cheeses that create a rich, creamy texture.
Ingredients
- 1 cup fresh spinach, chopped
- 1 can (14 oz) artichoke hearts, drained and roughly chopped
- 1 cup cream cheese, softened
- 1/2 cup sour cream
- 1/2 cup mayonnaise
- 1 cup shredded mozzarella cheese
- 1/2 cup grated parmesan cheese
- 1 teaspoon garlic powder
- 1/2 teaspoon onion powder
- Salt and pepper to taste
- 1/4 cup chopped tomatoes (optional, for garnish)
- Crackers or sliced baguette for serving
Instructions
- Preheat the Oven
Preheat your oven to 350°F (175°C). This will ensure that the dip gets nice and bubbly while baking. - Mix the Dip Ingredients
In a large mixing bowl, combine the softened cream cheese, sour cream, and mayonnaise until smooth. Add the chopped spinach, artichoke hearts, mozzarella cheese, parmesan cheese, garlic powder, and onion powder. Mix everything well to combine. Season with salt and pepper to taste. - Transfer to Baking Dish
Spoon the mixture into an oven-safe baking dish, spreading it evenly. You want the dip to be thick enough so that it stays creamy but not so deep that it doesn’t cook through evenly. - Bake Until Gooey
Place the baking dish in the preheated oven and bake for 20-25 minutes, or until the dip is hot and bubbly, and the cheese is melted. If you want a golden crust on top, you can broil it for an additional 2-3 minutes, keeping a close eye to avoid burning. - Garnish and Serve
Once out of the oven, let it cool for a couple of minutes. Sprinkle the top with the optional chopped tomatoes for a burst of color and added freshness. Serve the dip warm with a variety of crunchy crackers or sliced baguette for dipping.
Nutritional Information
Each serving of Gooey Spinach and Artichoke Dip is under 250 calories, making it a tasty yet mindful indulgence. The combination of spinach and artichokes provides a healthy boost of fiber and nutrients, while the cheese adds protein and that irresistible creamy texture.
Tips for Variation
- Add Some Spice: If you enjoy a bit of heat, consider adding 1/4 teaspoon of crushed red pepper flakes or a few dashes of hot sauce to the mix.
- Change the Cheese: Feel free to swap in other types of cheese, like cheddar or Gruyère, for a different flavor profile.
- Make it Lighter: To reduce the calorie count, you can substitute the mayonnaise with Greek yogurt and use reduced-fat cream cheese.
In the image, you can see the dip bubbling with cheese, inviting you to take a scoop. Surrounded by crunchy crackers, every bite is a delightful blend of flavors. The vibrant colors of spinach and tomatoes add a fresh touch that enhances its deliciousness.
Making this dip is straightforward and doesn’t take much time. Serve it warm, and watch it disappear!
Cheesy Brussels Sprouts Gratin
Cheesy Brussels Sprouts Gratin
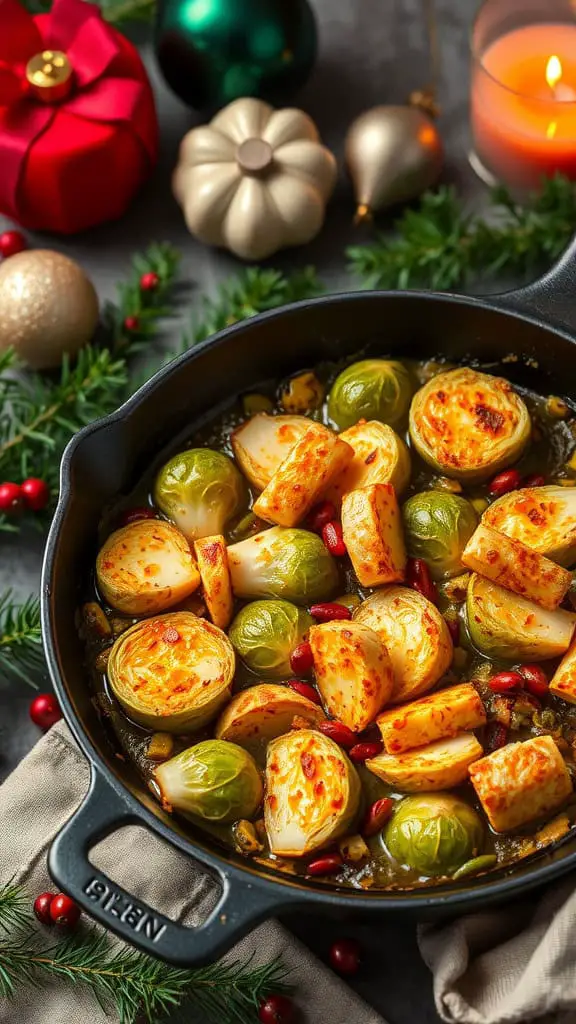
A delicious cheesy Brussels sprouts gratin in a black pan, surrounded by festive decorations.
Brussels sprouts don’t always get the love they deserve, but this cheesy gratin takes them to a whole new level. Picture perfectly roasted sprouts, soaking in a rich, creamy cheese sauce. The golden, bubbly top hints at the delightful flavors inside.
Ingredients
- 1 lb (about 450g) fresh Brussels sprouts, trimmed and halved
- 1 tablespoon olive oil
- Salt and pepper, to taste
- 1/2 cup heavy cream
- 1/4 cup milk (low-fat or whole)
- 1 garlic clove, minced
- 1 teaspoon Dijon mustard
- 1 cup shredded cheese (cheddar or Gruyère work well)
- 1/4 cup grated Parmesan cheese
Instructions
- Prepare and Roast the Brussels Sprouts
Preheat your oven to 400°F (200°C). In a mixing bowl, toss the halved Brussels sprouts with olive oil, salt, and pepper until well coated. Arrange them in an even layer in a baking dish or an oven-safe skillet. Roast for 15-20 minutes, or until the Brussels sprouts are tender and slightly browned at the edges. - Make the Creamy Cheese Sauce
While the Brussels sprouts are roasting, prepare the cheese sauce. In a small saucepan, combine the heavy cream, milk, minced garlic, and Dijon mustard. Heat over medium-low heat until it starts to simmer gently. Gradually add in the shredded cheese, whisking continuously until smooth and creamy. Be sure not to boil the mixture; just let it warm through to melt the cheese. - Combine and Bake
Remove the roasted Brussels sprouts from the oven. Pour the creamy cheese sauce evenly over the sprouts, making sure each piece is well coated. Sprinkle the grated Parmesan cheese on top. Return the dish to the oven and bake for an additional 10-15 minutes, or until the top is bubbly and golden. - Serve and Enjoy
Let the gratin cool for a few minutes before serving. This allows the cheese sauce to set slightly, making it easier to serve. The Brussels sprouts will be perfectly tender and infused with rich, cheesy flavor in every bite.
Nutritional Information
Each serving of Cheesy Brussels Sprouts Gratin is under 250 calories, making it a wonderful indulgence that won’t weigh you down. Brussels sprouts are packed with vitamins C and K, while the cheese adds a comforting creaminess and some protein. It’s an ideal side dish that feels decadent yet maintains a balance.
Tips for Variation
- Add Some Crunch: Top with a handful of breadcrumbs mixed with a little melted butter before baking for a crispy topping.
- Switch Up the Cheese: Gruyère, mozzarella, or even smoked Gouda can be used for a unique flavor twist.
- Add Bacon: For extra flavor, sprinkle cooked, crumbled bacon over the Brussels sprouts before pouring over the cheese sauce.
Perfect Pairings
This dish is perfect for those chilly evenings and works wonderfully as a side for any meal. It brings warmth and comfort, making it a great choice for holiday gatherings or cozy weeknight dinners. Just imagine serving this alongside some cheesy scalloped potatoes or a loaded baked potato casserole.
Enjoy this dish alongside other easy yummy side dishes, or make it the star of the table. Whether you’re hosting Thanksgiving or just a simple family dinner, this cheesy Brussels sprouts gratin will surely impress!
Macaroni and Cheese with a Twist
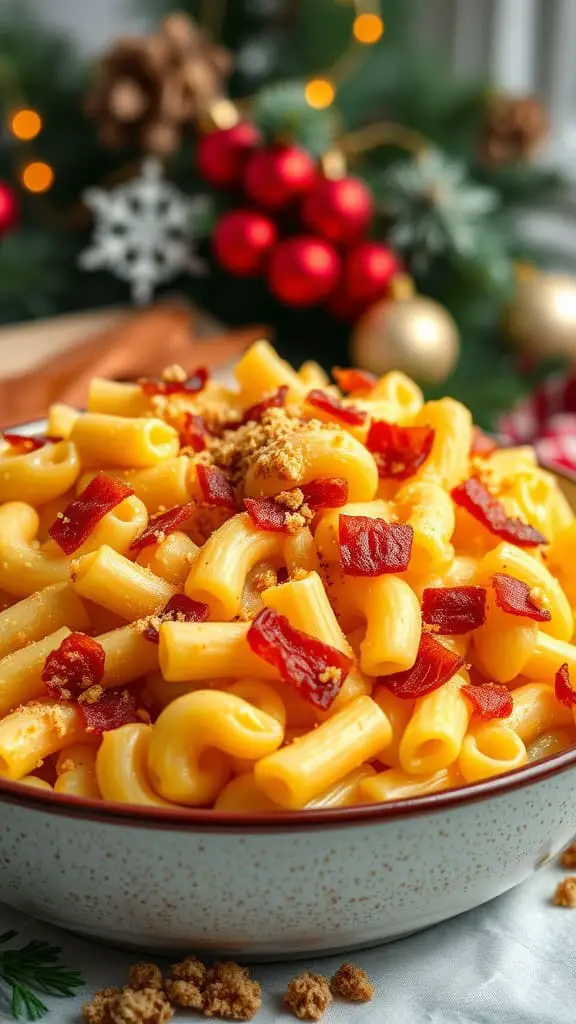
This dish is a fun take on the classic macaroni and cheese, perfect for cozy meals. The macaroni is coated in a rich, cheesy sauce, making every bite creamy and satisfying.
What sets this version apart is the addition of crispy bacon pieces sprinkled on top. The salty crunch of bacon pairs beautifully with the cheesy pasta, offering a delightful contrast in texture.
The presentation is festive, with a backdrop of holiday decorations. This makes it a great choice for gatherings or potlucks, as it fits right in with traditional Thanksgiving side recipes easy to prepare.
If you’re looking for an easy cheesy scalloped potatoes recipe or a cheesy rice in rice cooker option, this macaroni dish will impress. You can even make a cheesy cauliflower bake as a side to balance the meal.
For a comforting winter meal, try serving this alongside loaded baked potatoes or crispy parmesan cauliflower bites. It’s not just a side; it’s a crowd-pleaser.
Ingredients Breakdown
This macaroni and cheese with a twist is not just creamy but also full of bold flavors, thanks to its crispy bacon topping. Each serving is under 250 calories, making it both comforting and guilt-free.
For the Macaroni and Cheese:
- 8 oz whole wheat macaroni (adds fiber without compromising taste)
- 1 cup unsweetened almond milk (light and creamy)
- 1 cup reduced-fat shredded cheddar cheese (for that classic cheesy flavor)
- 1/4 cup grated parmesan cheese (for depth and saltiness)
- 2 tbsp light cream cheese (adds extra creaminess)
- 1 tbsp Dijon mustard (for a hint of tang)
- 1/2 tsp garlic powder (for savory depth)
- 1/4 tsp smoked paprika (optional, for a smoky kick)
- Salt and pepper to taste
For the Crispy Bacon Topping:
- 4 slices turkey bacon (lower in fat but still crispy and flavorful)
- 2 tbsp panko breadcrumbs (adds crunch)
- 1 tbsp olive oil (to help toast the breadcrumbs)
- 1 tbsp chopped fresh parsley (for garnish and a pop of freshness)
How to Make It:
- Cook the Macaroni: Boil the macaroni in salted water until al dente. Drain and set aside.
- Make the Cheese Sauce: In a saucepan over medium heat, whisk together almond milk, Dijon mustard, garlic powder, and smoked paprika. Stir frequently until warm.
- Melt the Cheese: Add the cheddar, parmesan, and cream cheese. Stir until the sauce becomes smooth and velvety.
- Combine: Add the cooked macaroni to the cheese sauce. Stir well to coat every piece of pasta.
- Prepare the Bacon Topping: In a skillet, cook turkey bacon until crispy. Let it cool slightly, then crumble it into bite-sized pieces.
- Toast the Breadcrumbs: In the same skillet, heat olive oil over medium heat. Add panko breadcrumbs and toast until golden brown.
- Assemble the Dish: Transfer the macaroni and cheese to a serving dish. Sprinkle bacon crumbles and toasted breadcrumbs evenly over the top.
- Garnish: Finish with freshly chopped parsley for added color and freshness.
Why It’s Amazing:
- Balanced Texture: Creamy, cheesy pasta meets crispy bacon and crunchy breadcrumbs.
- Healthier Twist: Using whole wheat pasta, light cheeses, and turkey bacon keeps it lighter without sacrificing flavor.
- Crowd-Pleasing Appeal: Perfect for holiday gatherings, potlucks, or cozy family dinners.
This isn’t just macaroni and cheese—it’s a holiday-ready, flavor-packed dish everyone will love!
Three-Cheese Stuffed Mushrooms

These three-cheese stuffed mushrooms are a celebration of flavor! Each mushroom cap is filled with a creamy mixture of cheeses, making them a perfect appetizer for any gathering. The golden crust on top, combined with the hearty mushroom base, creates a delightful bite that will impress your guests.
In the image, you can see the mushrooms topped generously with shredded cheese, adding a pleasing texture and melty goodness. The mushrooms are carefully arranged on a white platter, perfect for a festive occasion. The warm glow from the candle and hints of holiday decor in the background set a cozy scene for enjoying these delicious bites.
To make these stuffed mushrooms, gather ingredients like cream cheese, cheddar, and parmesan. Start by preheating your oven, then mix the cheeses with some herbs and spices. Spoon this mixture into the mushroom caps and bake until golden. These make for great easy weeknight sides or can be a standout dish at Thanksgiving gatherings.
Ingredients Breakdown
These three-cheese stuffed mushrooms are simple to make but taste gourmet. Each ingredient adds depth and richness, creating the perfect appetizer.
For the Filling:
- 8 oz cream cheese, softened (for a creamy base)
- 1 cup shredded cheddar cheese (sharp and melty)
- 1/2 cup grated parmesan cheese (for a salty, nutty kick)
- 2 tbsp sour cream (adds tang and smooth texture)
- 1 tsp garlic powder (for savory depth)
- 1 tsp onion powder (enhances the cheesy mix)
- 1/2 tsp Italian seasoning (for an herby flavor burst)
- 1/4 tsp smoked paprika (optional, for smoky warmth)
- Salt and pepper to taste
For the Mushrooms:
- 16 large white or cremini mushrooms (sturdy and perfect for stuffing)
- 2 tbsp olive oil (for brushing the mushrooms)
For Topping:
- 1/2 cup shredded mozzarella cheese (for a gooey finish)
- 2 tbsp chopped fresh parsley (for garnish and freshness)
How to Make It:
- Prep the Mushrooms: Wipe mushrooms clean with a damp paper towel. Gently pop out the stems and set the caps aside. Finely chop the stems.
- Make the Filling: In a large bowl, mix cream cheese, cheddar, parmesan, sour cream, garlic powder, onion powder, Italian seasoning, smoked paprika, salt, and pepper. Stir in the chopped mushroom stems.
- Stuff the Mushrooms: Use a spoon to generously fill each mushroom cap with the cheese mixture.
- Bake to Perfection: Place stuffed mushrooms on a greased baking sheet. Sprinkle mozzarella cheese on top of each mushroom. Bake at 375°F (190°C) for 20-25 minutes or until golden and bubbly.
- Serve and Enjoy: Sprinkle with fresh parsley before serving. Arrange on a platter and watch them disappear!
Why They’re Amazing:
- Rich and Cheesy: The blend of three cheeses makes these mushrooms incredibly creamy and flavorful.
- Savory and Satisfying: Garlic, onion powder, and Italian seasoning enhance every bite.
- Perfect for Parties: Easy to prepare and always a crowd-pleaser.
These three-cheese stuffed mushrooms are the ultimate savory treat for any festive occasion or cozy dinner night!
Creamy Garlic Parmesan Mashed Potatoes
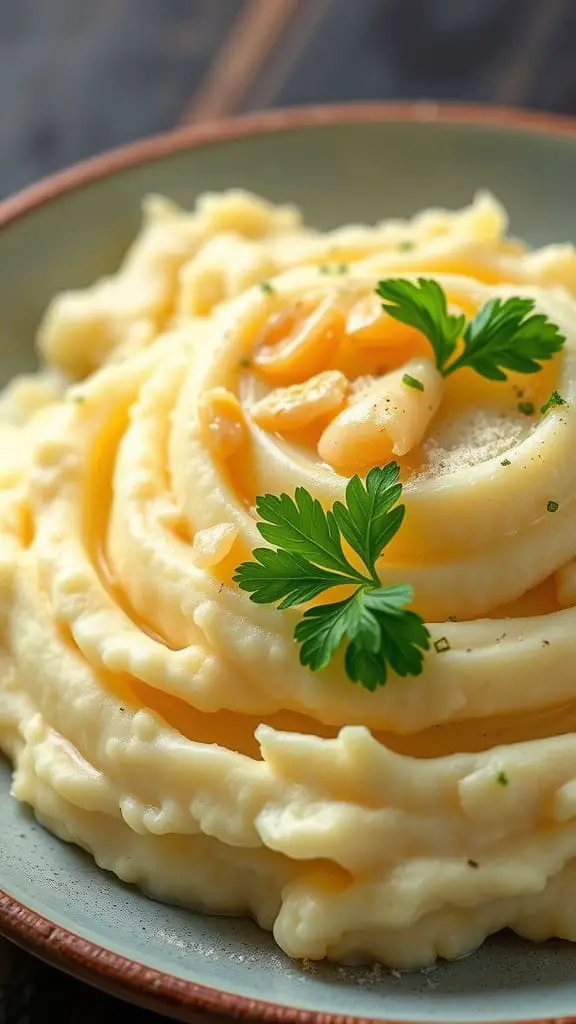
Creamy garlic Parmesan mashed potatoes are a delightful side dish that can elevate any meal. This dish features smooth, buttery potatoes infused with rich garlic and Parmesan flavors. The creamy texture makes it comforting and satisfying, perfect for cold weather side dishes.
To make these mashed potatoes, start by boiling peeled potatoes until tender. Mash them with a good amount of butter, cream, minced garlic, and freshly grated Parmesan cheese. Season with salt and pepper to taste. The result is a dish that pairs wonderfully with roasted meats or even a simple vegetable medley.
This recipe is a fantastic addition to your Thanksgiving side recipes easy collection. Impress your guests with a comforting and delicious side that complements everything from turkey to ham. If you’re looking for something cheesy, consider serving it alongside cheesy broccoli side dish or easy cheesy scalloped potatoes.
Garnish with fresh parsley for a touch of color and flavor. These creamy mashed potatoes are not just a holiday staple; they are a great option for any weeknight dinner. They make an excellent side to loaded baked potatoes or even as part of a bigger meal featuring a cheesy cauliflower bake. So next time you’re planning your dinner, remember these satisfying and delightful mashed potatoes!
Ingredients Breakdown
Let’s dive into what makes these creamy garlic Parmesan mashed potatoes irresistible. The combination of rich, buttery flavors and savory garlic creates a side dish that’s both indulgent and satisfying.
For the Mashed Potatoes:
- 2 lbs Yukon Gold potatoes (for their creamy texture)
- 1/2 cup unsalted butter (for that rich, buttery flavor)
- 1/2 cup heavy cream (makes them extra creamy)
- 1/2 cup freshly grated Parmesan cheese (adds savory depth)
- 4 cloves garlic, minced (for a robust garlic flavor)
- Salt and black pepper to taste (balances and enhances flavor)
For Garnish:
- Fresh parsley, chopped (adds freshness and a pop of color)
How to Make It:
- Boil the Potatoes: Peel and cut the potatoes into even chunks. Place them in a large pot, cover with water, and add a pinch of salt. Boil over medium-high heat until fork-tender (about 15-20 minutes).
- Prepare the Garlic Butter: While the potatoes cook, melt the butter in a small saucepan over medium heat. Add the minced garlic and cook until fragrant (about 1-2 minutes). Remove from heat.
- Mash the Potatoes: Drain the cooked potatoes and return them to the pot. Use a potato masher or ricer to mash them until smooth.
- Mix in the Good Stuff: Pour in the garlic butter, heavy cream, and Parmesan cheese. Stir until fully combined. Season with salt and black pepper to taste.
- Serve and Garnish: Transfer the mashed potatoes to a serving dish. Sprinkle with fresh parsley for a burst of color and extra flavor.
Why It’s Amazing:
- Ultra-Creamy Texture: Yukon Gold potatoes, heavy cream, and butter create a velvety, smooth mash.
- Savory Garlic Punch: The garlic butter blend infuses every bite with mouthwatering flavor.
- Perfect Pairing: This dish complements everything from roasted meats to veggie sides.
Whether it’s for a holiday feast or a cozy weeknight dinner, these creamy garlic Parmesan mashed potatoes are a guaranteed hit. Enjoy comfort in every bite!
Cheddar Jalapeño Cornbread

There’s nothing like the warm, inviting smell of freshly baked cornbread. This Cheddar Jalapeño Cornbread brings together the sweetness of cornbread with a spicy kick. Imagine fluffy muffins packed with melted cheddar cheese and a hint of jalapeño. They’re perfect for any gathering!
Each muffin is a delightful bite of flavor. The jalapeños add just the right amount of heat, while the cheddar gives it a creamy richness. This cornbread is not just a side dish; it can stand alone as a savory treat. Serve it alongside your favorite chili or as part of a cozy dinner.
If you’re looking for easy recipes, this one is a hit for Thanksgiving or any family gathering. It pairs well with other cheesy recipes, like Cheesy Scalloped Potatoes or Loaded Baked Potatoes. Imagine having Cheesy Cauliflower Bake on the table next to your cornbread. Yum!
Next time you need a simple yet delicious side, whip up this cornbread. It’s sure to be a crowd-pleaser!
Ingredients Breakdown
Let’s dive into what makes this Cheddar Jalapeño Cornbread so irresistible. It’s flavorful, hearty, and under 250 calories per serving.
For the Cornbread:
- 1 cup yellow cornmeal (for that classic cornbread texture)
- 1 cup whole wheat flour (adds a hearty, wholesome bite)
- 1 tbsp baking powder (for the perfect rise)
- 1/2 tsp baking soda (helps with the fluffiness)
- 1/2 tsp salt (to balance the flavors)
- 1 cup low-fat buttermilk (keeps it moist and tender)
- 2 large eggs (for structure and richness)
- 2 tbsp honey (for a touch of sweetness)
- 1/4 cup unsalted butter, melted (adds richness)
- 1 cup shredded sharp cheddar cheese (for melty goodness)
- 2-3 jalapeños, finely chopped (adjust to your heat preference)
For Topping:
- Sliced jalapeños (for garnish and extra kick)
- A sprinkle of extra cheddar cheese (for a cheesy crust)
How to Make It:
- Preheat the Oven: Set the oven to 400°F (200°C) and grease a muffin tin or baking dish.
- Mix the Dry Ingredients: In a large bowl, whisk together cornmeal, whole wheat flour, baking powder, baking soda, and salt.
- Combine the Wet Ingredients: In another bowl, beat the eggs, buttermilk, melted butter, and honey until smooth.
- Create the Batter: Gently fold the wet ingredients into the dry mixture until just combined. Be careful not to overmix.
- Add the Flavor Boosters: Stir in the shredded cheddar cheese and chopped jalapeños.
- Fill the Muffin Tin: Divide the batter evenly into the prepared muffin tin or baking dish. Top each with sliced jalapeños and a sprinkle of extra cheese.
- Bake: Bake for 18-22 minutes or until golden brown and a toothpick inserted in the center comes out clean.
- Cool and Enjoy: Let them cool slightly before serving.
Why It’s Amazing:
- Sweet and Spicy Balance: The honey and jalapeños create a perfect flavor contrast.
- Cheesy Goodness: Melty cheddar in every bite!
- Wholesome and Hearty: Whole wheat flour adds fiber without sacrificing taste.
These muffins are a hit at every meal. Serve them with chili, soup, or enjoy them on their own—they’re that good!
Bestselling Low Calorie Recipe Books

- Get the recipes everyone is talking about, handy nutrition facts, and 125 stunning photographs in the debut cookbook from the wildly popular blog Skinnytaste.
- Gina Homolka is America’s most trusted home cook when it comes to easy, flavorful recipes that are miraculously low-calorie and made from all-natural, easy-to-find ingredients. Her blog, Skinnytaste is the number one go-to site for slimmed down recipes that you’d swear are anything but.
- It only takes one look to see why people go crazy for Gina’s food: cheesy, creamy Fettuccini Alfredo with Chicken and Broccoli with only 420 calories per serving, breakfast dishes like Make-Ahead Western Omelet “Muffins” that truly fill you up until lunchtime, and sweets such as Double Chocolate Chip Walnut Cookies that are low in sugar and butter-free but still totally indulgent.

- Hardcover Book
- Rhee, Chungah (Author)
- English (Publication Language)
- Olson, Megan (Author)
- English (Publication Language)
- 160 Pages – 06/30/2020 (Publication Date) – Page Street Publishing (Publisher)

- The Editors of Cooking Light (Author)
- English (Publication Language)
- 288 Pages – 01/03/2017 (Publication Date) – TI Inc. Books (Publisher)
- Bax, Samantha (Author)
- English (Publication Language)
- 326 Pages – 06/14/2024 (Publication Date) – Prose Books LLC (Publisher)
Roasted Garlic and Cheese Breadsticks

These roasted garlic and cheese breadsticks are a delightful treat that pairs perfectly with a variety of dishes. Each breadstick is golden-brown, twisted into a fun shape, and filled with savory cheese that melts beautifully inside. The aroma of roasted garlic adds an irresistible touch, making them perfect for sharing at gatherings or enjoying on a cozy night in.
Imagine biting into these warm breadsticks, with the cheese oozing out and the garlic flavor dancing on your taste buds. They are not just a snack; they complement meals like cheesy scalloped potatoes or a loaded baked potato casserole. You might find yourself reaching for these breadsticks alongside a cheesy broccoli side dish or even with a bowl of cheesy rice soup.
For a fun twist, you can serve these breadsticks with a homemade dip or a bowl of marinara sauce. They’re great for parties or as a side for family dinners. If you’re looking for good easy side dishes, these breadsticks fit the bill perfectly!
Ingredients Breakdown
These roasted garlic and cheese breadsticks are savory, cheesy, and just under 250 calories per serving. They’re perfect as a snack or side dish.
For the Dough:
- 2 cups whole wheat flour (adds a hearty texture)
- 1 cup all-purpose flour (for a lighter bite)
- 2 1/4 tsp instant yeast (for a quick rise)
- 1 tsp salt (for balanced flavor)
- 1 cup warm water (activates the yeast)
- 2 tbsp olive oil (for moisture and richness)
For the Garlic Cheese Filling:
- 1/2 cup shredded mozzarella cheese (melty goodness)
- 1/4 cup grated Parmesan cheese (adds sharpness)
- 3 cloves roasted garlic, mashed (deep, rich flavor)
- 1 tbsp unsalted butter, melted (for added richness)
- 1 tsp dried Italian herbs (for an herby touch)
For Topping:
- 1 tbsp olive oil (for brushing)
- 1 tsp garlic powder (extra flavor boost)
- 1 tbsp chopped parsley (for freshness and color)
- 2 tbsp grated Parmesan (a savory finish)
How to Make It:
- Prepare the Dough: In a large bowl, mix whole wheat flour, all-purpose flour, yeast, and salt. Add warm water and olive oil, stirring until a dough forms. Knead for 8-10 minutes until smooth and elastic. Let it rise for 1 hour or until doubled in size.
- Make the Filling: In a small bowl, mix mozzarella, Parmesan, roasted garlic, melted butter, and Italian herbs until combined.
- Shape the Breadsticks: Preheat oven to 400°F (200°C). Divide the dough into 12 equal portions. Roll each piece into a long strip, flatten slightly, and spread the garlic cheese mixture down the center. Fold and twist each strip to enclose the filling.
- Bake: Place the twisted breadsticks on a parchment-lined baking sheet. Brush with olive oil and sprinkle with garlic powder, parsley, and grated Parmesan. Bake for 15-18 minutes until golden brown and crispy on the edges.
- Serve and Enjoy: Serve warm with your favorite dipping sauces like marinara or garlic butter.
Why They’re Amazing:
- Perfect Texture: Crispy on the outside, soft and cheesy inside.
- Bold Flavors: Roasted garlic and herb-infused cheese make every bite irresistible.
- Versatile Side: Great for soups, salads, and even party platters.
These breadsticks are more than just a side—they’re a show-stopping addition to any meal, full of irresistible garlic and cheese flavor!
Baked Caprese Salad Bites
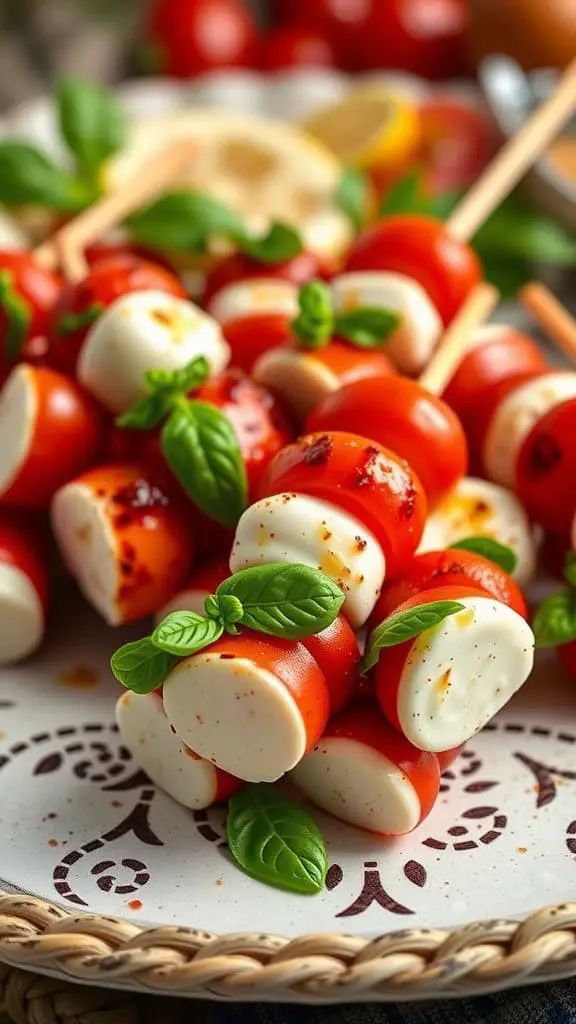
Baked Caprese salad bites are a delightful twist on a classic salad. They combine fresh ingredients into a fun, bite-sized treat. Picture vibrant cherry tomatoes, creamy mozzarella, and fragrant basil, all skewered together for easy eating.
These bites are not only visually appealing but also packed with flavor. The sweetness of the tomatoes pairs well with the rich taste of mozzarella, creating a perfect balance. You can easily make these as a healthy appetizer or a tasty snack for gatherings.
To prepare, simply alternate threading cherry tomatoes and mozzarella onto skewers. Drizzle with olive oil, sprinkle with salt and pepper, and bake until the cheese is slightly melted. You can even throw in a dash of balsamic glaze for extra zing!
Whether you’re planning a party or just want a quick, healthy dish, these baked bites fit the bill. They’re a fantastic addition to any meal and make for good easy side dishes, especially when served alongside some cheesy broccoli side dish or a loaded baked potato.
Ingredients Breakdown
Let’s dive into what makes these baked Caprese salad bites so irresistible. They’re fresh, flavorful, and under 250 calories per serving—perfect for guilt-free snacking.
For the Bites:
- 1 pint cherry tomatoes (sweet and juicy)
- 8 oz mozzarella balls (creamy and mild, preferably bocconcini or ciliegine)
- Fresh basil leaves (for that classic Caprese aroma)
- 2 tbsp olive oil (adds richness and helps with baking)
- 1 tsp balsamic glaze (optional, for extra tang)
- Salt and pepper (to taste)
- Skewers or toothpicks (for easy serving)
How to Make It:
- Preheat the Oven: Set your oven to 400°F (200°C). Line a baking sheet with parchment paper to prevent sticking.
- Assemble the Bites: On each skewer, thread a cherry tomato, a basil leaf, and a mozzarella ball. Repeat until the skewer is full, ending with a tomato for balance.
- Season and Drizzle: Arrange the skewers on the prepared baking sheet. Drizzle olive oil evenly over the skewers. Sprinkle with salt and pepper to enhance the flavors.
- Bake to Perfection: Bake for 8-10 minutes, just until the mozzarella starts to soften and melt slightly. Be careful not to overbake, as the tomatoes can burst.
- Finish with Balsamic Glaze: If using, drizzle balsamic glaze over the skewers right before serving for a tangy finish.
Why You’ll Love Them:
- Fresh and Flavorful: The blend of tomatoes, mozzarella, and basil creates a classic, mouthwatering taste.
- Easy and Quick: Assembling and baking take minimal time—great for busy days or last-minute parties.
- Healthy and Satisfying: These bites are light yet filling, offering protein from the mozzarella and vitamins from the veggies.
Whether you’re hosting a gathering or need a snack that’s easy, healthy, and delicious, these baked Caprese salad bites are the perfect choice!
Parmesan Truffle Fries
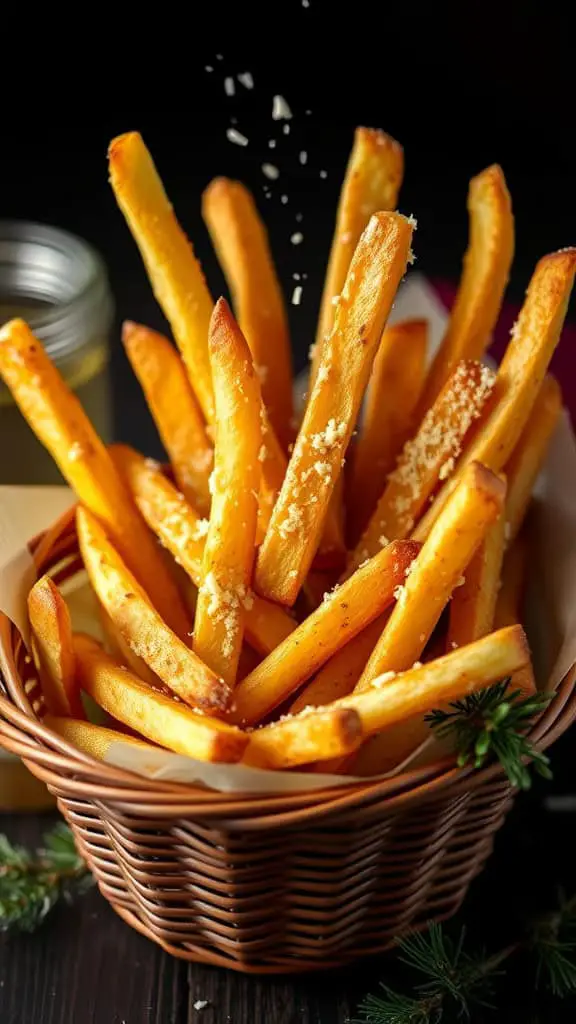
Parmesan truffle fries are a delicious twist on a classic favorite. Imagine golden brown fries, perfectly crispy on the outside and soft on the inside. They are generously sprinkled with freshly grated Parmesan cheese, adding a rich, savory flavor. The truffle oil drizzled on top elevates this dish with its earthy aroma and distinct taste.
This dish is perfect for sharing or enjoying all by yourself. Pair it with your favorite dipping sauce, and you have a delightful snack or side dish. Whether it’s a casual get-together or a festive gathering, these fries will surely impress everyone.
If you’re looking for easy side dishes, these parmesan truffle fries can complement any meal. They work well with everything from loaded baked potatoes to cheesy scalloped potatoes. Feel free to experiment with other toppings too, like fresh herbs or spicy seasonings!
Ingredients Breakdown
These Parmesan truffle fries are simple yet indulgent, staying under 250 calories per serving. Here’s what you’ll need:
For the Fries:
- 2 large russet potatoes (for crispy fries)
- 1 tbsp olive oil (for light, even browning)
- 1/2 tsp sea salt (to season the fries)
- 1/4 tsp black pepper (adds a touch of spice)
For the Toppings:
- 2 tbsp truffle oil (for an earthy, luxurious aroma)
- 1/4 cup freshly grated Parmesan cheese (for savory richness)
- 1 tbsp chopped fresh parsley (optional, for freshness and color)
- 1/2 tsp garlic powder (optional, for extra depth of flavor)
How to Make It:
- Prep the Potatoes: Scrub the potatoes well and cut them into thin fries. For extra crispiness, soak the fries in cold water for 30 minutes, then pat dry thoroughly.
- Season and Bake: Preheat your oven to 425°F (220°C). Toss the fries with olive oil, salt, and pepper until evenly coated. Spread them in a single layer on a baking sheet lined with parchment paper.
- Bake to Perfection: Bake for 25-30 minutes, flipping halfway through, until golden brown and crispy.
- Add the Finishing Touches: Remove the fries from the oven and immediately drizzle with truffle oil. Toss gently to coat.
- Top and Serve: Sprinkle with freshly grated Parmesan cheese, parsley, and garlic powder (if using). Serve hot with your favorite dipping sauce.
Why You’ll Love Them:
- Perfectly Crispy: Baking at high heat gives a satisfying crunch without deep frying.
- Savory and Aromatic: Truffle oil and Parmesan create a luxurious flavor.
- Easy to Make: A few simple steps for restaurant-quality fries at home.
These fries are not just a side dish—they’re a show-stopping snack that’s hard to resist!
Cheesy Cauliflower Casserole
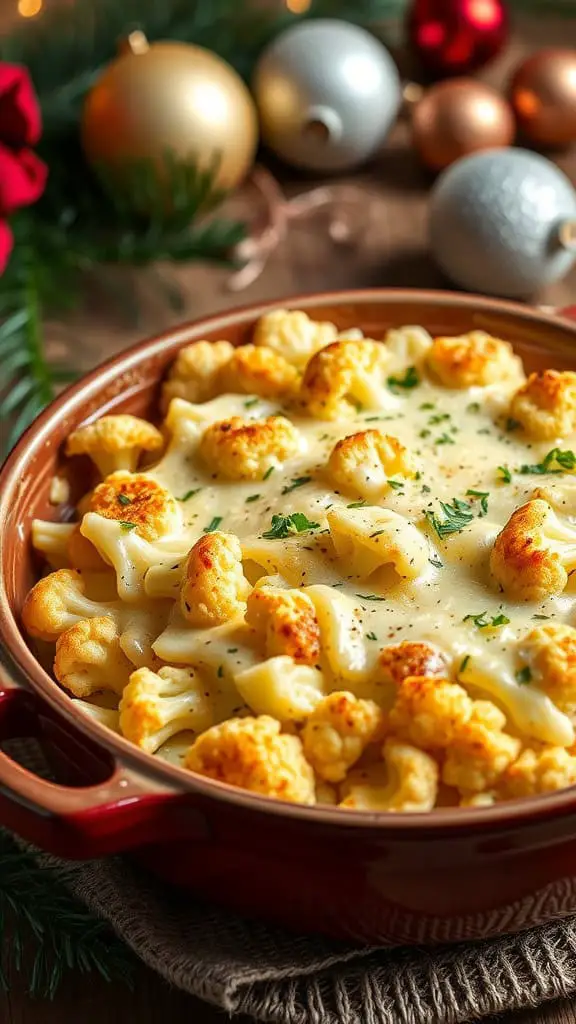
Cheesy cauliflower casserole is a delightful dish that brings comfort to your table. The golden, bubbly cheese on top creates a mouthwatering crust that invites everyone to dig in. Underneath that cheesy layer is tender cauliflower, perfectly roasted to enhance its natural flavor. This dish is not only tasty but also fits into the category of healthy delicious side dishes.
To make this casserole, you’ll need fresh cauliflower, cheese, and a few simple seasonings. Start by boiling or steaming the cauliflower until it’s tender. Next, mix it with a creamy cheese sauce and pour it into a baking dish. Top with extra cheese for that irresistible finish. Bake until golden brown and bubbly, and you’ll have a side that pairs well with everything from loaded baked potatoes to your favorite holiday meals.
This casserole is a fantastic choice for cold weather side dishes. It can easily be included in Thanksgiving side recipes easy enough for anyone to whip up. Plus, it’s a great way to sneak more veggies into your meals. Enjoy it alongside cheesy scalloped potatoes or serve it as a hearty addition to any family dinner. Not only is it delicious, but it’s also an excellent way to enjoy cauliflower in a cheesy, comforting way.
If you’re looking for easy meals with veggies, this casserole is a perfect fit. It combines the warmth of cheese with the health benefits of cauliflower, making it a win-win. You might even find it becomes a staple among your easy weeknight sides. So, next time you prepare a meal, consider adding this cheesy cauliflower casserole to your menu!
Ingredients Breakdown
Let’s dive into what makes this cheesy cauliflower casserole so irresistible. It’s hearty, flavorful, and under 250 calories per serving—comfort food without the guilt.
For the Casserole:
- 1 large head of cauliflower, cut into florets (the star of the dish!)
- 1/2 cup plain Greek yogurt (adds creaminess without the extra fat)
- 1/2 cup shredded sharp cheddar cheese (for bold flavor)
- 1/4 cup grated Parmesan cheese (adds a savory punch)
- 2 cloves garlic, minced (for depth of flavor)
- 1 tsp Dijon mustard (a hint of tanginess)
- 1/2 tsp smoked paprika (optional, for a smoky twist)
- 1/2 tsp salt (balances the flavors)
- 1/4 tsp black pepper (a little kick)
For the Topping:
- 1/2 cup shredded mozzarella cheese (for that golden, bubbly finish)
- 2 tbsp whole wheat breadcrumbs (optional, for extra crunch)
- Fresh parsley, chopped (for garnish and freshness)
How to Make It:
- Prepare the Cauliflower: Steam or boil the cauliflower florets until tender but not mushy, about 8-10 minutes. Drain well and pat dry.
- Make the Sauce: In a large bowl, mix Greek yogurt, cheddar cheese, Parmesan cheese, minced garlic, Dijon mustard, smoked paprika, salt, and pepper. Stir until well combined.
- Combine and Assemble: Gently fold the cooked cauliflower into the cheese sauce until evenly coated. Transfer the mixture into a greased baking dish.
- Add the Topping: Sprinkle mozzarella cheese evenly over the top. Add breadcrumbs if using for extra crunch.
- Bake: Bake at 400°F (200°C) for 20-25 minutes, or until the top is golden brown and bubbly.
- Garnish and Serve: Sprinkle freshly chopped parsley over the top before serving.
Why It’s Amazing:
- Rich and Creamy: Greek yogurt and cheeses create a luscious, creamy base.
- Bold Flavor: Sharp cheddar and Parmesan provide deep, savory notes.
- Healthy Twist: Lower in carbs and higher in nutrients thanks to the cauliflower base.
This cheesy cauliflower casserole is the ultimate comfort dish, perfect for holiday feasts or cozy weeknight dinners. It’s a flavorful, satisfying way to enjoy more veggies!
Stuffed Bell Peppers with Feta and Cheese

These stuffed bell peppers are a colorful delight, showcasing a mix of vibrant yellow, orange, red, and green peppers. Each pepper is generously filled with a tasty mixture that likely includes rice and cheese, making them a satisfying main dish or side. The creamy feta on top adds a lovely contrast to the sweet peppers, and the sprinkle of herbs gives them a fresh look.
Making stuffed bell peppers is simple and fun. Start by choosing your favorite bell peppers. After hollowing them out, you can fill them with a mixture of cooked rice, cheese, and seasonings. Whether you opt for a cheesy rice blend or a zesty combination, these peppers can easily be adapted to suit your taste.
These stuffed peppers are perfect for any meal. They can be a great addition to your dinner table or served as a vibrant side dish. Think of them as a healthy option when looking for easy meals with veggies. Pair them with a side of cheesy scalloped potatoes or a crispy salad, and you have a complete meal!
Ingredients Breakdown
Let’s dive into what makes these stuffed bell peppers both tasty and satisfying while keeping them under 250 calories per serving.
For the Peppers:
- 4 large bell peppers (red, yellow, orange, or green for color variety)
- 1 tbsp olive oil (for brushing and roasting)
For the Filling:
- 1 cup cooked brown rice (fiber-rich and filling)
- 1/2 cup cooked quinoa (adds protein and texture)
- 1/2 cup crumbled feta cheese (salty and creamy)
- 1/2 cup diced tomatoes (for juiciness and freshness)
- 1/4 cup finely chopped red onion (adds a mild kick)
- 1 garlic clove, minced (for extra flavor)
- 1 tsp dried oregano (earthy and aromatic)
- 1 tsp dried basil (for a sweet, herby touch)
- 1/2 tsp smoked paprika (adds a hint of smoky depth)
- Salt and pepper to taste (balances the flavors)
For Topping:
- Extra crumbled feta (for garnish)
- Fresh parsley or basil leaves (for a pop of color and freshness)
How to Make It:
- Prepare the Peppers: Cut the tops off the bell peppers and remove the seeds and membranes. Brush the insides lightly with olive oil.
- Pre-Bake the Peppers: Place the peppers cut-side up in a baking dish. Roast at 375°F (190°C) for 15 minutes to soften them slightly.
- Mix the Filling: In a large bowl, combine cooked brown rice, quinoa, tomatoes, red onion, garlic, feta cheese, oregano, basil, smoked paprika, salt, and pepper. Mix well until evenly combined.
- Stuff the Peppers: Generously fill each pre-roasted bell pepper with the prepared mixture, pressing down lightly.
- Bake the Stuffed Peppers: Return the stuffed peppers to the oven and bake at 375°F (190°C) for 20-25 minutes, or until heated through and lightly golden on top.
- Add Finishing Touches: Remove the peppers from the oven, sprinkle with extra feta cheese, and garnish with fresh parsley or basil leaves.
Why You’ll Love It:
- Balanced and Nutritious: Whole grains, veggies, and protein-packed feta create a wholesome, satisfying meal.
- Customizable: Swap out ingredients like adding black beans, corn, or spinach for even more flavor.
- Meal-Prep Friendly: Make ahead and reheat for a quick, healthy meal any day of the week.
These stuffed bell peppers are not just visually stunning but also a delicious way to enjoy a balanced, nutrient-packed meal. Their versatility makes them a favorite for weeknight dinners or impressive family gatherings!
Cheese and Herb Stuffed Sweet Potatoes
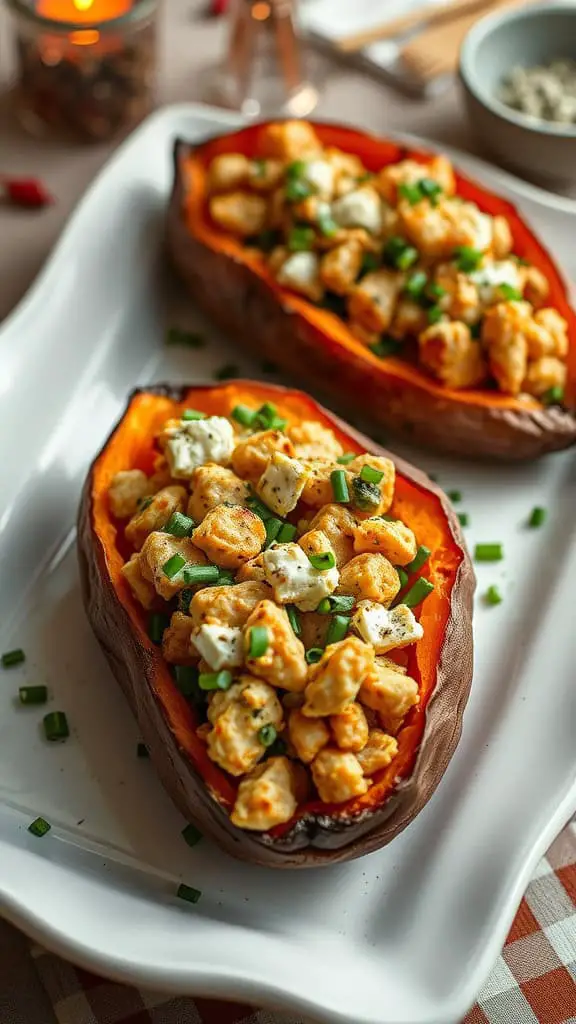
These cheese and herb stuffed sweet potatoes are a delightful twist on traditional comfort food. The sweet potato is perfectly baked, revealing a vibrant orange interior that sets the stage for a rich filling. It’s all about that balance of sweetness from the potato and the savory goodness of the cheese and herbs.
In this image, you can see two beautifully plated sweet potatoes, each generously loaded with a cheesy mixture. The bright green chives sprinkled on top add a pop of color and freshness. This dish is not only pleasing to the eye but also packed with flavor, making it a great addition to your dinner table.
This recipe can easily fit into various meal themes. Whether you’re planning a cozy family dinner or need something special for holiday gatherings, these stuffed sweet potatoes are a hit. They shine as a healthier option among your favorite potato casserole recipes. Plus, they can serve as a warm and satisfying side dish in cold weather, complementing your main course perfectly.
For those looking for easy and yummy side dishes, this recipe is a must-try. It’s simple to prepare and can be adapted to include different cheeses or herbs based on your preferences. Serve them alongside your favorite proteins for a complete meal, or enjoy them as a hearty main dish on their own.
Ingredients Breakdown
Let’s get into what makes these stuffed sweet potatoes so irresistible. They’re packed with flavorful ingredients that keep the calorie count under 250 per serving.
For the Sweet Potatoes:
- 4 medium sweet potatoes (perfectly baked for a tender inside)
- Olive oil spray (for a light coating)
For the Cheese and Herb Filling:
- 1/2 cup reduced-fat ricotta cheese (creamy and rich)
- 1/2 cup shredded mozzarella cheese (melty and delicious)
- 1/4 cup grated Parmesan cheese (adds a savory depth)
- 2 tbsp chopped fresh parsley (for a burst of freshness)
- 1 tbsp chopped fresh thyme (earthy and aromatic)
- 1 tsp garlic powder (adds a savory kick)
- 1/2 tsp salt (to balance the flavors)
- 1/4 tsp black pepper (for mild heat)
For Topping:
- 2 tbsp chopped chives (for a fresh pop of color)
- A pinch of red pepper flakes (optional, for some heat)
How to Make It:
- Prepare the Sweet Potatoes: Preheat the oven to 400°F (200°C). Pierce the sweet potatoes with a fork and place them on a baking sheet. Lightly spray with olive oil. Bake for 45-60 minutes or until tender.
- Make the Filling: In a mixing bowl, combine ricotta, mozzarella, Parmesan, parsley, thyme, garlic powder, salt, and pepper. Stir until well blended.
- Stuff the Potatoes: Once the sweet potatoes are cool enough to handle, slice them open lengthwise and gently fluff the inside with a fork. Spoon the cheese and herb mixture evenly into each potato.
- Bake Again: Return the stuffed sweet potatoes to the oven and bake for an additional 10-15 minutes, until the cheese is melted and bubbly.
- Garnish and Serve: Remove from the oven, sprinkle with fresh chives and a pinch of red pepper flakes if desired. Serve hot and enjoy!
Why You’ll Love It:
- Perfect Balance: The sweetness of the potatoes complements the savory cheese and herbs.
- Creamy and Satisfying: The cheese filling makes every bite rich and indulgent without being heavy.
- Customizable: Swap in your favorite herbs or cheeses for endless variations.
These cheese and herb stuffed sweet potatoes are more than a side—they’re a statement. Serve them at your next family dinner or holiday gathering for a dish everyone will remember!
Savory Cheese Puff Pastry Bites

These savory cheese puff pastry bites are a fantastic treat for any gathering. They look inviting with their golden, flaky crust and creamy cheese center. Perfectly baked, they offer that crunch you want when you take a bite.
To create these delightful snacks, all you need is some puff pastry and your favorite cheese. Simply cut the pastry into circles, place them in a muffin tin, and fill them with cheese. Bake until they’re puffed and golden. Serve them with a side of your favorite dipping sauce for an extra zing!
For a simple meal idea, consider pairing these bites with a side of cheesy broccoli or even a baked potato casserole. They make for great easy weeknight sides or even Thanksgiving side recipes. If you’re looking to impress your guests, these cheesy treats will definitely do the trick!
Ingredients Breakdown
Making these savory cheese puff pastry bites is as simple as it is satisfying. With just a few ingredients, you’ll create irresistible, golden treats perfect for any gathering.
For the Puff Pastry Bites:
- 1 sheet of puff pastry (thawed and ready to use)
- 1 cup shredded cheese (Cheddar, Gruyère, or a mix for extra flavor)
- 1 large egg (beaten, for egg wash)
- 1 tsp Dijon mustard (optional, for added depth)
- 1/2 tsp garlic powder (for a subtle savory kick)
- 1/4 tsp smoked paprika (optional, for a hint of smokiness)
For Garnishing and Serving:
- Fresh chives or parsley (finely chopped, for garnish)
- Favorite dipping sauce (marinara, ranch, or a spicy aioli)
How to Make It:
- Preheat the Oven: Heat your oven to 400°F (200°C). Line a baking sheet with parchment paper.
- Prepare the Puff Pastry: Roll out the puff pastry on a lightly floured surface. Cut into 2-inch squares or circles using a cookie cutter.
- Add the Filling: Place the pastry pieces on the prepared baking sheet. If using Dijon mustard, brush a light layer on each piece. Sprinkle shredded cheese evenly over each one. Add a pinch of garlic powder and smoked paprika for extra flavor.
- Seal and Brush: Fold the corners of each pastry square toward the center, pinching gently to seal. Brush the tops with beaten egg for a golden finish.
- Bake: Bake for 15-18 minutes or until puffed and golden brown. Keep an eye on them as baking times can vary.
- Garnish and Serve: Let the bites cool slightly before garnishing with fresh chives or parsley. Serve with your favorite dipping sauce on the side.
Why They’re Amazing:
- Crispy & Cheesy: The buttery puff pastry perfectly complements the melty cheese.
- Customizable: Use any cheese you love or add extras like cooked bacon or caramelized onions.
- Effortless Yet Impressive: They look fancy but are super simple to make.
These savory bites are perfect for game-day snacking, party platters, or even a cozy family movie night. They’ll disappear faster than you can say “cheese!”
Cheesy Broccoli and Rice Casserole
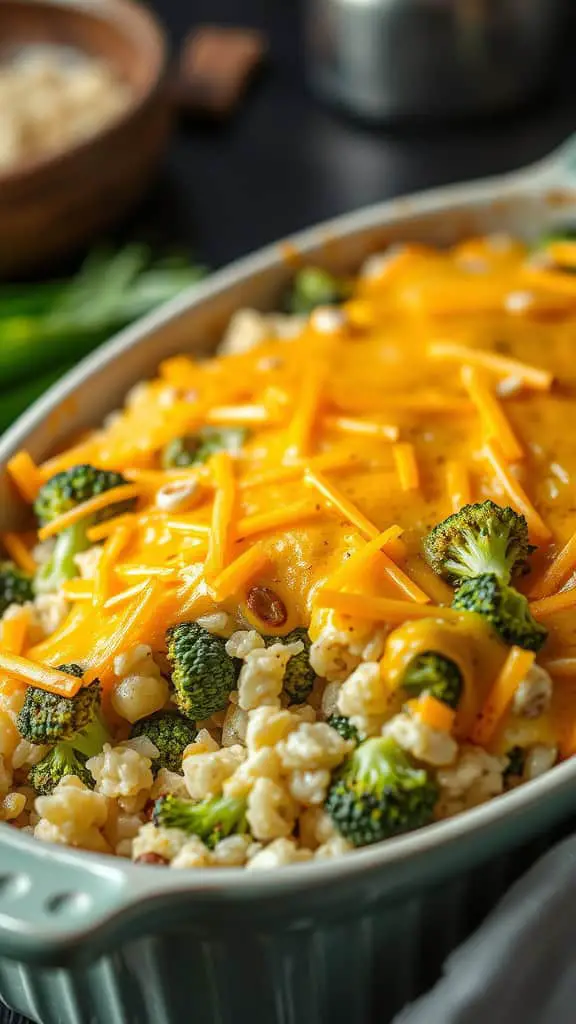
This cheesy broccoli and rice casserole is a warm and inviting dish that’s perfect for any gathering. The rich, gooey cheese melts beautifully over the tender broccoli and fluffy rice, creating a comforting meal that everyone will love.
The bright green broccoli adds a pop of color, making the dish not only tasty but visually appealing. It’s an easy way to sneak in some veggies, especially for picky eaters. Pair this casserole with a simple salad or a protein, and you’ve got a complete meal.
To make it, you’ll need ingredients like broccoli florets, cooked rice, and plenty of cheese. A sprinkle of garlic powder or onion adds extra flavor. Just mix everything in a baking dish, top with cheese, and pop it in the oven until bubbly and golden. It’s a go-to for busy weeknights or as a side for special occasions.
This dish is similar to other cheesy recipes like cheesy scalloped potatoes or baked potato casserole, making it a versatile addition to your recipe collection. It can easily fit into any meal plan, whether you’re looking for easy meals with veggies or comforting cold weather side dishes.
Ingredients Breakdown
Let’s dive into what makes this casserole so irresistibly good. It’s creamy, cheesy, and under 250 calories per serving—perfect comfort food without the guilt.
For the Casserole:
- 4 cups broccoli florets (fresh or frozen, lightly steamed)
- 2 cups cooked brown rice (for extra fiber and heartiness)
- 1 cup shredded reduced-fat cheddar cheese (for that melty goodness)
- 1/2 cup low-fat cottage cheese (for creaminess without extra calories)
- 1/2 cup plain Greek yogurt (adds protein and tang)
- 1/2 cup unsweetened almond milk (or any low-calorie milk)
- 2 large eggs (binds everything together)
- 1 tsp garlic powder (for depth of flavor)
- 1 tsp onion powder (for savory notes)
- 1/2 tsp salt (adjust to taste)
- 1/2 tsp black pepper (for a little kick)
For the Topping:
- 1/2 cup whole wheat breadcrumbs (adds a crispy finish)
- 1/4 cup shredded reduced-fat cheddar cheese (extra cheesy topping)
- 1 tbsp olive oil or melted light butter (for golden crispness)
How to Make It:
- Preheat and Prep: Preheat your oven to 375°F (190°C). Lightly grease a 9×13-inch baking dish.
- Mix the Base: In a large bowl, whisk the eggs, almond milk, cottage cheese, Greek yogurt, garlic powder, onion powder, salt, and pepper until smooth.
- Combine Ingredients: Add the cooked rice, steamed broccoli, and shredded cheddar cheese. Stir until evenly combined.
- Transfer to Dish: Pour the mixture into the prepared baking dish, spreading it evenly.
- Make the Topping: In a small bowl, mix breadcrumbs, cheddar cheese, and olive oil until combined. Sprinkle over the casserole.
- Bake: Bake uncovered for 25-30 minutes or until bubbly and golden brown on top.
- Serve and Enjoy: Let the casserole cool for about 5 minutes before serving. Pair it with a crisp salad or a protein for a complete meal.
Why It’s Amazing:
- Nutritious and Filling: Packed with protein, fiber, and veggies.
- Cheesy Comfort: Melty cheddar and creamy Greek yogurt make it indulgent yet light.
- Simple Prep: Easy to assemble and perfect for weeknight dinners or special gatherings.
This casserole is a crowd-pleaser that brings cozy vibes to your table while keeping the calories in check. It’s comfort food made better!
Creamy Cheddar Grits

Creamy cheddar grits are a comforting side dish that’s sure to please everyone at the table. The smooth, rich texture combined with the sharpness of cheddar cheese creates a delightful flavor that pairs perfectly with many meals.
This dish is not just about taste; it’s also incredibly easy to prepare. You simply cook the grits in water or broth until they’re tender, then stir in butter and cheese for that creamy finish. Adding a sprinkle of chives on top not only enhances the flavor but also adds a pop of color.
If you’re looking for good easy side dishes, these grits can shine alongside meats, veggies, or even on their own. They can be a great alternative to mashed potatoes or baked potato casserole. Plus, they fit right into comfort food cravings, especially during cold weather.
For a fun twist, you might consider adding other ingredients like sautéed mushrooms or crispy bacon bits. Whether you’re hosting a holiday dinner or just whipping up an easy weeknight meal, creamy cheddar grits are a hit every time!
Ingredients Breakdown
Let’s talk about what makes these creamy cheddar grits so irresistible. Every ingredient brings something special to the table, making this dish comfort food at its finest.
For the Grits:
- 1 cup stone-ground grits (for authentic texture)
- 4 cups water or chicken broth (for rich flavor and perfect consistency)
- 1/2 tsp salt (enhances the overall taste)
- 1/4 tsp black pepper (for a slight kick)
For the Creamy Finish:
- 1 cup sharp cheddar cheese, shredded (for bold, cheesy flavor)
- 2 tbsp unsalted butter (adds richness and smoothness)
- 1/4 cup half-and-half or heavy cream (for a luscious texture)
For Garnish:
- Fresh chives, chopped (adds freshness and a pop of color)
How to Make It:
- Boil the Liquid: In a medium saucepan, bring water or chicken broth to a boil. Stir in salt and pepper.
- Cook the Grits: Slowly whisk in the grits to prevent lumps. Lower the heat to a simmer and cook, stirring occasionally, for 20-25 minutes until thick and creamy.
- Add the Creamy Ingredients: Once the grits are tender, stir in the butter, shredded cheddar, and half-and-half. Mix until everything is melted and velvety smooth.
- Serve and Garnish: Spoon the grits into bowls, sprinkle with fresh chives, and serve warm.
Why It’s Amazing:
- Rich and Cheesy: The sharp cheddar melts perfectly into the warm grits, creating a comforting, cheesy bite.
- Smooth and Creamy: Butter and cream ensure a luxurious texture.
- Versatile Side Dish: Pairs wonderfully with meats, veggies, or even as a standalone meal.
These creamy cheddar grits are everything you want in a comfort food—easy to make, packed with flavor, and sure to please every guest at your table!
Cheesy Zucchini Fritters

These cheesy zucchini fritters are a delicious way to enjoy your veggies. Stacked high and golden brown, they are perfect for a snack or a side dish. The crispy edges and cheesy centers make them hard to resist!
This dish combines grated zucchini with cheese for a great flavor and texture. You can pair these fritters with a creamy dipping sauce or enjoy them plain. They make a fantastic addition to any meal.
Looking for easy meals with veggies? These fritters fit the bill! They are simple to prepare and can even be made ahead of time. Just reheat them in the oven for a quick snack. Consider adding them to your list of good easy side dishes or even Thanksgiving side recipes easy.
With fall approaching, these fritters are a cozy choice that brings comfort without the guilt. They are perfect for cold weather side dishes. You can even incorporate them into a larger meal, like alongside baked potato casserole or cheesy scalloped potatoes. Enjoy this delightful twist on veggies!
Ingredients Breakdown
Let’s talk about what makes these fritters so irresistible. Each bite is loaded with flavor and crunch, all while staying under 250 calories per serving.
For the Fritters:
- 2 medium zucchinis, grated (moisture removed)
- 1/2 cup shredded mozzarella cheese (melty goodness)
- 1/4 cup grated Parmesan cheese (extra cheesy flavor)
- 2 large eggs (binding power)
- 1/2 cup whole wheat flour (for structure and extra fiber)
- 1/2 tsp baking powder (lightens the texture)
- 1/2 tsp garlic powder (adds savory depth)
- 1/4 tsp onion powder (for added flavor)
- 1/2 tsp salt (enhances taste)
- 1/4 tsp black pepper (a subtle kick)
- Olive oil spray (for crispy frying)
For Garnish (Optional):
- Fresh parsley, chopped (for freshness and color)
- A sprinkle of extra Parmesan (because why not?)
How to Make It:
- Prepare the Zucchini: Grate the zucchinis and squeeze out as much water as possible using a clean kitchen towel. This step is key to achieving crispy fritters.
- Mix the Batter: In a large bowl, combine the grated zucchini, mozzarella, Parmesan, eggs, flour, baking powder, garlic powder, onion powder, salt, and pepper. Mix well until everything is evenly combined.
- Shape the Fritters: Scoop about 2 tablespoons of the mixture and shape into small patties.
- Cook the Fritters: Heat a large non-stick skillet over medium heat and lightly spray with olive oil. Cook the fritters for 3-4 minutes on each side, until golden brown and crispy.
- Serve and Enjoy: Arrange the fritters on a plate, sprinkle with fresh parsley and extra Parmesan if desired.
Why They’re Amazing:
- Crispy Outside, Cheesy Inside: The perfect balance of textures.
- Veggie-Packed Goodness: A delicious way to sneak in extra veggies.
- Easy and Versatile: Great as a snack, side dish, or even a light meal.
These cheesy zucchini fritters are the perfect combination of crispy, cheesy, and wholesome. Serve them with a dollop of Greek yogurt or your favorite dipping sauce for an irresistible treat!
Herbed Goat Cheese Toasts

These herbed goat cheese toasts are a delightful addition to any gathering. The image showcases pieces of toasted bread topped with creamy goat cheese, sprinkled with fresh herbs. They look inviting and are sure to impress your guests.
Making these toasts is simple and fun. Start with a good quality baguette or crusty bread. Slice it thick and toast until golden. The goat cheese is the star here—smooth and tangy, it pairs wonderfully with herbs like thyme or chives.
This dish can be served as an appetizer or a light snack. Pair it with a refreshing salad or some roasted veggies for a satisfying meal. If you’re looking for easy side dishes, these toasts complement many options, including cheesy scalloped potatoes or loaded baked potato casserole.
For an extra layer of flavor, consider adding a drizzle of honey or a sprinkle of red pepper flakes on top. These little tweaks can take your toasts to the next level. Enjoy them as part of your next get-together or simply as a tasty treat for yourself!
Ingredients Breakdown
Let’s talk about what makes these herbed goat cheese toasts so irresistible. They’re flavorful, satisfying, and under 250 calories per serving—perfect for a light bite.
For the Toasts:
- 1 baguette or crusty artisan bread (sliced into 1/2-inch thick rounds)
- 2 tbsp olive oil (for brushing the bread)
For the Herbed Goat Cheese Spread:
- 8 oz goat cheese (softened for easy spreading)
- 2 tbsp fresh chives (finely chopped)
- 1 tbsp fresh thyme leaves (finely chopped)
- 1 tbsp fresh parsley (finely chopped)
- 1 tsp lemon zest (for brightness)
- 1/2 tsp garlic powder (for depth of flavor)
- Salt and pepper (to taste)
For Garnish:
- Fresh herb sprigs (like thyme or rosemary)
- Optional: drizzle of honey or sprinkle of red pepper flakes
How to Make It:
- Prepare the Bread: Lay out the baguette slices on a baking sheet. Brush both sides lightly with olive oil and toast in a preheated oven at 400°F (200°C) for 8-10 minutes until golden brown.
- Mix the Cheese Spread: In a bowl, combine the softened goat cheese, chopped herbs, lemon zest, garlic powder, salt, and pepper. Mix until smooth and creamy.
- Assemble the Toasts: Spread a generous layer of the herbed goat cheese mixture onto each toasted bread slice.
- Garnish and Serve: Add a sprinkle of fresh herbs for color and a touch of elegance. For added flavor, drizzle with honey or sprinkle with red pepper flakes.
Why It’s Amazing:
- Flavorful & Fresh: The combination of herbs, tangy goat cheese, and lemon zest makes each bite bright and savory.
- Versatile & Easy: Great as an appetizer, snack, or side dish.
- Customizable: Add your favorite toppings like roasted tomatoes or balsamic glaze.
These herbed goat cheese toasts are a simple yet elegant way to elevate any gathering. Enjoy the perfect blend of creamy, tangy, and herby goodness in every bite!
Cheese and Spinach Stuffed Shells
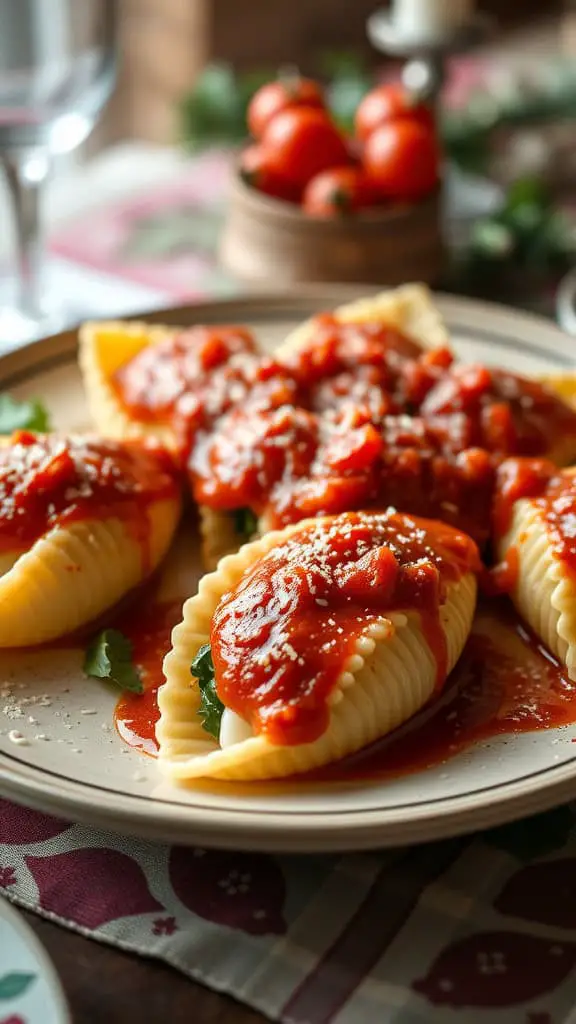
These cheesy stuffed shells are a delightful dish that brings comfort and flavor to the table. The large pasta shells are filled with a creamy mixture of cheese and spinach, then topped with a rich marinara sauce. It’s a simple yet satisfying meal that anyone can enjoy.
The image showcases beautifully arranged stuffed shells, generously smothered in vibrant red sauce and sprinkled with a touch of cheese. This dish is perfect for gatherings, making it one of those easy yummy side dishes that can impress your guests.
Using ingredients like ricotta, mozzarella, and parmesan, you can create a cheesy blend that pairs perfectly with the spinach. This recipe fits right in with other good easy side dishes, including cheesy scalloped potatoes and potato casserole recipes, making it a versatile addition to any meal.
To prepare, cook the shells until al dente, mix the cheese and spinach, stuff the shells, and then bake them in the oven with the sauce. It’s an easy weeknight dinner that warms you up on a chilly evening, perfect for cold weather side dishes.
Ingredients Breakdown
Let’s talk about what makes these cheese and spinach stuffed shells so irresistible. Each component plays a key role in creating this comforting, flavorful dish.
For the Stuffed Shells:
- 20 jumbo pasta shells (cooked al dente, ready for stuffing)
- 2 cups ricotta cheese (for creamy richness)
- 1 cup shredded mozzarella cheese (for that melty goodness)
- 1/2 cup grated parmesan cheese (adds a salty, nutty kick)
- 1 large egg (helps bind the filling)
- 2 cups fresh spinach (wilted and finely chopped for added nutrition)
- 2 cloves garlic (minced for depth of flavor)
- 1 tsp Italian seasoning (for a classic herb blend)
- 1/2 tsp salt (to balance flavors)
- 1/4 tsp black pepper (for a bit of spice)
For the Sauce:
- 2 cups marinara sauce (store-bought or homemade for a fresh tomato base)
- 1/2 tsp red pepper flakes (optional, for some heat)
For Garnish:
- Fresh basil leaves (chopped, for a burst of freshness)
- Extra grated parmesan (because more cheese is always welcome!)
How to Make It:
- Cook the Pasta: Boil the jumbo shells until al dente. Drain and rinse under cold water to stop the cooking process.
- Make the Filling: In a large bowl, mix ricotta, mozzarella, parmesan, egg, spinach, garlic, Italian seasoning, salt, and pepper until well combined.
- Stuff the Shells: Fill each pasta shell generously with the cheese and spinach mixture. Arrange them snugly in a baking dish.
- Add the Sauce: Pour marinara sauce evenly over the stuffed shells, ensuring they are well coated.
- Bake: Cover the dish with foil and bake at 375°F (190°C) for 25-30 minutes. Remove the foil and bake for another 10 minutes until bubbly and golden.
- Serve: Sprinkle fresh basil and extra parmesan on top before serving.
Why It’s Amazing:
- Cheesy Comfort: A blend of three cheeses creates a rich, creamy filling.
- Nutritious Spinach: Adds color, flavor, and a boost of vitamins.
- Classic Flavors: Italian herbs and marinara sauce make every bite taste like home.
These stuffed shells are a heartwarming dish that’s as comforting as it is delicious. Serve them as a satisfying main course or a standout side dish for your next gathering!
Cheddar and Apple Slaw
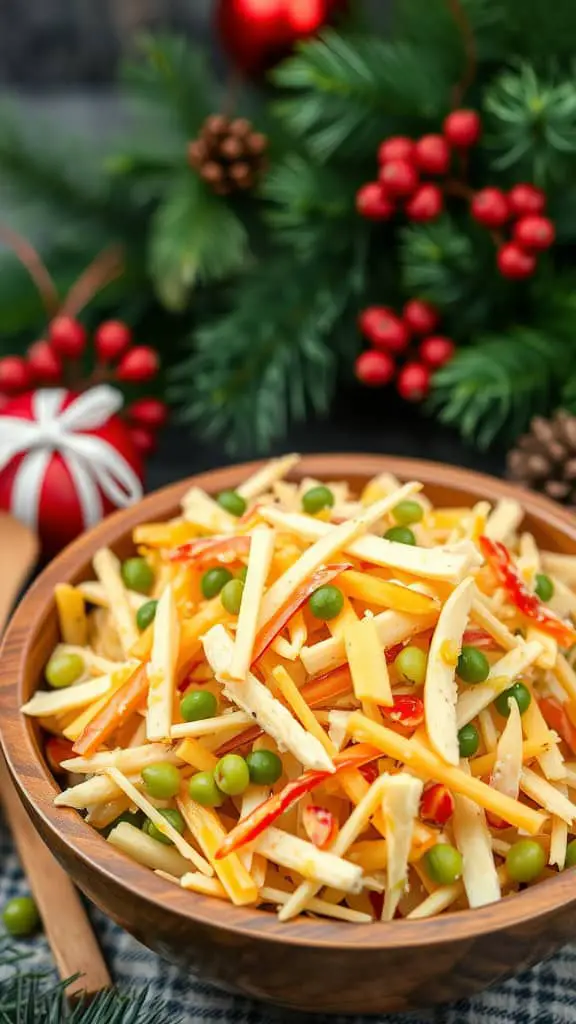
This Cheddar and Apple Slaw is a delightful twist on traditional slaws. The vibrant colors of the shredded apples and cheddar cheese create an inviting presentation, perfect for any gathering. The addition of green peas adds a pop of freshness that complements the creamy cheese.
To make this dish, start by gathering your ingredients: sharp cheddar cheese, crisp apples, and sweet green peas. Shred the cheese and apples into thin strips, then mix them in a bowl. A drizzle of your favorite dressing enhances the flavors, bringing everything together nicely.
This slaw makes a great side dish for a hearty meal. It pairs beautifully with comfort foods like Loaded Baked Potato Casserole or Cheesy Scalloped Potatoes. Plus, it’s an easy dish that can be whipped up in no time, making it a go-to for quick, delicious meals.
Whether you’re serving it at a holiday feast or just looking for a fresh side, this Cheddar and Apple Slaw will be a hit. It’s vibrant, crunchy, and packed with flavor, making it one of those easy yummy side dishes you’ll want to make again and again.
Ingredients
- Cheddar Cheese: 1 cup sharp cheddar, shredded (adds a rich, tangy flavor).
- Apples: 2 crisp apples (such as Granny Smith or Honeycrisp), julienned or shredded (for sweetness and crunch).
- Green Peas: 1 cup fresh or frozen peas (adds a burst of freshness).
- Red Cabbage: 2 cups finely shredded (optional, for added color and texture).
- Carrots: 1 cup shredded (optional, for extra sweetness and color).
For the Dressing:
- Mayonnaise: 1/2 cup (for creaminess).
- Greek Yogurt: 1/2 cup (lightens up the dressing).
- Apple Cider Vinegar: 2 tbsp (for tang and balance).
- Honey: 1 tbsp (adds a hint of sweetness).
- Dijon Mustard: 1 tbsp (for a touch of sharpness).
- Salt and Pepper: To taste (balances the flavors).
How to Make It:
- Prep the Ingredients: Shred the cheddar, apples, red cabbage, and carrots. If using frozen peas, thaw them first.
- Mix the Dressing: In a small bowl, whisk together mayonnaise, Greek yogurt, apple cider vinegar, honey, Dijon mustard, salt, and pepper until smooth and well combined.
- Combine Everything: In a large bowl, toss the shredded cheddar, apples, peas, red cabbage, and carrots. Pour the dressing over the mixture and gently toss until everything is evenly coated.
- Chill and Serve: Cover the bowl and refrigerate for at least 30 minutes to let the flavors meld. Serve cold for the best taste.
Why You’ll Love It:
- Flavorful and Fresh: The balance of sweet apples, sharp cheddar, and creamy dressing is irresistible.
- Quick and Easy: It’s ready in minutes, making it perfect for busy days.
- Versatile Side: Pairs well with hearty comfort foods or lighter main dishes.
This Cheddar and Apple Slaw is a delicious, colorful side that’s sure to become a favorite at your table!
Cheesy Quinoa and Vegetable Bake
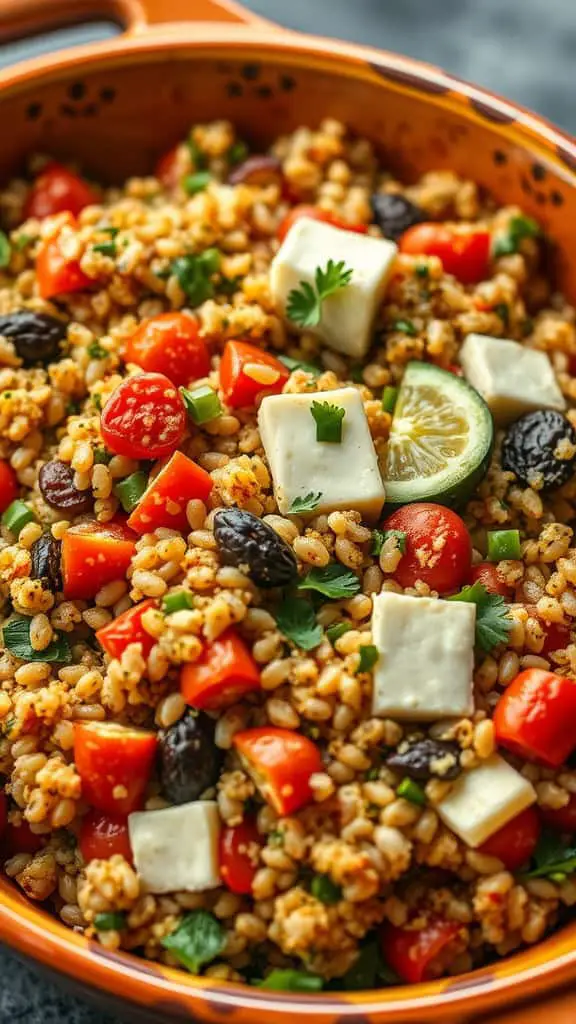
This Cheesy Quinoa and Vegetable Bake is a colorful dish that brings together wholesome ingredients in a delicious way. The vibrant mix of chopped tomatoes, green onions, and colorful bell peppers shines through, making it not only tasty but visually appealing.
The quinoa serves as a fantastic base, providing a nutty flavor and a healthy twist. Topped with creamy cheese, every bite offers a delightful combination of textures. You can consider adding some of your favorite veggies or even a handful of crispy Parmesan cauliflower bites on the side for an extra cheesy touch.
Whether you serve it as a main course or a side dish, this bake fits perfectly into easy weeknight meals. Pair it with your go-to cheesy broccoli side dish or loaded baked potato for a hearty dinner. It’s a great way to sneak in some veggies while enjoying a comforting meal!
Ingredients Breakdown
Let’s create a delicious and wholesome Cheesy Quinoa and Vegetable Bake that’s under 250 calories per serving. Here’s what you’ll need:
For the Bake:
- 1 cup quinoa (rinsed and cooked, for a nutty and filling base)
- 1 cup diced tomatoes (fresh and juicy)
- 1 cup bell peppers (mixed colors, diced for sweetness and crunch)
- 1/2 cup green onions (thinly sliced for added flavor)
- 1/2 cup zucchini (diced, for extra nutrition)
- 1 cup low-fat shredded mozzarella cheese (for creamy, melty goodness)
- 1/2 cup reduced-fat cheddar cheese (adds a bold, cheesy flavor)
- 1 tsp garlic powder (for a savory kick)
- 1 tsp onion powder (to deepen the flavor)
- 1 tsp Italian seasoning (for a herbaceous touch)
- 1/2 tsp smoked paprika (adds a subtle smoky note)
- Salt and pepper (to taste)
For the Topping:
- 1/4 cup grated Parmesan cheese (for a crispy, golden crust)
- 2 tbsp whole-wheat breadcrumbs (light and crunchy)
- Fresh parsley (chopped, for garnish)
How to Make It:
- Cook the Quinoa: Prepare quinoa according to package instructions. Set aside to cool slightly.
- Mix the Ingredients: In a large bowl, combine cooked quinoa, diced tomatoes, bell peppers, green onions, zucchini, mozzarella, cheddar cheese, garlic powder, onion powder, Italian seasoning, smoked paprika, salt, and pepper. Stir until well combined.
- Assemble the Bake: Lightly grease a baking dish. Spread the quinoa mixture evenly into the dish.
- Add the Topping: In a small bowl, mix Parmesan cheese and whole-wheat breadcrumbs. Sprinkle evenly over the top.
- Bake: Preheat the oven to 375°F (190°C). Bake for 25-30 minutes or until the top is golden brown and bubbly.
- Garnish and Serve: Remove from the oven and let cool slightly. Sprinkle fresh parsley on top before serving.
Why You’ll Love It:
- Nutrient-Packed: Quinoa and veggies create a filling, balanced meal.
- Cheesy Delight: A blend of cheeses ensures maximum flavor with minimal calories.
- Make-Ahead Friendly: Prep it earlier and bake when ready for an easy weeknight meal.
This Cheesy Quinoa and Vegetable Bake is the perfect comfort food that keeps things light while satisfying those cheesy cravings!
Buffalo Cauliflower Bites

Buffalo cauliflower bites are a delicious, spicy alternative to traditional buffalo wings. These crispy bites are coated in a flavorful buffalo sauce that packs a punch, making them a hit at any gathering. The bright orange hue of the sauce contrasts beautifully with the creamy dip, inviting you to take a bite.
In this image, you see a generous serving of these bites, neatly arranged alongside some fresh green celery sticks. The cauliflower is perfectly battered and fried, offering that crunchy texture we all love. The bowl of ranch dressing in the center adds a creamy balance, perfect for dipping.
These bites are not just tasty; they’re also a healthier option compared to typical wings. They can easily be paired with other dishes like loaded baked potatoes or cheesy scalloped potatoes for a satisfying meal. Whether you’re entertaining guests or just looking for a healthy snack, buffalo cauliflower bites are sure to impress!
Ingredients Breakdown
These buffalo cauliflower bites are spicy, crispy, and under 250 calories per serving—a perfect snack or party appetizer!
For the Cauliflower Bites:
- 1 large head of cauliflower, cut into bite-sized florets (main ingredient, hearty and filling)
- 3/4 cup whole wheat flour (for coating and crispiness)
- 1/2 cup unsweetened almond milk (for a lighter batter)
- 1/2 cup water (helps thin out the batter)
- 1 tsp garlic powder (for extra flavor)
- 1 tsp smoked paprika (adds a hint of smokiness)
- 1/2 tsp salt (balances the flavors)
- 1/4 tsp black pepper (for a mild kick)
For the Buffalo Sauce:
- 1/2 cup hot sauce (choose your preferred level of heat)
- 2 tbsp melted unsalted butter or coconut oil (adds richness)
- 1 tbsp apple cider vinegar (for tanginess)
For Serving:
- Fresh celery sticks (cool and crunchy side)
- Ranch or blue cheese dressing (for dipping and balance)
How to Make It:
- Prepare the Batter: In a large bowl, whisk together the flour, almond milk, water, garlic powder, smoked paprika, salt, and black pepper until smooth.
- Coat the Cauliflower: Toss the cauliflower florets in the batter, ensuring each piece is evenly coated.
- Bake the Bites: Arrange the coated florets on a parchment-lined baking sheet. Bake at 425°F (220°C) for 25-30 minutes, flipping halfway through for even crispiness.
- Make the Sauce: While the cauliflower bakes, whisk together hot sauce, melted butter or coconut oil, and apple cider vinegar.
- Sauce the Bites: Once the cauliflower is golden and crispy, remove from the oven and toss gently in the buffalo sauce.
- Serve and Enjoy: Arrange the sauced bites on a platter with celery sticks and a bowl of ranch or blue cheese dressing.
Why You’ll Love These Bites:
- Crispy Texture: Baked to golden perfection.
- Bold Flavor: Smoky, spicy, and tangy all in one.
- Health-Conscious: Low in calories but high in flavor.
These buffalo cauliflower bites are guaranteed to be a crowd-pleaser. They’re flavorful, fun, and easy to whip up for any occasion!
Cheesy Ratatouille Bake
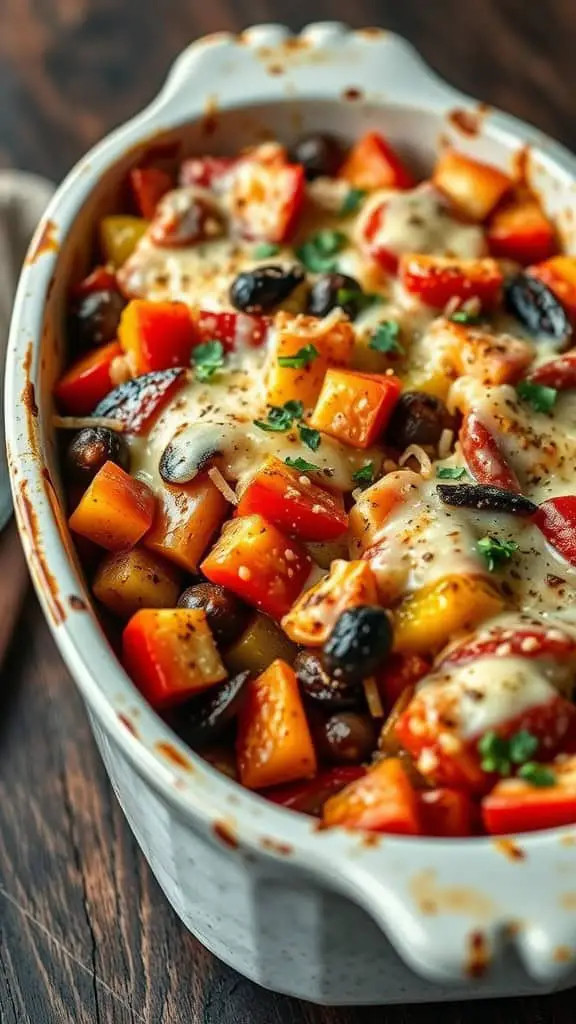
This Cheesy Ratatouille Bake brings a warm, comforting vibe to any table. Picture a vibrant mix of colorful veggies like bell peppers, zucchini, and tomatoes, all roasted to perfection and generously topped with gooey cheese. It’s a wonderful blend of flavors that makes for a perfect dish during those chilly months.
One of the best parts about this bake is how versatile it is. It fits right in with Cold Weather Side Dishes, making it a great addition to your Thanksgiving Side Recipes Easy list. With a few simple ingredients, you can create a crowd-pleaser that everyone will love.
To make this dish, start with diced veggies. Layer them in a baking dish, sprinkle some spices, and cover with cheese. Bake until the cheese is bubbly and golden. It pairs beautifully with Loaded Baked Potatoes or even Cheesy Scalloped Potatoes Recipe for a hearty meal.
Whether you’re looking for a new way to enjoy veggies or need Easy Meals With Veggies, this Cheesy Ratatouille Bake fits the bill. It’s not just tasty but also adds a colorful touch to your dining experience!
Ingredients Breakdown
For the Veggie Base:
- 2 medium zucchini, sliced into thin rounds
- 2 medium eggplants, sliced into thin rounds
- 3 bell peppers (red, yellow, green), diced
- 4 medium tomatoes, sliced
- 1 large onion, finely chopped
- 3 cloves garlic, minced (adds depth of flavor)
- 2 tbsp olive oil (for roasting)
- 1 tsp salt (for seasoning)
- 1/2 tsp black pepper (a hint of spice)
- 1 tsp dried thyme (earthy aroma)
- 1 tsp dried oregano (Mediterranean flair)
For the Cheesy Topping:
- 1 cup shredded mozzarella cheese (melty goodness)
- 1/2 cup grated Parmesan cheese (for a sharp finish)
- 2 tbsp fresh basil, chopped (optional, for garnish)
How to Make It:
- Prepare the Veggies: Preheat the oven to 400°F (200°C). Lightly grease a baking dish. Arrange the zucchini, eggplant, bell peppers, tomatoes, and onion in alternating layers.
- Season the Veggies: Drizzle the olive oil evenly over the vegetables. Sprinkle with salt, pepper, thyme, oregano, and minced garlic.
- Bake the Base: Cover the baking dish with foil and bake for 30-35 minutes until the veggies are tender.
- Add the Cheese: Remove the foil and sprinkle mozzarella and Parmesan evenly over the top. Return to the oven and bake uncovered for 15-20 minutes until the cheese is bubbly and golden brown.
- Serve and Enjoy: Let the bake rest for 5 minutes before serving. Garnish with fresh basil if desired.
Why It’s Amazing:
- Flavor-Packed: The blend of herbs and veggies creates a robust taste.
- Cheesy and Comforting: The mozzarella and Parmesan combo is irresistibly gooey.
- Healthy and Hearty: Packed with veggies, it’s as nutritious as it is delicious.
This Cheesy Ratatouille Bake is a crowd-pleaser that adds warmth and color to your table. Serve it alongside your favorite sides or enjoy it as a standalone dish for a comforting, satisfying meal!
Roasted Vegetable and Cheese Galette
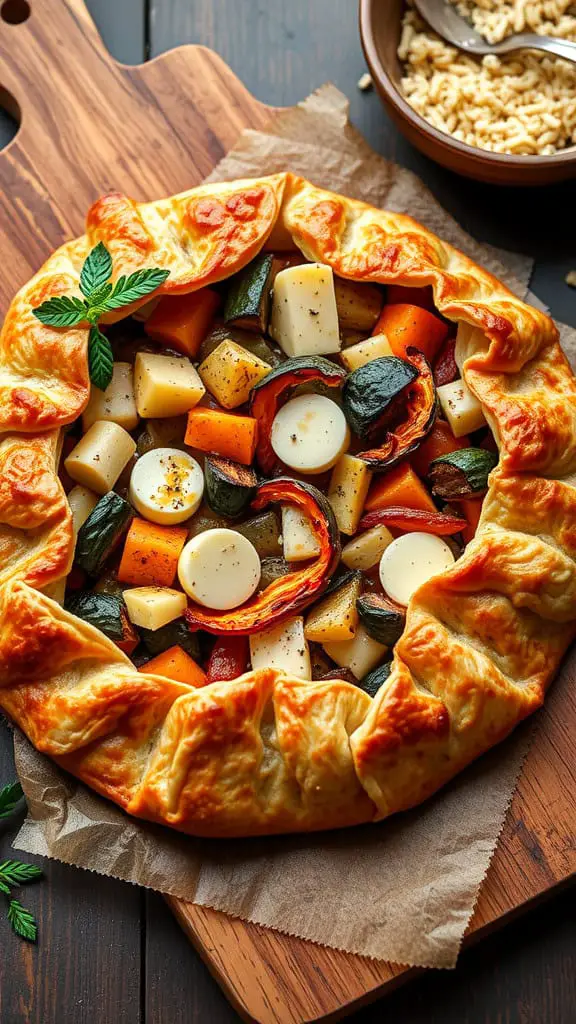
Imagine a golden crust cradling a colorful medley of roasted vegetables and creamy cheese. This roasted vegetable and cheese galette is not just a feast for the eyes but also a delightful treat for your taste buds. The rustic presentation makes it perfect for any occasion, from a casual weeknight dinner to a festive gathering.
Inside the flaky pastry, you’ll find diced zucchini, squash, and other seasonal vegetables, all beautifully roasted to enhance their flavors. The cheese adds a creamy richness that ties everything together. It’s a harmonious blend that highlights the goodness of fresh ingredients.
This dish pairs well with various sides. Consider serving it alongside a light salad or perhaps some cheesy scalloped potatoes for an extra indulgence. If you’re looking for easy meals with veggies, this galette fits the bill perfectly!
To make your own, start with a simple dough and fill it with your favorite roasted veggies, topped with cheese. Bake until the crust is golden brown, and prepare for the compliments to roll in. This recipe is sure to become a favorite for anyone who loves easy, cheesy goodness.
Ingredients Breakdown
Let’s talk about what makes this galette irresistibly good. It’s packed with wholesome ingredients that balance flavor and texture.
For the Dough:
- 1 1/2 cups all-purpose flour (for a perfectly flaky crust)
- 1/2 cup whole wheat flour (adds a nutty depth)
- 1/2 tsp salt (enhances the overall taste)
- 1/2 cup cold unsalted butter, cubed (creates those irresistible layers)
- 1/4 cup plain Greek yogurt (adds tenderness)
- 1/4 cup ice water (for bringing the dough together)
For the Filling:
- 1 small zucchini, diced (fresh and slightly sweet)
- 1 small yellow squash, diced (mild and tender)
- 1 small red bell pepper, diced (adds color and a hint of sweetness)
- 1 cup cherry tomatoes, halved (bursting with juicy flavor)
- 1 small red onion, sliced (for a touch of savory depth)
- 2 tbsp olive oil (for roasting)
- 1 tsp dried thyme (earthy and aromatic)
- 1 tsp dried oregano (adds a Mediterranean touch)
- Salt and pepper, to taste (essential seasoning)
For the Cheese Layer:
- 1/2 cup ricotta cheese (light and creamy)
- 1/2 cup shredded mozzarella (melty goodness)
- 1/4 cup grated Parmesan (adds sharp, salty notes)
For Assembly:
- 1 large egg, beaten (for a shiny, golden crust)
- Fresh basil leaves, for garnish (optional but flavorful)
How to Make It:
- Make the Dough: In a large bowl, mix the flours and salt. Cut in the cold butter using a pastry cutter until the mixture resembles coarse crumbs. Stir in Greek yogurt and ice water until the dough comes together. Shape into a disk, wrap in plastic, and chill for 30 minutes.
- Roast the Vegetables: Preheat the oven to 425°F (220°C). Toss zucchini, squash, bell pepper, tomatoes, and red onion with olive oil, thyme, oregano, salt, and pepper. Spread on a baking sheet and roast for 25-30 minutes until caramelized.
- Prepare the Cheese Mixture: In a small bowl, combine ricotta, mozzarella, and Parmesan. Mix well.
- Assemble the Galette: Roll out the dough on a floured surface into a 12-inch circle. Transfer to a parchment-lined baking sheet. Spread the cheese mixture evenly, leaving a 2-inch border. Layer the roasted vegetables on top.
- Fold and Bake: Gently fold the edges of the dough over the filling, pleating as needed. Brush the edges with beaten egg for a glossy finish. Bake at 400°F (200°C) for 35-40 minutes until the crust is golden and the filling is bubbly.
- Serve and Enjoy: Let the galette cool slightly before slicing. Sprinkle with fresh basil leaves for a burst of flavor.
Why It’s Amazing:
- Flaky Crust: The buttery, homemade crust is perfectly crisp.
- Rich and Creamy Cheese: The cheese layer melts beautifully, tying the veggies together.
- Bold Roasted Flavors: Caramelized vegetables bring natural sweetness and depth.
This roasted vegetable and cheese galette is rustic, flavorful, and sure to impress. It’s a versatile dish that works as a main course or an elegant appetizer for gatherings. Give it a try and enjoy a slice of wholesome comfort!
Can Creative Veggie Sides Pair Well with Cheesy Dishes at Christmas Dinner?
Balancing rich, cheesy dishes at Christmas dinner with vibrant, creative veggie sides creates a harmonious feast. Roasted Brussels sprouts, honey-glazed carrots, or herbed zucchini chips provide a fresh contrast, enhancing flavors without overpowering. These thoughtful pairings elevate the meal, offering a delicious balance for guests to savor and remember.
Cheesy Spinach Quiche

Cheesy Spinach Quiche
Slice of cheesy spinach quiche on a decorative plate.
This cheesy spinach quiche is a delightful dish that brings comfort and flavor to any meal. The golden crust holds a creamy filling packed with fresh spinach and melty cheese. It’s a perfect blend of textures that makes each bite satisfying.
Ingredients
- 1 ready-made pie crust (or homemade if preferred)
- 1 tablespoon olive oil
- 1 small onion, finely chopped
- 3 cups fresh spinach, washed and roughly chopped
- 3 large eggs
- 1 cup milk (or half-and-half for a creamier texture)
- 1/2 teaspoon salt
- 1/4 teaspoon ground black pepper
- 1/4 teaspoon ground nutmeg (optional)
- 1 cup shredded cheese (cheddar, mozzarella, or a mix)
Instructions
- Prepare the Crust
Preheat your oven to 375°F (190°C). Roll out the pie crust and place it in a 9-inch pie dish. Trim and crimp the edges. Poke the bottom with a fork to prevent puffing. Bake the crust for about 10 minutes, or until slightly golden. Set aside to cool. - Cook the Spinach Filling
In a skillet, heat the olive oil over medium heat. Add the finely chopped onion and sauté until it becomes translucent, about 3-4 minutes. Add the spinach and cook for another 2-3 minutes until wilted. Remove from heat and let it cool slightly. - Prepare the Egg Mixture
In a mixing bowl, whisk together the eggs, milk, salt, pepper, and nutmeg (if using). Stir in the shredded cheese and the cooled spinach mixture. Mix well until all ingredients are evenly combined. - Fill and Bake the Quiche
Pour the egg and spinach mixture into the prepared pie crust. Use a spatula to spread it evenly. Place the pie dish in the oven and bake for 30-35 minutes, or until the center is set and the top is golden brown. Allow the quiche to cool for about 10 minutes before slicing. - Serve and Enjoy
This cheesy spinach quiche is best enjoyed warm or at room temperature. The vibrant green spinach contrasts beautifully with the golden cheese topping, making it both visually appealing and delicious. Pair it with a simple side salad for a light meal, or enjoy it on its own for a quick lunch or dinner.
Nutritional Information
Each serving of this Cheesy Spinach Quiche is under 250 calories, making it a lighter yet satisfying meal option. It’s packed with leafy greens and protein from the eggs, making it a well-rounded dish for any occasion.
Tips for Variation
- Add Extra Veggies: Try adding sautéed mushrooms or bell peppers for additional flavors and textures.
- Cheese Swap: Use feta cheese for a sharper flavor or Gruyère for a gourmet twist.
- Herbs and Spices: Add fresh herbs like thyme or basil for extra flavor. A pinch of red pepper flakes can also give the quiche a subtle kick.
Enjoy this quiche warm or at room temperature, making it a versatile option for any gathering!