Valentine’s Day is the perfect excuse to treat your sweet tooth and impress your loved one with some delightful desserts. Here are 15 fun and creative ideas that will add a romantic touch to your celebration. From classic favorites to unique twists, there’s something for everyone to enjoy!
Affiliate Disclosure: "As an Amazon Associate I earn from qualifying purchases made from the images and links in this post. We are a participant in the Amazon Services LLC Associates Program, an affiliate advertising program designed to provide a means for us to earn fees by linking to Amazon.com and other affiliated sites."
Sweetheart Red Velvet Cupcake Bites

These Sweetheart Red Velvet Cupcake Bites are perfect for any love-themed dessert display. Their vibrant red color and cute heart toppers make them a standout choice for a Valentine’s Day treat bar.
The rich red velvet pairs wonderfully with smooth cream cheese frosting. Each mini cupcake is topped with a small red heart, capturing the essence of romance. They not only taste delicious but also look fantastic on any Valentine’s Day dessert table setup.
For those looking to impress, these bites are a delightful addition to any romantic dessert ideas. They can be part of your Valentine’s baking ideas, making your dessert table feel extra special. Whether you are hosting a party or just treating yourself, these cupcakes are a sweet way to celebrate love!
Ingredients:
- 1 box red velvet cake mix (plus ingredients listed on the box: eggs, oil, water)
- 1 tub (16 oz) cream cheese frosting
- Red food coloring (optional for deeper color)
- Heart-shaped sprinkles or edible decorations
- Mini cupcake liners
Instructions:
- Preheat Oven: Preheat your oven to 350°F (175°C). Line a mini muffin tin with cupcake liners.
- Prepare Batter: Follow the instructions on the red velvet cake mix box to prepare the batter. Add a few extra drops of red food coloring if you want a more vibrant color.
- Fill Liners: Use a small scoop or spoon to fill each liner about 2/3 full with the batter.
- Bake: Bake for 12-15 minutes or until a toothpick inserted into the center comes out clean.
- Cool: Remove from the oven and let the cupcakes cool in the pan for a few minutes before transferring them to a wire rack to cool completely.
- Frosting Prep: Spoon cream cheese frosting into a piping bag fitted with a star tip or use a zip-top bag with the corner snipped off.
- Decorate: Pipe a swirl of frosting on each cupcake. Top with heart-shaped sprinkles or edible decorations.
- Serve: Arrange the cupcake bites on a decorative plate or tiered stand for a festive presentation.
Serving Tips:
- Make Ahead: Bake the cupcakes a day in advance and frost just before serving.
- Custom Toppers: Use personalized toppers for special messages or names.
- Storage: Store leftovers in an airtight container in the refrigerator for up to 3 days.
These Sweetheart Red Velvet Cupcake Bites are sure to impress with their bold color and creamy frosting. They add a touch of love to any dessert table, making every bite a sweet celebration!
Valentine’s Kiss Chocolate Truffles

Valentine’s Day is the perfect time to indulge in sweet treats, and these heart-shaped chocolate truffles are a delightful choice. Arranged beautifully, they capture the essence of love and celebration.
Each truffle is carefully crafted, showcasing a mix of rich dark chocolate, creamy milk chocolate, and a touch of white chocolate for contrast. They are adorned with playful drizzles and sprinkles, adding a fun touch to these romantic sweets.
The soft petals around the truffles enhance the lovely atmosphere, making them a stunning addition to any Valentine’s Day dessert table. These chocolates are not just tasty; they also make for a gorgeous display that will impress your sweetheart.
If you’re looking for inspiration for your Valentine’s Day Dessert Bar, these truffles are an ideal centerpiece. They can be paired with other sweet recipes like chocolate-dipped strawberries or heart-shaped cookies, creating a feast for the eyes and the palate.
Ingredients:
- 8 oz dark chocolate, finely chopped
- 4 oz milk chocolate, finely chopped
- 1/2 cup heavy cream
- 1 tsp vanilla extract
- 2 tbsp unsalted butter, softened
- Cocoa powder, for coating
- White chocolate, melted (optional, for drizzling)
- Sprinkles or edible glitter (optional, for decoration)
Instructions:
- Prepare the Chocolate Base: In a heatproof bowl, combine the dark and milk chocolate.
- Heat the Cream: In a small saucepan, heat the heavy cream over medium heat until it just begins to simmer. Do not boil.
- Combine and Melt: Pour the hot cream over the chopped chocolate. Let it sit for 2-3 minutes, then stir gently until smooth and fully melted.
- Add Flavor: Stir in the vanilla extract and softened butter until fully incorporated.
- Chill the Mixture: Cover the bowl with plastic wrap and refrigerate for about 2 hours or until firm enough to handle.
- Shape the Truffles: Use a small cookie scoop or spoon to portion out the mixture. Roll each portion into a heart shape or ball using your hands.
- Coat the Truffles: Roll the truffles in cocoa powder for a classic finish. Alternatively, drizzle melted white chocolate over the truffles or decorate with sprinkles.
- Set and Serve: Place the decorated truffles on a parchment-lined tray and refrigerate until firm. Serve chilled or at room temperature.
Serving Tips:
- Gift Presentation: Arrange the truffles in a decorative box or tin lined with parchment paper for a thoughtful Valentine’s Day gift.
- Dessert Table Highlight: Use heart-shaped serving platters or elegant trays for a romantic dessert spread.
- Pairing Idea: Enjoy these truffles with a glass of champagne or a warm cup of coffee for the ultimate Valentine’s treat.
These truffles are a sweet way to show your love. With their rich, melt-in-your-mouth texture and beautiful presentation, they’ll make Valentine’s Day extra special!
Love Blossom Raspberry Cheesecake Tarts
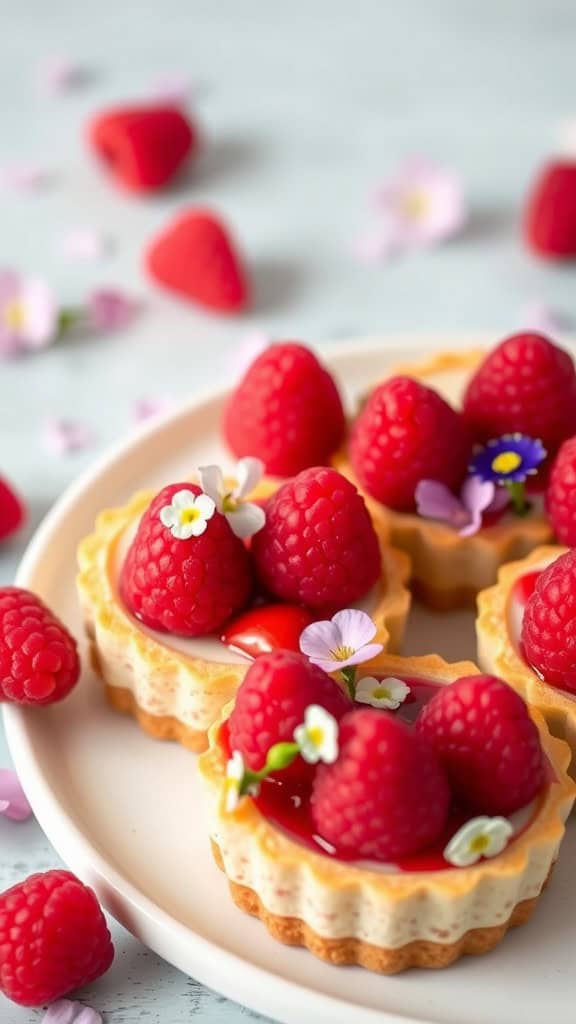
These Love Blossom Raspberry Cheesecake Tarts are a perfect blend of sweetness and elegance. The delicate tarts are filled with creamy cheesecake and topped with vibrant, fresh raspberries. Each tart is a mini work of art, adorned with charming edible flowers that add a lovely touch to the presentation.
The combination of rich cheesecake and tart raspberries makes these treats a hit for any occasion, especially for Valentine’s Day. They can be the star of your Valentine’s Day Dessert Table Ideas, adding a colorful and romantic flair to your spread.
If you’re looking for romantic dessert ideas, these tarts are easy to make and will impress your loved ones. Picture them on your Valentine’s Day Dessert Table Setup, surrounded by other sweet treats. They not only taste delicious but also look stunning, making them perfect for a Love-Themed Dessert Display.
Ingredients:
- 1 cup graham cracker crumbs
- 4 tbsp unsalted butter, melted
- 8 oz cream cheese, softened
- 1/2 cup granulated sugar
- 1 tsp vanilla extract
- 1 large egg
- 1/4 cup sour cream
- 1 cup fresh raspberries (plus extra for garnish)
- Edible flowers (optional, for decoration)
- Powdered sugar (for dusting, optional)
Instructions:
- Preheat the Oven: Preheat the oven to 325°F (160°C). Line a muffin tin with cupcake liners.
- Make the Crust: In a mixing bowl, combine the graham cracker crumbs and melted butter. Mix until the crumbs are evenly coated and moist.
- Press the Crust: Spoon the crust mixture into the cupcake liners, pressing down firmly with the back of a spoon to create an even layer.
- Prepare the Filling: In a large bowl, beat the cream cheese and granulated sugar together until smooth and creamy.
- Add Vanilla and Egg: Mix in the vanilla extract, followed by the egg. Beat until fully combined, but don’t overmix.
- Incorporate Sour Cream: Gently fold in the sour cream until smooth and creamy.
- Assemble the Tarts: Spoon the cheesecake mixture over the prepared crusts, filling each liner about 3/4 full.
- Bake: Bake for 18-20 minutes, or until the centers are just set and slightly jiggly.
- Cool: Let the tarts cool in the pan for 10 minutes, then transfer them to a wire rack to cool completely.
- Chill: Refrigerate for at least 2 hours or until fully chilled.
- Decorate: Before serving, top each tart with fresh raspberries and a sprinkle of powdered sugar. Add edible flowers for an elegant touch if desired.
Serving Tips:
- Make Ahead: Prepare the tarts a day in advance and store them in the refrigerator.
- Presentation: Serve on a decorative platter with extra raspberries and flowers for a stunning display.
- Special Touch: Drizzle with raspberry sauce for added flavor and visual appeal.
These Love Blossom Raspberry Cheesecake Tarts are a sweet way to show your love. Their creamy, tangy filling combined with the freshness of raspberries makes each bite unforgettable. Enjoy sharing them with someone special!
Cupid’s Strawberry Mousse Parfaits
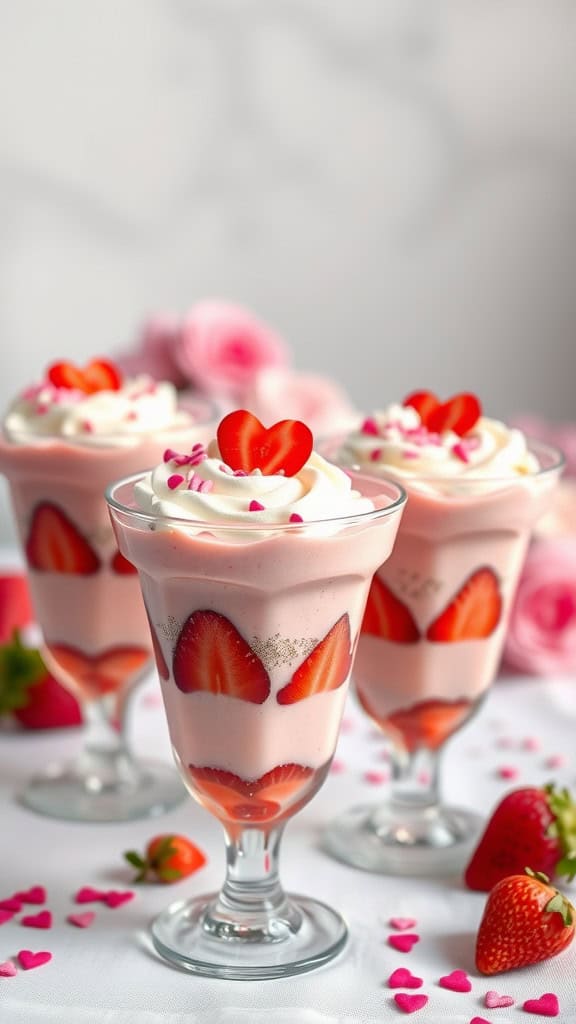
Cupid’s Strawberry Mousse Parfaits are a delightful treat perfect for Valentine’s Day. These desserts are layered with creamy strawberry mousse and fresh strawberries, making them not just tasty but visually stunning.
The parfaits are topped with whipped cream, pink sprinkles, and heart-shaped candy, adding a playful touch. They look great on any romantic dessert table setup.
For those planning a Valentine’s Dessert Bar, these parfaits can be a centerpiece. Their sweet colors and textures fit right into love-themed dessert displays.
To make these parfaits, you’ll need simple ingredients like strawberries, cream, and gelatin. Layer them up in elegant glasses for a charming presentation.
Ingredients:
- 2 cups fresh strawberries, hulled and chopped (plus extra for garnish)
- 1/2 cup granulated sugar
- 1 tablespoon lemon juice
- 1 envelope (2 1/4 tsp) unflavored gelatin
- 2 tablespoons cold water
- 1 cup heavy whipping cream
- 1/4 cup powdered sugar
- Pink sprinkles and heart-shaped candies (optional, for garnish)
Instructions:
- Make the Strawberry Puree:
- In a blender or food processor, blend the strawberries, granulated sugar, and lemon juice until smooth.
- Strain through a fine-mesh sieve to remove seeds for a smoother mousse.
- Bloom the Gelatin:
- In a small bowl, sprinkle the gelatin over cold water and let sit for 5 minutes.
- Microwave the bloomed gelatin for 10 seconds or until melted.
- Combine the Mousse Base:
- Stir the melted gelatin into the strawberry puree until fully incorporated.
- Whip the Cream:
- In a large mixing bowl, beat the heavy cream and powdered sugar until stiff peaks form.
- Fold and Chill:
- Gently fold the strawberry-gelatin mixture into the whipped cream until combined.
- Divide the mixture into serving glasses, layering with extra chopped strawberries if desired.
- Chill for at least 2 hours or until set.
- Serve and Decorate:
- Top each parfait with whipped cream, pink sprinkles, and heart-shaped candies.
- Add a fresh strawberry slice on the rim for extra flair.
Serving Tips:
- Presentation Tip: Use clear dessert glasses or jars for a layered effect.
- Make-Ahead Friendly: Prepare up to 24 hours in advance and refrigerate.
- Creative Touch: Add a chocolate drizzle or a small cookie on the side.
These Cupid’s Strawberry Mousse Parfaits are a sweet way to celebrate love. The creamy layers, fruity freshness, and playful decorations make them a Valentine’s Day dessert everyone will adore!
Romantic Rosewater Panna Cotta
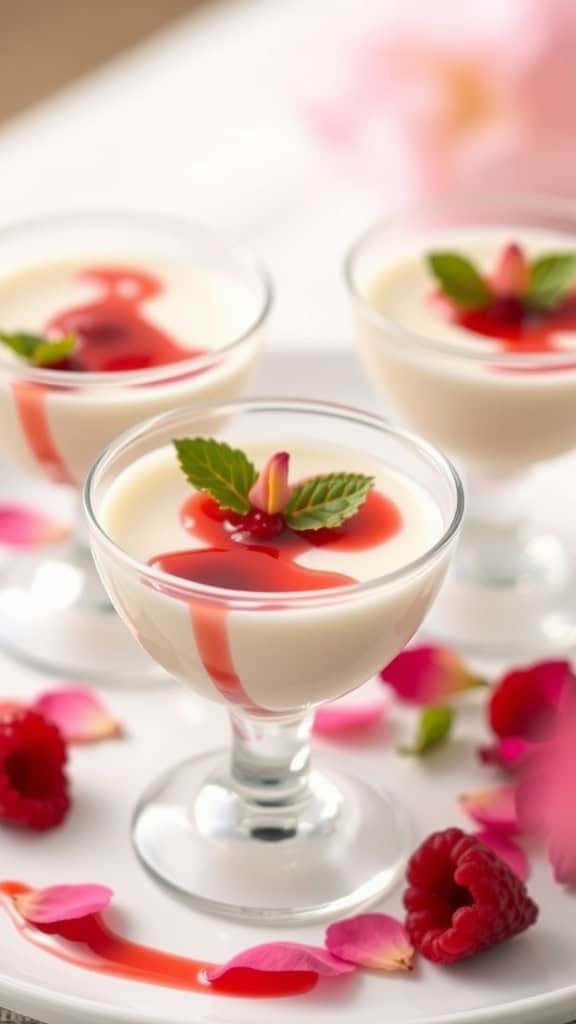
This delightful dessert is the perfect way to celebrate love. The creamy texture of panna cotta pairs beautifully with the floral notes of rosewater, making it an ideal choice for a Valentine’s Day dessert table setup. Each serving is topped with a vibrant raspberry sauce and fresh mint, adding a pop of color that is sure to impress.
To make this treat, you’ll need just a few key ingredients: heavy cream, sugar, gelatin, rosewater, and fresh raspberries for the sauce. The process is simple. Start by blooming the gelatin in cold water, then heat the cream and sugar until dissolved. Mix in the rosewater and gelatin, pour into serving cups, and let it set in the fridge.
Once the panna cotta is ready, drizzle it with raspberry sauce and add a mint leaf for that finishing touch. This dessert not only tastes amazing but also looks stunning, making it a standout on any romantic dessert bar. It’s perfect for a Sweetheart Baking Inspiration moment or when you’re planning a beautiful Valentine’s Day Treat Bar. Serve with love and watch your special someone light up with joy!
Ingredients:
- 2 cups heavy cream
- 1/2 cup whole milk
- 1/2 cup granulated sugar
- 1 1/2 teaspoons rosewater (adjust to taste)
- 2 1/2 teaspoons unflavored gelatin
- 3 tablespoons cold water
For the Raspberry Sauce:
- 1 cup fresh raspberries
- 2 tablespoons sugar (adjust for sweetness)
- 1 tablespoon lemon juice
For Garnish:
- Fresh mint leaves
- Extra fresh raspberries
- Edible rose petals (optional)
Instructions:
- Bloom the Gelatin: In a small bowl, sprinkle the gelatin over cold water and let it sit for 5 minutes until softened.
- Heat the Cream Mixture: In a medium saucepan, combine the heavy cream, milk, and sugar over medium heat. Stir until the sugar is dissolved but avoid boiling.
- Add Gelatin and Rosewater: Remove the saucepan from heat and stir in the bloomed gelatin until fully dissolved. Add the rosewater and mix well.
- Pour and Chill: Divide the mixture evenly into serving cups or ramekins. Let cool slightly before covering with plastic wrap. Refrigerate for at least 4 hours or until fully set.
- Make the Raspberry Sauce: In a small saucepan over medium heat, combine raspberries, sugar, and lemon juice. Cook until the raspberries break down and the sauce thickens slightly, about 5-7 minutes. Strain through a fine-mesh sieve to remove seeds if desired. Let cool.
- Serve: Once the panna cotta is set, drizzle each cup with raspberry sauce. Garnish with fresh mint leaves, extra raspberries, and edible rose petals for a romantic presentation.
Serving Tips:
- Make Ahead: Panna cotta can be made a day in advance, making it perfect for stress-free entertaining.
- Presentation Tip: Serve in clear glasses to showcase the layers of panna cotta and raspberry sauce.
- Flavor Variation: Add a splash of vanilla or orange blossom water for a unique twist.
This rosewater panna cotta is a beautiful blend of creamy, floral, and fruity flavors, making every bite a sweet expression of love. Enjoy this elegant dessert and create unforgettable memories!
Hearts Aflame Chocolate Lava Cakes
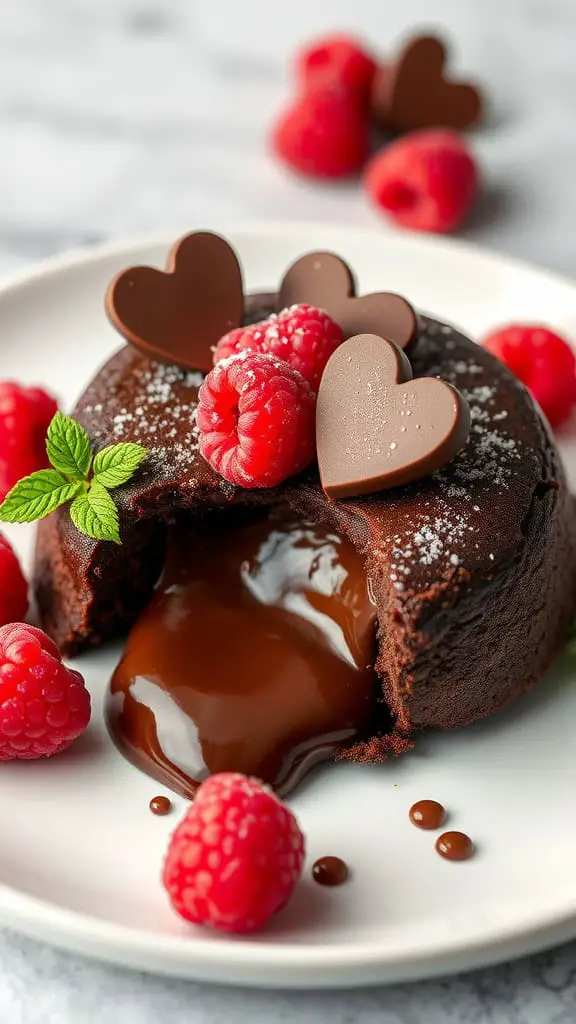
Picture this: a warm, rich chocolate lava cake spilling gooey chocolate goodness as you take your first bite. This delightful dessert is perfect for a romantic evening, especially around Valentine’s Day. The combination of chocolate and raspberry creates a lovely flavor harmony that is sure to impress your loved one.
The cake is topped with sweet raspberries and cute heart-shaped chocolate pieces, making it a standout choice for a romantic dessert table. It’s not just a treat; it’s a sweet centerpiece for your Valentine’s Day Dessert Table Setup.
Making these cakes is simpler than you might think. You’ll need ingredients like dark chocolate, butter, sugar, eggs, and a hint of flour. Melt the chocolate and butter, mix in the eggs and sugar, then fold in the flour. Bake until the edges are set but the center remains soft. When you cut in, the molten chocolate flows out, creating a dreamy effect!
This dessert is just one of many Valentine’s Day Sweet Recipes that can elevate your evening. Whether you serve it as part of a larger Romantic Dessert Bar or pair it with ice cream, it’s bound to be a hit. So, gather your ingredients and get ready to create a Love-Themed Dessert Display that your sweetheart will adore!
Ingredients:
- 4 oz dark chocolate (at least 70% cocoa), chopped
- 1/2 cup (1 stick) unsalted butter, plus extra for greasing
- 1 cup powdered sugar
- 2 large eggs
- 2 large egg yolks
- 1/2 cup all-purpose flour
- 1 tsp vanilla extract
- Pinch of salt
- Fresh raspberries (for garnish)
- Heart-shaped chocolate decorations (optional)
Instructions:
- Preheat the Oven: Preheat your oven to 425°F (220°C). Grease four ramekins or small oven-safe bowls with butter and lightly dust with cocoa powder.
- Melt the Chocolate and Butter: In a heatproof bowl, combine the chopped dark chocolate and butter. Melt over a double boiler or microwave in 20-second intervals, stirring until smooth.
- Mix the Batter: In a separate bowl, whisk together the eggs, egg yolks, powdered sugar, vanilla extract, and salt until thick and pale.
- Combine Ingredients: Gently fold the melted chocolate mixture into the egg mixture. Sift in the flour and fold carefully until just combined.
- Fill the Ramekins: Divide the batter evenly among the prepared ramekins, filling each about 3/4 full.
- Bake: Bake for 12-14 minutes, until the edges are set but the centers are still soft and slightly jiggly.
- Rest and Serve: Let the cakes cool for 1-2 minutes, then carefully invert them onto serving plates.
- Garnish: Top each cake with fresh raspberries and heart-shaped chocolate decorations.
Serving Tips:
- Serve Immediately: These cakes are best enjoyed fresh from the oven while the centers are still molten.
- Pair with Ice Cream: Add a scoop of vanilla ice cream or a dollop of whipped cream for extra indulgence.
- Romantic Presentation: Use a decorative platter or individual dessert plates for a special Valentine’s Day touch.
With their luscious molten centers and elegant presentation, these Hearts Aflame Chocolate Lava Cakes will make your romantic evening unforgettable. Enjoy each decadent bite!
Be Mine Heart-Shaped Macarons

These heart-shaped macarons are the perfect addition to a Valentine’s Day dessert table setup. Their vibrant colors and playful shapes instantly catch the eye. Made in shades of pink, red, and even a chocolate hue, they embody the spirit of love and sweetness.
Imagine placing these delightful treats on a romantic dessert table. They fit seamlessly into any Valentine’s baking ideas, whether you’re planning a small gathering or a grand celebration. The smooth, glossy shells look inviting, making them a must-have for any Valentine’s Day sweet treats display.
These macarons can be filled with various flavors, from raspberry to chocolate ganache, adding a delightful surprise in every bite. Not only do they taste great, but they also serve as beautiful decorations for your romantic dessert table ideas. Think about pairing them with other romantic sweets & treats for a complete love-themed dessert display!
If you’re inspired to create your own, consider experimenting with flavors and colors for your sweetheart baking inspiration. These macarons will surely impress anyone who receives them, making them a wonderful gift or personal treat this Valentine’s Day.
Ingredients:
- 1 3/4 cups (210g) powdered sugar
- 1 cup (120g) almond flour, finely sifted
- 3 large egg whites, room temperature
- 1/4 cup (50g) granulated sugar
- 1/2 tsp vanilla extract
- Gel food coloring (pink, red, brown)
For the Filling:
- 1/2 cup (115g) unsalted butter, softened
- 1 1/2 cups (180g) powdered sugar
- 2 tbsp heavy cream
- 1 tsp vanilla extract
- Optional flavors: raspberry jam, chocolate ganache, or strawberry preserves
Instructions:
- Prepare the Baking Sheets: Line two baking sheets with parchment paper or silicone mats.
- Sift the Dry Ingredients: Sift powdered sugar and almond flour together into a large bowl. Discard any large bits that don’t pass through.
- Whip the Egg Whites: In a clean, dry mixing bowl, beat egg whites on medium speed until foamy. Gradually add granulated sugar and vanilla extract while beating. Increase speed to high and beat until stiff, glossy peaks form.
- Fold the Batter: Gently fold the dry ingredients into the whipped egg whites in batches. Use a spatula and fold carefully to avoid deflating the batter. Add gel food coloring at this stage and continue folding until the batter flows like lava when lifted.
- Pipe the Macarons: Transfer the batter to a piping bag fitted with a round tip. Pipe small heart shapes onto the prepared baking sheets, leaving space between each one. Tap the baking sheets firmly on the counter several times to remove air bubbles.
- Rest the Macarons: Let the piped macarons sit at room temperature for 30-60 minutes or until the tops are dry and form a skin.
- Bake the Macarons: Preheat the oven to 300°F (150°C). Bake one sheet at a time for 14-16 minutes. The macarons should rise to form feet and easily lift off the parchment when done.
- Cool Completely: Allow the macarons to cool on the baking sheets before removing them.
- Make the Filling: Beat the softened butter until creamy. Gradually add powdered sugar, heavy cream, and vanilla extract. Mix until smooth and fluffy. Add desired flavorings if using.
- Assemble the Macarons: Pair similar-sized shells. Pipe a generous dollop of filling onto the flat side of one shell and gently press another shell on top.
- Serve or Store: Place the macarons in an airtight container and refrigerate for at least 24 hours to allow flavors to meld. Bring to room temperature before serving.
Tips for Success:
- Room Temperature Ingredients: Ensure egg whites are at room temperature for better volume.
- Accurate Measuring: Use a kitchen scale for precise measurements.
- Resting Time: Don’t skip the resting stage; it’s crucial for developing smooth, glossy tops.
Enjoy creating these heart-shaped macarons and sharing them with loved ones. Their sweet flavors and delicate texture make them a perfect Valentine’s Day treat!
Cupid’s Arrow Chocolate-Dipped Strawberries

Chocolate-dipped strawberries are a classic choice for a romantic dessert. These treats are not just delicious; they also look stunning. Picture juicy strawberries, perfectly coated in rich chocolate, adorned with charming heart-shaped decorations.
These sweet delights fit perfectly into any Valentine’s Day celebration. Think of a romantic dessert table setup filled with love-themed dessert displays. You can create a whole Valentine’s Day treat bar featuring these strawberries along with other sweets.
Making these creations is quite simple. Start with fresh strawberries, quality chocolate, and some fun toppings. Melt the chocolate, dip the strawberries, and add your decorations. It’s a fun activity that brings out creativity, making it one of the best Valentine’s dessert ideas.
Whether you’re hosting a romantic dinner or preparing a surprise for a loved one, these Cupid’s arrow strawberries will surely impress. They embody the spirit of love and sweetness. So, why not add them to your Valentine’s baking ideas this year?
Ingredients:
- 1 pound fresh strawberries, rinsed and dried
- 8 oz semi-sweet chocolate chips or melting chocolate
- 4 oz white chocolate chips (optional for drizzling)
- Heart-shaped sprinkles, edible glitter, or candy decorations
- Toothpicks or decorative skewers
Instructions:
- Prepare the Strawberries: Ensure the strawberries are fully dry after rinsing to help the chocolate stick.
- Melt the Chocolate:
- In a microwave-safe bowl, melt the semi-sweet chocolate in 30-second intervals, stirring after each round until smooth.
- If using white chocolate for drizzling, melt it in a separate bowl.
- Dip the Strawberries:
- Hold each strawberry by the stem or use a skewer. Dip into the melted semi-sweet chocolate, covering about two-thirds of the strawberry.
- Allow excess chocolate to drip off before placing the strawberry on a parchment-lined baking sheet.
- Decorate:
- While the chocolate is still wet, add heart-shaped sprinkles or edible glitter.
- For extra flair, use a fork or piping bag to drizzle the melted white chocolate over the coated strawberries.
- Set and Cool:
- Allow the strawberries to set at room temperature for about 30 minutes or refrigerate for 15 minutes until firm.
- Add Toppers:
- Insert heart-shaped toppers or decorative skewers for added charm.
Serving Tips:
- Presentation: Arrange the strawberries on a heart-shaped plate or a decorative tray for an extra romantic touch.
- Make Ahead: These treats can be made a few hours in advance. Store them in the refrigerator until ready to serve.
- Gift Idea: Pack them in a decorative box with tissue paper for a thoughtful homemade gift.
These Cupid’s Arrow Chocolate-Dipped Strawberries are sure to be a sweet hit. They’re perfect for sharing love and creating unforgettable Valentine’s memories!
Passion Fruit Love Cheesecake Bars
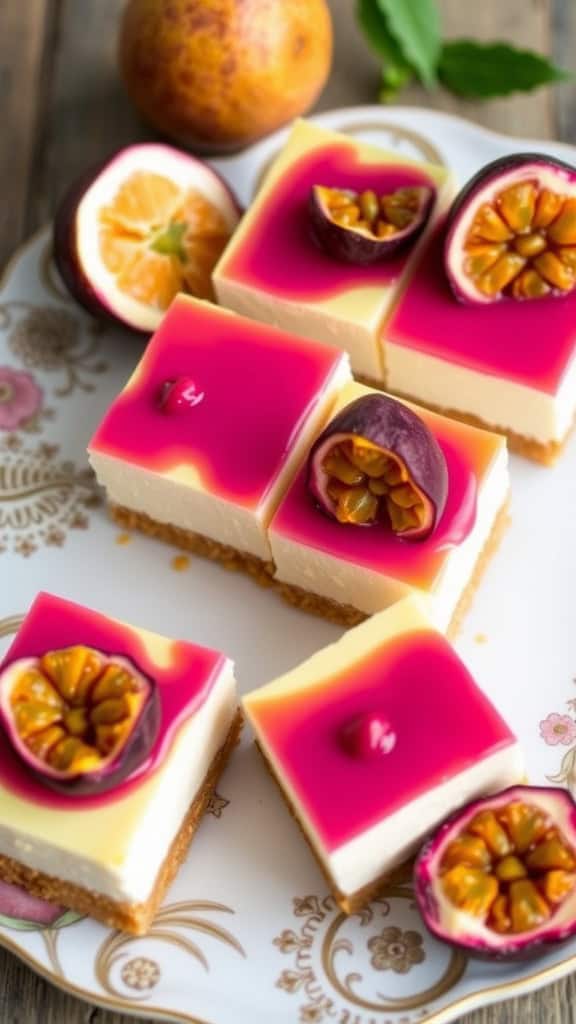
These Passion Fruit Love Cheesecake Bars are a stunning treat that will light up any Valentine’s Day dessert table. The combination of creamy cheesecake with a vibrant passion fruit topping makes them visually irresistible.
Each bar features a smooth, rich cheesecake layer resting on a buttery graham cracker crust. Topped with a glossy, pink passion fruit jelly, they are as delightful to eat as they are to look at.
For those looking to impress, these bars fit perfectly in any romantic dessert bar setup. They add a splash of color and a unique flavor that stands out among traditional sweets. Perfect for a Valentine’s Day sweet treats spread!
Making these bars is straightforward. You’ll need cream cheese, sugar, vanilla, eggs, and, of course, fresh passion fruit for that zesty punch. Just prepare your crust, mix the filling, and let it chill before adding the vibrant topping. Serve them up for an impressive finish to a romantic dinner.
So, if you’re planning a sweet celebration, consider these bars as part of your Valentine’s Baking Ideas. They’ll surely be a highlight on any Love-Themed Dessert Display!
Ingredients:
For the Crust:
- 1 1/2 cups graham cracker crumbs
- 1/4 cup granulated sugar
- 1/2 cup unsalted butter, melted
For the Cheesecake Layer:
- 16 oz (2 packages) cream cheese, softened
- 3/4 cup granulated sugar
- 2 large eggs
- 1 tsp vanilla extract
- 1 tbsp all-purpose flour
- 2 tbsp sour cream (optional, for extra creaminess)
For the Passion Fruit Topping:
- 1 cup passion fruit pulp (fresh or canned)
- 1/2 cup water
- 1/2 cup granulated sugar
- 2 tbsp cornstarch (dissolved in 2 tbsp water)
- A few drops of pink food coloring (optional for extra vibrancy)
Instructions:
- Preheat the Oven: Preheat your oven to 350°F (175°C). Line a 9×9-inch baking pan with parchment paper, leaving an overhang for easy removal.
- Make the Crust: In a medium bowl, combine graham cracker crumbs, sugar, and melted butter. Mix until fully moistened. Press the mixture firmly into the prepared baking pan, creating an even layer. Bake for 8-10 minutes, then set aside to cool.
- Prepare the Cheesecake Layer: In a large bowl, beat the cream cheese and sugar until smooth and creamy. Add the eggs one at a time, mixing well after each addition. Stir in vanilla extract, flour, and sour cream (if using). Pour the mixture over the cooled crust, spreading evenly.
- Bake the Cheesecake Layer: Bake for 30-35 minutes or until the edges are set but the center is slightly jiggly. Remove from the oven and allow to cool at room temperature, then chill in the refrigerator for at least 2 hours.
- Make the Passion Fruit Topping: In a saucepan, combine passion fruit pulp, water, and sugar. Bring to a simmer over medium heat, stirring occasionally. Add the dissolved cornstarch mixture and continue cooking until thickened and glossy. Stir in pink food coloring if desired. Allow to cool slightly.
- Assemble the Bars: Pour the cooled passion fruit topping over the chilled cheesecake layer, spreading evenly. Return to the refrigerator for at least 1 hour to set completely.
- Serve and Enjoy: Once fully set, lift the cheesecake out of the pan using the parchment overhang. Slice into bars and serve chilled.
Serving Tips:
- Presentation: Serve on a decorative platter with a sprinkle of edible flowers or a dusting of powdered sugar.
- Make Ahead: These bars can be made a day in advance, making them perfect for special occasions.
- Storage: Keep refrigerated in an airtight container for up to 3 days.
These Passion Fruit Love Cheesecake Bars are a show-stopping treat that’s as delicious as they are beautiful. Enjoy making and sharing them with someone special!
Raspberry Rose Meringue Kisses
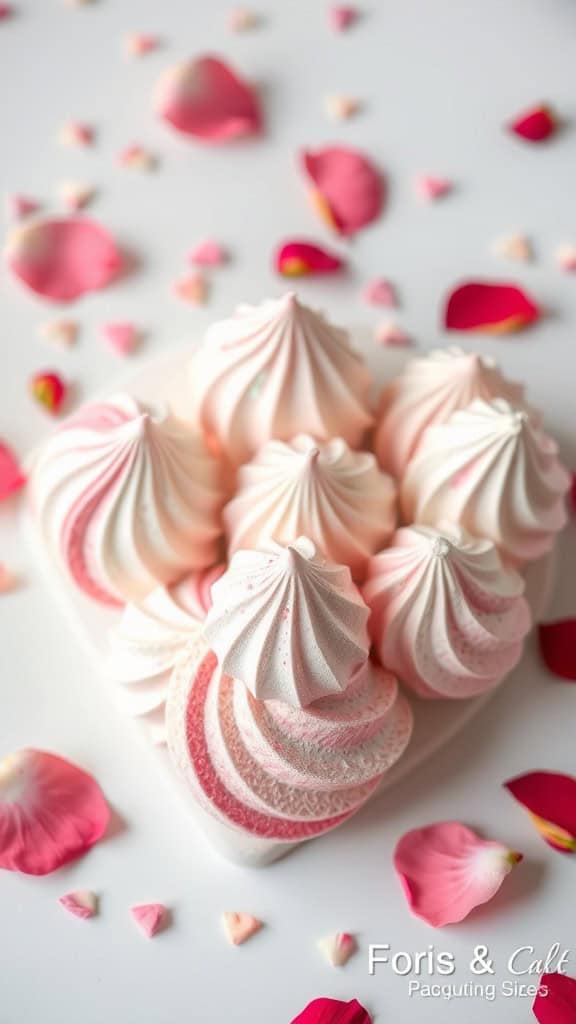
These Raspberry Rose Meringue Kisses are a perfect addition to your Valentine’s Day dessert table ideas. With their soft pink and white swirls, they not only look stunning but also taste delightful. The delicate flavors of raspberry and rose come together, creating a sweet treat that’s hard to resist.
Imagine these charming meringues sitting pretty on your Valentine’s Day dessert table setup. Their light, airy texture makes them a lovely addition to any romantic dessert bar. They are great for sharing or simply enjoying alone with a cup of tea.
For those looking to impress, these meringue kisses are an ideal choice. They add that special touch to Valentine’s Day sweet recipes, making your dessert spread truly memorable. Plus, they can be a fun activity for you and your loved ones, turning baking into a love-themed dessert experience.
To make these treats, you’ll need simple ingredients like egg whites, sugar, and raspberry puree. Whipping them to the right consistency is key. Once piped, they are baked low and slow until perfectly crisp. Try adding some edible rose petals for an extra romantic touch!
Ingredients:
- 3 large egg whites (room temperature)
- 3/4 cup granulated sugar
- 1/4 tsp cream of tartar
- 1 tsp vanilla extract
- 1 tbsp raspberry puree (strained to remove seeds)
- A few drops of rose water (optional, adjust to taste)
- Pink gel food coloring (optional)
- Edible rose petals (optional, for decoration)
Instructions:
- Preheat the Oven: Preheat your oven to 200°F (95°C). Line two baking sheets with parchment paper.
- Make the Meringue: In a clean mixing bowl, beat the egg whites and cream of tartar on medium speed until soft peaks form.
- Add Sugar Gradually: Increase the mixer speed to high and add the sugar one tablespoon at a time. Beat until the mixture is thick, glossy, and stiff peaks form.
- Flavor and Color: Gently fold in the vanilla extract, raspberry puree, and rose water (if using). Avoid over-mixing.
- Add Swirls: If using food coloring, streak the inside of a piping bag with pink gel coloring before filling it with the meringue mixture.
- Pipe the Kisses: Use a star or round tip to pipe small meringue kisses onto the prepared baking sheets, leaving about 1 inch of space between each.
- Bake: Bake for 1 1/2 to 2 hours or until the meringues are dry to the touch and easily lift off the parchment paper.
- Cool: Turn off the oven and let the meringues cool completely inside with the door slightly ajar.
- Serve and Decorate: Arrange the meringue kisses on a serving platter. For an extra romantic touch, sprinkle with edible rose petals.
Tips:
- Avoid Humidity: Meringues can be sensitive to moisture, so make them on a dry day if possible.
- Storage: Store in an airtight container at room temperature for up to a week.
- Gift Idea: Package these in decorative boxes for thoughtful Valentine’s Day gifts.
These Raspberry Rose Meringue Kisses are a delightful blend of beauty and flavor. With their light, crisp texture and subtle floral notes, they’re sure to make any occasion extra special!
Sweetheart S’mores Dip Delight
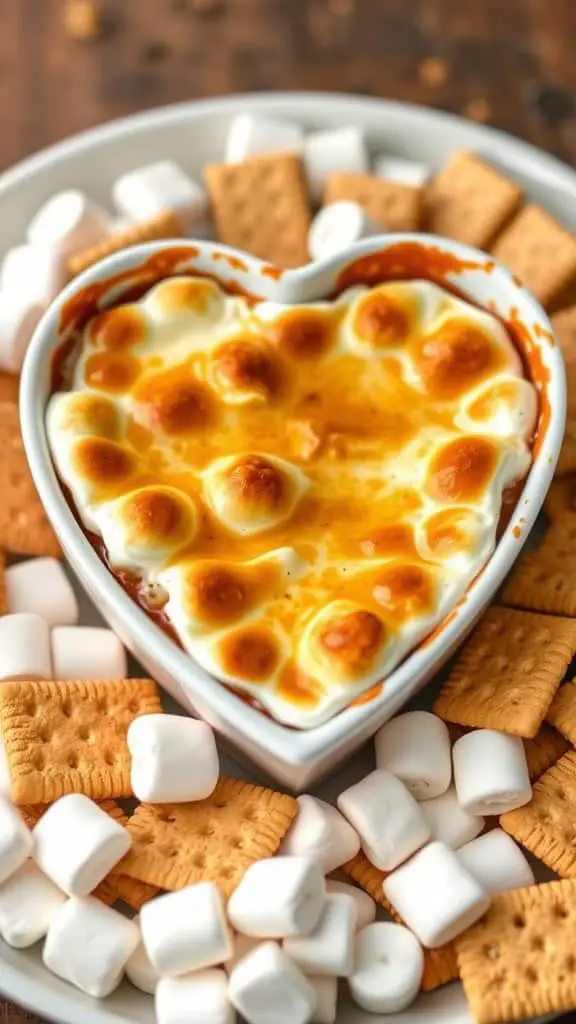
This Sweetheart S’mores Dip is a fun twist on a classic dessert. Served in a charming heart-shaped dish, it’s perfect for a cozy gathering or a romantic evening. The golden-brown marshmallows on top add a deliciously gooey texture that pairs beautifully with graham crackers and fluffy marshmallows surrounding the dip.
To whip up this delightful treat, you’ll need some simple ingredients. Gather chocolate chips, marshmallows, and cream cheese for a creamy base. Mix them together and bake until melty. Pair it with graham crackers for dipping, and voila! You have a dish that shines on any Valentine’s Day dessert table setup.
This dip fits right into a Valentine’s Day treat bar, bringing a sweet touch to your romantic dessert ideas. It’s an easy way to impress your loved one without spending hours in the kitchen. Plus, it’s a great addition to any Valentine’s Day dessert inspiration. Grab your favorite people, get a few spoons, and enjoy this memorable dessert!
Ingredients:
- 1 cup semi-sweet chocolate chips
- 1/2 cup milk chocolate chips (optional for extra sweetness)
- 1 cup mini marshmallows (plus extra for topping)
- 4 oz cream cheese, softened
- 1/4 cup heavy cream
- 1/4 cup powdered sugar
- 1 tsp vanilla extract
- Graham crackers, strawberries, or cookies for dipping
Instructions:
- Preheat the Oven: Set the oven to 375°F (190°C). Lightly grease a heart-shaped baking dish or a similar oven-safe dish.
- Make the Chocolate Layer: In a microwave-safe bowl, melt the semi-sweet and milk chocolate chips in 30-second intervals, stirring after each until smooth.
- Prepare the Creamy Base: In a mixing bowl, beat together softened cream cheese, heavy cream, powdered sugar, and vanilla extract until smooth and creamy.
- Assemble the Dip: Spread the melted chocolate evenly in the bottom of the prepared baking dish. Add dollops of the cream cheese mixture on top and gently swirl with a knife or skewer for a marbled effect.
- Add Marshmallows: Sprinkle mini marshmallows generously over the top, ensuring full coverage.
- Bake: Place the dish in the preheated oven and bake for 8-10 minutes or until the marshmallows are golden brown and gooey.
- Serve: Carefully remove from the oven and let cool slightly. Serve warm with graham crackers, strawberries, or cookies for dipping.
Serving Tips:
- Keep it Warm: Use a warming tray or low oven setting to keep the dip gooey during serving.
- Make it Extra Festive: Sprinkle red or pink sprinkles on top for added Valentine’s Day flair.
- Customize Dippers: Try pretzels, wafer cookies, or even fruit slices for fun dipping options.
This Sweetheart S’mores Dip is guaranteed to win hearts with its gooey, chocolatey layers and marshmallow goodness. It’s an irresistible treat perfect for sharing and savoring!
Berry Bliss Valentine’s Pavlova
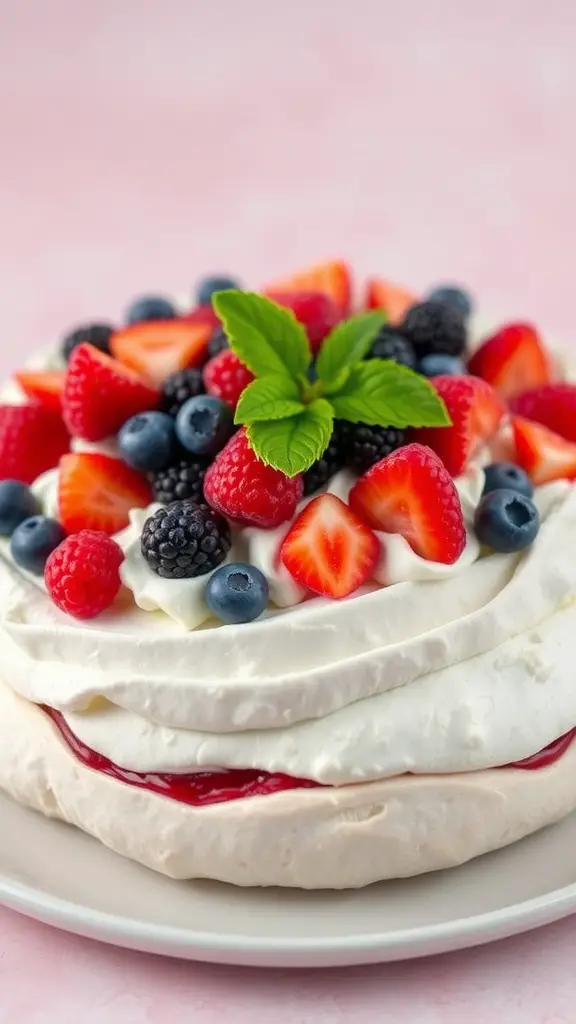
This Berry Bliss Pavlova is a showstopper for your Valentine’s Day dessert table. With its light, airy meringue base topped with fluffy whipped cream, it’s a sweet delight that screams romance.
The vibrant colors of fresh strawberries, blueberries, and raspberries create a stunning contrast against the white cream and meringue layers. This dessert not only looks beautiful but tastes heavenly. It’s soft, sweet, and perfectly balanced with the tartness of the berries.
For a delightful treat, consider making this for your Valentine’s Day sweet treats. It pairs wonderfully with other romantic dessert ideas and can be the centerpiece of a dessert bar setup. Fill your romantic dessert table with this pavlova, and watch your loved ones enjoy every bite!
Ingredients:
For the Meringue Base:
- 4 large egg whites (room temperature)
- 1 cup (200g) granulated sugar
- 1 tsp white vinegar
- 1 tsp vanilla extract
- 1 tbsp cornstarch (sifted)
For the Topping:
- 1 cup (240ml) heavy whipping cream
- 2 tbsp powdered sugar
- 1 tsp vanilla extract
For the Berry Topping:
- 1 cup fresh strawberries (hulled and sliced)
- 1 cup fresh blueberries
- 1 cup fresh raspberries
- Fresh mint leaves (optional, for garnish)
Instructions:
- Preheat Oven: Preheat your oven to 250°F (120°C). Line a baking sheet with parchment paper and draw a 9-inch circle on the paper as a guide.
- Make the Meringue: In a clean, dry mixing bowl, beat the egg whites on medium speed until soft peaks form. Gradually add sugar, 1 tablespoon at a time, beating well after each addition. Continue until stiff, glossy peaks form.
- Stabilize the Meringue: Gently fold in the white vinegar, vanilla extract, and cornstarch with a spatula.
- Shape the Meringue: Spoon the meringue onto the prepared baking sheet, spreading it into the circle guide. Create a slight dip in the center to hold the toppings later.
- Bake: Bake for 1 hour and 15 minutes. Turn off the oven, leaving the meringue inside with the door closed for another hour to cool completely.
- Prepare the Topping: In a chilled bowl, beat the heavy whipping cream, powdered sugar, and vanilla extract until soft peaks form.
- Assemble the Pavlova: Transfer the cooled meringue to a serving platter. Spread the whipped cream evenly over the meringue base.
- Add the Berries: Arrange the strawberries, blueberries, and raspberries on top of the whipped cream. Garnish with fresh mint leaves if desired.
Serving Tips:
- Serve Immediately: Serve the pavlova right after assembling to keep the meringue crisp.
- Make Ahead: You can bake the meringue up to a day in advance and store it in an airtight container.
- Customize: Swap berries for other seasonal fruits like peaches or cherries for a different twist.
This Berry Bliss Pavlova is a dreamy dessert that’s as delightful to eat as it is to look at. It’s the perfect Valentine’s Day treat that will wow your loved ones with its stunning presentation and irresistible flavors.
Lovers’ Chocolate-Covered Pretzel Rods
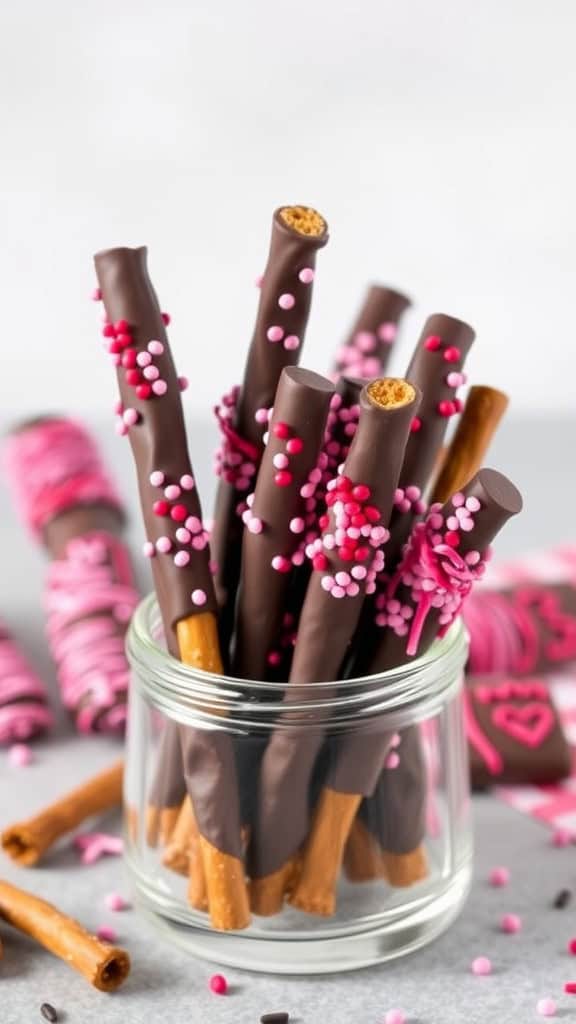
These chocolate-covered pretzel rods are the perfect blend of sweet and salty. Dipped in rich chocolate and decorated with vibrant pink and red sprinkles, they catch the eye and tempt the taste buds. Each bite offers a satisfying crunch, making them a delightful addition to any Valentine’s Day celebration.
Creating these treats is simple and fun. Just gather your favorite pretzel rods, melt some chocolate, and dip the pretzels until they’re coated. Then, sprinkle on the decorations while the chocolate is still warm. Let them set, and you have a stunning treat to share with your special someone.
These pretzel rods are a fantastic option for a Valentine’s Day treat bar. They serve as a playful addition to romantic dessert table ideas, bringing a touch of whimsy to the occasion. Perfect for sharing or enjoying solo, they embody the spirit of love-themed dessert displays.
Ingredients:
- 1 bag (12 oz) pretzel rods
- 1 cup semi-sweet or milk chocolate chips
- 1 cup white chocolate chips (optional for contrast)
- 2 tbsp coconut oil or shortening (for smooth melting)
- Assorted sprinkles: pink, red, heart-shaped, or any festive mix
- Wax paper or parchment paper
Instructions:
- Prepare the Workspace: Line a baking sheet with wax or parchment paper to prevent sticking.
- Melt the Chocolate: In a microwave-safe bowl, combine the chocolate chips and coconut oil. Microwave in 30-second intervals, stirring between each, until smooth and fully melted.
- Dip the Pretzels: Hold each pretzel rod by one end and dip it into the melted chocolate, covering about two-thirds of the rod. Let excess chocolate drip off gently.
- Decorate: While the chocolate is still wet, sprinkle your chosen decorations evenly over the coated portion.
- Set the Pretzels: Place the decorated pretzel rods on the prepared baking sheet. Allow them to set at room temperature or chill in the refrigerator for about 20 minutes until firm.
- Serve or Package: Once the pretzels are fully set, arrange them in a decorative jar or wrap them individually in treat bags for gifting.
Serving Tips:
- Gift Idea: Tie with ribbons or include personalized tags for a thoughtful Valentine’s gift.
- Flavor Twist: Try using dark chocolate or caramel drizzle for added variety.
- Party Display: Arrange on a tiered dessert stand for an eye-catching centerpiece.
These chocolate-covered pretzel rods are a delightful blend of crunch, sweetness, and festive flair. They make Valentine’s Day extra special with every satisfying bite!
Velvet Love Mini Bundt Cakes
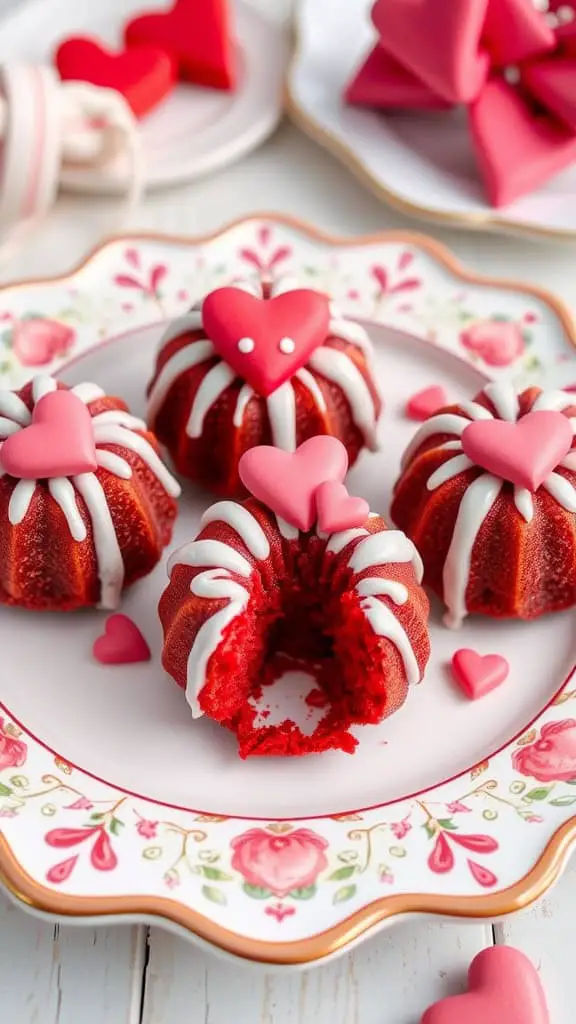
These adorable Velvet Love Mini Bundt Cakes are perfect for adding a touch of sweetness to any celebration. Their rich red color instantly brings to mind love and romance, making them an ideal choice for your Valentine’s Day dessert table.
Topped with white icing and heart-shaped candies, these mini cakes not only taste great but also look stunning. They can easily be the centerpiece of any love-themed dessert display. Whether you’re planning a romantic dinner or a fun gathering with friends, these cakes are sure to impress.
Making these delightful treats is simple. You’ll need red velvet cake mix, eggs, oil, and buttermilk for the cake base. Once baked, drizzle with icing and decorate with cute heart candies. These mini bundt cakes are a fantastic addition to your Valentine’s baking ideas.
So go ahead and whip up a batch for your next celebration. They’re sure to be a hit and leave everyone with sweet memories!
Ingredients:
- 1 box red velvet cake mix (approximately 15.25 oz)
- 3 large eggs
- 1/2 cup vegetable oil
- 1 cup buttermilk
- Non-stick cooking spray
For the Icing and Decoration:
- 1 cup powdered sugar
- 2-3 tablespoons milk or cream (adjust for desired consistency)
- 1/2 teaspoon vanilla extract (optional)
- Heart-shaped candies, sprinkles, or edible glitter for decoration
Instructions:
- Preheat the Oven: Set your oven to 350°F (175°C). Grease a mini bundt cake pan with non-stick cooking spray.
- Prepare the Batter: In a large mixing bowl, combine the red velvet cake mix, eggs, vegetable oil, and buttermilk. Beat with a hand mixer on low speed for 30 seconds, then on medium speed for 2 minutes until smooth.
- Fill the Pans: Spoon the batter into the prepared mini bundt cake pans, filling each about 2/3 full to allow room for rising.
- Bake: Place the pan in the preheated oven and bake for 18-22 minutes or until a toothpick inserted into the center of a cake comes out clean.
- Cool the Cakes: Allow the cakes to cool in the pan for about 10 minutes, then gently remove them and transfer to a wire rack to cool completely.
- Make the Icing: In a small bowl, whisk together powdered sugar, milk or cream, and vanilla extract (if using) until smooth. Adjust the consistency by adding more milk or powdered sugar as needed.
- Decorate: Drizzle the icing over the cooled cakes. While the icing is still wet, decorate with heart-shaped candies, sprinkles, or edible glitter.
- Serve and Enjoy: Arrange the decorated mini bundt cakes on a serving platter. They’re ready to share and enjoy!
Tips for Success:
- Use Buttermilk Substitute: If you don’t have buttermilk, make a quick substitute by mixing 1 tablespoon of lemon juice or white vinegar with 1 cup of milk. Let it sit for 5 minutes before using.
- Storage: Store leftovers in an airtight container at room temperature for up to 2 days or refrigerate for up to a week.
These Velvet Love Mini Bundt Cakes are a delightful way to show your love. Their moist, rich flavor and beautiful presentation make them a perfect treat for special occasions or simply sharing sweet moments with loved ones!
Hearts of Joy Berry Tartlets
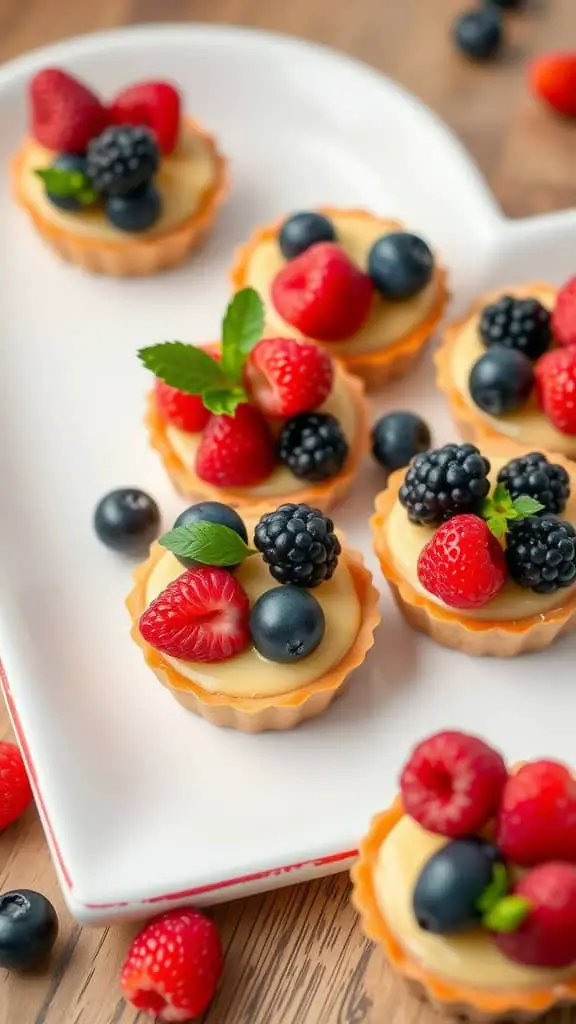
These delightful Hearts of Joy Berry Tartlets are a feast for the eyes and the taste buds! Each tartlet is a mini masterpiece, featuring a buttery crust filled with creamy goodness and topped with fresh berries. The vibrant colors of the strawberries, blueberries, and blackberries pop against the creamy backdrop, creating a joyful presentation perfect for any occasion.
Whether you’re planning a Valentine’s Day dessert table setup or just craving some sweet treats, these tartlets fit right in. They are not only tasty but also add charm to your dessert display. Imagine serving these at a Valentine’s dessert bar, where guests can indulge in love-themed dessert recipes!
Making these tartlets is simple. Start with a classic tart shell, fill it with a rich custard, and top it with a mix of berries. A touch of mint adds a fresh twist. These treats are a wonderful way to celebrate love, making them ideal for romantic desserts or any gathering.
For anyone looking for sweetheart baking inspiration, this recipe is a must-try. They are perfect for sharing and are sure to impress. With their charming appearance and delicious flavor, these tartlets are among the best Valentine’s Day sweet recipes around!
Ingredients:
For the Tart Shells:
- 1 1/4 cups all-purpose flour
- 1/2 cup unsalted butter, chilled and cubed
- 1/4 cup powdered sugar
- 1/4 tsp salt
- 1 large egg yolk
- 2 tbsp ice water (as needed)
For the Custard Filling:
- 1 cup whole milk
- 1/2 cup heavy cream
- 1/3 cup granulated sugar
- 3 large egg yolks
- 2 tbsp cornstarch
- 1 tsp vanilla extract
- Pinch of salt
For the Topping:
- Fresh raspberries
- Fresh blueberries
- Fresh blackberries
- Fresh mint leaves (optional)
Instructions:
- Make the Tart Shells:
- In a food processor, combine flour, powdered sugar, and salt.
- Add cubed butter and pulse until the mixture resembles coarse crumbs.
- Add egg yolk and pulse again. Slowly add ice water, one tablespoon at a time, until the dough comes together.
- Shape into a disk, wrap in plastic, and chill for at least 30 minutes.
- Preheat oven to 350°F (175°C). Roll out the dough on a floured surface and cut into rounds to fit your tartlet molds.
- Press dough into molds, trim excess, and prick bottoms with a fork.
- Bake for 15-18 minutes until golden brown. Cool completely.
- Prepare the Custard Filling:
- In a medium saucepan, heat milk and cream over medium heat until steaming but not boiling.
- In a bowl, whisk egg yolks, sugar, cornstarch, vanilla extract, and salt until smooth.
- Slowly add hot milk mixture into egg mixture while whisking constantly.
- Return mixture to the saucepan and cook over medium heat, stirring constantly, until thickened.
- Remove from heat, cover with plastic wrap directly on the custard surface, and let cool.
- Assemble the Tartlets:
- Spoon cooled custard into tart shells, smoothing the top.
- Arrange berries on top, creating a colorful design.
- Garnish with fresh mint leaves if desired.
Serving Tips:
- Chill Before Serving: Let the assembled tartlets chill for at least 1 hour for the best flavor.
- Presentation Idea: Serve on a heart-shaped platter for added charm.
- Make Ahead: Both the tart shells and custard can be prepared a day in advance.
These Hearts of Joy Berry Tartlets are guaranteed to bring smiles and sweet satisfaction to your gathering. Enjoy sharing these lovely treats with family and friends!


