Ready to shake up your cottage cheese routine? With these 25 toppings and mix-ins, you can take this simple, nutritious staple and turn it into a taste sensation. From sweet to savory, there’s something here for every palate, so grab a spoon and let’s make cottage cheese your new go-to snack!
Affiliate Disclosure: "As an Amazon Associate I earn from qualifying purchases made from the images and links in this post. We are a participant in the Amazon Services LLC Associates Program, an affiliate advertising program designed to provide a means for us to earn fees by linking to Amazon.com and other affiliated sites."
Nut Butter Bliss – Swirl in almond butter, peanut butter, or cashew butter for a creamy, protein-packed treat.
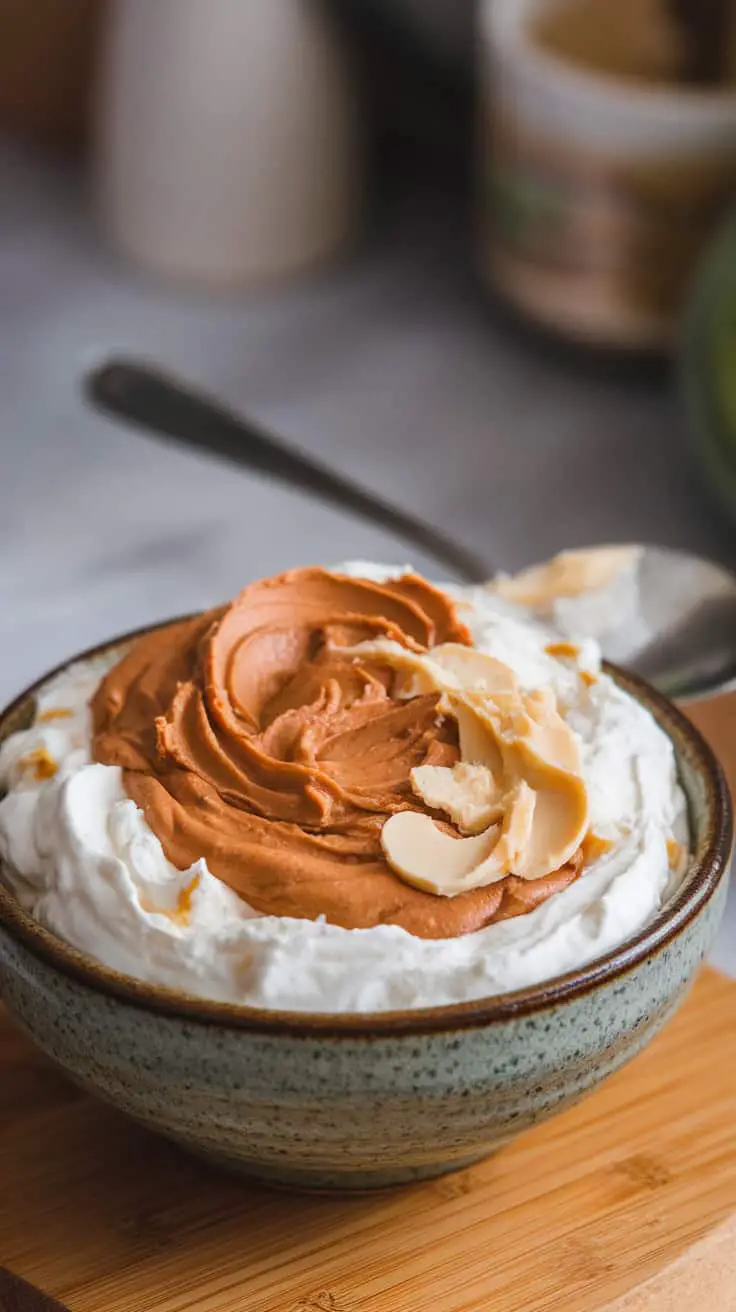
This image showcases a delightful bowl filled with a creamy blend of nut butters, inviting you to enjoy a rich and nutritious snack. The smooth texture of the almond and peanut butter swirls beautifully with fluffy whipped cream, creating an enticing visual. You can see slices of almonds scattered on top, adding a touch of crunch to each bite.
Nut butters are a fantastic way to pack in protein and healthy fats. You can easily switch between almond, peanut, or even cashew butter to suit your mood. Each option offers unique flavors and health benefits. Mixing them into yogurt or oatmeal not only enhances the taste but also boosts the nutritional value.
To make this creamy treat, simply combine your choice of nut butter with yogurt or whipped cream. Swirl it together for a stunning presentation. Top with nuts or seeds for added texture. It’s quick, simple, and perfect for a snack or dessert.
Ingredients You’ll Need
Here’s what makes this nut butter bliss so irresistibly creamy and satisfying while keeping it under 250 calories:
- Nut Butter: 2 tablespoons of almond, peanut, or cashew butter for rich, creamy texture and protein.
- Greek Yogurt or Whipped Cottage Cheese: 1/2 cup non-fat Greek yogurt or whipped cottage cheese for a velvety base.
- Sweetener: 1 teaspoon of honey, maple syrup, or a pinch of stevia for a hint of sweetness (optional).
- Vanilla Extract: 1/2 teaspoon for a warm, cozy flavor boost.
- Almond Slices or Chopped Nuts: 1 tablespoon for crunch and added nutrients.
- Cinnamon or Cocoa Powder: A sprinkle for extra depth and warmth.
How to Make It
- Blend the Base: In a bowl, mix Greek yogurt (or cottage cheese) with vanilla extract and sweetener. Stir until smooth and creamy.
- Swirl the Nut Butter: Warm the nut butter slightly if needed for easier swirling. Drop spoonfuls into the yogurt mixture and gently swirl with a knife or spoon for that beautiful marbled effect.
- Top It Off: Sprinkle with almond slices, chopped nuts, and a dash of cinnamon or cocoa powder for extra flavor and crunch.
- Serve & Enjoy: Dive in with a spoon, savoring every creamy, nutty bite!
Why You’ll Love It
- Protein-Packed: Nut butter + Greek yogurt = a powerful protein duo.
- Quick & Easy: Ready in minutes for a fast snack or dessert.
- Customizable: Switch up the nut butters and toppings to keep it exciting.
Serving Ideas
- Breakfast Bowl: Pair with berries, granola, or a sliced banana.
- Energy Snack: Enjoy as is for a quick protein boost.
- Decadent Dessert: Top with dark chocolate chips for a sweet indulgence.
Get ready for a spoonful of creamy, nutty bliss that tastes like a treat but fuels your body like a pro!
Honey Drizzle – A touch of honey can elevate cottage cheese to dessert status.

Cottage cheese often gets a bad rap. People see it as a bland option, but with a simple addition, it can transform into something delightful. The main player here is honey, drizzled generously over creamy cottage cheese.
The image shows a bowl of fluffy cottage cheese, topped with a beautiful swirl of golden honey. The honey not only adds sweetness but also gives the dish a lovely visual appeal. You can see crunchy bits sprinkled on top, possibly nuts, which add texture and flavor.
This dish is perfect for breakfast or a light dessert. Just grab a spoon and enjoy the creamy texture combined with the sweetness of honey. You can even mix in some fruits for a refreshing twist.
Ingredients You’ll Need
Here’s how to turn plain cottage cheese into a mouthwatering treat with just a few simple additions:
- Cottage Cheese: 1 cup of low-fat or full-fat cottage cheese for a creamy base.
- Honey: 2 tablespoons of your favorite honey for natural sweetness.
- Nuts: 2 tablespoons of chopped walnuts, almonds, or pecans for added crunch.
- Fresh Fruit (Optional): Sliced bananas, berries, or diced apples for a fruity twist.
- Cinnamon (Optional): A pinch of ground cinnamon for warmth and extra flavor.
How to Make It
- Start with Cottage Cheese: Scoop the cottage cheese into a bowl, spreading it evenly.
- Drizzle the Honey: Slowly drizzle the honey over the top, creating a glossy, sweet finish.
- Add Crunch & Texture: Sprinkle the chopped nuts generously for that perfect bite.
- Customize with Fruit: Top with fresh fruit if you like a sweet and refreshing balance.
- Final Touch: A light sprinkle of cinnamon can add depth and warmth to the dish.
Why You’ll Love It
- Naturally Sweet: No refined sugar, just the goodness of honey.
- Protein-Rich: Cottage cheese keeps you full and energized.
- Quick & Easy: Ready in minutes with no cooking required.
Serving Ideas
- Breakfast Boost: Pair it with whole-grain toast or a warm croissant.
- Dessert Delight: Enjoy it as a light, satisfying after-dinner treat.
- Snack Anytime: Keep it simple or take it on the go in a small container.
This honey-drizzled cottage cheese dish is a perfect blend of creamy, sweet, and crunchy. It’s a delicious way to elevate cottage cheese from ordinary to extraordinary!
Granola Crunch – Sprinkle with your favorite granola for a satisfying breakfast option.
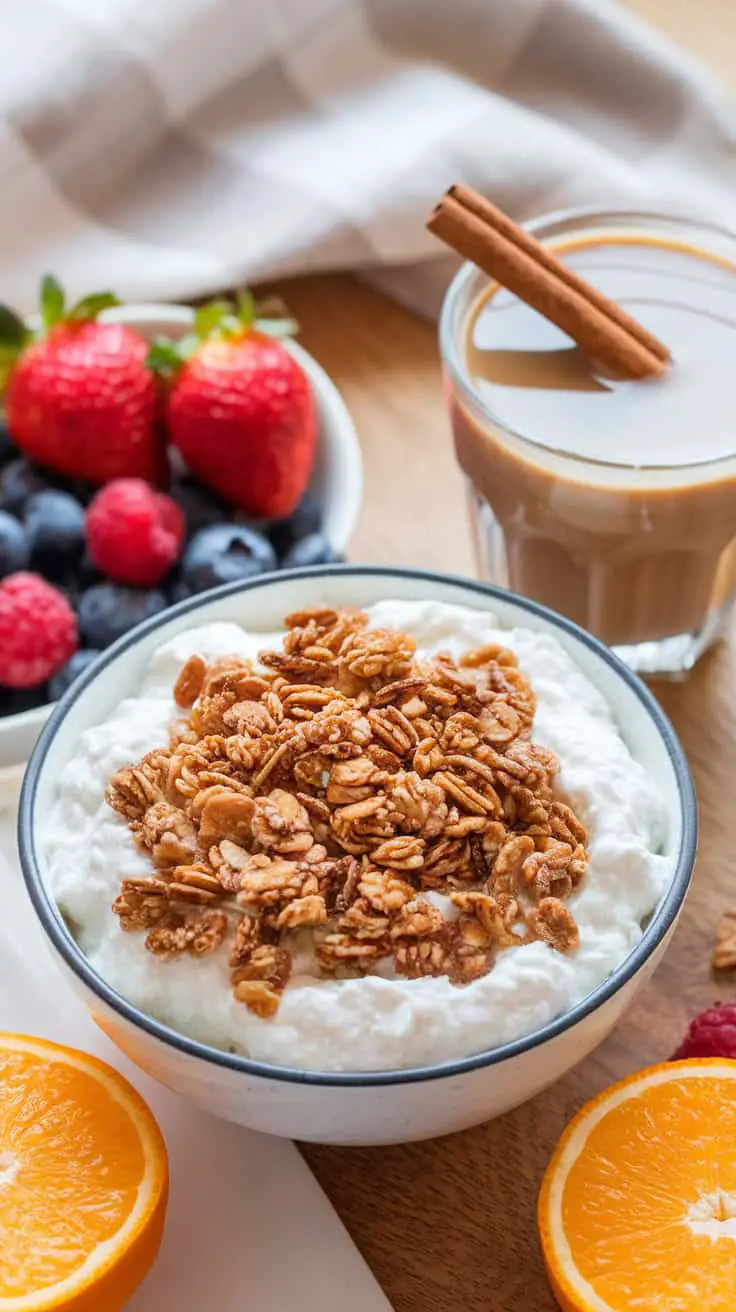
Granola adds a delightful crunch to your breakfast. In the image, creamy yogurt sits in a bowl, topped generously with golden-brown granola. The combination is visually appealing and promises a tasty start to your day.
Fresh fruits are on the side, including vibrant strawberries and blueberries. These not only add flavor but also boost your vitamin intake. A citrus slice of orange adds a refreshing touch to the plate.
On the table, there’s a warm cup of coffee, perfect for pairing with this breakfast. The cinnamon sticks sticking out hint at a cozy, comforting drink. This setup is ideal for a leisurely morning or a quick breakfast before heading out.
Ingredients You’ll Need
Here’s how to create a satisfying, crunchy granola breakfast while keeping it under 250 calories:
- Yogurt: 1 cup non-fat Greek yogurt for creaminess and protein.
- Granola: 1/4 cup low-sugar granola for that perfect crunch.
- Fresh Berries: 1/2 cup mixed strawberries, blueberries, or raspberries for sweetness and vitamins.
- Orange Slices: A few slices for a refreshing citrus boost.
- Cinnamon Sticks (Optional): For garnish or stirring into your coffee for added warmth.
How to Assemble
- Prepare the Bowl: Scoop Greek yogurt into your favorite breakfast bowl, spreading it evenly for a neat presentation.
- Add the Crunch: Sprinkle granola generously over the yogurt. It adds texture and flavor while staying light.
- Layer the Freshness: Scatter mixed berries on top for a burst of sweetness and essential nutrients.
- Citrus Twist: Add a couple of orange slices on the side for extra freshness and color.
- Coffee Pairing: Brew a warm cup of coffee and drop in a cinnamon stick for a hint of spice if you like.
Why You’ll Love It
- Quick & Easy: Perfect for busy mornings or a leisurely brunch.
- Nutritious & Balanced: Protein, fiber, vitamins, and healthy carbs in every bite.
- Customizable: Swap fruits or granola flavors to keep it interesting.
Serving Ideas
- Morning Energy Boost: Pair with a boiled egg or a slice of whole-grain toast.
- Snack Time Treat: Enjoy as an afternoon pick-me-up.
- Dessert Alternative: Drizzle with a touch of honey or a sprinkle of dark chocolate chips for a guilt-free treat.
Enjoy the creamy, crunchy, and fruity goodness that makes every spoonful a delightful experience!
Avocado Delight – Mash or slice avocado and mix it in for a rich and creamy twist.

This delightful image showcases a bowl of creamy goodness topped with beautifully sliced avocado. The contrast of the smooth, white base and the vibrant green slices makes it visually appealing and inviting. You can almost taste the richness just by looking at it!
The combination of ingredients here is simple yet effective. Starting with a base of creamy goodness, mixing in mashed or sliced avocado adds a rich texture and flavor. A drizzle of honey or olive oil on top not only enhances the taste but offers a lovely sheen that makes this dish pop.
Using ripe avocados is key. Their creamy texture blends perfectly, making every bite satisfying. Whether you’re enjoying this for breakfast, a snack, or dessert, it’s bound to be a hit. This dish is not just tasty but also packed with nutrients, making it a great choice for a healthy lifestyle.
Ingredients You’ll Need
This creamy avocado delight comes together with just a handful of fresh ingredients:
- Avocado: 1 ripe avocado, mashed or sliced, for that creamy, buttery texture.
- Greek Yogurt: 1/2 cup non-fat Greek yogurt for a protein-rich base.
- Lemon Juice: 1 tablespoon freshly squeezed to brighten the flavor and keep the avocado from browning.
- Honey: 1 teaspoon for a hint of natural sweetness.
- Salt and Pepper: A pinch of each to enhance the taste.
- Olive Oil (optional): A light drizzle for extra richness.
How to Make It
- Prep the Avocado: Cut the avocado in half, remove the pit, and scoop out the flesh. Mash it lightly for a chunkier texture or slice it thinly for a decorative touch.
- Mix the Base: In a bowl, combine Greek yogurt, lemon juice, honey, salt, and pepper. Stir until smooth and well blended.
- Assemble the Dish: Spread the creamy yogurt mixture in a bowl or plate. Top with the mashed or sliced avocado.
- Add the Finishing Touches: Drizzle with a bit of olive oil or extra honey for added richness. Sprinkle with more salt and pepper if desired.
Why You’ll Love It
- Creamy & Satisfying: The perfect balance of smooth, tangy, and sweet.
- Nutrient-Rich: Packed with healthy fats, protein, and vitamins.
- Quick & Easy: Ready in minutes with minimal effort.
Serving Ideas
- Breakfast Boost: Enjoy with whole-grain toast or a sprinkle of granola.
- Midday Snack: Pair with veggie sticks or whole-grain crackers.
- Simple Dessert: Add a sprinkle of nuts or dark chocolate chips for a sweet finish.
Dive into this creamy avocado delight and experience a perfect blend of flavors and textures. It’s healthy, delicious, and irresistibly good!
Savory Veggie Medley – Add diced cucumbers, tomatoes, and bell peppers for a refreshing crunch.
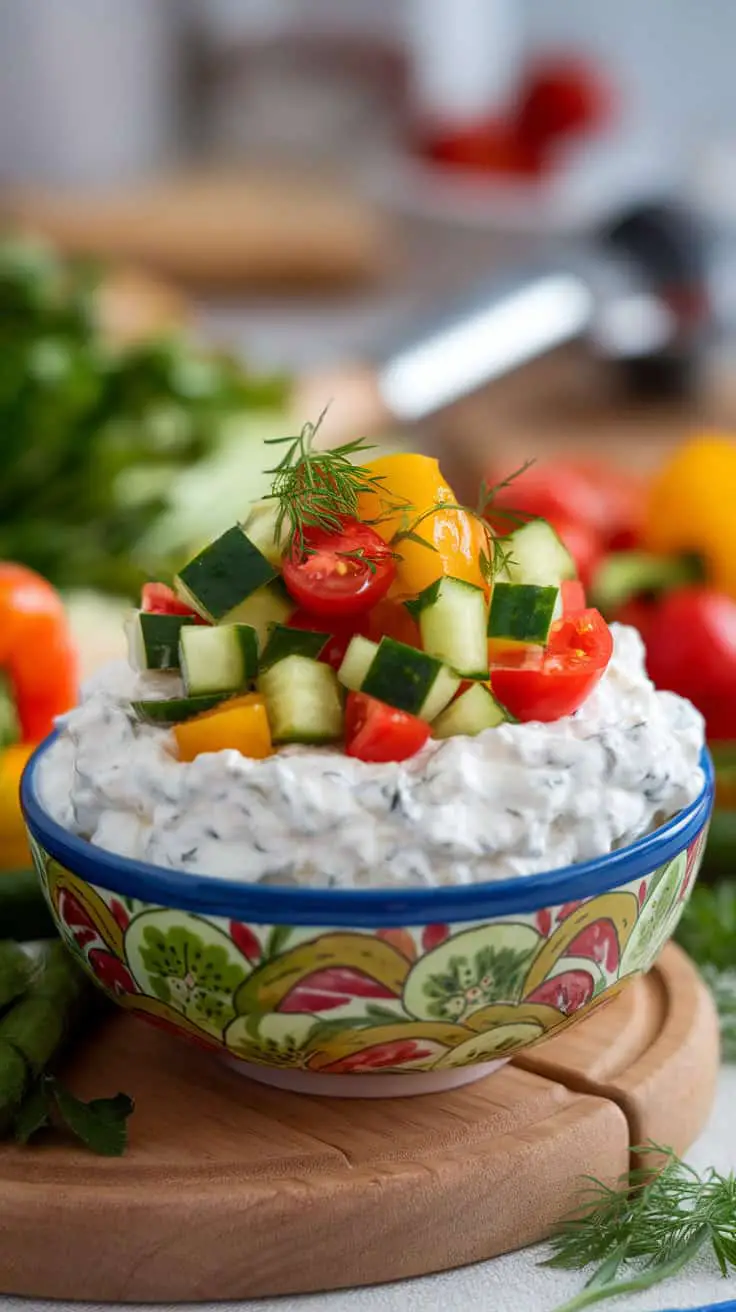
This image showcases a vibrant bowl filled with a creamy dip topped with fresh diced cucumbers, tomatoes, and bell peppers. The colorful vegetables add a delightful crunch and a fresh taste to the dish.
The dip, likely made with yogurt or a similar base, offers a rich and creamy texture that complements the crisp veggies perfectly. The bright red of the cherry tomatoes and the sunny yellow of the bell peppers stand out, making the bowl inviting and appetizing.
Using diced cucumbers adds a refreshing element that balances the creaminess of the dip. It’s a great way to enjoy a burst of flavor with every bite, making it perfect for gatherings or as a quick snack. The dill on top not only looks beautiful but also enhances the overall flavor.
Ingredients You’ll Need
Here’s what makes this savory veggie medley both tasty and refreshing:
- Cucumbers: 1 cup diced cucumbers for a cool, crisp bite.
- Cherry Tomatoes: 1 cup diced, adding juicy sweetness and vibrant color.
- Bell Peppers: 1 cup diced yellow and red bell peppers for a crunchy, sweet contrast.
- Greek Yogurt: 1 cup non-fat Greek yogurt for a creamy, protein-packed base.
- Garlic Powder: 1/2 teaspoon for a subtle savory depth.
- Dill (Fresh or Dried): 1 tablespoon chopped for fresh, herby notes.
- Salt & Pepper: To taste, for balanced seasoning.
How to Make It
- Prepare the Veggies: Dice cucumbers, cherry tomatoes, and bell peppers into small, even pieces for the best texture.
- Mix the Dip Base: In a bowl, combine Greek yogurt, garlic powder, dill, salt, and pepper. Stir well until smooth and creamy.
- Assemble the Dish: Spread the yogurt dip evenly in a shallow serving bowl. Top with the diced veggies, spreading them evenly for a colorful presentation.
- Garnish & Serve: Sprinkle extra dill or a pinch of smoked paprika on top for added flair. Serve immediately or chill for extra freshness.
Why You’ll Love It
- Refreshing & Light: The crisp veggies paired with creamy yogurt create a satisfying, guilt-free snack.
- Under 250 Calories: A generous serving fits perfectly into a healthy eating plan.
- Quick & Easy: Simple ingredients, minimal prep, and ready in minutes.
Serving Ideas
- Dip Delight: Serve with whole-grain crackers, pita chips, or veggie sticks.
- Salad Alternative: Enjoy it as a fresh, low-carb side dish.
- Wrap Filler: Spoon into whole-wheat wraps for a light and flavorful meal.
Enjoy the perfect balance of creamy, crunchy, and refreshing flavors that will keep you coming back for more!
Fresh Fruits Galore – Top cottage cheese with berries, sliced bananas, or juicy peaches for a natural sweetness.
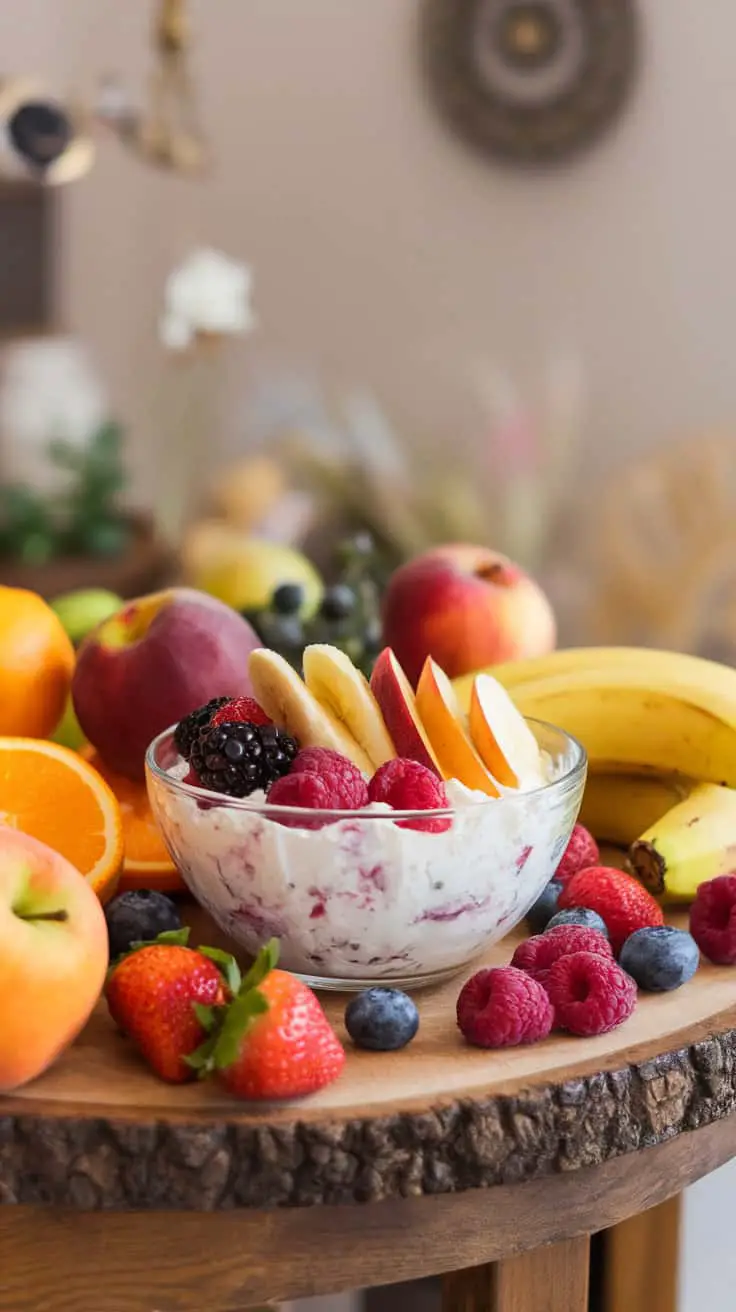
Picture a delightful bowl of cottage cheese crowned with a rainbow of fruits. This simple dish is not just about taste; it’s a feast for the eyes too! Fresh strawberries, vibrant blueberries, and luscious raspberries sit atop the creamy base, adding bursts of color and flavor.
Bananas and peaches bring their own unique sweetness to the mix. Sliced bananas are a classic choice, softening the tang of the cottage cheese. Juicy peaches add a refreshing touch, making each bite a little bit of summer.
Surrounding this tasty bowl are more fruits, showcasing nature’s bounty. Apples, oranges, and more berries add variety and appeal to the scene. This composition not only highlights how versatile cottage cheese can be, but also how easy it is to create a nutritious snack or breakfast.
This dish is perfect for a quick pick-me-up, packed with protein and vitamins. So, grab your favorite fruits and get ready to enjoy a delicious treat!
Ingredients You’ll Need
Create a colorful and satisfying cottage cheese fruit bowl with these fresh ingredients:
- Cottage Cheese: 1 cup low-fat or fat-free cottage cheese for a creamy, protein-rich base.
- Strawberries: 1/2 cup, hulled and sliced for a sweet, juicy bite.
- Blueberries: 1/2 cup for a pop of flavor and antioxidants.
- Raspberries: 1/2 cup for a tart-sweet contrast.
- Banana: 1 medium, sliced for creamy sweetness.
- Peach: 1 small, sliced or diced for a burst of summer freshness.
Optional Add-Ins:
- Honey or Maple Syrup: A drizzle for extra sweetness, if desired.
- Nuts or Seeds: A sprinkle of almonds, walnuts, or chia seeds for added crunch and nutrition.
- Granola: A handful for extra texture and heartiness.
How to Make It
- Start with the Base: Spoon cottage cheese into a bowl, creating a smooth, even layer.
- Add the Fruits: Arrange sliced strawberries, blueberries, raspberries, banana slices, and peach pieces on top in sections or a creative pattern.
- Customize Your Bowl: Drizzle with honey or maple syrup for added sweetness, if desired. Sprinkle with nuts, seeds, or granola for extra crunch and nutrition.
- Serve & Savor: Enjoy immediately for a fresh, protein-packed snack or breakfast.
Why You’ll Love It
- Protein Power: Cottage cheese keeps you full and energized.
- Vitamin Boost: Packed with immune-boosting vitamins and antioxidants from the fruits.
- Quick & Customizable: Ready in minutes and easy to adapt with your favorite seasonal fruits.
Serving Ideas
- Breakfast Delight: Pair with whole-grain toast for a complete morning meal.
- Healthy Snack: Enjoy as a mid-day pick-me-up or post-workout treat.
- Dessert Twist: Add a sprinkle of dark chocolate chips or a dollop of whipped cream for a guilt-free dessert.
Dive into this refreshing and nutritious bowl that’s as beautiful as it is delicious!
Spiced Apple Mix – Combine cottage cheese with warm cinnamon apples for a cozy snack.

This spiced apple mix is perfect for a quick and cozy snack. The image beautifully showcases sliced apples, topped with creamy cottage cheese and a sprinkle of cinnamon. A couple of cinnamon sticks rest on top, adding a rustic touch.
To make this delightful snack, start by warming up your apple slices in a pan with a bit of cinnamon. Once they’re soft and fragrant, pile them on top of a generous scoop of cottage cheese. The creamy texture of the cheese pairs wonderfully with the sweet, spiced apples.
This mix not only tastes amazing but also offers a nice balance of protein and natural sweetness. It’s a fantastic choice for those chilly days when you want something warm and satisfying!
Ingredients You’ll Need
This spiced apple mix is both nutritious and delicious, keeping each serving under 250 calories:
- Apples: 2 medium apples, peeled, cored, and thinly sliced for natural sweetness.
- Cottage Cheese: 1 cup low-fat cottage cheese for creamy texture and protein.
- Cinnamon: 1 teaspoon ground cinnamon for warm, cozy flavor.
- Nutmeg: A pinch of nutmeg for added depth and warmth (optional).
- Honey or Maple Syrup: 1 tablespoon for a touch of natural sweetness (optional).
- Lemon Juice: 1 teaspoon to keep the apples fresh and balance the sweetness.
- Chopped Nuts or Granola: Optional, for added crunch and texture.
How to Make It
- Prepare the Apples: In a medium pan over medium heat, toss the apple slices with lemon juice, cinnamon, and nutmeg. Cook for 5-7 minutes until they’re tender and fragrant. Add honey or maple syrup if desired for extra sweetness.
- Assemble the Snack: Divide the warm spiced apples into two bowls. Top each with half a cup of cottage cheese.
- Add the Final Touch: Sprinkle with extra cinnamon and a handful of chopped nuts or granola if using.
Why You’ll Love It
- Protein Meets Sweetness: Cottage cheese keeps you full while apples add natural sweetness.
- Quick & Cozy: Ready in minutes and perfect for chilly days.
- Balanced & Nutritious: A perfect snack to curb cravings without the guilt.
Serving Ideas
- Breakfast Treat: Serve with a sprinkle of granola for added crunch.
- Dessert Alternative: Enjoy it warm with a drizzle of maple syrup.
- Snack Fix: Keep the mix prepped for an easy, protein-packed snack on busy days.
Enjoy this warm and spiced apple mix that feels like a comforting dessert but is nutritious enough for any time of day!
Egg Salad Upgrade – Mix with chopped boiled eggs and seasoning for a creamy, savory side.
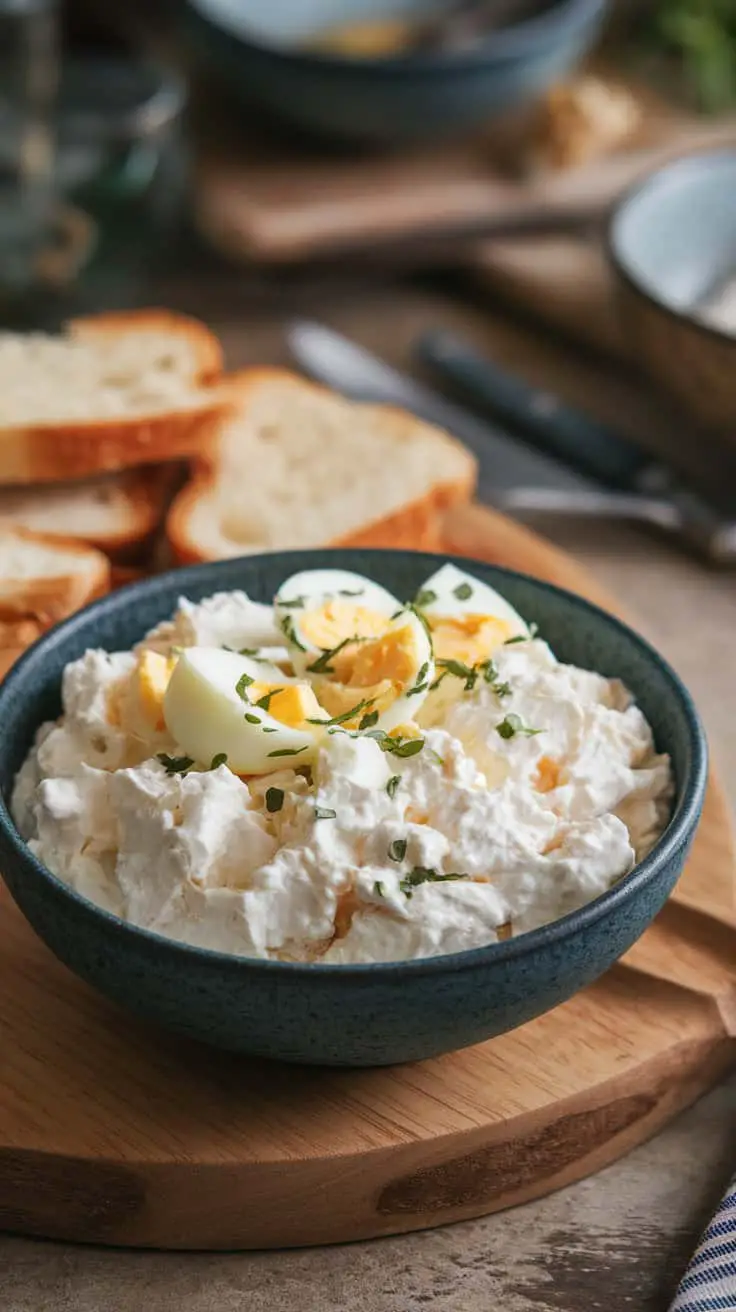
This egg salad takes a classic favorite and gives it a fresh twist. The creamy texture comes from perfectly chopped boiled eggs mixed with just the right seasonings. It’s not just your average egg salad; it’s a delightful side dish that pairs well with many meals.
The bowl shows the fluffy, white salad topped with slices of boiled eggs and a sprinkle of herbs. This presentation not only looks appealing but also hints at the delicious flavors waiting to be enjoyed. Served alongside slices of fresh bread, it makes for an inviting meal option.
For a simple recipe, gather boiled eggs, mayonnaise, mustard, salt, and pepper. Mash the eggs in a bowl, then mix in the other ingredients until creamy. Garnish with chopped herbs for an extra pop of flavor. This dish is perfect for picnics, lunches, or a comforting dinner.
Ingredients You’ll Need
Here’s what makes this egg salad creamy, flavorful, and still under 250 calories per serving:
- Boiled Eggs: 4 large eggs, cooled, peeled, and chopped for a hearty texture.
- Greek Yogurt: 1/4 cup non-fat Greek yogurt for creaminess with fewer calories.
- Mayonnaise: 1 tablespoon light mayonnaise for that classic egg salad richness.
- Dijon Mustard: 2 teaspoons for a tangy kick.
- Lemon Juice: 1 teaspoon to brighten the flavors.
- Salt & Pepper: To taste, for balanced seasoning.
- Fresh Herbs (Optional): Chopped parsley, dill, or chives for a fresh, herby finish.
How to Make It
- Prep the Eggs: Chop the boiled eggs into small chunks. For extra creaminess, mash one egg before mixing.
- Mix the Dressing: In a large bowl, whisk together Greek yogurt, mayonnaise, Dijon mustard, lemon juice, salt, and pepper until smooth.
- Combine & Mix: Gently fold in the chopped eggs, making sure they’re evenly coated with the dressing.
- Garnish & Serve: Sprinkle with fresh herbs if using. Serve immediately or chill for an hour to enhance the flavors.
Why You’ll Love It
- Protein-Packed: Eggs and Greek yogurt make it a powerhouse meal.
- Low-Calorie Creaminess: All the richness without the extra calories.
- Meal Prep Ready: Keeps well in the fridge for up to 3 days.
Serving Ideas
- Classic Sandwich: Spread on whole-grain bread with lettuce and tomato.
- Light Snack: Serve with crackers or sliced veggies.
- Simple Side: Pair with a fresh green salad for a complete meal.
Enjoy every creamy, savory bite knowing it’s both satisfying and nutritious. Perfect for picnics, meal prep, or a quick, healthy snack!
Berry Compote – Add a spoonful of homemade or store-bought berry compote for vibrant color and flavor.

Berry compote is a delightful addition to many dishes, and it really brings a pop of color and flavor to your meals. In the image, we see a beautiful bowl filled with whipped cream topped generously with a mix of dark, juicy berries. The rich red and purple hues of the compote contrast nicely with the white cream, making it visually appealing.
Making berry compote is simple and can be done with fresh or frozen berries. You can use strawberries, blueberries, raspberries, or a mix of your favorites. Start by cooking the berries with some sugar and a splash of lemon juice until they break down and create a thick sauce. This process enhances the natural sweetness and tartness of the berries, resulting in a homemade treat that tastes fantastic.
If you’re short on time, store-bought berry compote works just as well. Just open the jar and pour it over your desserts, pancakes, or yogurt. The convenience of having it ready to use means you can enjoy that burst of berry flavor anytime!
Whether you make it yourself or grab a jar from the store, berry compote is versatile. Use it to drizzle over breakfast items, scoop it onto desserts, or mix it into yogurt for a tasty snack. It’s an easy way to elevate your dishes and impress your guests!
Ingredients You’ll Need
Here’s what goes into a delicious berry compote that’s bursting with flavor:
- Mixed Berries: 2 cups fresh or frozen (strawberries, blueberries, raspberries, blackberries).
- Sugar or Honey: 2-4 tablespoons, depending on how sweet you like it.
- Lemon Juice: 1 tablespoon for a bright, tangy kick.
- Water: 2 tablespoons to help the berries simmer.
- Cornstarch (optional): 1 teaspoon mixed with water for a thicker compote.
How to Make It
- Cook the Berries: In a medium saucepan, combine berries, sugar, lemon juice, and water. Cook over medium heat, stirring occasionally.
- Simmer and Soften: Let the berries break down and release their juices, about 8-10 minutes.
- Thicken (Optional): If you prefer a thicker compote, stir in the cornstarch mixture and cook for 2 more minutes until it thickens.
- Cool and Serve: Remove from heat and let cool slightly. Serve warm or chilled.
Why You’ll Love It
- Versatile: Perfect for breakfasts, desserts, or snacks.
- Natural Sweetness: Enjoy the pure taste of real berries with just a touch of added sugar.
- Simple & Fast: Ready in under 15 minutes.
Serving Ideas
- Breakfast Favorites: Drizzle over pancakes, waffles, or oatmeal.
- Dessert Topping: Pour over cheesecake, ice cream, or brownies.
- Yogurt Parfait: Layer with Greek yogurt and granola.
- Elegant Touch: Spoon onto whipped cream for a stunning, easy dessert.
Whether you’re looking to elevate a simple treat or impress at brunch, this berry compote is your go-to for a pop of color, flavor, and freshness!
Herbed Cottage Cheese Spread – Blend in fresh herbs like dill, parsley, or chives for a gourmet touch.
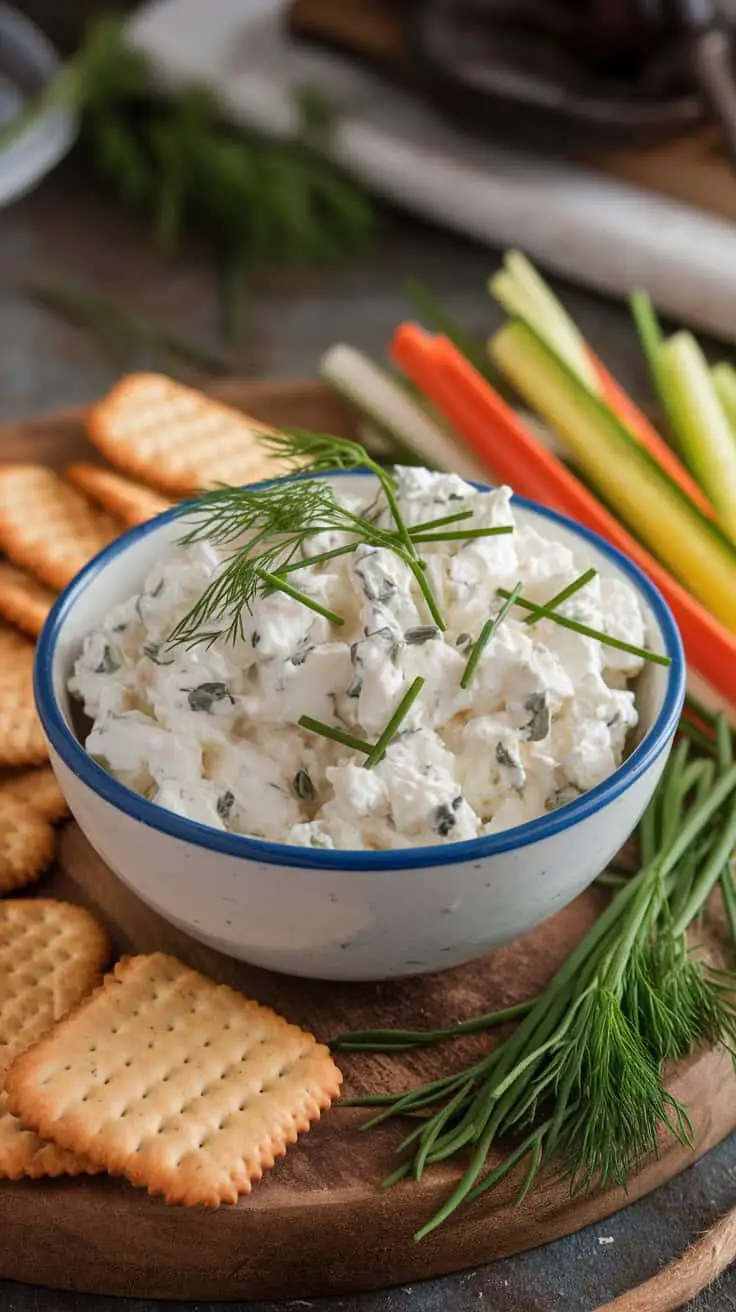
This herbed cottage cheese spread is a delightful treat! It brings together creamy cottage cheese and fresh herbs, creating a light and refreshing dip. The combination of flavors makes it perfect for spreading on crackers or serving with veggies.
In the image, you can see a bowl filled with the cottage cheese spread, topped with green herbs like dill and chives. It’s surrounded by crunchy crackers and colorful vegetable sticks, showcasing how versatile this dish can be. The bright colors of the herbs and veggies add a cheerful touch!
Making this spread is simple. Just mix cottage cheese with your choice of fresh herbs such as dill, parsley, or chives. You can add a squeeze of lemon juice for extra zing. Serve it at parties or enjoy it as a snack. It’s a tasty way to enjoy a healthy treat!
Ingredients You’ll Need
Here’s what makes this herbed cottage cheese spread irresistible while keeping it light and under 250 calories per serving:
- Cottage Cheese: 1 cup low-fat cottage cheese for creamy texture and protein.
- Fresh Herbs: A mix of 2 tablespoons each of chopped dill, parsley, and chives for a fresh, aromatic flavor.
- Lemon Juice: 1 tablespoon for brightness and a hint of tang.
- Garlic Powder: 1/2 teaspoon for a subtle savory kick.
- Salt and Pepper: To taste, balancing and enhancing the flavors.
How to Make It
- Blend the Base: In a food processor or blender, pulse the cottage cheese until smooth and creamy. If you prefer a chunkier texture, skip this step and mix by hand.
- Add Freshness: Stir in the chopped herbs, lemon juice, garlic powder, salt, and pepper. Mix until well combined.
- Taste & Adjust: Adjust seasoning as needed. Add more herbs for extra freshness or a touch of lemon juice for added zing.
- Serve & Enjoy: Transfer the spread to a bowl and garnish with extra herbs on top. Serve immediately or chill for an hour to let the flavors meld.
Why You’ll Love It
- Protein-Rich & Low-Calorie: Cottage cheese keeps it light yet satisfying.
- Fresh & Flavorful: The herbs add a refreshing burst of flavor.
- Versatile: Use it as a dip, spread, or even a sandwich filler.
Serving Ideas
- Snack Board Star: Serve with crackers, veggie sticks, or whole-grain toast.
- Party Favorite: Use it as a sophisticated dip for gatherings.
- Light Lunch: Spread on whole-grain bread and top with sliced cucumber or tomatoes.
This herbed cottage cheese spread is a refreshing way to enjoy a protein-packed snack that’s bursting with fresh flavors. Enjoy every creamy, herb-infused bite!
Trail Mix Topper – Toss in a handful of raisins, nuts, and seeds for a crunchy, sweet combination.
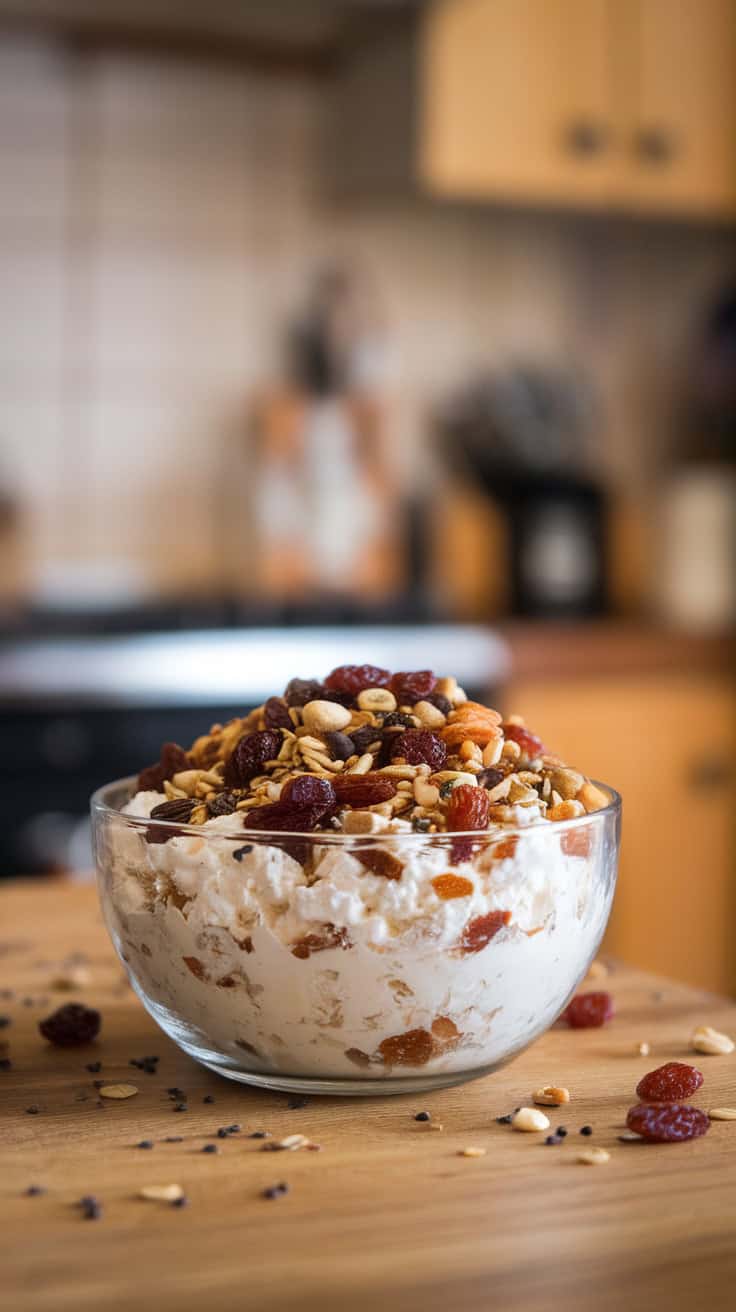
This image showcases a delicious bowl filled with a creamy base topped generously with trail mix. The mix includes a variety of nuts, seeds, and vibrant raisins, creating an inviting crunch. This combination not only adds delightful texture but also a burst of flavor.
Trail mix is perfect for snacking and can easily be made at home. Start with a base like yogurt or cottage cheese, and then sprinkle in your favorite toppings. The sweetness of the raisins pairs wonderfully with the salty crunch of the nuts. It’s a simple way to enjoy a healthy treat.
To make this at home, gather your ingredients: a bowl of yogurt, a mix of nuts like almonds and cashews, seeds such as sunflower or pumpkin, and a handful of raisins. Just toss everything together for a quick and satisfying snack that’s great for any time of the day!
Ingredients You’ll Need
Here’s what makes this trail mix topper both nutritious and delicious, while keeping each serving under 250 calories:
- Yogurt: 1 cup of non-fat Greek yogurt for a creamy, protein-rich base.
- Raisins: 2 tablespoons for natural sweetness and chewy texture.
- Almonds: 1 tablespoon chopped, adding a satisfying crunch and healthy fats.
- Cashews: 1 tablespoon chopped, bringing a buttery taste.
- Sunflower Seeds: 1 tablespoon for a boost of healthy fats and a light nutty flavor.
- Pumpkin Seeds: 1 tablespoon for extra crunch and essential minerals.
- Honey or Maple Syrup: Optional drizzle for added sweetness if desired.
How to Make It
- Start with the Base: Spoon Greek yogurt into a bowl, creating a smooth, creamy surface.
- Build the Mix: Sprinkle on raisins, almonds, cashews, sunflower seeds, and pumpkin seeds.
- Optional Sweet Touch: Drizzle a bit of honey or maple syrup if you like a sweeter bite.
- Enjoy Immediately: Grab a spoon and dive in while the mix is fresh and crunchy!
Why You’ll Love It
- Balanced Nutrition: A perfect mix of protein, healthy fats, and natural sugars.
- Crunch Meets Cream: The nuts and seeds complement the creamy yogurt beautifully.
- Quick & Customizable: Swap in your favorite nuts or dried fruits.
Serving Ideas
- Breakfast Power Bowl: Add some fresh berries or a sprinkle of granola.
- Post-Workout Snack: Enjoy after a workout for protein and energy.
- On-the-Go Fuel: Pack the mix separately and assemble when ready.
Relish the satisfying crunch, the creamy smoothness, and the naturally sweet and nutty flavors in every bite. It’s a wholesome treat you’ll want to enjoy every day!
Greek-Inspired Combo – Top with olives, cherry tomatoes, and a sprinkle of oregano.
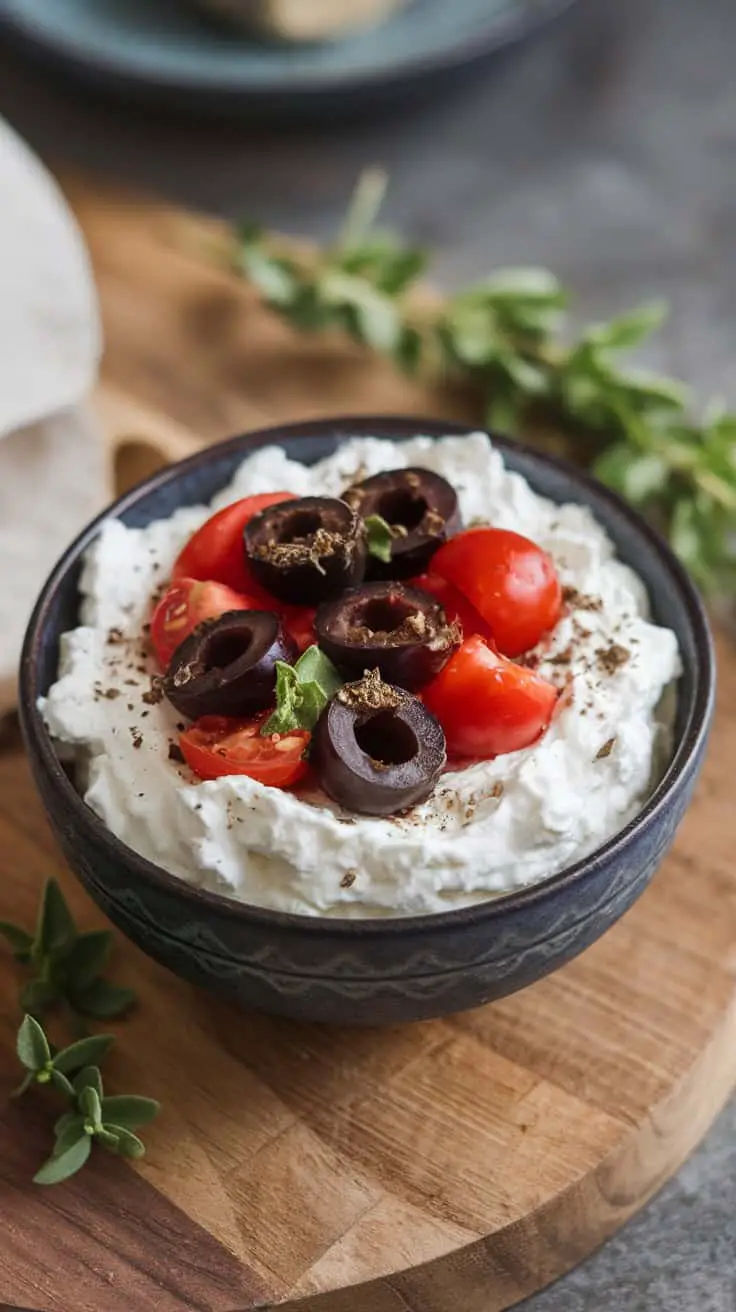
This delicious dish features a creamy base topped with vibrant olives and juicy cherry tomatoes. The contrast of colors makes it visually appealing and gives a hint of freshness. The rich texture of the base paired with the tangy olives and sweet tomatoes creates a delightful flavor balance.
To make this dish, start with a smooth, creamy base, like whipped feta or yogurt. Next, add halved cherry tomatoes for a pop of sweetness and earthy black olives for a salty kick. A sprinkle of oregano enhances the flavor profile and brings a hint of Mediterranean magic.
This combo is perfect for sharing as a dip or enjoying on its own. It pairs wonderfully with pita bread or fresh vegetables. Whether for a casual snack or a party appetizer, this Greek-inspired treat is sure to please everyone’s palate.
Ingredients You’ll Need
This Greek-inspired combo comes together with just a few simple ingredients, keeping it light and flavorful:
- Base: 1 cup Greek yogurt (non-fat for fewer calories) or whipped feta for extra creaminess.
- Cherry Tomatoes: 1 cup, halved for a burst of juicy sweetness.
- Black Olives: 1/2 cup, pitted and sliced for a salty, briny flavor.
- Oregano: 1 teaspoon dried or a few sprigs of fresh for that classic Mediterranean touch.
- Olive Oil: 1 tablespoon for drizzling (optional but adds richness).
- Salt & Pepper: To taste, balancing the flavors perfectly.
How to Make It
- Prepare the Base: Spread Greek yogurt or whipped feta evenly on a serving plate or shallow bowl. Create gentle swirls for an inviting texture.
- Add the Toppings: Scatter the halved cherry tomatoes and sliced black olives over the creamy base.
- Season Generously: Sprinkle oregano, a pinch of salt, and freshly ground black pepper on top.
- Finish with a Drizzle: Add a light drizzle of olive oil for extra richness and shine (optional if counting calories).
Why You’ll Love It
- Bright & Fresh: The juicy tomatoes and briny olives create an irresistible combo.
- Healthy & Satisfying: Packed with protein and healthy fats while staying under 250 calories per serving.
- Quick & Easy: Ready in minutes with no cooking required!
Serving Ideas
- Dip Delight: Serve with whole-grain pita chips, crunchy cucumber slices, or bell pepper strips.
- Appetizer Magic: Use it as a party starter or casual snack.
- Light Meal: Enjoy it with a side salad for a refreshing, Mediterranean-inspired lunch.
This Greek-inspired combo is a simple yet elegant dish that brings a taste of the Mediterranean right to your table. Enjoy every bite of this flavorful, nutritious creation!
Sweet and Salty Treat – Add sliced pears, a pinch of sea salt, and a few walnuts.
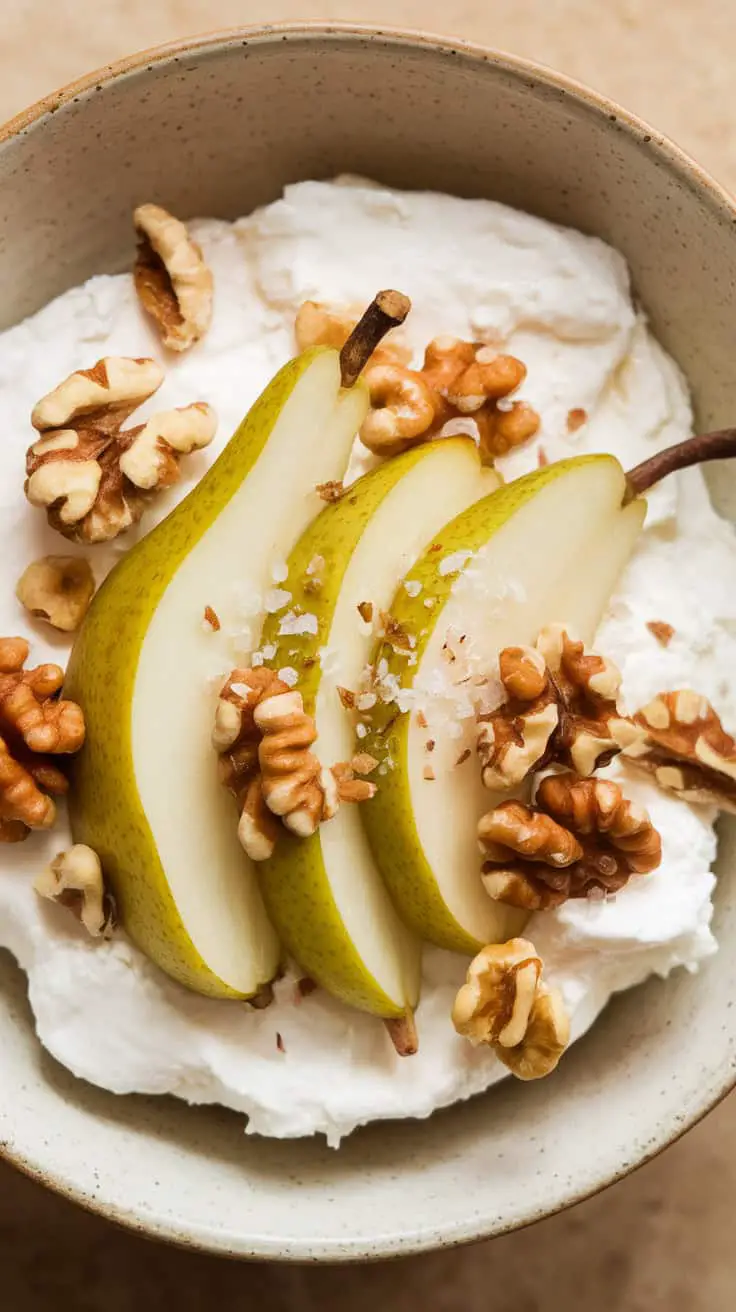
This delightful treat combines sweet and salty flavors for a perfect snack or dessert. The image shows beautifully sliced pears arranged on a bed of creamy goodness, topped off with crunchy walnuts and a sprinkle of sea salt.
The juicy pears bring a natural sweetness that pairs wonderfully with the rich, creamy base. As you bite into the slices, you’ll experience a burst of flavor that is both refreshing and satisfying. The walnuts add a nice crunch, enhancing the texture of the dish.
A pinch of sea salt is the secret ingredient here, balancing the sweetness of the pears and bringing all the flavors together. It’s that simple addition that elevates this dish from ordinary to extraordinary. Serve it as a light dessert, a healthy snack, or even a fancy appetizer. You can’t go wrong!
Ingredients You’ll Need
Here’s how to create this perfect sweet-and-salty combo under 250 calories:
- Pears: 1 medium pear, thinly sliced for natural sweetness and juiciness.
- Greek Yogurt: 1/2 cup non-fat Greek yogurt as the creamy, protein-rich base.
- Walnuts: 1 tablespoon chopped walnuts for a satisfying crunch and healthy fats.
- Sea Salt: A pinch to enhance the sweetness and balance the flavors.
- Honey (Optional): A light drizzle for extra sweetness if desired.
How to Make It
- Prepare the Base: Spread Greek yogurt evenly on a serving plate or bowl, creating a smooth, creamy foundation.
- Slice the Pears: Thinly slice the pear and arrange the slices beautifully on top of the yogurt, slightly overlapping them for a pleasing look.
- Add the Crunch: Sprinkle the chopped walnuts over the pears for added texture and nutty flavor.
- Sprinkle Sea Salt: Lightly sprinkle a pinch of sea salt over the entire dish. This small step makes the flavors pop.
- Optional Sweetness: Drizzle a touch of honey over the top if you want an extra hint of sweetness.
Why You’ll Love It
- Balanced Flavors: The sweet pears, creamy yogurt, and salty crunch create a perfect taste harmony.
- Quick & Easy: It comes together in minutes for a healthy snack or elegant dessert.
- Under 250 Calories: A guilt-free treat that feels indulgent.
Serving Ideas
- Breakfast Boost: Enjoy with a sprinkle of granola for a heartier start to the day.
- Light Dessert: Serve after dinner for a refreshing and satisfying finish.
- Party Appetizer: Arrange on a platter for a stunning, crowd-pleasing snack.
Every bite offers a delightful mix of sweet, creamy, crunchy, and salty — a treat you’ll want to make again and again!
Tropical Paradise – Mix in pineapple chunks, shredded coconut, and a dash of lime juice.
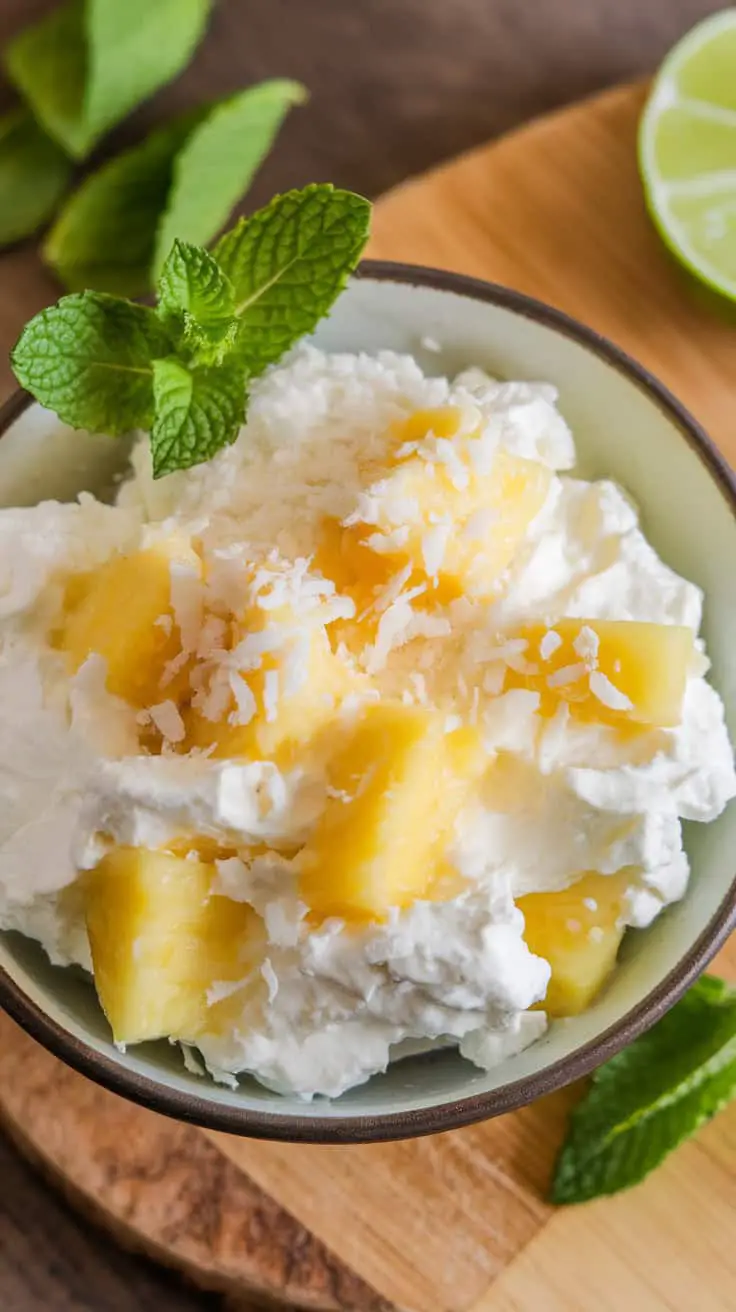
Imagine a bowl filled with creamy goodness, topped with fresh pineapple chunks and a sprinkle of shredded coconut. This delightful treat is not just a dessert; it’s a little taste of paradise right in your kitchen.
The vibrant yellow of the pineapple contrasts beautifully with the fluffy white coconut, creating a visually appealing dish. A few mint leaves add a pop of green, making it look even more inviting. Adding a squeeze of lime juice lifts the flavors, balancing the sweetness with a refreshing zing.
This simple recipe is perfect for warm days or when you need a quick pick-me-up. Just mix together your ingredients, and you have a tropical treat ready to enjoy. It’s great as a snack or a light dessert.
Don’t forget to customize it! You can swap in different fruits or add a scoop of yogurt for extra creaminess. This tropical dish is all about making it your own while enjoying the bright, fresh flavors that remind you of sunny days on the beach.
Ingredients You’ll Need
Here’s how to create this tropical delight while keeping each serving under 250 calories:
- Pineapple Chunks: 1 cup of fresh or canned pineapple (in its own juice) for natural sweetness and juiciness.
- Shredded Coconut: 2 tablespoons unsweetened for a tropical, nutty flavor.
- Greek Yogurt: 1/2 cup non-fat Greek yogurt for creaminess and protein.
- Lime Juice: 1 tablespoon freshly squeezed for a tangy citrus kick.
- Honey or Maple Syrup: Optional, 1 teaspoon for extra sweetness if needed.
- Fresh Mint Leaves: A few for garnish and added freshness.
How to Make It
- Prep the Pineapple: If using fresh pineapple, dice it into bite-sized chunks. If canned, drain the juice well.
- Mix the Base: In a bowl, combine Greek yogurt, lime juice, and honey or maple syrup (if using). Stir until smooth.
- Assemble the Bowl: Layer the pineapple chunks over the creamy yogurt mixture. Sprinkle the shredded coconut evenly on top.
- Garnish & Serve: Add a few fresh mint leaves for a burst of color and flavor. Serve immediately or chill for 10-15 minutes for a cooler treat.
Why You’ll Love It
- Refreshing & Light: Perfect for warm days or a post-meal treat.
- Naturally Sweet: The pineapple and coconut add tropical sweetness without too much sugar.
- Protein Boost: Thanks to Greek yogurt, it keeps you full longer.
Serving Ideas
- Breakfast Bliss: Add granola for a crunchy, filling start to your day.
- Quick Snack: Enjoy as is for a refreshing energy boost.
- Dessert Twist: Serve in a hollowed-out pineapple for a tropical presentation.
This tropical treat is your ticket to a mini-vacation right at home. Each bite is a perfect balance of creamy, tangy, and sweet flavors — a little paradise in every spoonful!
Pesto Perfection – Add a dollop of pesto and pair with whole-grain crackers.
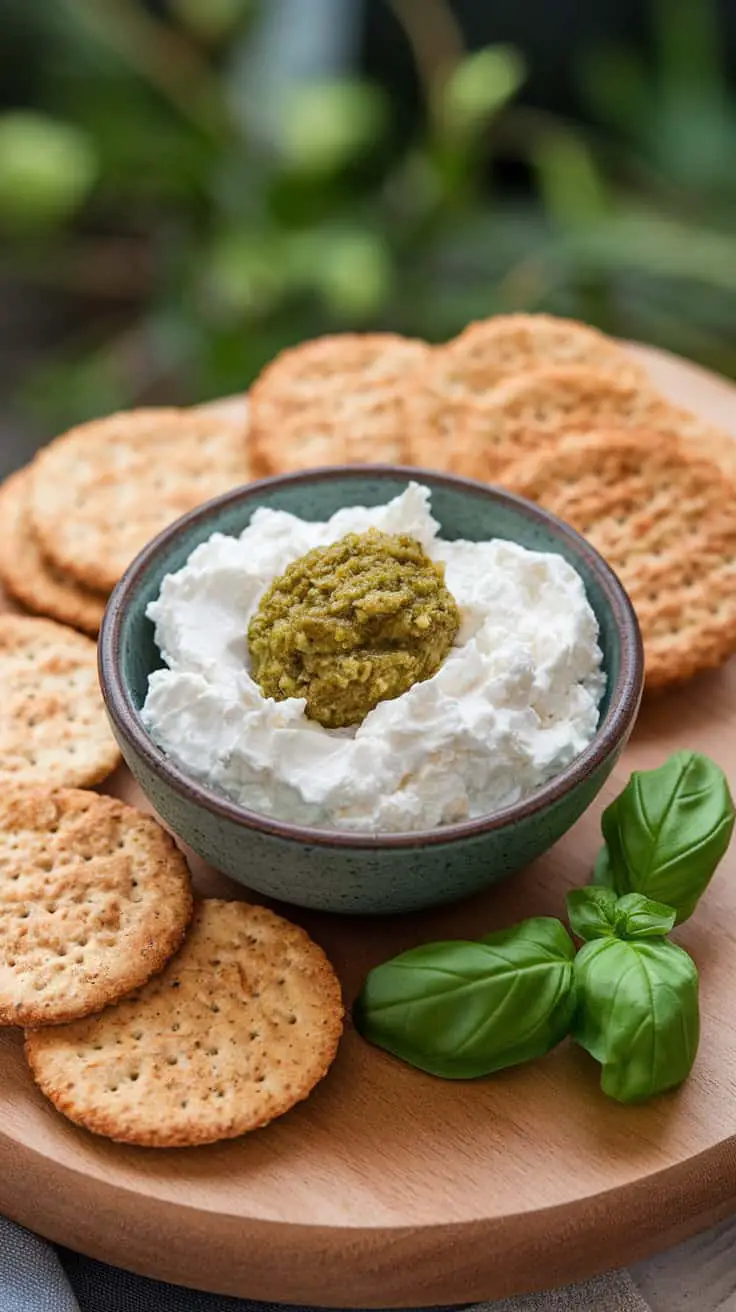
This simple yet delicious combination is perfect for snacking or entertaining. The creamy texture of the ricotta pairs wonderfully with the bold flavors of pesto. Just a dollop of pesto on top adds a burst of freshness that elevates the dish.
The whole-grain crackers provide a satisfying crunch, making it a well-balanced snack. Not only is it tasty, but it also offers a good source of fiber and nutrients. You can easily prepare this in a few minutes, making it ideal for those unexpected guests or a cozy night in.
To make this dish even better, consider adding fresh basil leaves, which bring a lovely aroma and complement the pesto beautifully. Enjoy this delightful treat with a glass of wine or your favorite beverage!
Ingredients You’ll Need
This simple snack comes together with just a few flavorful essentials:
- Ricotta Cheese: 1/2 cup part-skim ricotta for a creamy, protein-rich base.
- Pesto: 2 tablespoons of fresh basil pesto for that bold, herby kick.
- Whole-Grain Crackers: 8 small whole-grain crackers for a satisfying crunch.
- Fresh Basil Leaves: A few leaves for garnish, adding freshness and visual appeal.
- Olive Oil (Optional): A drizzle for extra richness and shine.
- Salt & Pepper: To taste, for a hint of seasoning.
How to Assemble
- Prep the Base: Spoon the ricotta into a small serving bowl. Smooth the surface slightly with the back of the spoon.
- Add the Pesto: Dollop the pesto right in the center of the ricotta. Swirl gently for a pretty marbled effect if you like.
- Season & Garnish: Sprinkle with salt and pepper. Add a few fresh basil leaves on top for that pop of green and extra fragrance.
- Serve with Crackers: Arrange whole-grain crackers around the bowl or on a wooden platter for an inviting presentation.
Why You’ll Love It
- Quick & Easy: Takes just minutes to prepare.
- Nutritious & Balanced: Protein from ricotta, fiber from whole-grain crackers, and healthy fats from pesto.
- Great for Entertaining: Looks elegant but is super simple to make.
Serving Ideas
- Appetizer Spread: Add olives, cherry tomatoes, and sliced veggies for a complete snack board.
- Light Lunch: Pair with a mixed green salad for a refreshing, balanced meal.
- Wine Night: Enjoy with your favorite glass of wine or sparkling water for a relaxing evening treat.
This delightful blend of creamy, crunchy, and herby goodness is guaranteed to please your taste buds while keeping things light and satisfying!
Protein-Packed Boost – Stir in a scoop of protein powder for a workout-friendly snack.
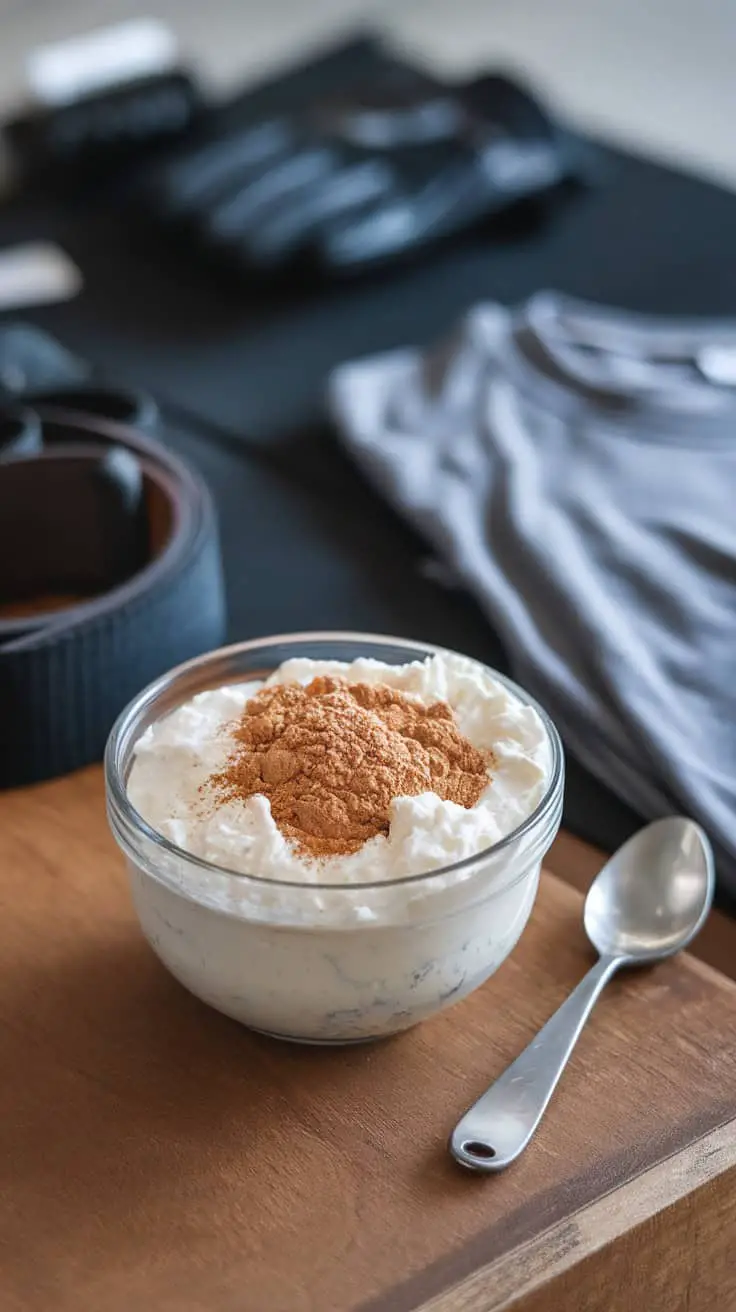
This image showcases a delicious bowl of protein-rich goodness, perfect for a post-workout treat. The creamy texture of the yogurt or cottage cheese is enhanced by a sprinkle of protein powder, making it both nutritious and satisfying.
Adding protein powder is a simple way to boost your intake. Whether you’re hitting the gym or just need a healthy snack, this blend provides the fuel your body craves. The cinnamon on top not only adds flavor but also a hint of warmth.
Pair this snack with your favorite fruits or nuts for extra taste and texture. It’s quick to make and easy to enjoy, especially when you’re on the go. Just grab a spoon and dig in!
Ingredients You’ll Need
Here’s what makes this protein-packed bowl the ultimate post-workout snack:
- Greek Yogurt: 1 cup non-fat Greek yogurt for creaminess and a solid protein base.
- Protein Powder: 1 scoop (about 25g) of your favorite vanilla or unflavored protein powder.
- Cinnamon: 1/2 teaspoon ground cinnamon for warmth and added flavor.
- Honey or Maple Syrup (Optional): 1 tablespoon for a touch of natural sweetness.
- Fresh Fruit: 1/2 cup of berries, banana slices, or apple chunks for extra fiber and vitamins.
- Nuts or Seeds: 1 tablespoon of chopped almonds, walnuts, or chia seeds for crunch and healthy fats.
How to Make It
- Mix the Base: In a bowl, combine Greek yogurt and protein powder. Stir well until fully blended and creamy. Adjust the thickness with a splash of water or milk if needed.
- Add Flavor: Sprinkle in the ground cinnamon and stir again for that warm, comforting taste.
- Sweeten If Desired: Drizzle honey or maple syrup on top for extra sweetness, if preferred.
- Top It Off: Add your favorite fresh fruit and a sprinkle of nuts or seeds for added crunch and nutrition.
- Enjoy Immediately: Grab a spoon and savor every bite!
Why You’ll Love It
- Protein Boost: Packed with over 30g of protein to keep you full and fuel your muscles.
- Quick & Easy: Takes less than 5 minutes to make.
- Customizable: Swap out fruits, nuts, or protein powder flavors to fit your taste.
Serving Ideas
- Pre- or Post-Workout Fuel: Perfect after a workout or as a quick energy-boosting breakfast.
- On-the-Go Snack: Prep in a to-go container for busy days.
- Dessert Swap: Satisfy sweet cravings with a nutritious twist by adding dark chocolate chips or cocoa nibs.
With its creamy texture, satisfying crunch, and delicious flavors, this protein-packed bowl is a snack you’ll look forward to every time!
Everything Bagel Seasoning – Sprinkle this popular mix for instant savory flavor.
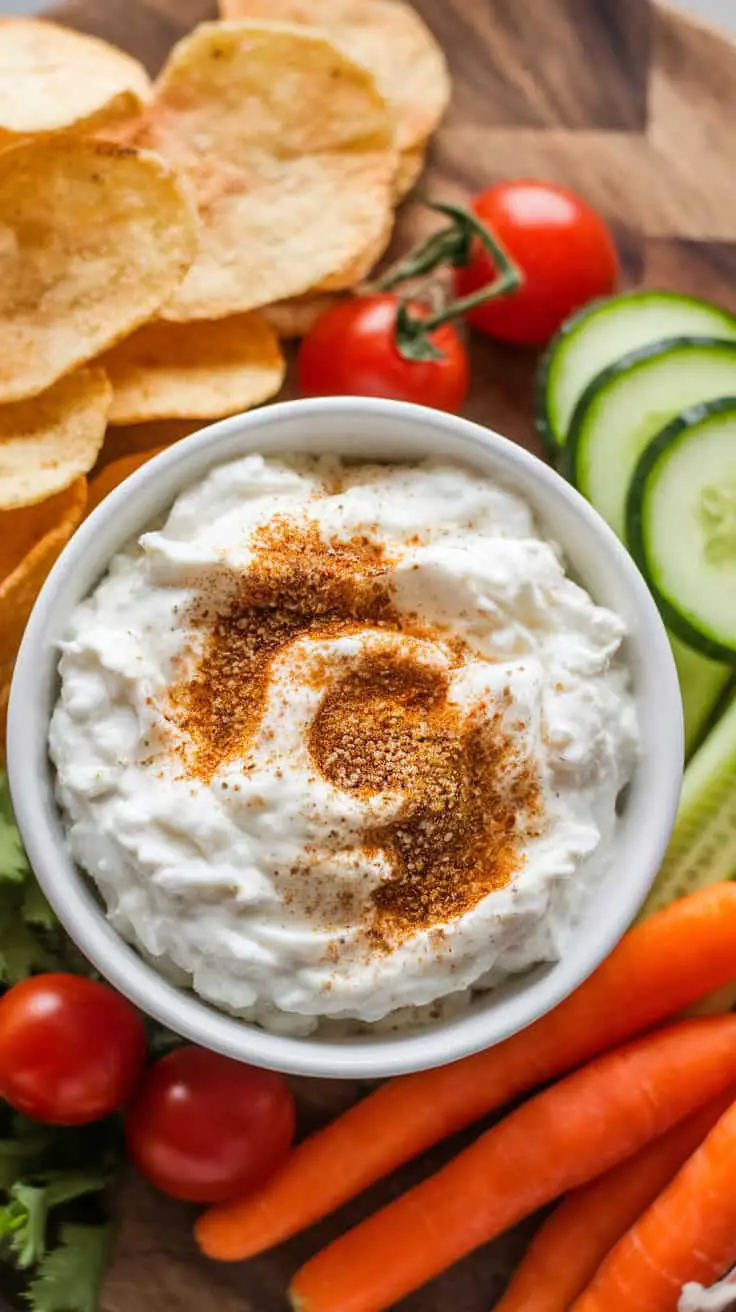
This image showcases a delicious dip surrounded by fresh veggies and crispy chips, highlighting the appeal of using Everything Bagel seasoning. The creamy dip, sprinkled with a dash of seasoning, instantly draws the eye and promises a burst of flavor.
The dip, likely made from cream cheese or yogurt, serves as the perfect base for the seasoning. With its blend of sesame seeds, poppy seeds, garlic, and onion, this seasoning mix brings a unique taste. Those crunchy chips and fresh veggies enhance the experience, providing a delightful contrast.
Using Everything Bagel seasoning is simple. Just sprinkle it over your dips, salads, or even roasted vegetables for that extra kick. It’s a great way to elevate everyday snacks and meals.
The vibrant colors of the tomatoes, cucumbers, and carrots surrounding the dip add freshness and make for a beautiful presentation. Whether you’re entertaining guests or enjoying a casual snack at home, this setup brings a sense of fun and flavor to the table.
Ingredients for Everything Bagel Seasoning
This classic seasoning blend transforms simple dishes into savory masterpieces:
- Sesame Seeds: 2 tablespoons white sesame seeds for a nutty, toasted crunch.
- Black Sesame Seeds: 1 tablespoon for added depth and visual contrast.
- Poppy Seeds: 1 tablespoon to enhance the signature everything bagel flavor.
- Dried Minced Garlic: 1 tablespoon for a bold garlic kick.
- Dried Minced Onion: 1 tablespoon for sweet, savory onion notes.
- Flaked Sea Salt: 1 teaspoon for that perfect salty touch.
How to Make the Seasoning
- Mix It Up: Combine all the ingredients in a small bowl. Stir well to ensure everything is evenly distributed.
- Store for Later: Transfer to an airtight container or spice jar. It stays fresh for months!
Ways to Use Everything Bagel Seasoning
- Dips & Spreads: Sprinkle over cream cheese, Greek yogurt, or hummus for instant flavor.
- Avocado Toast: Elevate your morning toast with a generous sprinkle.
- Egg Dishes: Add to scrambled eggs, omelets, or deviled eggs for a savory twist.
- Salads & Bowls: Toss into salads or grain bowls for extra texture and taste.
- Veggie Roasts: Sprinkle on roasted vegetables like carrots, potatoes, or Brussels sprouts.
- Baked Goods: Press onto homemade breadsticks, bagels, or even crackers before baking.
Why You’ll Love It
- Flavor Explosion: Every sprinkle delivers a burst of savory goodness.
- Versatile & Easy: Works on just about everything from breakfast to dinner.
- Homemade Freshness: Skip store-bought and enjoy a fresher, more flavorful mix.
Serving Idea
- Snack Board Must-Have: Pair a creamy dip topped with this seasoning with a colorful array of chips, cherry tomatoes, cucumber slices, and carrots. It’s a guaranteed hit at any gathering!
Sprinkle, savor, and elevate every meal with this flavorful seasoning mix that’s as fun as it is delicious!
Chili Flakes and Olive Oil – Drizzle with olive oil and a sprinkle of chili flakes for a spicy kick.
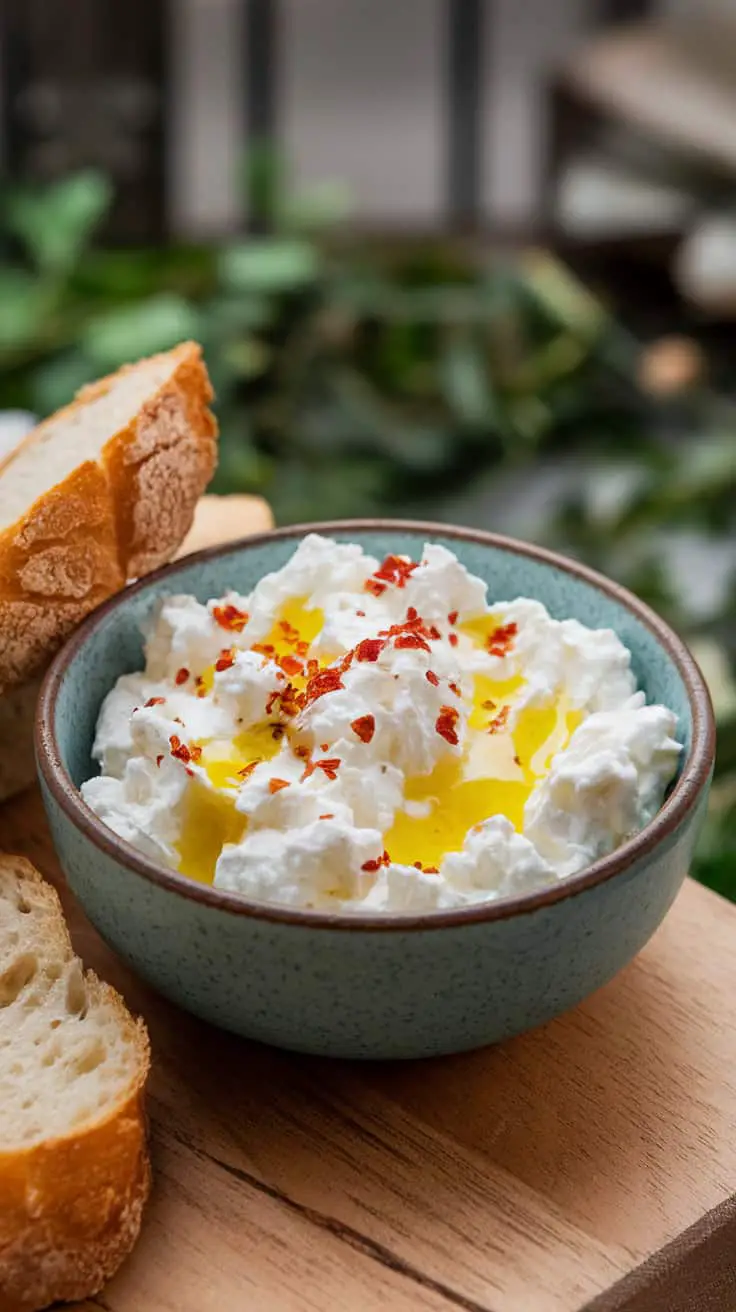
In this section, we focus on a simple yet delightful dish that bursts with flavor. Imagine a bowl of creamy goodness topped with a golden drizzle of olive oil. The addition of chili flakes gives it just the right amount of heat, making it an irresistible treat.
This dish can be enjoyed in various ways. It pairs wonderfully with fresh bread, perfect for dipping. The crusty bread acts as a delightful contrast to the smooth texture of the cheese underneath. Each bite offers a balance of creaminess and spice, keeping your taste buds engaged.
To recreate this dish, gather a few ingredients: fresh cheese, olive oil, and chili flakes. Start by placing the cheese in a bowl, then generously drizzle olive oil on top. Finish it off with a sprinkle of chili flakes to taste. It’s that easy!
This creation is not just about flavor; it’s also visually appealing. The vibrant red chili flakes stand out against the white cheese, all set in a charming bowl. Serve it at your next gathering, and watch as it quickly becomes a favorite.
Ingredients You’ll Need
Here’s what makes this simple dish so flavorful while keeping it light and satisfying:
- Fresh Cheese: 1 cup ricotta, feta, or cream cheese for a creamy base.
- Extra Virgin Olive Oil: 2 tablespoons for richness and a glossy finish.
- Chili Flakes: 1 teaspoon (adjust to taste) for a spicy kick.
- Salt and Pepper: A pinch of each to enhance overall flavor.
- Fresh Bread or Crackers: Optional but perfect for dipping.
How to Make It
- Prepare the Cheese Base: Place your cheese of choice in a shallow serving bowl. If using feta, crumble it; if using ricotta or cream cheese, spread it evenly.
- Drizzle with Olive Oil: Pour the olive oil generously over the cheese, letting it pool slightly around the edges for a beautiful presentation.
- Sprinkle the Chili Flakes: Add chili flakes evenly across the top. Adjust the amount based on your spice preference.
- Season to Taste: Add a pinch of salt and freshly ground pepper if needed.
- Serve & Enjoy: Pair with warm, crusty bread or crispy crackers. Serve immediately and enjoy the creamy, spicy, and savory flavors in every bite.
Why You’ll Love It
- Effortless Yet Elegant: Takes minutes to prepare but looks and tastes gourmet.
- Customizable: Adjust spice levels or try different cheeses for unique flavors.
- Versatile Appetizer: Great for parties, snacks, or even a light lunch.
Serving Ideas
- Mediterranean Spread: Serve alongside olives, tomatoes, and cured meats.
- Bruschetta Style: Spread on toasted bread and top with diced tomatoes and basil.
- Salad Companion: Add a dollop to salads for extra creaminess and depth.
With its perfect blend of heat, creaminess, and richness, this dish transforms simple ingredients into a show-stopping appetizer. Enjoy every spicy, savory bite!
Cucumber and Smoked Salmon – Layer with thinly sliced cucumber and smoked salmon for a fancy treat.
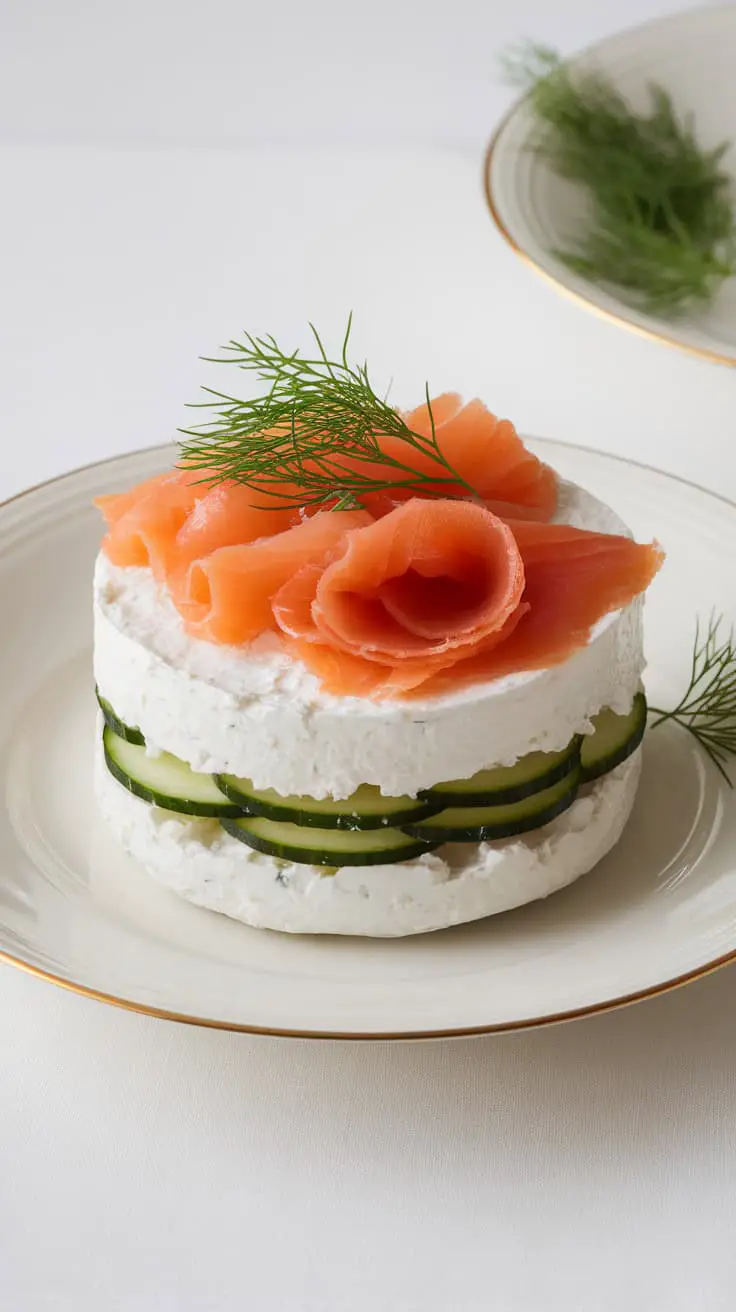
This dish features a beautiful combination of flavors and textures. The layers of thinly sliced cucumber provide a refreshing crunch, while the smoked salmon adds a rich, savory element. Together, they create a delightful treat that looks as good as it tastes.
The creamy base, likely a blend of soft cheese or a light spread, ties everything together. It balances the saltiness of the salmon and enhances the fresh taste of the cucumber. A sprig of dill on top not only adds a pop of green but also complements the flavors perfectly.
This elegant presentation makes it a great choice for gatherings or special occasions. It’s simple yet impressive, sure to wow your guests.
Ingredients You’ll Need
Here’s what makes this cucumber and smoked salmon dish a perfect balance of fresh and savory:
- Cucumber: 1 large English cucumber, thinly sliced for a crisp, refreshing base.
- Smoked Salmon: 4-6 oz of high-quality smoked salmon, thinly sliced for that rich, savory touch.
- Cream Cheese or Greek Yogurt Spread: 1/2 cup light cream cheese or Greek yogurt, softened, to add creamy balance.
- Fresh Dill: A few sprigs for garnish and extra herbal freshness.
- Lemon Juice: 1 tablespoon for a hint of brightness.
- Capers (Optional): 1 tablespoon for an extra briny kick.
- Salt & Pepper: To season lightly as needed.
How to Make It
- Prep the Cucumber: Use a mandoline or sharp knife to slice the cucumber into thin, even rounds. Pat dry with a paper towel to remove excess moisture.
- Mix the Spread: In a small bowl, combine cream cheese (or Greek yogurt) with lemon juice, salt, and pepper. Stir until smooth and spreadable.
- Layer the Dish: Arrange cucumber slices slightly overlapping on a serving platter. Spread a thin layer of the cream cheese mixture over the cucumber base.
- Add the Salmon: Lay thin slices of smoked salmon over the spread. Tuck in capers if using for extra flavor.
- Finish with Freshness: Garnish generously with sprigs of dill and a sprinkle of freshly ground black pepper.
Why You’ll Love It
- Light & Refreshing: Crisp cucumber balances the rich, smoky salmon.
- Elegant but Easy: It’s impressive yet quick to assemble.
- Low-Calorie: Under 250 calories per serving.
Serving Ideas
- Appetizer Plate: Serve as a stylish starter at dinner parties.
- Brunch Delight: Pair with bagels and eggs for a classy brunch spread.
- Light Lunch: Enjoy as a low-carb lunch with a side salad.
Savor every bite of this sophisticated yet simple dish that’s all about fresh flavors and elegant presentation!
Pumpkin Spice and Maple Syrup – Add a seasonal twist with a drizzle of maple syrup and a sprinkle of pumpkin spice.

Picture a cozy fall setting, where the warmth of pumpkin spice meets the sweetness of maple syrup. This delightful combination is perfect for adding a seasonal twist to your favorite treats.
The image showcases a bowl filled with fluffy whipped cream, drizzled with golden maple syrup and sprinkled with pumpkin spice. Surrounding this creamy goodness are vibrant autumn leaves and small pumpkins, creating a festive atmosphere.
To recreate this seasonal delight, simply whip up some heavy cream until fluffy, then drizzle with maple syrup and a dash of pumpkin spice. This treat is perfect for topping off desserts or enjoying on its own.
Whether you’re cozying up with a cup of hot cocoa or indulging in pumpkin pie, this combination adds that extra special touch to any fall gathering.
Ingredients You’ll Need
Here’s what makes this fall-inspired treat so irresistible while keeping it light and flavorful:
- Heavy Whipping Cream: 1 cup chilled, for that perfect fluffy texture.
- Maple Syrup: 2 tablespoons pure maple syrup for a naturally sweet drizzle.
- Pumpkin Spice: 1 teaspoon pumpkin spice blend for that cozy autumn flavor.
- Vanilla Extract (Optional): 1/2 teaspoon for extra warmth and depth.
- Pinch of Salt: Enhances the sweetness and balances the flavors.
How to Make It
- Whip the Cream: In a chilled bowl, beat the heavy cream with a hand mixer or whisk until soft peaks form. Add the maple syrup, vanilla extract (if using), and a pinch of salt. Continue whipping until stiff peaks form.
- Add the Magic: Gently fold in 1/2 teaspoon of pumpkin spice, leaving a light swirl for a pretty effect if you like.
- Serve & Enjoy: Spoon into a serving dish, drizzle with more maple syrup, and sprinkle with the remaining pumpkin spice.
Why You’ll Love It
- Cozy & Comforting: Brings autumn vibes with every bite.
- Naturally Sweetened: Maple syrup keeps it delicious yet wholesome.
- Versatile Delight: Use it as a topping or enjoy it straight from the bowl!
Serving Ideas
- Fall Beverages: Add a dollop to hot cocoa, pumpkin lattes, or spiced teas.
- Dessert Topping: Crown your pumpkin pie, apple crisp, or cinnamon rolls.
- Breakfast Treat: Spread on pancakes, waffles, or oatmeal for a seasonal twist.
Let the warm flavors of pumpkin spice and the rich sweetness of maple syrup turn any moment into a fall celebration. Cozy up and savor this autumn-inspired treat!
Salsa Fiesta – Mix in your favorite salsa and serve with tortilla chips.

A vibrant salsa fiesta is a perfect way to bring a party to life. In the image, you’ll see a colorful display of deliciousness that beckons you to dig in. The centerpiece is a beautifully crafted bowl filled with a fresh salsa. It looks like it has diced tomatoes, onions, and a sprinkle of cilantro, creating a feast for the eyes as well as the palate.
Surrounding the salsa are golden tortilla chips, ready for dipping. They have that perfect crunch you crave when snacking. The chips are arranged neatly to showcase the salsa, inviting everyone to enjoy a bite.
In the background, there’s an assortment of fruits and other dishes, adding to the festive feel. The colorful “FELIZ NAVIDAD” banner hints at a joyful celebration, making this a wonderful centerpiece for holiday gatherings or any get-together. It’s a friendly reminder that food and fun go hand in hand!
To kick off your salsa fiesta, gather your favorite ingredients. You can use tomatoes, onions, peppers, and even some mango for a twist. Mix everything together, season it with lime juice and salt, and you’re set! Pair it with those crispy tortilla chips, and you’ll have a hit on your hands.
Ingredients for the Perfect Salsa Fiesta
Here’s how to create a mouthwatering salsa that’s as festive as it looks:
- Tomatoes: 4 large ripe tomatoes, diced for a juicy base.
- Onion: 1 small red onion, finely chopped for a bit of zing.
- Bell Pepper: 1 small bell pepper (any color), diced for crunch and sweetness.
- Jalapeño: 1 small jalapeño, minced (optional for some heat).
- Cilantro: A handful of fresh cilantro, chopped for a burst of freshness.
- Lime Juice: Juice of 2 limes to brighten up the flavors.
- Salt & Pepper: To taste, for the perfect seasoning.
- Optional Add-Ins:
- Mango or Pineapple: For a tropical twist.
- Avocado: For creaminess and extra richness.
How to Make It
- Chop & Combine: In a large bowl, combine diced tomatoes, onion, bell pepper, jalapeño, and cilantro. Add any optional fruits if you like a sweet-savory mix.
- Season It Right: Squeeze in fresh lime juice and sprinkle with salt and pepper. Stir gently to mix everything well.
- Let It Rest: Allow the salsa to sit for at least 15-20 minutes so the flavors can meld together beautifully.
- Serve & Celebrate: Transfer the salsa to a festive serving bowl. Surround it with crispy tortilla chips and any other favorite sides like guacamole or queso dip.
Why It’s a Party Essential
- Fresh & Flavorful: Every bite bursts with garden-fresh ingredients.
- Customizable: Adjust the heat, sweetness, or add-ins to your taste.
- Crowd-Pleaser: It’s a hit at any party, from game nights to holiday feasts.
Serving Tips
- Classic Snack: Scoop with tortilla chips or pita chips for a perfect bite.
- Taco Topper: Spoon over tacos, burritos, or nachos for extra flair.
- Salad Boost: Use as a flavorful topping for mixed green salads.
Whether you’re hosting a holiday gathering or just craving something fresh, this salsa fiesta is sure to be the star of the table. Grab a chip and dive in!
Dark Chocolate Shavings – Sprinkle with dark chocolate shavings and a handful of strawberries.
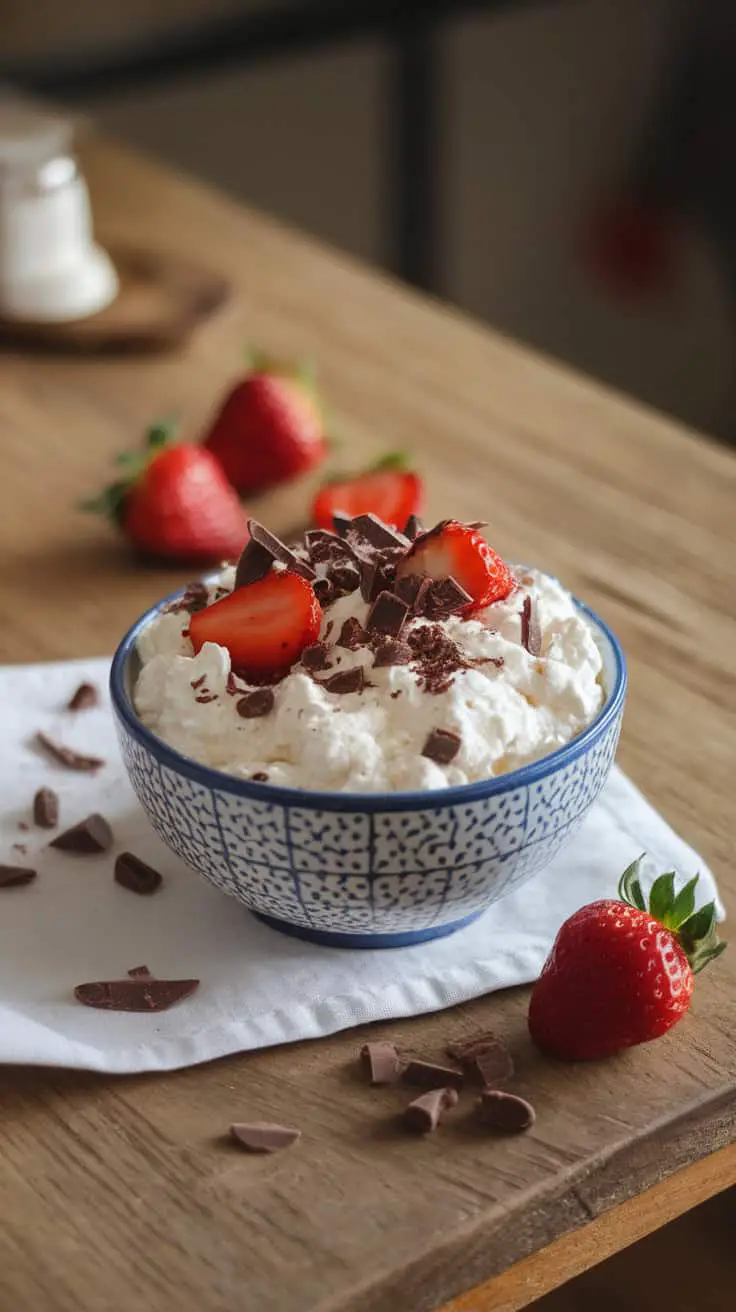
Dark chocolate shavings are a wonderful addition to many desserts. They bring a rich flavor that pairs beautifully with fresh fruits. In this image, we see a delightful bowl of whipped cream topped with these chocolate shavings and bright red strawberries.
The creamy texture of the whipped cream invites you in, while the dark chocolate adds a touch of elegance. Each bite offers a balance of sweetness and slight bitterness, making it a perfect treat for any occasion.
Fresh strawberries not only look appealing, but they also add a juicy quality to each mouthful. Their vibrant color contrasts nicely with the dark chocolate, making the dish visually striking. Together, these ingredients create a dessert that is both simple and indulgent.
To create a similar treat, you’ll need heavy cream, sugar, and good quality dark chocolate. Whip the cream until soft peaks form, then fold in sugar. Top it off with chocolate shavings and sliced strawberries for a sweet finish. Enjoy this delightful mix of flavors!
Ingredients You’ll Need
Here’s what makes this dessert both simple and indulgent, all while keeping each serving under 250 calories:
- Heavy Cream: 1 cup chilled, for that luscious whipped texture.
- Powdered Sugar: 2 tablespoons to lightly sweeten the cream.
- Vanilla Extract: 1 teaspoon for a warm, aromatic hint.
- Dark Chocolate: 1 ounce (70% cocoa or higher) for rich, bittersweet shavings.
- Fresh Strawberries: 1 cup, hulled and sliced for juicy sweetness.
How to Make It
- Whip the Cream: In a large bowl, beat the chilled heavy cream, powdered sugar, and vanilla extract until soft peaks form. Be careful not to overwhip!
- Prepare the Chocolate Shavings: Use a vegetable peeler or grater to shave the dark chocolate into thin curls or small shards.
- Assemble the Dessert: Spoon the whipped cream into serving bowls. Generously sprinkle the dark chocolate shavings over the top.
- Add Fresh Strawberries: Arrange the sliced strawberries around the whipped cream for a pop of color and freshness.
- Serve & Savor: Enjoy immediately for the freshest taste and creamiest texture!
Why You’ll Love It
- Balanced Indulgence: The richness of the dark chocolate pairs beautifully with the light, fluffy whipped cream.
- Fresh & Fruity: Juicy strawberries add natural sweetness and a refreshing contrast.
- Quick & Easy: Takes just minutes to assemble but looks and tastes like a gourmet treat!
Serving Ideas
- Elegant Dessert: Serve in glass bowls or dessert cups for a stylish presentation.
- Decadent Topping: Use as a topping for pancakes, waffles, or even brownies.
- Make It Your Own: Swap strawberries for raspberries or add a sprinkle of nuts for extra crunch.
Enjoy every creamy, chocolatey, and fruity bite—this dessert is a simple pleasure worth savoring!
Spicy Sriracha Twist – Add a squirt of sriracha and chopped green onions for a bold flavor.
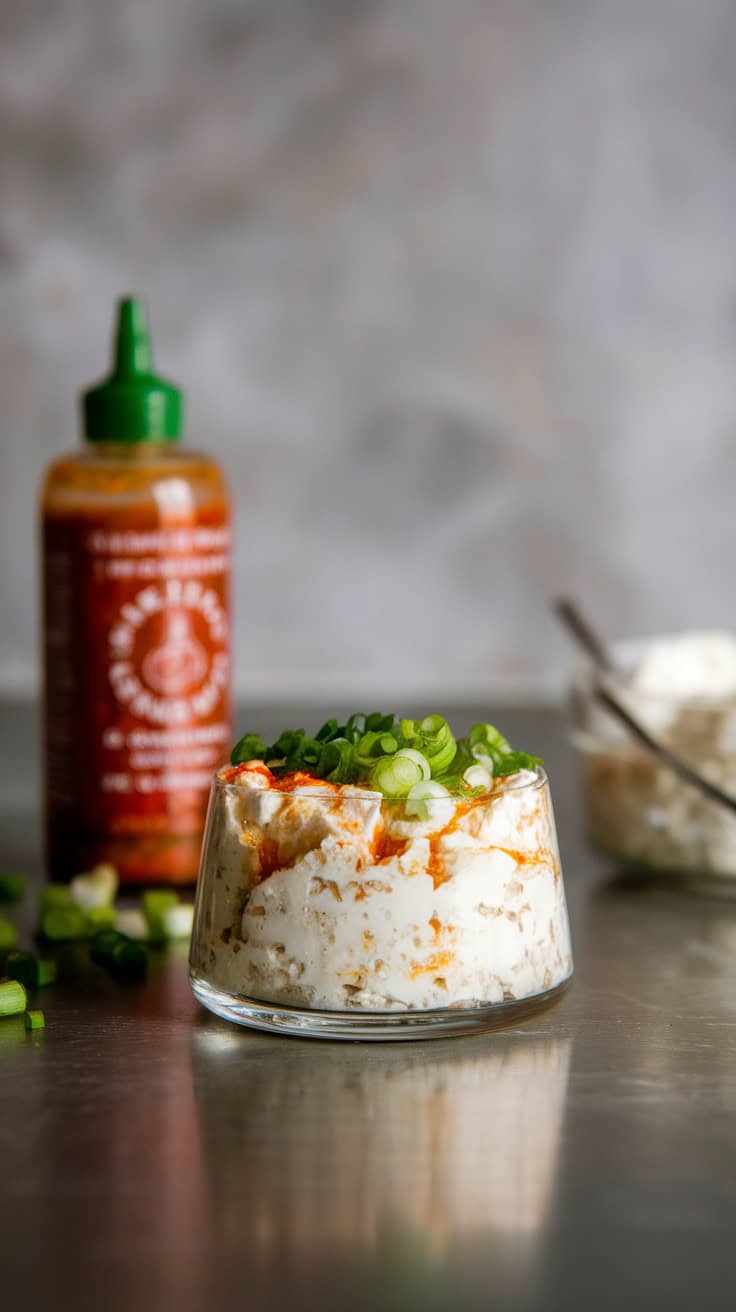
Check out this delicious dish that’s all about bold flavors! The creamy base is topped with a generous squirt of vibrant sriracha, giving it just the right amount of zing. Chopped green onions add a fresh crunch that complements the heat perfectly.
This combination isn’t just visually appealing; it’s a game changer for your taste buds! The rich creaminess combined with the spicy kick creates a balance that’s hard to resist. Whether you’re serving it as a dip or a topping, it’s sure to impress.
To replicate this in your kitchen, grab your favorite cream cheese or yogurt as a base. Then, simply mix in sriracha to your liking and top with those fresh green onions. It’s a quick and easy way to amp up any dish!
Ingredients You’ll Need
Get ready for a bold flavor explosion with these simple ingredients:
- Cream Cheese or Greek Yogurt: 1 cup, softened, for a creamy base.
- Sriracha Sauce: 2 tablespoons (or more for extra heat).
- Green Onions: 2 stalks, finely chopped, for freshness and crunch.
- Garlic Powder: 1/2 teaspoon for added depth (optional).
- Salt & Pepper: To taste, for balanced seasoning.
How to Make It
- Prepare the Base: In a mixing bowl, stir together softened cream cheese or Greek yogurt until smooth and creamy.
- Add the Heat: Mix in sriracha sauce, adjusting the amount to match your spice preference.
- Season & Enhance: Sprinkle in garlic powder, salt, and pepper. Stir until well combined.
- Top It Off: Transfer the dip to a serving dish. Sprinkle with chopped green onions and drizzle a little extra sriracha on top for that perfect presentation.
Why You’ll Love It
- Flavor-Packed: The perfect blend of creamy, spicy, and fresh.
- Quick & Easy: Ready in minutes with minimal prep.
- Versatile: Use it as a dip, spread, or sauce for tacos, burgers, or wraps.
Serving Ideas
- Dip Delight: Serve with chips, veggie sticks, or pita bread.
- Burger Booster: Spread on burgers or grilled chicken sandwiches.
- Taco Topping: Drizzle over tacos, burritos, or nachos for an extra kick.
This Spicy Sriracha Twist is your go-to for quick, crowd-pleasing flavor with just the right amount of heat and freshness!
Roasted Veggie Heaven – Top with roasted zucchini, eggplant, and a drizzle of balsamic glaze.
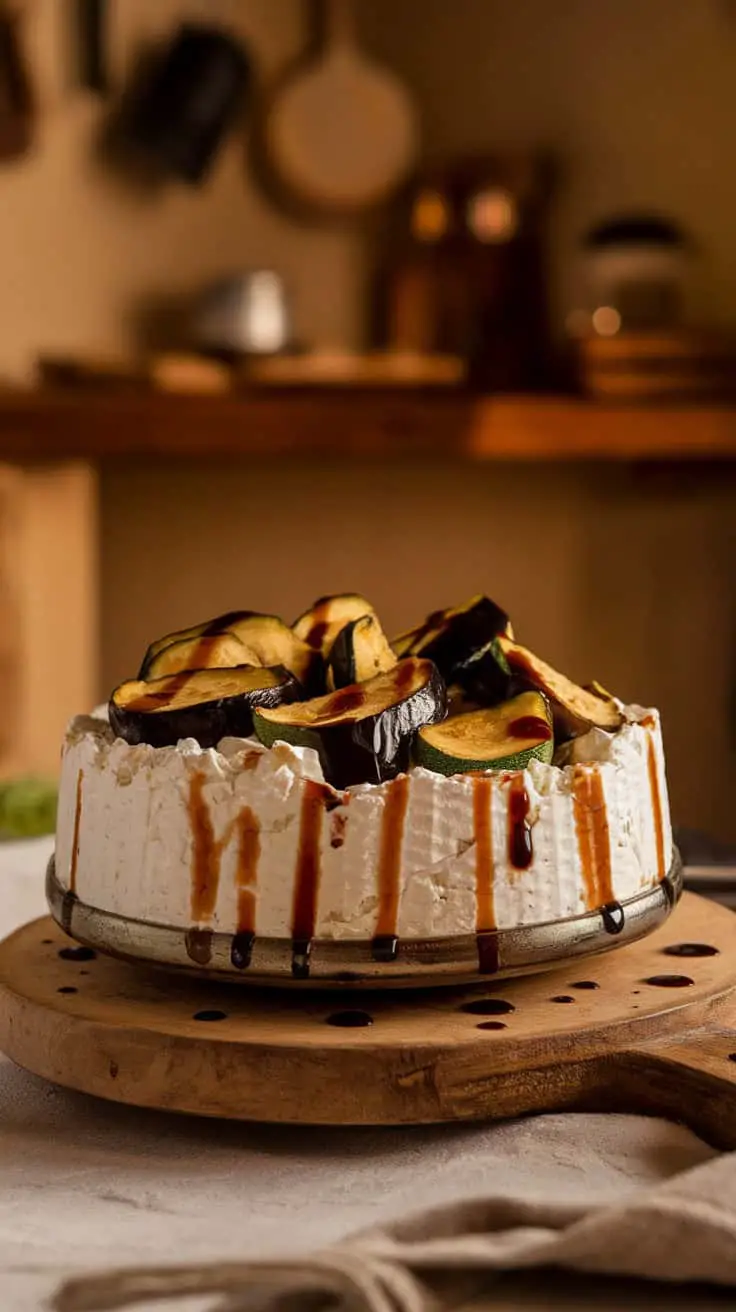
This image showcases a delightful dish featuring roasted zucchini and eggplant, beautifully arranged on a creamy base. The vibrant colors of the veggies pop against the white backdrop of the creamy layer, making it visually appealing.
The balsamic glaze drizzled on top adds a glossy finish and hints at a tangy flavor that balances the rich taste of the roasted vegetables. This simple yet elegant presentation invites you to dig in.
The dish is perfect for gatherings or a cozy dinner at home. Whether served as an appetizer or a main course, it highlights how delicious healthy eating can be. Pair it with some crusty bread or a fresh salad for a complete meal.
Ingredients You’ll Need
These fresh and flavorful ingredients come together for a dish under 250 calories per serving:
- Zucchini: 2 medium zucchinis, sliced into thick rounds for a tender bite.
- Eggplant: 1 medium eggplant, cut into slices or cubes for a hearty, smoky base.
- Olive Oil: 2 tablespoons for roasting and enhancing natural flavors.
- Balsamic Glaze: 2 tablespoons for that sweet and tangy finishing drizzle.
- Garlic Powder: 1 teaspoon for a hint of savory depth.
- Salt & Pepper: To season and balance the roasted veggies.
- Fresh Basil or Parsley (Optional): Chopped for a burst of fresh flavor.
How to Make It
- Prep the Veggies: Preheat your oven to 425°F (220°C). Slice the zucchini and eggplant into even pieces for consistent roasting.
- Season & Toss: In a large bowl, toss the veggies with olive oil, garlic powder, salt, and pepper until evenly coated.
- Roast to Perfection: Spread the vegetables on a baking sheet in a single layer. Roast for 20-25 minutes, flipping halfway, until golden and tender.
- Assemble the Dish: Arrange the roasted zucchini and eggplant on a platter or serving dish. Drizzle generously with balsamic glaze for that irresistible tang.
- Garnish & Serve: Sprinkle fresh herbs on top for extra freshness and visual appeal.
Why You’ll Love It
- Vibrant & Healthy: Packed with fiber, vitamins, and a satisfying roasted flavor.
- Low-Calorie & Guilt-Free: Each serving is under 250 calories.
- Versatile & Easy: Perfect as a side, appetizer, or even a light main course.
Serving Ideas
- Main Meal Magic: Serve over quinoa or couscous for a filling, balanced meal.
- Appetizer Alert: Use as a topping for toasted baguette slices or flatbreads.
- Salad Upgrade: Add to a mixed green salad with feta cheese and nuts.
Enjoy the perfect harmony of savory roasted veggies, sweet balsamic glaze, and fresh herbs. This is healthy eating at its most flavorful!
How can Low-Carb Snack Ideas Make Cottage Cheese More Exciting?
Looking to jazz up your cottage cheese? Try incorporating delicious lowcarb snack ideas like nuts, berries, or veggies. These additions can add flavor, texture, and nutrients to your snack, making it more exciting and satisfying. Plus, they can help keep your carb intake in check while still enjoying your cottage cheese.
Simple Salt and Pepper – Sometimes, all you need is a touch of salt and cracked black pepper to make it perfect.
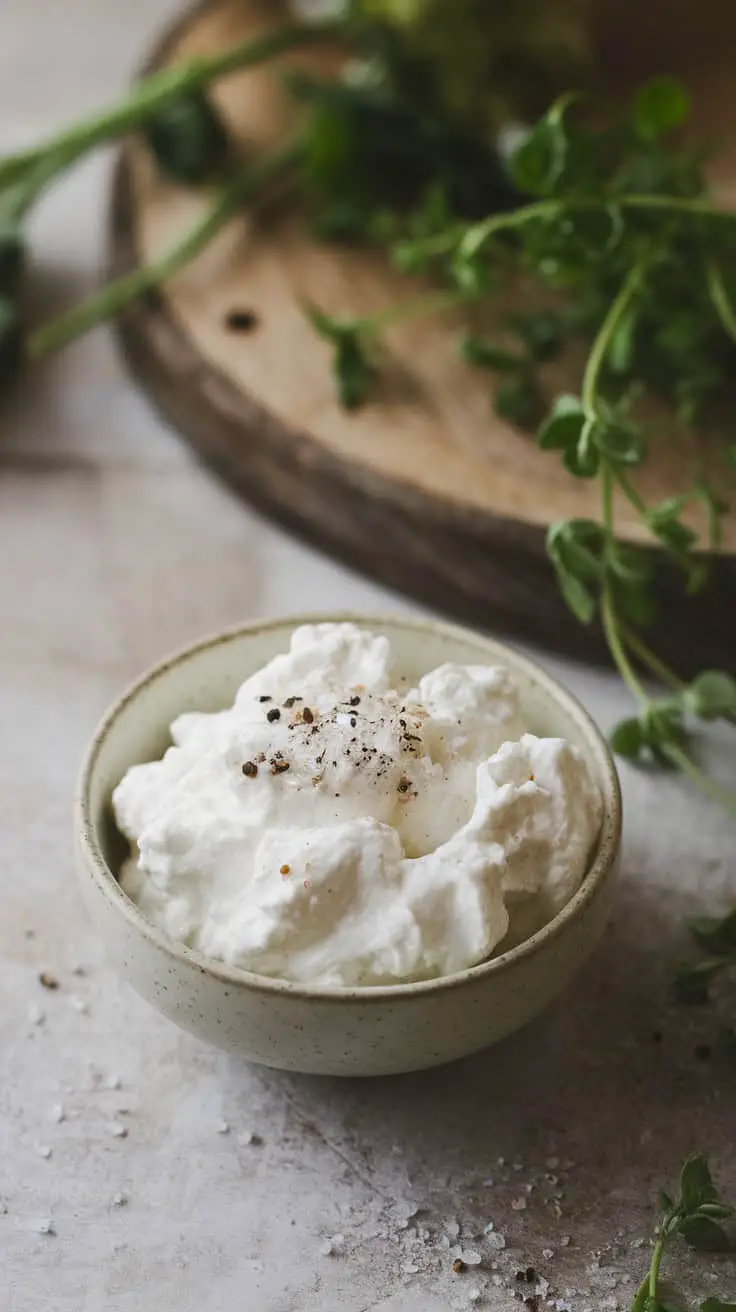
In the culinary world, simplicity often reigns supreme. Take a look at the image of that creamy, fluffy dish topped with a sprinkle of salt and cracked black pepper. It’s a perfect example of how minimal ingredients can elevate flavor.
The soft, white texture of the dish invites you in, while the seasoning adds just the right amount of zest. Salt enhances the natural taste, while black pepper brings a subtle warmth. Together, they create a delightful balance that complements the richness of the base ingredient.
This simple combination proves that you don’t need elaborate recipes or exotic spices to create a delicious dish. Sometimes, just a touch of salt and pepper is all it takes to make something truly special.
Next time you’re in the kitchen, remember this quick tip. A little salt and cracked black pepper can transform your meals, bringing out the flavors you didn’t even know were there!
Ingredients You’ll Need
This simple yet flavorful combo is all about balance and enhancing the natural taste of your dish:
- Salt: 1/2 teaspoon of sea salt or kosher salt for a clean, natural flavor.
- Cracked Black Pepper: 1/2 teaspoon freshly cracked black pepper for warmth and subtle spice.
How to Use It
- Prepare the Base: Choose a creamy dish like mashed potatoes, scrambled eggs, or a light soup. The neutral base lets the seasoning shine.
- Season with Intention: Sprinkle salt evenly over the surface to enhance the natural flavors. Add cracked black pepper for depth and a gentle kick.
- Adjust to Taste: Start with a small amount, then taste and adjust. Remember, you can always add more, but you can’t take it out.
- Garnish for Appeal: Finish with a sprinkle of fresh herbs like parsley or chives for a pop of color and freshness.
Why This Works
- Flavor Boost: Salt brings out the natural sweetness and richness in foods.
- Aromatic Warmth: Black pepper adds a mild heat without overpowering the dish.
- Versatility: This combo works on everything from creamy pasta to roasted veggies.
Serving Ideas
- Breakfast Favorite: Add to scrambled eggs or avocado toast.
- Simple Side: Toss freshly boiled potatoes or steamed veggies with olive oil, salt, and pepper.
- Classic Comfort: Sprinkle over creamy soups, risottos, or even buttered bread.
With just two pantry staples, you can elevate even the simplest dishes. Salt and cracked black pepper aren’t just seasonings—they’re game-changers in the kitchen!


