Snack platters are perfect for any occasion, whether it’s a cozy night in or a lively gathering with friends. They’re all about bringing together a variety of flavors and textures that everyone can enjoy. Check out these 25 fun and creative snack platter ideas to inspire your next spread!
Affiliate Disclosure: "As an Amazon Associate I earn from qualifying purchases made from the images and links in this post. We are a participant in the Amazon Services LLC Associates Program, an affiliate advertising program designed to provide a means for us to earn fees by linking to Amazon.com and other affiliated sites."
Brunch Bites Board
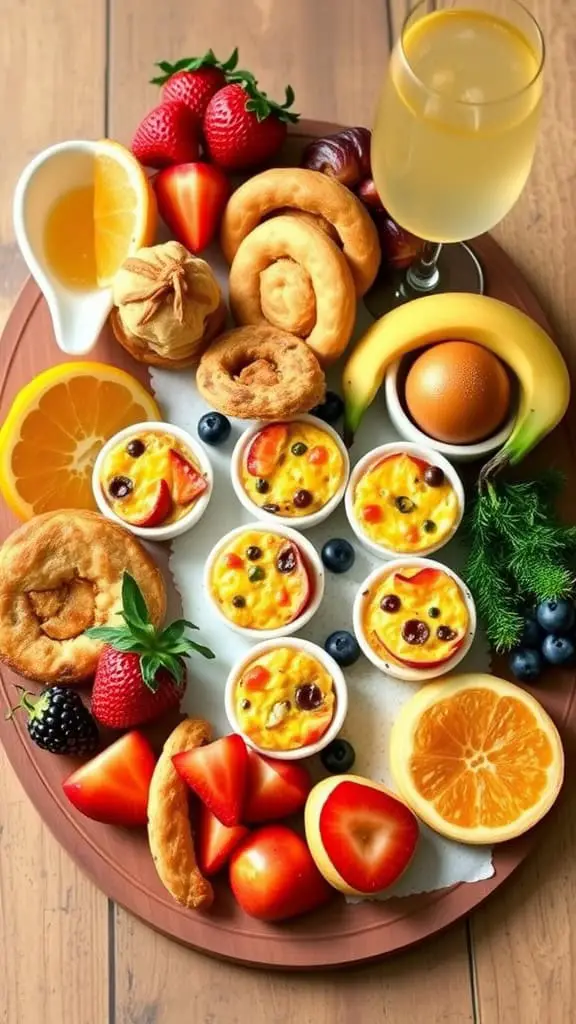
When it comes to brunch, a bites board can really shine. Picture a beautiful platter filled with a delightful mix of flavors and textures. This board is all about sharing and enjoying a variety of tasty treats.
Fresh fruits like strawberries, oranges, and bananas add a bright touch. They not only look good but taste great too! Adding some light pastries and savory bites ensures there’s something for everyone. Think of mini quiches nestled beside sweet rolls, creating a perfect balance.
Don’t forget the drinks! A refreshing glass of mimosa pairs wonderfully with your brunch spread. This combination truly makes it a festive occasion, whether you’re hosting a small gathering or just enjoying a cozy morning.
For those looking to impress, consider adding some themed elements to your brunch bites board. Try integrating seasonal grazing board ideas or even a sweet and salty twist. The options are endless, and it’s a fun way to mix things up!
Ingredients:
- Fresh Fruits:
- Strawberries, halved
- Orange slices
- Banana slices (optional: toss in lemon juice to prevent browning)
- Blueberries and raspberries for color and sweetness
- Pastries & Sweets:
- Mini croissants
- Danish pastries or sweet rolls
- Muffins (mini or regular size)
- Scones with small bowls of jam and clotted cream
- Savory Bites:
- Mini quiches (spinach and cheese, ham and cheese, or veggie)
- Cheese cubes (cheddar, gouda, or brie)
- Sliced deli meats (turkey, ham, or prosciutto)
- Hard-boiled eggs, halved and sprinkled with salt and pepper
- Extras:
- Nuts (almonds, walnuts, or pecans)
- Dried fruits (apricots, figs, or dates)
- Crackers or mini bagels
- Small bowls of cream cheese, honey, or flavored butters
Instructions:
- Prep the Ingredients: Wash and dry fruits thoroughly. Slice any large fruits and pastries for easy grabbing.
- Arrange the Board: Start with larger items like pastries and mini quiches. Spread them across the board, leaving spaces for smaller items.
- Add Fruits and Savory Bites: Place fruits in clusters for a visually appealing look. Add savory items like cheese cubes, deli meats, and eggs in separate sections.
- Fill Gaps with Extras: Use nuts, dried fruits, and crackers to fill any empty spaces. Add small bowls of spreads, dips, or sauces as needed.
- Garnish and Serve: Add fresh herbs like mint or rosemary for a pop of greenery. Serve immediately or cover and refrigerate until ready.
Serving Tips:
- Personal Touch: Use themed serving boards or platters for extra flair.
- Beverage Pairing: Serve with mimosas, coffee, or a refreshing fruit-infused water.
- Make Ahead: Prep ingredients the night before and assemble just before serving.
This brunch bites board is a feast for the eyes and the taste buds. With its vibrant colors and mix of sweet and savory treats, it’s the perfect centerpiece for your next brunch gathering!
Fruit & Nut Harmony Platter
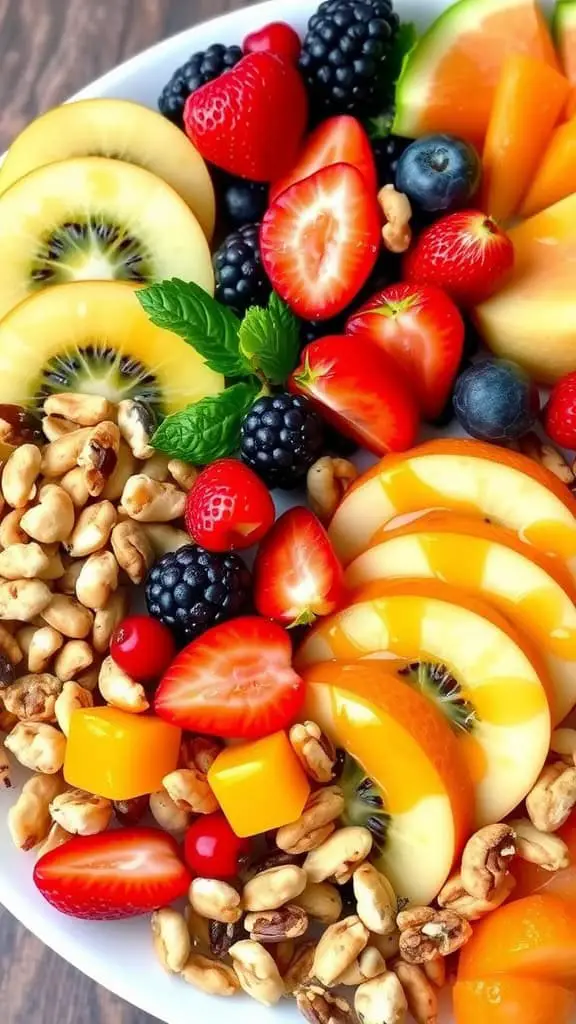
The Fruit & Nut Harmony Platter is a colorful and inviting spread that’s perfect for any gathering. Picture slices of ripe kiwi and juicy peaches artfully arranged alongside a mix of fresh berries. The vibrant colors pop, making it a feast for the eyes.
This platter not only looks good but also offers a delightful balance of flavors. The sweet and tart notes from strawberries and blueberries complement the crunchy texture of walnuts and mixed nuts. It’s a healthy option that adds a refreshing touch to your snack table.
If you’re planning a movie night, consider pairing this platter with some cheese and meat board inspiration for a wholesome snack experience. You can also make it a part of your tapas tray creations or even a game night snack board.
With this Fruit & Nut Harmony Platter, you’re not just serving food; you’re creating an opportunity for everyone to share and enjoy. It’s a great way to introduce some seasonal grazing board ideas at your next gathering. Plus, it’s super easy to assemble!
Ingredients:
- Fresh Fruit:
- 2 kiwis, peeled and sliced
- 2 peaches, pitted and sliced
- 1 cup strawberries, hulled and halved
- 1 cup blueberries
- Nuts and Extras:
- 1/2 cup walnuts
- 1/2 cup mixed nuts (almonds, cashews, pecans)
- Optional: dried apricots, cranberries, or dark chocolate pieces
Instructions:
- Prepare the Fruit: Wash all fruit thoroughly. Peel and slice kiwis and peaches. Hull and halve the strawberries.
- Arrange the Platter:
- Start with a large serving tray or wooden board.
- Arrange kiwi slices and peach wedges in alternating rows or clusters.
- Scatter strawberries and blueberries around the larger fruit for visual appeal.
- Add the Nuts:
- Place walnuts and mixed nuts in small sections or in separate bowls if preferred.
- Sprinkle dried fruit or chocolate pieces around the fruit for added sweetness.
- Finishing Touch:
- Garnish with fresh mint leaves or edible flowers for extra flair.
Serving Tips:
- Presentation Tip: Use a variety of bowls, ramekins, or small plates to separate nuts from juicy fruits to keep textures fresh.
- Customization Idea: Swap out fruits with whatever is in season or your favorites like grapes, cherries, or pineapple.
- Make Ahead: Assemble the platter up to 2 hours ahead of time and keep it refrigerated until serving.
This Fruit & Nut Harmony Platter is a crowd-pleasing centerpiece that combines freshness, sweetness, and crunch in every bite. It’s as enjoyable to look at as it is to eat—perfect for creating memorable gatherings!
Sweet & Savory Snack Spread
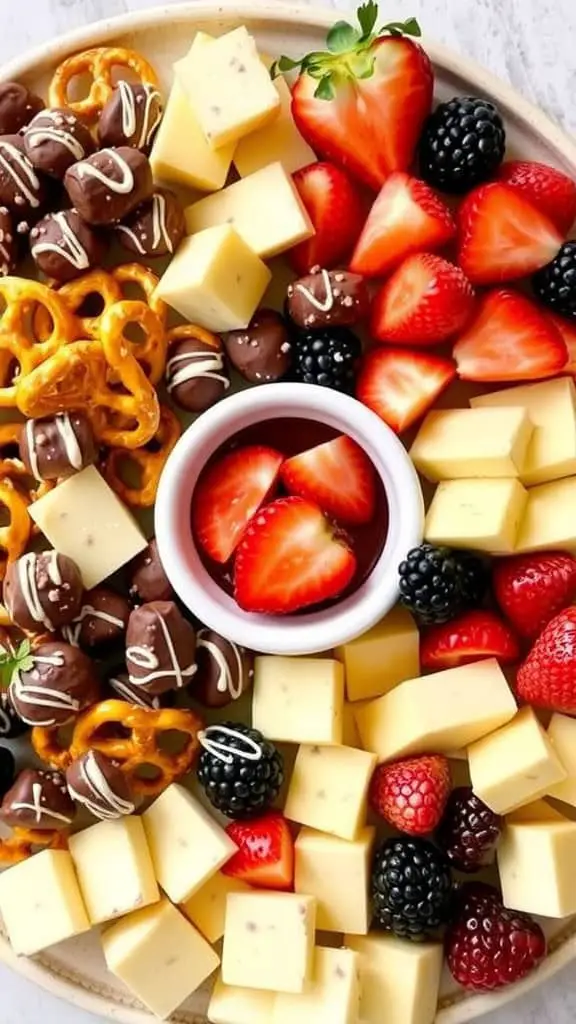
This vibrant spread is a perfect mix of sweet and savory treats that brings a smile to any gathering. The combination of juicy strawberries, rich cheeses, and crunchy pretzels creates an inviting snack experience.
The centerpiece features a variety of cheeses cut into bite-sized cubes, offering a creamy contrast to the fresh fruits. Strawberries and blackberries add a burst of color and sweetness, making the platter visually appealing.
Chocolate-covered pretzels provide a delightful crunch, pairing well with the cheese. The small bowl of strawberry dipping sauce in the middle invites everyone to enjoy an extra layer of flavor. It’s a fun touch that encourages sharing, perfect for a movie night munchies platter or a casual gathering with friends.
This spread serves as great inspiration for anyone looking to create their own DIY snack tray ideas. Whether you’re planning a party or a cozy evening at home, consider this as one of your go-to snack board ideas.
Ingredients:
- Cheese Cubes:
- 1 cup sharp cheddar cheese, cubed
- 1 cup Monterey Jack or your favorite mild cheese, cubed
- Fruits:
- 1 cup fresh strawberries, hulled and halved
- 1 cup fresh blackberries
- Crunchy Treats:
- 1 cup chocolate-covered pretzels (dark or milk chocolate)
- Dipping Sauce:
- 1/2 cup strawberry or mixed berry dipping sauce (store-bought or homemade)
Instructions:
- Prepare the Ingredients:
- Wash and dry the strawberries and blackberries thoroughly.
- Cut the cheeses into bite-sized cubes.
- Assemble the Spread:
- Use a large serving platter or wooden board.
- Arrange the cheese cubes in neat sections for easy grabbing.
- Place the strawberries and blackberries in separate clusters around the board.
- Add the chocolate-covered pretzels to create texture and contrast.
- Add the Dipping Sauce:
- Pour the dipping sauce into a small bowl and place it in the center or a convenient spot on the board.
- Presentation Tips:
- Use sprigs of fresh mint or edible flowers for added color.
- Vary the arrangement to create an inviting, visually balanced spread.
Serving Suggestions:
- Party Ready: This spread makes a great appetizer for parties, potlucks, or casual get-togethers.
- Movie Night Treat: Perfect for a cozy movie night with friends or family.
- Brunch Addition: Add it to a larger brunch board for a sweet and savory twist.
With its vibrant colors, contrasting textures, and balanced flavors, this sweet and savory snack spread is sure to be a hit at any gathering. Enjoy mixing and matching bites for the ultimate snacking experience!
Mediterranean Mezze Board
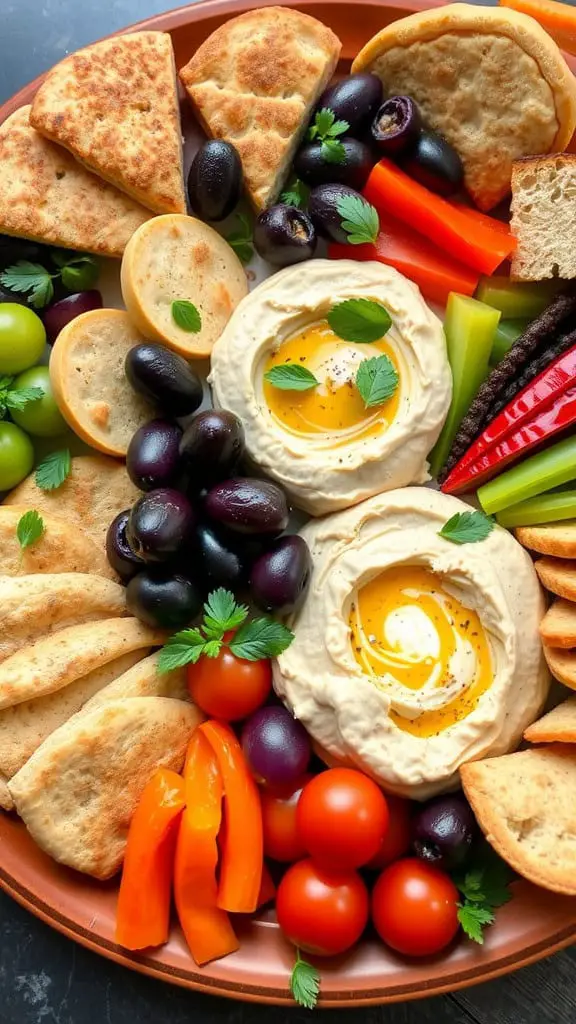
A Mediterranean mezze board is a delightful way to enjoy a variety of flavors. Picture a large platter filled with vibrant colors and textures. This spread is perfect for sharing with friends and family. You’ll find soft hummus topped with a drizzle of olive oil, inviting you to dip in your favorite veggies or pita bread.
Alongside the hummus, the board features fresh grape tomatoes, crunchy bell peppers, and crisp celery sticks. These fresh ingredients add a refreshing crunch to your snacking experience. The olives bring a briny touch, balancing the flavors beautifully.
Pita bread and warm flatbreads are essential here. They are great for scooping up the hummus or enjoying on their own. Adding various textures makes this board a true feast for the senses. It’s not just a snack; it’s a way to gather and enjoy delightful bites.
This mezze board can inspire many ideas for your next gathering. You could easily turn it into a tapas tray or a movie night munchies platter. The key is to choose a mix of textures and tastes that everyone will love. Whether it’s for a party or a cozy evening in, a Mediterranean mezze board is always a hit!
Ingredients:
- Hummus: 1 cup store-bought or homemade, drizzled with extra virgin olive oil and sprinkled with paprika or za’atar.
- Pita Bread & Flatbreads: 4-6 pieces, warmed and cut into triangles.
- Olives: 1 cup mixed olives (Kalamata, green, or your favorites).
- Fresh Vegetables:
- Grape tomatoes (1 cup)
- Cucumber slices (1 large cucumber)
- Bell pepper strips (1-2, mixed colors)
- Celery sticks (2-3 stalks, trimmed and cut into sticks)
- Carrot sticks (2 large carrots, peeled and sliced)
- Cheese (Optional): Feta cubes or mozzarella balls for extra richness.
- Extras (Optional):
- Stuffed grape leaves (dolmas)
- Marinated artichokes or roasted red peppers
- Tzatziki or baba ganoush for additional dipping options
Instructions:
- Prepare the Board: Use a large wooden board, platter, or tray as your base. Arrange the hummus bowl in the center.
- Add the Dippers: Place pita triangles around the hummus. Add flatbreads if using.
- Arrange the Vegetables: Group fresh veggies in sections around the board, keeping contrasting colors next to each other for visual appeal.
- Include Olives & Extras: Scatter the olives around the board. Add any optional extras like cheese, dolmas, or marinated veggies for variety.
- Final Touches: Drizzle a bit of olive oil over the hummus, sprinkle with paprika or za’atar, and garnish the board with fresh herbs like parsley or mint if desired.
- Serve & Enjoy: Serve immediately or cover and refrigerate until ready to serve.
Serving Tips:
- Customizable: Swap in your favorite Mediterranean ingredients like roasted eggplant or sun-dried tomatoes.
- Presentation Tip: Use small bowls for dips or juicy items like olives to prevent spreading.
- Party Ready: Prepare ahead, refrigerate, and add fresh bread and herbs just before serving.
With its balance of creamy, crunchy, salty, and fresh flavors, this Mediterranean mezze board is a perfect centerpiece for any gathering. Enjoy sharing and savoring every bite!
Cheese & Charcuterie Delight
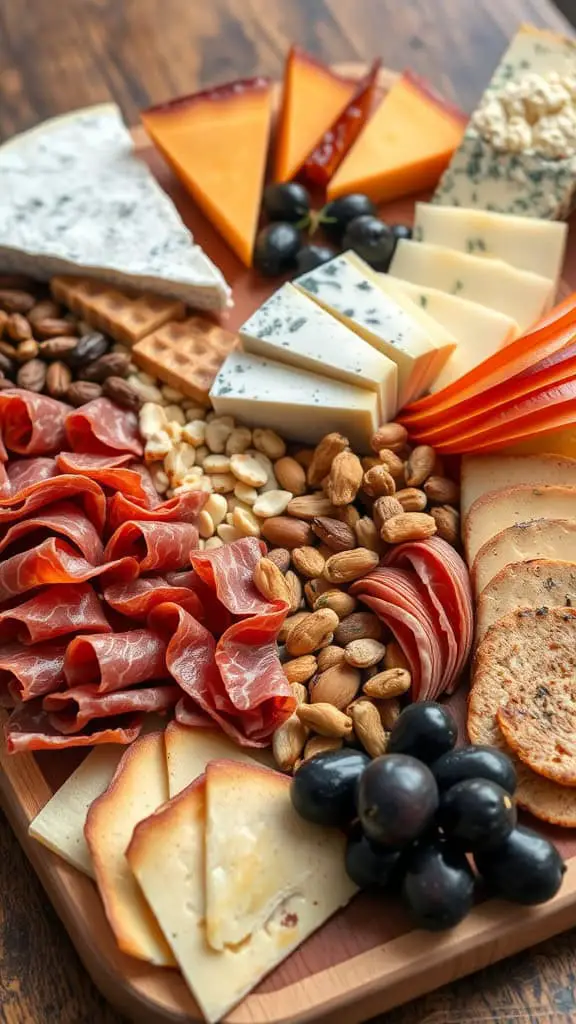
Picture a beautiful spread that invites you to snack away. This cheese and charcuterie board is a feast for the eyes and taste buds. Each item adds its own flavor and texture, making this a go-to for any gathering.
You’ll find an array of cheeses here, from creamy blue to sharp cheddar. The different colors and shapes create a vibrant display. Complementing the cheeses are slices of cured meats, offering savory bites that pair perfectly with the cheese. Add in a handful of nuts and some fresh grapes, and you have a well-rounded mix.
This setup is not just for fancy parties. It’s perfect for cozy movie nights, festive gatherings, or casual get-togethers with friends. Consider some shareable snack board ideas or a game night snack board to keep the good times rolling.
For those who enjoy variety, a sweet and salty board can bring even more excitement. You can include fruits, crackers, and maybe even some chocolate. Whether you go for gourmet snack platter ideas or simple finger food ideas, your guests will love the options.
Next time you’re hosting, think about creating your own charcuterie board creations. It’s easy, fun, and sure to impress. Use this as your snack tray inspiration to get started!
Ingredients:
- Cheeses:
- 4 oz sharp cheddar (cubed or sliced)
- 4 oz brie (cut into wedges)
- 4 oz gouda or smoked cheese (sliced)
- 4 oz blue cheese (crumbled or in small wedges)
- Cured Meats:
- 4 oz prosciutto (thinly sliced)
- 4 oz salami (sliced)
- 4 oz chorizo or pepperoni (optional for extra spice)
- Fruits & Nuts:
- 1 cup seedless grapes (red and green for color contrast)
- 1 apple or pear (sliced)
- 1/2 cup dried apricots or figs
- 1/2 cup mixed nuts (almonds, walnuts, or pecans)
- Crackers & Breads:
- 1 baguette (sliced thin)
- 1 sleeve of assorted crackers (whole-grain, seeded, or water crackers)
- Extras & Garnishes:
- Fresh rosemary sprigs or thyme (for a pop of green)
- Honey or fig jam (for sweetness)
- Dijon mustard (for a tangy dip)
- Cornichons or pickles (for a vinegary bite)
Instructions:
- Prepare the Board: Choose a large wooden or slate serving board. Arrange small bowls for dips, honey, and nuts.
- Start with Cheese: Spread out the cheeses across the board. Vary the types for visual appeal and easy access.
- Add Cured Meats: Fold or roll the meats and place them near complementary cheeses.
- Place Fruits & Nuts: Fill gaps with grapes, sliced apples or pears, and dried fruits. Scatter mixed nuts around for crunch.
- Arrange Crackers & Bread: Stack crackers and bread slices on the sides or near spreads.
- Garnish & Serve: Add rosemary sprigs, mustard, and pickles for added flavor and presentation.
Serving Tips:
- Balance Flavors: Combine sweet fruits with salty meats and tangy cheeses.
- Mix Textures: Include creamy, crunchy, and chewy elements for variety.
- Keep it Fresh: Add fruits and crackers just before serving to keep everything crisp.
This cheese and charcuterie board is an instant hit for any gathering. It’s simple to assemble but looks impressively gourmet. Enjoy building your own customized snack board and let the delicious combinations shine!
Tex-Mex Fiesta Board
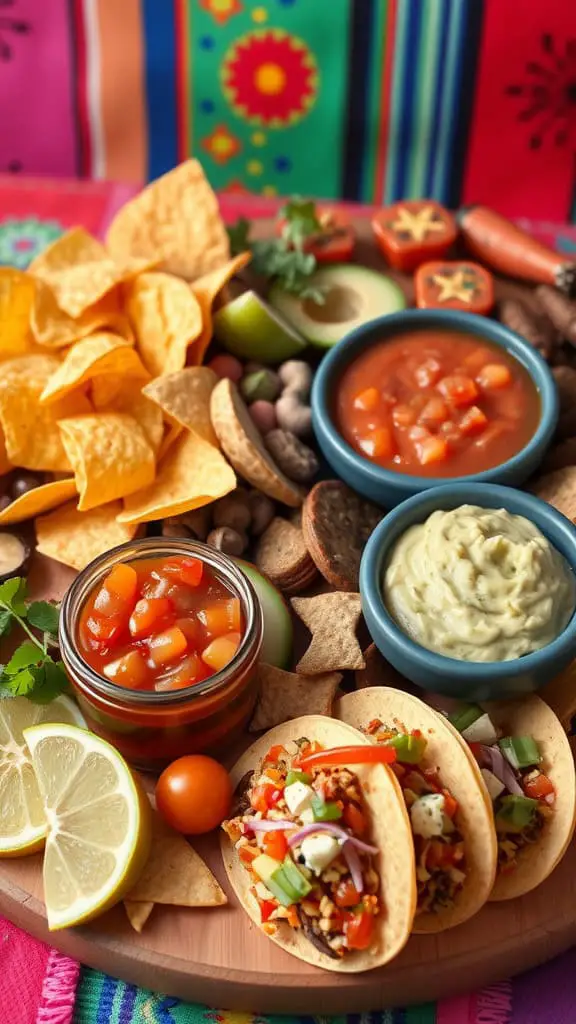
Get ready for a colorful feast with this Tex-Mex fiesta board! It’s packed with tasty treats that make any gathering feel special. You’ll find crunchy tortilla chips, zesty salsa, and fresh guacamole that scream flavor.
The star of the show is definitely those adorable mini tacos. Filled with savory goodness, they’re the perfect bite-sized delight. You can also see some refreshing lime wedges and cherry tomatoes for a burst of freshness.
This board is a stellar example of how to create a festive appetizer board. It combines classic flavors and vibrant colors that are sure to impress your guests. Whether it’s a game night or a casual get-together, this setup is sure to be a hit.
For those looking for more ideas, consider adding a few more options like a cheese and meat board inspiration, or even some seasonal grazing board ideas. Whatever you choose, a well-arranged platter like this makes for the ultimate party platter options!
Ingredients:
- Tortilla Chips: Choose your favorite variety—classic, blue corn, or multigrain.
- Mini Tacos: Store-bought or homemade with fillings like seasoned beef, shredded chicken, or black beans.
- Salsa: Fresh tomato salsa or pico de gallo for a zesty kick.
- Guacamole: Creamy, homemade guacamole with ripe avocados, lime juice, cilantro, onion, and a pinch of salt.
- Cheese: Shredded cheddar, Monterey Jack, or a Mexican cheese blend.
- Fresh Garnishes: Lime wedges, sliced jalapeños, cherry tomatoes, and chopped cilantro.
- Extras (Optional): Sour cream, hot sauce, and queso dip.
Instructions:
- Prep the Ingredients: Make or buy mini tacos, guacamole, salsa, and prepare your chosen garnishes.
- Assemble the Board:
- Start with larger items like mini tacos and bowls of salsa and guacamole.
- Arrange tortilla chips around the bowls and create small piles.
- Sprinkle cheese between the chips for added flavor.
- Add fresh garnishes like lime wedges, jalapeños, and cherry tomatoes for pops of color.
- Final Touches:
- Add any extras like sour cream or hot sauce on the side.
- Garnish the guacamole and salsa bowls with a sprig of cilantro or a lime slice for a festive look.
Serving Tips:
- Keep It Fresh: Prepare the guacamole and salsa just before serving to keep them vibrant and flavorful.
- Customize It: Add your favorite Tex-Mex items like taquitos, quesadillas, or even Mexican street corn.
- Presentation: Use a wooden or slate board for a rustic, authentic touch.
Your Tex-Mex fiesta board is now ready to wow your guests! The combination of crunchy chips, savory tacos, and zesty dips guarantees a fun and flavorful party experience. Enjoy the fiesta!
Veggie & Dip Extravaganza
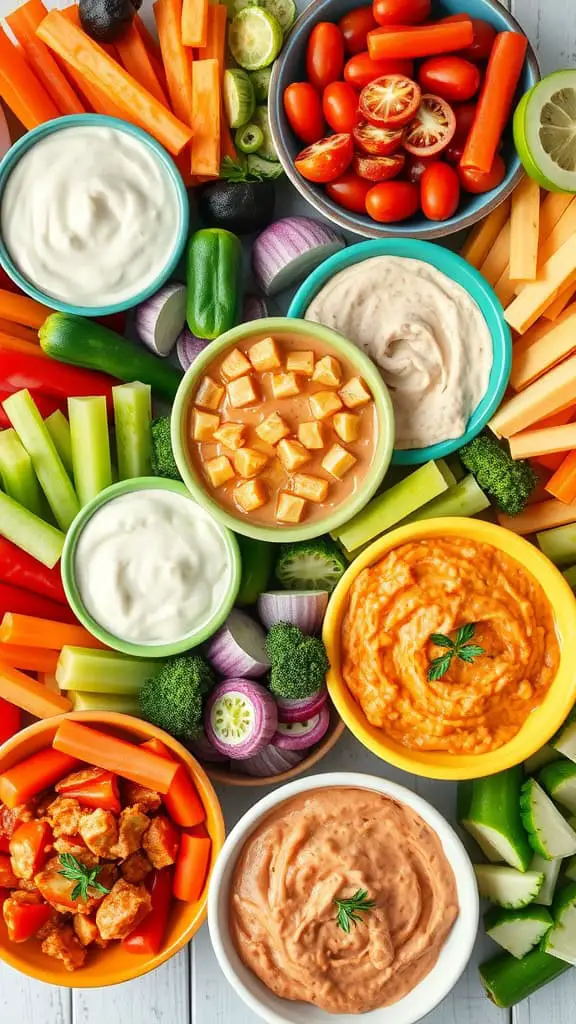
This colorful spread is a veggie lover’s dream! A vibrant array of fresh vegetables surrounds a selection of delicious dips, making it perfect for any gathering.
The crunch of carrots, celery, and bell peppers pairs beautifully with creamy dips like ranch and hummus. You can easily transform this into a healthy grazing board with options for everyone.
For those planning a game night, this platter serves as a great base for your movie night munchies. Pair it with some cheese and meat board inspiration or even add in a fruit and nut platter to balance out the flavors.
Creating a shareable snack board like this is fun and easy! It’s perfect for a picnic, a kids’ snack tray, or a festive appetizer board. Just think about mixing it with sweet and salty boards or themed party platter ideas for your next event.
So grab your favorite veggies and dips, gather your friends, and enjoy a delightful veggie extravaganza that everyone will love!
Ingredients:
Vegetables:
- Carrot sticks
- Celery sticks
- Bell peppers (red, yellow, green) sliced into strips
- Cherry tomatoes
- Cucumber slices
- Broccoli florets
- Cauliflower florets
- Radishes, halved or sliced
Dips:
- Classic ranch dressing
- Hummus (plain or flavored)
- Guacamole
- Greek yogurt dill dip
- Spinach artichoke dip
Instructions:
- Prepare the Veggies: Wash all vegetables thoroughly and pat them dry with paper towels.
- Slice and Arrange: Cut the vegetables into bite-sized pieces. Arrange them in groups on a large serving platter or wooden board for a visually appealing presentation.
- Place the Dips: Transfer dips into small serving bowls. Nestle the bowls among the vegetables to create an inviting and balanced look.
- Add Garnish (Optional): Sprinkle fresh herbs like parsley or dill over the veggies and dips for extra freshness and visual appeal.
- Serve and Enjoy: Set out the platter just before your guests arrive. Encourage mixing and matching for endless flavor combinations.
Serving Tips:
- Keep It Fresh: Cover and refrigerate until ready to serve.
- Mix It Up: Swap in seasonal veggies like snap peas, zucchini sticks, or asparagus.
- Customize the Dips: Offer a mix of creamy, tangy, and spicy dips to please all palates.
This veggie and dip extravaganza is a feast for both the eyes and the taste buds. It’s wholesome, fresh, and endlessly customizable. Enjoy creating a colorful and delicious spread that’s sure to be the star of any gathering!
Healthy Energy Booster Platter
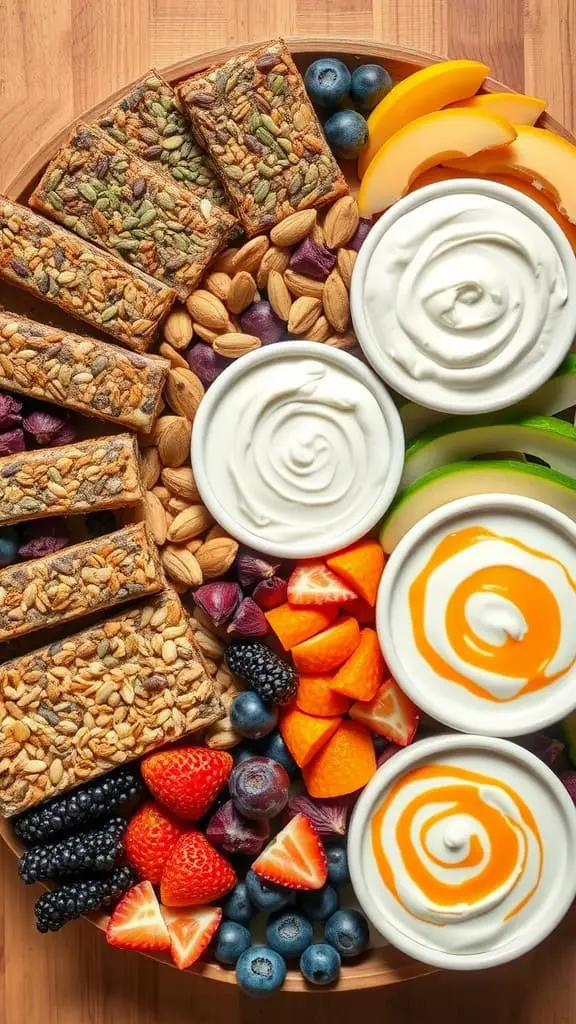
Looking for a fun way to boost your energy? This Healthy Energy Booster Platter is packed with delicious and nutritious options. It offers a vibrant mix of fruits, nuts, and yogurt, making it perfect for any time of the day.
The platter features crunchy granola bars with seeds, providing a satisfying texture and lots of fiber. Nuts like almonds add a nice crunch and are great for protein. Fresh fruits like strawberries, blueberries, and slices of green apple bring a burst of flavor and natural sweetness.
Dipping into creamy yogurt is a treat! The yogurt not only adds creaminess but also enhances the nutritional value. You can swirl in some honey or fruit puree for an extra zing. This platter is a fantastic choice for healthy grazing board ideas, whether for a snack at home or a gathering with friends.
It’s perfect for movie nights, game nights, or even as a light bites platter option at parties. The mix of sweet and savory flavors keeps everyone coming back for more!
Ingredients:
- Granola Bars: Choose your favorite variety, preferably with nuts, seeds, or dried fruit.
- Nuts and Seeds: Almonds, walnuts, cashews, sunflower seeds, and pumpkin seeds.
- Fresh Fruits:
- Strawberries, halved
- Blueberries
- Green apple slices (sprinkle with lemon juice to prevent browning)
- Grapes (red or green)
- Orange segments or mandarin slices
- Yogurt Dip:
- Plain Greek yogurt (or a flavored variety if preferred)
- Honey or maple syrup (optional, for sweetness)
- A sprinkle of cinnamon or a dash of vanilla extract (optional)
Instructions:
- Prepare the Fruits: Wash all the fruits thoroughly. Slice apples, oranges, and strawberries. Keep the grapes and blueberries whole for easy snacking.
- Arrange the Platter: Use a large serving board or tray.
- Place a small bowl of yogurt in the center.
- Arrange granola bars around the yogurt bowl.
- Create sections for each type of nut and fruit, ensuring a balanced and visually appealing layout.
- Customize the Dip:
- If desired, stir honey or maple syrup into the yogurt for added sweetness.
- Add a sprinkle of cinnamon or vanilla extract for extra flavor.
- Serve and Enjoy:
- Serve immediately, or cover and chill until ready to serve.
- Offer small plates or bowls for guests to create their own combinations.
Serving Tips:
- Personalize It: Add dark chocolate chips or coconut flakes for extra variety.
- Make It Fun: Use small skewers or cocktail sticks so guests can easily assemble fruit and granola bites.
- Stay Fresh: Keep chilled until serving to maintain fruit freshness.
This Healthy Energy Booster Platter is a hit with its mix of flavors and textures. The balance of crunchy, juicy, and creamy ingredients ensures a satisfying snack everyone will enjoy!
Italian Antipasto Feast
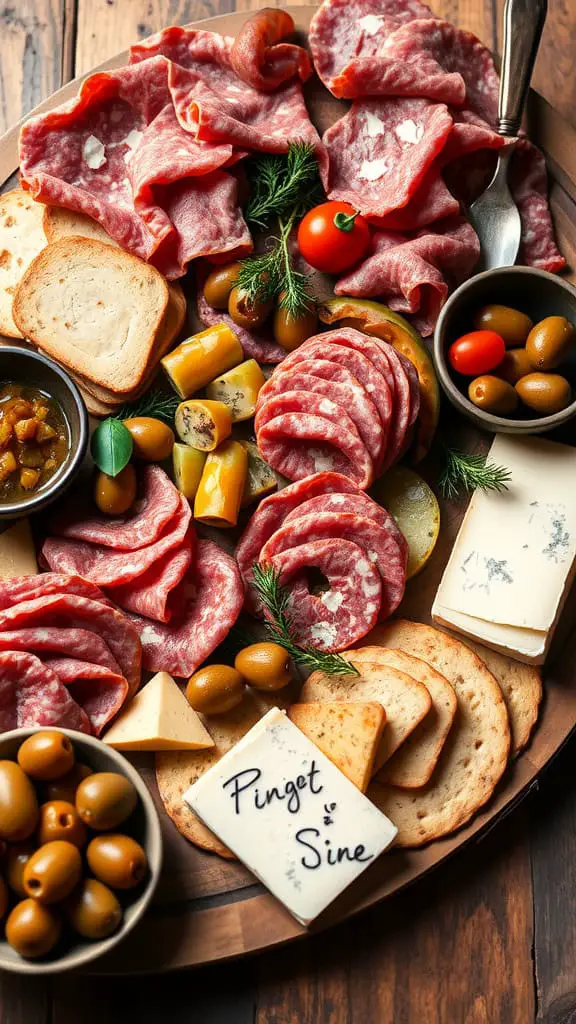
An Italian antipasto feast is a delightful way to kick off any gathering. Imagine a beautifully arranged platter filled with an array of savory treats. The image captures the essence of this spread perfectly.
Salami and other cured meats take center stage, inviting everyone to dig in. The rich colors and textures create a feast for the eyes. Pairing these meats with slices of bread only enhances the experience.
You’ll also find a mix of olives and pickled vegetables, adding a tangy twist to the board. These components make great finger food ideas for any occasion. The fresh tomatoes and herbs provide a pop of color, making the platter not just tasty but visually appealing.
This antipasto board serves as fantastic picnic board inspiration and works well for themed party platter ideas. It’s perfect for a game night snack board or a festive appetizer board. Everyone can grab a little something, making it a social way to enjoy food.
Consider adding some cheese varieties for a gourmet snack platter idea. Whether it’s mozzarella or a sharper option, cheese complements the meats wonderfully. These elements come together to create a relaxed atmosphere, perfect for enjoying time with friends and family.
Ingredients:
- Cured Meats: Sliced salami, prosciutto, capicola, and mortadella
- Cheeses: Fresh mozzarella, provolone, Parmesan wedges, or Asiago
- Breads & Crackers: Sliced baguette, ciabatta, grissini (Italian breadsticks), and assorted crackers
- Olives & Pickles: Green and black olives, marinated artichoke hearts, pickled peppers, and cornichons
- Fresh Produce: Cherry tomatoes, cucumber slices, sweet bell pepper strips, and fresh basil leaves
- Extras: Roasted red peppers, sun-dried tomatoes, marinated mushrooms, and stuffed grape leaves
- Condiments: Olive oil, balsamic glaze, and a selection of mustards or spreads
Instructions:
- Prepare the Platter: Choose a large wooden board or serving tray as your base.
- Arrange Meats: Fold or roll the cured meats into attractive bundles and place them in different sections of the platter.
- Add Cheeses: Slice the cheeses into bite-sized pieces or leave larger chunks for variety. Spread them evenly around the platter.
- Include Breads and Crackers: Fan out the sliced bread and arrange the crackers in open spaces for easy grabbing.
- Add Olives and Pickles: Place olives, artichokes, and pickles in small bowls or directly on the board to contain juices.
- Fresh Produce: Scatter cherry tomatoes, cucumber slices, and bell pepper strips throughout the platter for color and freshness.
- Extras for Flavor: Add sun-dried tomatoes, marinated mushrooms, and roasted red peppers for extra depth of flavor.
- Finishing Touches: Drizzle olive oil and balsamic glaze over select items if desired. Garnish with fresh basil leaves for an aromatic touch.
- Serve and Enjoy: Present the antipasto platter as a centerpiece. Encourage guests to mix and match flavors for a personalized tasting experience.
Serving Tips:
- Theme It: Customize the platter with Italian-themed décor or napkins for added flair.
- Balance the Flavors: Aim for a mix of salty, tangy, creamy, and crunchy elements.
- Keep It Fresh: Prepare the platter shortly before serving to maintain freshness and appearance.
This Italian antipasto feast is a surefire crowd-pleaser. The harmonious mix of cured meats, cheeses, and pickled treats creates a perfect balance of flavors. Enjoy the delicious variety with family and friends!
Tropical Paradise Snack Tray
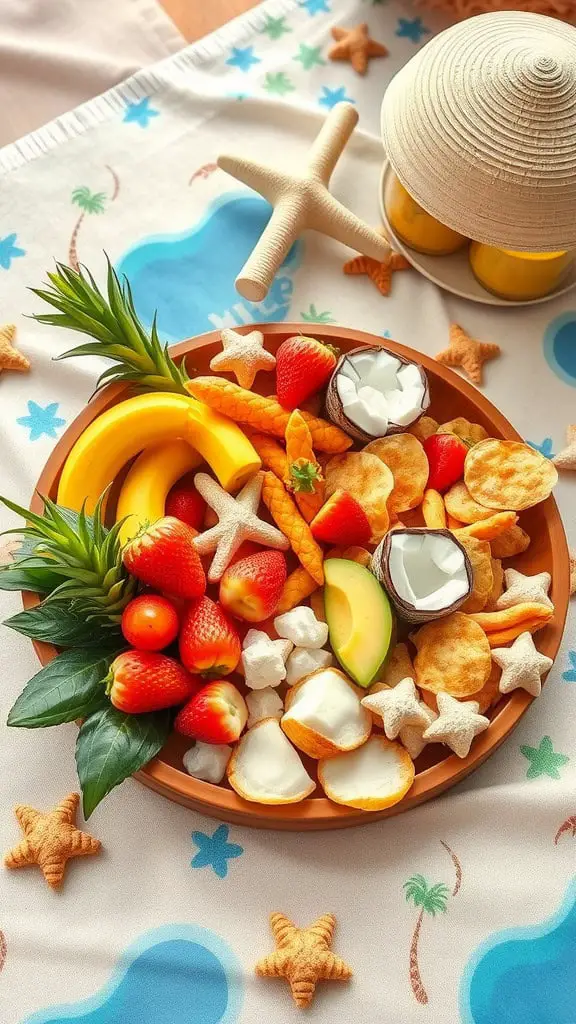
Picture a sunny beach day without ever leaving your home. That’s the vibe this Tropical Paradise Snack Tray brings! It’s a fun and colorful mix of treats that will transport you straight to the tropics.
The tray is filled with vibrant fruits like bananas, strawberries, and avocados, paired with crunchy snacks that add variety. The star-shaped cookies and coconut pieces not only look cute but also enhance the tropical theme. This setup is perfect for sharing with friends or enjoying during a cozy movie night.
If you’re looking for DIY Snack Tray Ideas, this platter is a great inspiration. Mix and match your favorite fruits and snacks to create your own tropical masterpiece. You can also consider making it a themed party platter for gatherings, adding even more fun!
For those who enjoy light bites, this snack tray is a great choice. It combines sweet and salty elements, making it appealing for everyone. Plus, it’s easy to assemble, so you can spend more time enjoying your time rather than prepping.
Finish off your tropical experience by pairing this platter with refreshing drinks. Whether you’re hosting a happy hour or planning a picnic, this Tropical Paradise Snack Tray is sure to impress!
Ingredients:
- Fruits:
- 2 bananas, sliced
- 1 cup strawberries, hulled and halved
- 1 mango, peeled and sliced
- 1 cup pineapple chunks
- 2 kiwis, peeled and sliced
- 1 avocado, sliced (optional for savory touch)
- Snacks:
- 1 cup coconut chips or shredded coconut
- 1 cup plantain chips or banana chips
- 1 cup assorted nuts (cashews, almonds, or macadamia nuts)
- 1 cup star-shaped sugar cookies
- Extras:
- Fresh mint leaves for garnish
- Lime wedges for extra tropical flair
- Yogurt or fruit dip (optional)
Instructions:
- Prepare the Fruits: Wash, peel, and slice all the fruits. Arrange them in sections on a large serving tray, keeping similar colors together for a visually appealing layout.
- Add the Snacks: Fill in empty spaces with plantain chips, coconut chips, and nuts. Sprinkle the coconut over fruits for added texture.
- Star Power: Place star-shaped cookies around the edges of the tray or use them to frame the fruit sections.
- Finishing Touches: Garnish with fresh mint leaves and add lime wedges on the side for an optional citrus squeeze.
- Serve and Enjoy: Pair with tropical drinks like coconut water, fruit punch, or a refreshing mocktail.
Serving Tips:
- Customizable: Swap out fruits based on what’s in season or your favorites.
- Make Ahead: Prep the fruits and snacks a few hours in advance and refrigerate.
- Party Presentation: Use a wooden tray or tropical-themed platter for a more festive look.
This Tropical Paradise Snack Tray is the perfect mix of sweet and crunchy treats. It’s a feast for the eyes and the taste buds, bringing a taste of the tropics to your table. Enjoy creating your own tropical escape!
Game Day Snack Attack

Game day is all about the snacks, and this spread is a perfect example. Picture a table loaded with delicious bites that fans can enjoy while cheering for their team. A big platter showcases crispy wings and crunchy chips, making it hard to resist.
Wings are a classic choice, offering a blend of spices and flavors that everyone loves. They pair perfectly with creamy dips, adding a touch of indulgence. On the side, the chips bring a satisfying crunch, making them an ideal companion for all kinds of dips, from guacamole to salsa.
Drinks are just as important on game day. Cold beers and refreshing sodas sit next to the snack tray, keeping everyone hydrated and ready to celebrate every touchdown. This setup not only fuels the excitement but also invites everyone to dig in and mingle.
For anyone looking to recreate this vibe, think of it as a shareable snack board idea. Combine finger food ideas like wings, chips, and dips to create your own game night snack board. You can even explore DIY snack tray ideas, customizing it to fit everyone’s tastes. Whether it’s for a big game or a casual gathering, this spread promises to be a hit!
Ingredients:
- Wings:
- 2 lbs chicken wings (split into drumettes and flats)
- 1 tbsp olive oil
- 1 tsp garlic powder
- 1 tsp onion powder
- 1 tsp smoked paprika
- 1/2 tsp cayenne pepper (optional for extra heat)
- Salt and pepper to taste
- Favorite wing sauce (buffalo, BBQ, or honey garlic)
- Chips & Dips:
- 1 large bag of tortilla chips
- 1 cup guacamole
- 1 cup salsa
- 1 cup sour cream or ranch dressing
- Drinks:
- Assorted sodas, iced tea, lemonade, or cold beer
Instructions:
- Prepare the Wings:
- Preheat the oven to 400°F (200°C). Line a baking sheet with foil and place a wire rack on top.
- In a large bowl, toss the chicken wings with olive oil, garlic powder, onion powder, smoked paprika, cayenne pepper, salt, and pepper until evenly coated.
- Arrange the wings on the prepared baking sheet in a single layer.
- Bake for 45-50 minutes, flipping halfway through, until the wings are crispy and cooked through.
- Toss the hot wings in your favorite wing sauce before serving.
- Arrange the Snack Board:
- Place the chips in a large serving bowl or directly on the platter.
- Arrange bowls of guacamole, salsa, and sour cream or ranch dressing around the chips.
- Add the freshly baked wings to the platter.
- Serve the Drinks:
- Set up a drink station with sodas, iced tea, lemonade, or cold beer in an ice-filled cooler or bucket.
Serving Tips:
- Keep Warm: Place wings in a low oven (around 200°F) to stay warm before serving.
- Make Ahead: Prep dips and sauces ahead of time for easier game day assembly.
- Presentation: Use a large wooden tray or football-themed platter to complete the look.
This game day snack spread is guaranteed to be a touchdown with your crowd. Crispy wings, crunchy chips, and refreshing drinks create the ultimate combo for football fun!
Seafood Lover’s Platter
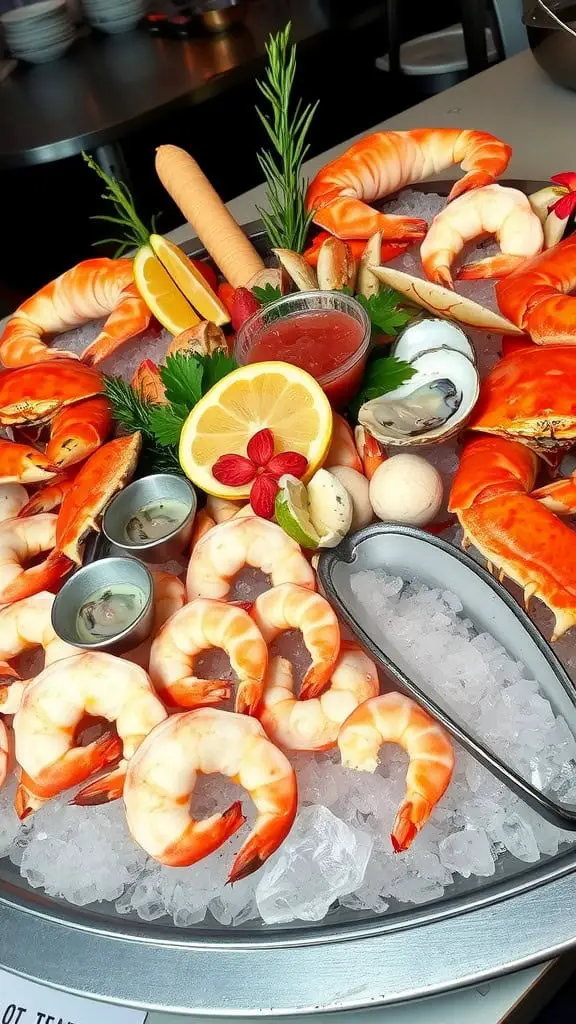
The seafood lover’s platter is a feast for the eyes and the taste buds. Picture a large, round tray filled with a variety of fresh seafood, all beautifully arranged over a bed of ice. You’ll find plump shrimp, vibrant crab legs, and tender oysters, each inviting you to take a bite.
Bright garnishes like lemon wedges and sprigs of parsley add a refreshing pop of color. The addition of cocktail sauce and lemon slices makes it easy to customize each bite. This platter is perfect for anyone who enjoys a mix of flavors and textures.
When hosting or planning a gathering, consider this platter as part of your appetizer options. It’s a great centerpiece for sharing with friends and family during festive occasions. Pair it with some wine for an elevated experience, or mix it in with other appetizer platter concepts for variety.
For a casual get-together, this platter is an excellent choice. You can even create themed party platter ideas by adding complementary snacks or drinks. The enjoyment of seafood transcends the ordinary, making it a perfect highlight for any occasion.
Ingredients:
- Shrimp: 1 lb large shrimp, cooked, peeled, and deveined
- Crab Legs: 2 lbs cooked snow crab legs, split for easy access
- Oysters: 12 fresh oysters, shucked (optional: serve on half-shells)
- Lemon Wedges: 2 lemons, cut into wedges
- Cocktail Sauce: 1 cup homemade or store-bought
- Garnishes: Fresh parsley sprigs, dill, or microgreens for presentation
- Ice: Crushed ice for serving base
Instructions:
- Prepare the Serving Tray:
- Use a large serving platter or tray with a slight rim to hold the ice.
- Spread a generous layer of crushed ice over the entire platter.
- Arrange the Seafood:
- Place the crab legs in a visually appealing fan shape around the edges.
- Stack the shrimp in neat piles on one side of the platter.
- If using oysters, arrange them in a circular pattern in the center or another prominent section.
- Add Garnishes:
- Tuck lemon wedges strategically around the seafood.
- Sprinkle fresh parsley or dill over the top for a vibrant finish.
- Serve with Dipping Sauces:
- Place cocktail sauce in a small serving bowl on the platter or nearby.
- Consider adding other sauces like tartar sauce, garlic aioli, or melted butter.
Serving Tips:
- Keep It Fresh: Serve the platter immediately after assembling to ensure everything stays chilled.
- Custom Additions: Include items like smoked salmon, mussels, or lobster tails for extra variety.
- Pairings: Offer crusty bread, crackers, or a light salad as complementary sides.
A seafood lover’s platter is a surefire way to impress your guests. The fresh, chilled seafood combined with flavorful dipping sauces creates a luxurious experience perfect for any occasion.
Dessert Dreams Board

Imagine a vibrant spread that captures the essence of sweetness. This Dessert Dreams Board is a feast for the eyes and the taste buds. Each treat is arranged artfully, showcasing a delightful mix of colors and shapes.
You’ll find an assortment of cupcakes, cookies, and other confections, all crafted to perfection. The pastel shades of blue, pink, and cream create a playful yet elegant vibe. It’s a perfect centerpiece for any gathering.
This kind of board is not just about looks; it’s a fantastic way to cater to various tastes. Consider adding some DIY Snack Tray Ideas to let guests pick their favorites. You can spice things up with Themed Party Platter Ideas to match any occasion, from birthdays to baby showers.
Whether you’re planning a movie night or a holiday celebration, a Dessert Dreams Board can elevate your snack game. Pair it with a Happy Hour Snack Board for a complete treat experience. Everyone loves a sweet ending, and this board promises just that!
Ingredients:
- Cupcakes: Vanilla, chocolate, or funfetti mini cupcakes with assorted frostings.
- Cookies: A mix of sugar cookies, chocolate chip cookies, and macarons.
- Confections: Assorted candies like gummy bears, chocolate truffles, and mints.
- Fruits: Fresh strawberries, blueberries, and raspberries for a refreshing touch.
- Extras: Marshmallows, pretzels dipped in chocolate, and mini brownies.
- Decorative Elements: Edible flowers, sprinkles, and decorative picks for added flair.
Instructions:
- Choose a Board: Select a large serving tray, wooden board, or platter with enough space to create visual variety.
- Start with the Centerpiece: Place the cupcakes in the center as the focal point.
- Add Cookies and Confections: Arrange cookies and confections around the cupcakes, alternating colors and shapes for balance.
- Incorporate Fruits: Tuck fresh fruits into the gaps for a pop of color and freshness.
- Fill in the Gaps: Use marshmallows, pretzels, and brownies to fill any remaining spaces.
- Add Finishing Touches: Sprinkle edible flowers, sprinkles, and decorative picks over the board for an extra-special look.
Serving Tips:
- Mix and Match: Use different sizes and shapes of treats to keep the board visually interesting.
- Customize for Themes: Adjust the color scheme and treats to fit specific party themes.
- Pre-Portion for Ease: Consider pre-wrapping certain items for grab-and-go convenience.
This Dessert Dreams Board is guaranteed to delight both the eyes and the taste buds. The mix of flavors, textures, and colors creates an unforgettable sweet experience!
Asian-Inspired Appetizer Tray

This vibrant appetizer tray showcases a delightful mix of Asian flavors. The plate features fresh vegetable rolls, perfectly wrapped and packed with colorful veggies like carrots and greens. These rolls are not just a treat for the taste buds, but they also make for great finger food ideas at any gathering.
Next to the fresh rolls, you’ll find tender dumplings, offering a satisfying contrast in texture. These small bites are perfect for sharing and fit right in with the concept of a festive appetizer board. A dip, such as soy sauce, elevates the experience, adding a burst of flavor.
On the side, bright green edamame adds both color and nutrition to the platter. This combination creates a healthy grazing board idea that’s perfect for any occasion. Whether it’s a party or a casual movie night, this Asian-inspired appetizer tray is sure to impress your guests with its vibrant presentation and delicious taste.
Ingredients:
- Vegetable Rolls:
- Rice paper wrappers
- 1 cup shredded carrots
- 1 cup shredded cabbage (red or green)
- 1 cucumber, julienned
- Fresh herbs: mint, cilantro, and basil
- Cooked vermicelli noodles (optional)
- Dumplings:
- 1 package frozen dumplings (vegetarian or meat-based)
- Soy sauce for dipping
- Sesame oil (optional for extra flavor)
- Edamame:
- 2 cups edamame in pods (fresh or frozen)
- Sea salt or flaky salt for sprinkling
- Dipping Sauces:
- Soy sauce
- Hoisin sauce
- Peanut sauce
- Sweet chili sauce
Instructions:
- Prepare the Vegetable Rolls:
- Soak rice paper wrappers one at a time in warm water until pliable.
- Lay each wrapper flat and layer carrots, cabbage, cucumber, herbs, and noodles (if using).
- Roll tightly, folding in the sides as you go. Set aside.
- Cook the Dumplings:
- Follow the package instructions for steaming, boiling, or pan-frying.
- Drizzle with sesame oil after cooking for extra flavor, if desired.
- Prepare the Edamame:
- Boil edamame in salted water for 3-5 minutes until tender.
- Drain and sprinkle with sea salt.
- Assemble the Tray:
- Arrange vegetable rolls, dumplings, and edamame on a large serving platter.
- Include small bowls of dipping sauces around the platter.
Serving Tips:
- Customization: Add sushi rolls, crispy spring rolls, or tempura for extra variety.
- Presentation: Use a bamboo tray or large wooden board for a rustic, elegant look.
- Make Ahead: Prep the rolls and edamame a few hours in advance, covering them with a damp paper towel to keep fresh.
This Asian-inspired appetizer tray offers a perfect balance of freshness, texture, and bold flavors. Your guests will love grazing through this vibrant selection, making every bite a flavorful adventure!
Mini Sandwich & Wrap Sampler
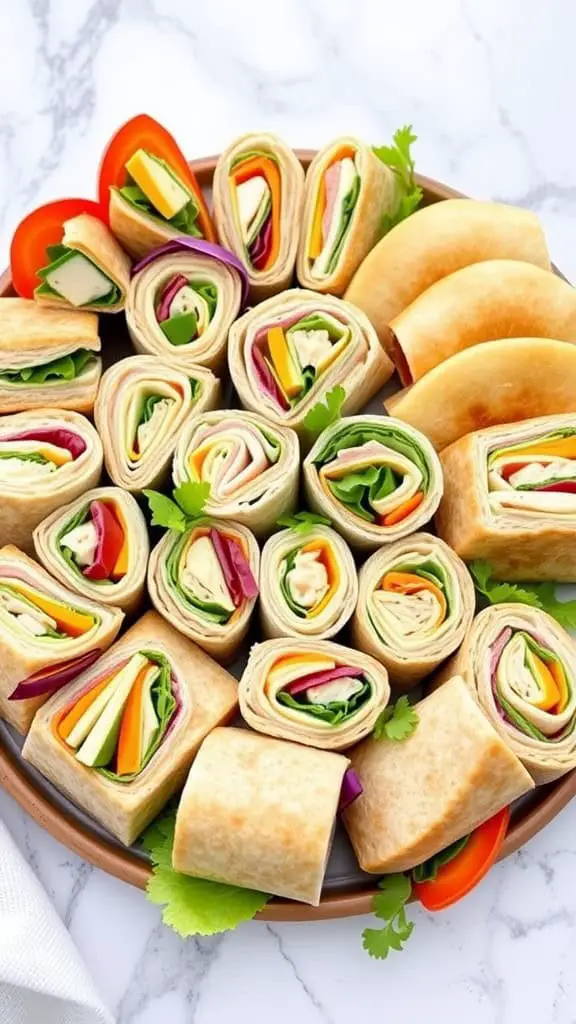
This mini sandwich and wrap sampler is perfect for any gathering. It’s colorful, fresh, and ready to please a crowd. Each wrap showcases layers of vibrant veggies and flavorful meats or cheeses, making it a feast for the eyes as well as the taste buds.
These wraps are not just good-looking; they are also easy to grab, making them ideal for parties or casual get-togethers. They fit right into any DIY snack tray ideas you might be planning. You can mix and match ingredients for a variety of flavors, ensuring there’s something for everyone.
If you’re thinking of hosting a game night, this sampler can serve as part of your shareable snack board ideas. Guests will love the bite-sized portions, allowing them to enjoy multiple flavors without committing to a full sandwich.
For a kid-friendly option, consider adding some fun shapes or colors that will make your kids’ snack tray concepts more exciting. These wraps can be made ahead of time and stored in the fridge, making them a fantastic addition to any festive appetizer board.
Ingredients:
- Wraps & Breads:
- Whole wheat tortillas
- Spinach tortillas
- Mini slider buns
- Proteins:
- Sliced turkey breast
- Smoked ham
- Grilled chicken strips
- Tuna salad or chicken salad
- Cheeses:
- Cheddar cheese slices
- Swiss cheese slices
- Provolone cheese slices
- Vegetables & Greens:
- Leafy lettuce (Romaine, spinach, or mixed greens)
- Sliced tomatoes
- Thinly sliced cucumbers
- Bell pepper strips (variety of colors)
- Red onion slices (optional)
- Spreads & Condiments:
- Mayonnaise
- Mustard
- Hummus
- Cream cheese spread
- Pesto sauce
- Optional Add-Ons:
- Pickles
- Olive slices
- Fresh herbs like basil or cilantro
Instructions:
- Prepare the Ingredients:
- Wash and dry all vegetables.
- Slice proteins, cheeses, and veggies into thin, even slices.
- Assemble the Wraps:
- Lay out tortillas or wraps on a clean surface.
- Spread your chosen condiment evenly over the surface.
- Layer with greens, proteins, cheeses, and vegetables.
- Roll tightly and secure with toothpicks if needed.
- Slice into bite-sized pieces.
- Build the Mini Sandwiches:
- Slice slider buns in half.
- Spread sauces on the inner sides of the buns.
- Add layers of meat, cheese, and veggies.
- Secure with decorative toothpicks for easy serving.
- Presentation Tip:
- Arrange the wraps and sandwiches on a large serving platter.
- Mix colors and textures for an appealing display.
- Add small bowls of extra condiments or dipping sauces on the side.
Serving Suggestions:
- Keep Fresh: Cover with plastic wrap and refrigerate until ready to serve.
- Mix & Match: Offer a variety of flavor combinations to please different palates.
- Themed Presentation: Use decorative trays or boards to match your event theme.
These mini sandwiches and wraps are perfect for any occasion, offering a mix of textures, flavors, and vibrant colors that will have your guests coming back for more. Enjoy the convenience and fun of these shareable bites!
Cheese Lover’s Ultimate Board
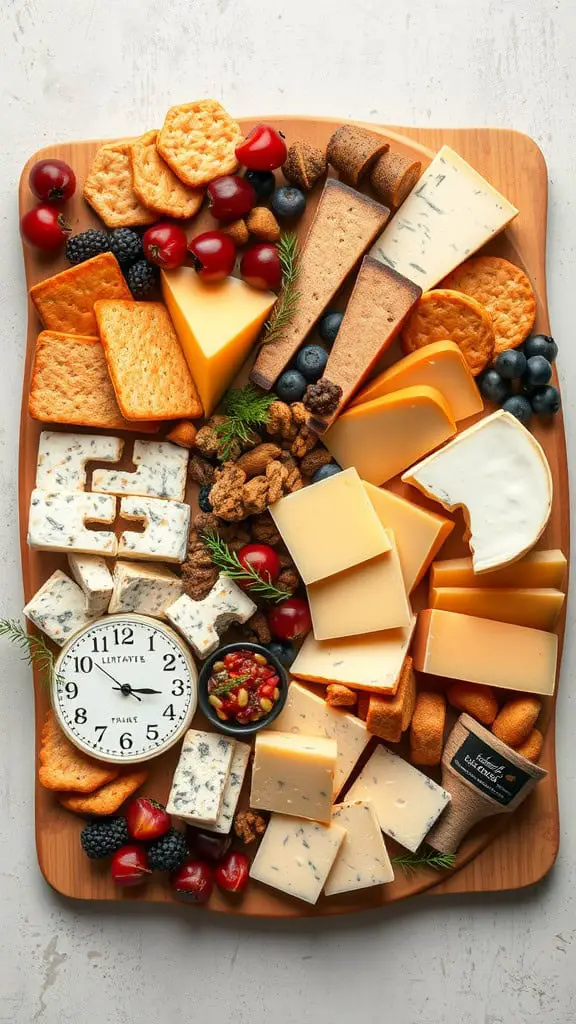
This cheese board is a feast for the eyes and the taste buds. It features a variety of cheeses, each with its unique flavor and texture. You can see sharp cheddar, creamy brie, and blue cheese all artistically arranged. This mix invites everyone to grab their favorites!
Alongside the cheeses, there are tasty crackers and crunchy snacks. They add perfect contrast, making each bite delightful. The colorful fruits like berries and cherries not only add sweetness but also make the board look vibrant.
This setup is fantastic for gatherings or a cozy night at home. You can easily turn this into a Festive Appetizer Board or even a Movie Night Munchies Platter. It’s all about sharing delicious bites with friends and family, so don’t hold back on the toppings!
Consider adding a small bowl of salsa or dips to elevate the experience. It’s a great way to mix flavors and keep things interesting. This board truly captures the essence of cheese and snack bliss, perfect for any occasion.
Ingredients:
- Cheeses:
- Sharp cheddar (cubed or sliced)
- Creamy brie (leave whole or slice into wedges)
- Blue cheese (crumbled or in a wedge)
- Gouda, havarti, or any personal favorites
- Crackers & Breads:
- Assorted crackers (multigrain, water crackers, rye crisps)
- Sliced baguette or breadsticks
- Fruits & Nuts:
- Grapes (red and green for variety)
- Berries (strawberries, blueberries, raspberries)
- Dried fruits (apricots, figs)
- Mixed nuts (almonds, walnuts, pecans)
- Savory Additions:
- Cured meats (salami, prosciutto, or chorizo)
- Olives (green, black, or stuffed)
- Cornichons or pickles
- Dips & Spreads:
- Small bowl of salsa (mild or spicy)
- Hummus or tapenade
- Honey or fruit preserves (fig or apricot work well)
Instructions:
- Prepare the Board: Choose a large wooden or marble board as the base. Arrange smaller bowls or ramekins for dips and spreads first.
- Add the Cheeses: Space out the cheeses around the board. Slice some pieces ahead of time for easy grabbing.
- Layer the Crackers & Breads: Fan out crackers and breadsticks near the cheeses. Place extras in a basket nearby if needed.
- Fruits & Nuts: Fill empty spaces with clusters of grapes, berries, and dried fruits. Scatter nuts throughout for added texture and crunch.
- Savory Touches: Add cured meats by folding or rolling them into attractive shapes. Place olives and pickles in small bowls or directly on the board.
- Finish with Garnishes: Add a few sprigs of rosemary or thyme for a fresh, aromatic touch.
Serving Tips:
- Balance Flavors: Aim for a mix of savory, sweet, and tangy items.
- Personalize It: Swap ingredients based on your preferences or what’s in season.
- Keep It Fresh: Add cold items like brie and fruits just before serving to keep them at their best.
With this beautifully arranged cheese board, you’re ready to impress guests or enjoy a quiet evening at home. Every bite is a perfect blend of flavors and textures that keeps everyone coming back for more!
Savory & Spicy Taster Platter
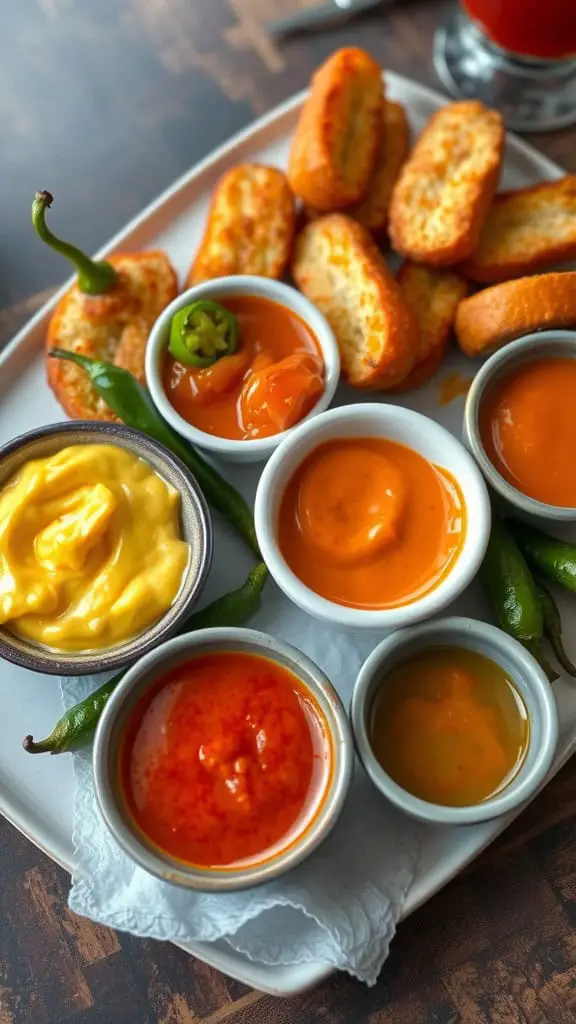
This taster platter is a vibrant mix of crispy bites and zesty dips. The golden, crunchy pieces are perfect for dipping, making it an ideal choice for gatherings or a casual night in.
Each sauce offers a unique punch of flavor. The creamy yellow dip adds a comforting touch, while the bright red and orange sauces bring the heat. A couple of green chilies are scattered around, inviting those who love a little spice.
This setup is perfect for sharing, whether it’s a game night snack board or a movie night munchies platter. It’s a simple way to keep everyone satisfied with a variety of tastes. Think about pairing this with some themed party platter ideas or even a gourmet snack platter for a complete experience.
Ingredients:
- For the Crispy Bread Pieces:
- 1 baguette or loaf of crusty bread, sliced thinly
- 2 tablespoons olive oil
- 1 teaspoon garlic powder
- 1 teaspoon smoked paprika
- Salt and pepper to taste
- For the Dipping Sauces:
- Creamy Dip:
- 1/2 cup sour cream
- 1 tablespoon mayonnaise
- 1 teaspoon Dijon mustard
- Salt and pepper to taste
- Spicy Red Sauce:
- 1/2 cup ketchup
- 1 tablespoon hot sauce (adjust to taste)
- 1 teaspoon smoked paprika
- Zesty Orange Sauce:
- 1/2 cup Greek yogurt
- 1 tablespoon sriracha
- 1 teaspoon lime juice
- 1/2 teaspoon ground cumin
- Creamy Dip:
- Garnishes:
- Fresh green chilies, thinly sliced (optional)
- Fresh parsley or cilantro, chopped (optional)
Instructions:
- Prepare the Crispy Bread Pieces:
- Preheat the oven to 400°F (200°C). Line a baking sheet with parchment paper.
- Arrange the bread slices in a single layer.
- In a small bowl, mix olive oil, garlic powder, smoked paprika, salt, and pepper.
- Brush the mixture evenly over the bread slices.
- Bake for 8-10 minutes or until golden brown and crispy. Set aside to cool.
- Make the Dips:
- Creamy Dip: Combine sour cream, mayonnaise, Dijon mustard, salt, and pepper in a small bowl. Mix well.
- Spicy Red Sauce: In another bowl, whisk together ketchup, hot sauce, and smoked paprika.
- Zesty Orange Sauce: Mix Greek yogurt, sriracha, lime juice, and ground cumin until smooth.
- Assemble the Platter:
- Arrange the crispy bread pieces on a large serving board or platter.
- Place dipping sauces in small bowls and arrange them around the bread pieces.
- Garnish with fresh chilies and herbs if desired.
Serving Tips:
- Add Variety: Include extra dipping options like hummus or guacamole.
- Make Ahead: Prepare the dips a few hours before serving and refrigerate.
- Customize Heat Levels: Adjust the spice level in the sauces to suit your guests.
This savory and spicy taster platter is a flavor-packed treat perfect for sharing. The combination of crunchy bread and bold sauces will keep everyone dipping and coming back for more!
Low-Carb Snack Medley
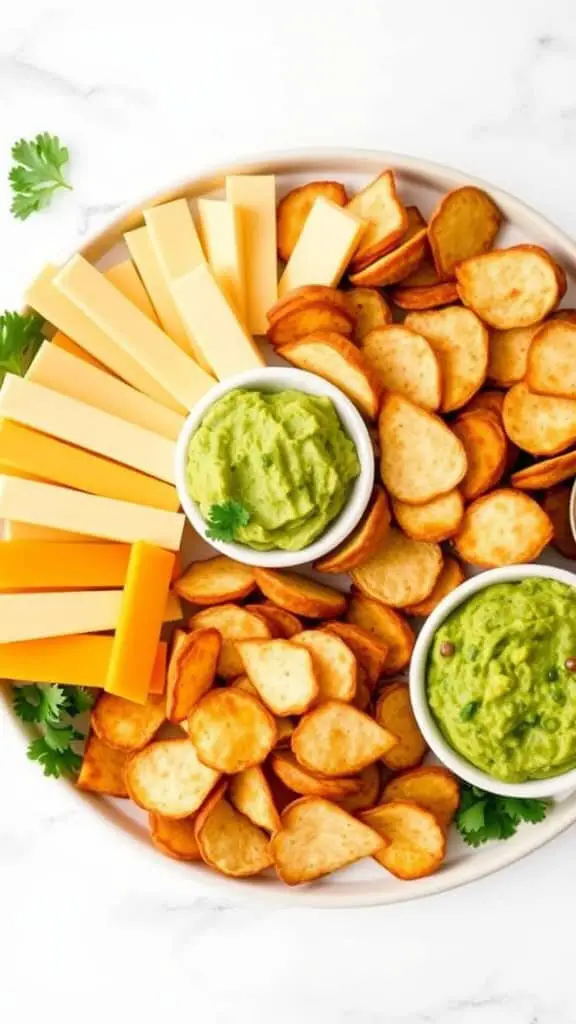
This snack board is a delightful mix of flavors and textures that make it perfect for any gathering. The visuals alone invite you to dig in. With a variety of cheeses sliced neatly, crispy chips, and creamy dips, it’s hard to resist.
The combination of cheese and crunchy bites creates a satisfying crunch in every mouthful. The two bowls of dips—one rich and creamy, the other with a fresh green hue—offer options for those who enjoy a bit of zest with their snacks. These dips pair wonderfully with the cheese and chips, making it a versatile choice for a munchies tray.
For themed party platter ideas, this setup fits right in. It aligns perfectly with happy hour snack boards or movie night munchies platters. Whether you’re entertaining guests or just indulging for yourself, this medley stands out as a delicious and healthy grazing board option.
Ingredients:
- Cheese Selection:
- Cheddar cheese sticks
- Mozzarella sticks
- Pepper Jack slices (or your favorite low-carb cheese)
- Crispy Bites:
- Pork rinds (for a zero-carb crunch)
- Low-carb seed crackers
- Cheese crisps
- Dips:
- Guacamole (made with avocado, lime juice, salt, and cilantro)
- Spinach and artichoke dip (low-carb version)
- Sour cream mixed with fresh herbs (dill, chives, and parsley)
Instructions:
- Prepare the Cheeses:
- Slice cheeses into sticks or cubes for easy snacking.
- Arrange them in sections on your platter.
- Add Crispy Bites:
- Place pork rinds, seed crackers, and cheese crisps in separate sections for variety.
- Make the Dips:
- Prepare guacamole by mashing ripe avocados with lime juice, salt, and cilantro.
- For the spinach and artichoke dip, mix cooked spinach, artichokes, cream cheese, and mozzarella; heat until bubbly.
- Stir herbs into sour cream for a quick and fresh-tasting dip.
- Assemble the Platter:
- Use small bowls for dips and arrange them on the platter.
- Surround the dips with cheese sticks, crackers, and crispy bites.
- Garnish and Serve:
- Add a sprinkle of fresh herbs or a few lime wedges for extra color.
- Serve immediately or cover with plastic wrap and refrigerate until ready to enjoy.
Serving Tips:
- Customizable: Swap in your favorite low-carb cheeses or dips.
- Fresh Elements: Add cucumber slices or celery sticks for extra crunch.
- Themed Presentation: Arrange items on a rustic wooden board or a stylish platter for a polished look.
This low-carb snack medley is more than a treat—it’s a delicious way to stay on track while enjoying bold flavors and satisfying textures. Perfect for casual get-togethers or quiet evenings at home!
DIY Taco Bites Bar
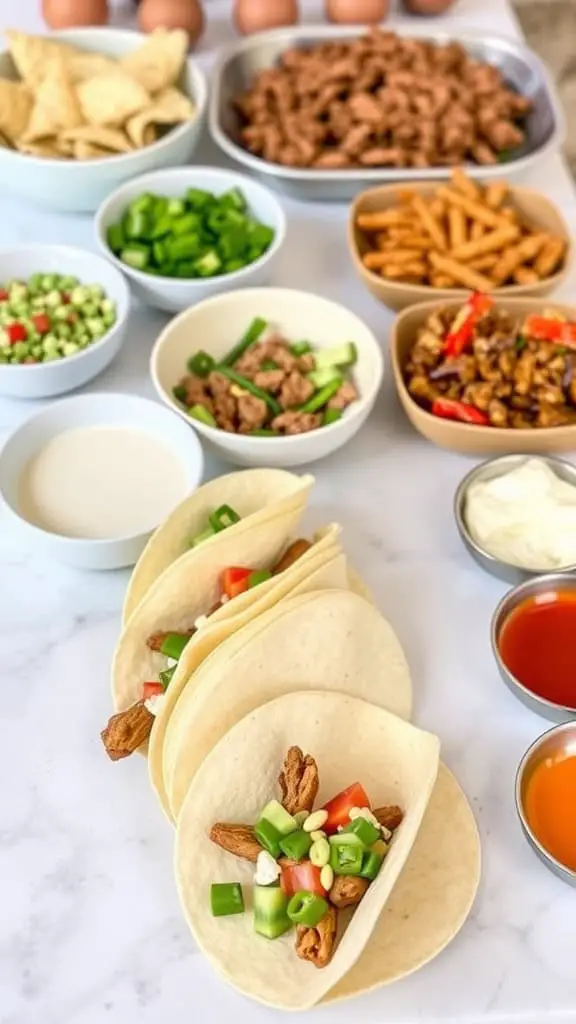
Setting up a DIY Taco Bites Bar is a fun and interactive way to enjoy taco night. The image shows a vibrant spread of ingredients perfect for assembling mini tacos. You’ll find soft tortillas ready to be filled with delicious options.
In the background, there’s a variety of toppings like chopped green peppers, diced tomatoes, and savory meat. These fresh ingredients make it easy to customize each bite. Don’t forget the crunchy tortilla chips that add a delightful texture!
This setup is great for parties or casual gatherings. Guests can create their own taco masterpieces, making it a fantastic option for a Game Night Snack Board or a festive appetizer board. With all the colors and textures, it’s also a great way to inspire some creative Snack Board Ideas.
Ingredients:
- Tortillas: Mini soft tortillas or tortilla chips for a crunchy option.
- Proteins:
- Seasoned ground beef or turkey
- Shredded chicken with taco seasoning
- Black beans or refried beans for a vegetarian option
- Fresh Toppings:
- Diced tomatoes
- Chopped lettuce
- Shredded cheese (cheddar, Monterey Jack, or a blend)
- Sliced black olives
- Diced red onions or green onions
- Fresh cilantro (optional)
- Sauces & Condiments:
- Sour cream
- Guacamole
- Salsa (mild, medium, or hot)
- Taco sauce
- Lime wedges for extra zing
Instructions:
- Prep the Ingredients: Cook the proteins and keep them warm. Dice and chop the toppings, placing them in separate serving bowls.
- Set Up the Bar: Arrange all ingredients on a large table or counter in sections. Start with tortillas and chips, followed by proteins, then toppings, and finally sauces and condiments.
- Build Your Taco Bites: Allow guests to create their taco bites by layering tortillas or chips with their preferred proteins, toppings, and sauces.
- Serve and Enjoy: Provide small plates and napkins for easy serving. Encourage guests to mix and match toppings to create their perfect taco bites.
Serving Tips:
- Keep It Warm: Use slow cookers or warming trays to keep proteins hot throughout the event.
- Add Variety: Offer different salsa heat levels and specialty toppings like pickled jalapeños or cotija cheese.
- Party Presentation: Use colorful serving bowls and trays for a festive display.
This DIY Taco Bites Bar is guaranteed to be a hit at any gathering. It’s customizable, fun, and packed with bold flavors. Let the taco party begin!
Mediterranean Veggie & Hummus Board
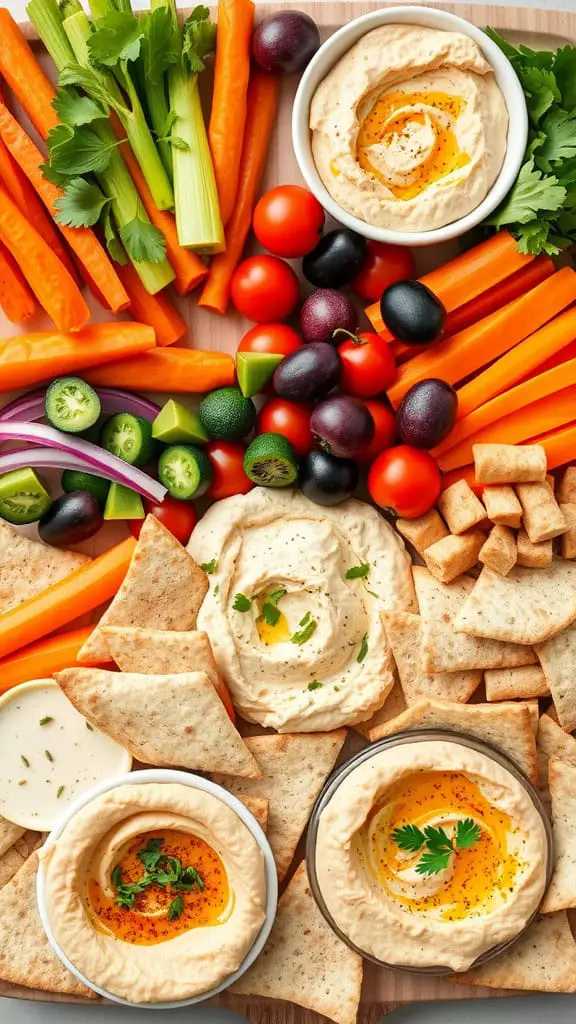
This colorful Mediterranean Veggie & Hummus Board is a perfect choice for any gathering. It features a variety of fresh vegetables like vibrant carrots, crisp celery, and juicy cherry tomatoes. These not only add a splash of color but also make for healthy snack options.
Bowl after bowl of creamy hummus sits at the center, inviting everyone to dig in. With three different flavors, there’s something for everyone. Pair the veggies with pita chips for that satisfying crunch.
This board isn’t just a feast for the eyes; it’s a great way to share healthy grazing board ideas. It’s ideal for game nights, picnics, or movie nights. Just set it out and let your guests munch away. Plus, it’s easy to customize! Swap in your favorite veggies or add some olives for a salty kick.
Whether you’re hosting a party or just looking for finger food ideas for a cozy night in, this platter is a winning choice. You can even make it a DIY snack tray where everyone can build their own bites. Enjoying good food together has never been this simple!
Ingredients:
- Fresh Vegetables:
- Carrot sticks
- Celery sticks
- Cherry tomatoes
- Cucumber slices
- Bell pepper strips (assorted colors)
- Radishes, halved or sliced
- Hummus (choose 2-3 flavors):
- Classic hummus
- Roasted red pepper hummus
- Garlic or lemon hummus
- Spicy hummus (optional for heat lovers)
- Breads & Crackers:
- Pita chips
- Whole wheat pita bread, cut into wedges
- Seeded crackers (optional for extra crunch)
- Extras:
- Kalamata olives
- Feta cheese cubes (optional for added Mediterranean flavor)
- Fresh herbs like parsley or dill for garnish
- Olive oil drizzle (optional)
- A sprinkle of smoked paprika or za’atar for extra flair
Instructions:
- Prepare the Veggies: Wash, dry, and slice all vegetables into easy-to-grab pieces.
- Arrange the Board: On a large serving tray or wooden board, place the bowls of hummus in the center.
- Create Visual Appeal: Arrange the vegetables around the bowls, mixing colors and textures for a visually stunning display.
- Add Bread & Crackers: Place pita chips, bread wedges, and crackers in clusters around the edges.
- Garnish & Finish: Scatter olives and feta cubes in any open spaces. Garnish with fresh herbs and a drizzle of olive oil over the hummus if desired.
- Serve & Enjoy: Set the board out with small plates and napkins, letting guests serve themselves.
Serving Tips:
- Customization: Feel free to swap out vegetables based on seasonality or preference.
- Make Ahead: Prep veggies and hummus bowls in advance; assemble right before serving.
- Flavor Boost: Offer a few hot sauces or flavored oils for guests to drizzle on their plates.
This Mediterranean Veggie & Hummus Board is as versatile as it is delicious. Whether you’re hosting a party or enjoying a casual gathering, this spread is sure to impress with its bold flavors and inviting presentation.
Farmers’ Market Fresh Platter
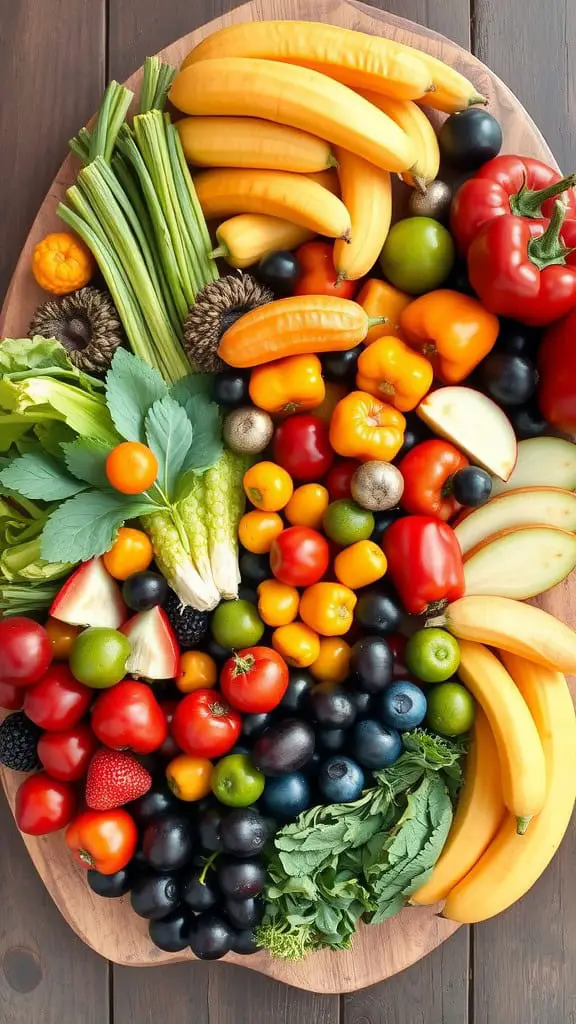
Picture a vibrant spread of fresh fruits and vegetables, perfect for any gathering. This farmers’ market platter is a feast for the eyes and the taste buds. With bright bananas, crisp celery, and colorful bell peppers, it showcases seasonal produce at its best.
Each item on the platter has its unique flavor and texture. The bananas offer sweetness, while the peppers add a satisfying crunch. This mix makes it a fantastic option for finger food ideas or a healthy snacking option.
Whether you’re planning a picnic or a game night, this assortment fits right in. It’s ideal for a munchies tray concept, bringing freshness to any event. You can easily transform it into a light bites platter by adding some dips or cheese for extra variety.
This platter not only looks good but is also packed with nutrients. It’s perfect for those who want healthy grazing board ideas without sacrificing flavor. Your guests will appreciate the effort, and you’ll enjoy the delicious offerings too!
Ingredients:
- Fresh fruits: bananas, apples, grapes, berries (strawberries, blueberries, raspberries)
- Fresh vegetables: cherry tomatoes, bell peppers (red, yellow, green), cucumbers, carrots, celery sticks
- Leafy greens: kale, romaine, or lettuce for garnish
- Optional extras: nuts (almonds, walnuts), cheese cubes (cheddar, mozzarella), whole-grain crackers
- Dips: hummus, ranch, yogurt-based dips, guacamole
Instructions:
- Prepare the Fruits and Vegetables:
- Wash all produce thoroughly.
- Slice apples, cucumbers, and bell peppers into bite-sized pieces.
- Peel and slice bananas just before serving to avoid browning.
- Assemble the Platter:
- Arrange leafy greens as a base on a large serving tray.
- Group similar items together, creating sections for fruits, vegetables, nuts, and cheese.
- Place dips in small bowls around the platter.
- Presentation Tips:
- Create Contrast: Mix colors for an eye-catching display.
- Height Variation: Use small bowls or stands to add height and depth.
- Garnish: Add sprigs of fresh herbs like parsley or mint for extra freshness.
- Serving Suggestions:
- Snack Station: Pair with sparkling water or iced tea for a refreshing spread.
- Picnic-Ready: Pack components separately and assemble on-site.
- Customization: Swap in seasonal produce or specialty cheeses for variety.
This farmers’ market fresh platter is a wholesome, colorful, and delicious way to serve fresh, healthy snacks. It’s perfect for any gathering and will leave your guests impressed with its vibrant presentation and satisfying flavors!
Kid-Friendly Snack Adventure
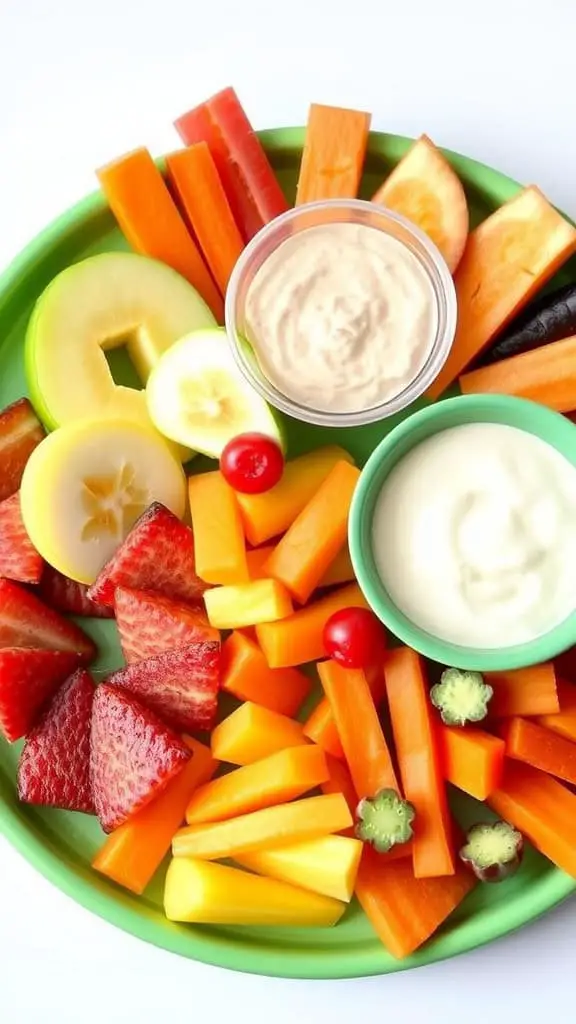
This colorful snack plate is perfect for kids. It features a variety of fruits and vegetables, making it both healthy and appealing. The bright colors of the orange carrots, red strawberries, and green melon are sure to catch a child’s eye.
The plate includes tasty dips on the side. Creamy sauces can make veggies more exciting. Kids love to dip! These finger food ideas are not just fun to eat, but also easy to prepare.
Creating a munchies tray like this is simple. Gather seasonal fruits and veggies, slice them into fun shapes, and arrange them nicely. Kids can help with the prep, making it a great family activity. This setup works great for parties, playdates, or even as a light snack after school.
For a themed party platter, mix in some cheese cubes or whole-grain crackers. You can also add a few sweet treats to balance the flavors. This approach gives kids a taste of both sweet and savory options.
Ingredients:
- Fruits:
- Strawberries (hulled and halved)
- Seedless grapes (any color)
- Melon (cantaloupe or honeydew, cubed)
- Apple slices (dipped in lemon water to prevent browning)
- Blueberries (optional for added color)
- Vegetables:
- Baby carrots
- Cucumber slices (cut into rounds or sticks)
- Cherry tomatoes (halved if needed)
- Sweet bell peppers (cut into strips)
- Dips:
- Greek yogurt-based ranch dip
- Hummus (classic or flavored)
- Nut butter (if no allergies)
- Cheese spread (optional for variety)
Instructions:
- Prepare the Produce: Wash all fruits and vegetables thoroughly. Peel and slice as needed, creating a mix of shapes for variety.
- Arrange the Platter: On a large plate or tray, start by placing small bowls of dips in the center.
- Add the Fruits and Vegetables: Arrange the fruits on one half and the vegetables on the other half of the plate. Group similar colors together for an eye-catching presentation.
- Finishing Touches: Add a few sprigs of fresh herbs like mint or parsley for a touch of greenery.
Serving Tips:
- Kid Involvement: Let kids arrange the platter themselves for added fun.
- Party-Ready: Use themed picks or small skewers for easy grabbing.
- Balance Flavors: Add whole-grain crackers, cheese cubes, or even a few pretzel sticks for variety.
This kid-friendly snack platter is nutritious, colorful, and fun to eat. The combination of fruits, veggies, and tasty dips makes it a winning choice for any occasion!
Grazing Picnic Platter
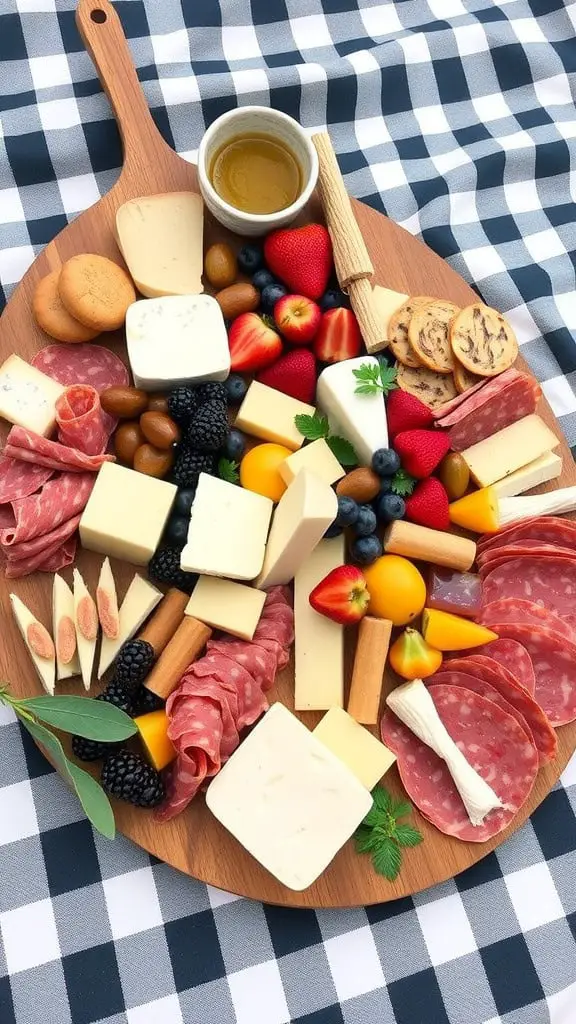
A grazing picnic platter is the perfect way to enjoy a sunny day outdoors. This image showcases a variety of delicious snacks arranged beautifully on a wooden board. It has everything from cheeses and meats to fresh fruits and cookies, offering a little something for everyone.
Healthy grazing board ideas can include a range of options like cheeses, cured meats, olives, and colorful fruits. Think about using both savory snack ideas like salami and sweet additions like strawberries. Combine these elements to create a visually appealing and tasty spread.
If you’re planning a picnic or a gathering, consider DIY snack tray ideas. You can get creative with themed party platter ideas, whether it’s for a casual get-together or a festive event. A good mix of flavors and textures can elevate your snack board concepts.
This platter also exemplifies the charm of shareable snack board ideas. Guests can mingle and enjoy small bites without the need for formal dining. It’s practical and fun! You could even make it a game night snack board, pairing it with your favorite drinks.
So, when you’re looking to impress at your next gathering, think about a grazing board. It’s not just about the food, but the experience of sharing and enjoying good company.
Ingredients:
- Cheeses: Brie, aged cheddar, gouda, goat cheese (or your favorites)
- Meats: Salami, prosciutto, smoked turkey, chorizo
- Fresh Fruits: Grapes, strawberries, blueberries, apple slices
- Dried Fruits: Apricots, figs, cranberries
- Crackers & Breads: Assorted crackers, breadsticks, baguette slices
- Nuts & Seeds: Almonds, walnuts, pistachios
- Condiments: Honey, fig jam, mustard
- Extras: Olives, pickles, cherry tomatoes, fresh herbs for garnish
Instructions:
- Choose the Board: Use a large wooden board, serving tray, or platter as your base.
- Arrange the Cheeses: Start by placing cheeses on different corners of the board. Leave them whole or pre-slice some for convenience.
- Add Meats: Fold or roll the meats into bite-sized portions and arrange near the cheeses.
- Fruits & Veggies: Scatter fresh and dried fruits around the board for color and sweetness.
- Crackers & Breads: Stack or fan out crackers and bread slices in open spaces.
- Nuts & Seeds: Fill small gaps with nuts and seeds for crunch.
- Condiments & Extras: Use small bowls or ramekins for honey, jams, mustard, and olives.
- Garnish: Finish with fresh herbs like rosemary or thyme for a touch of elegance.
Serving Tips:
- Balance the Flavors: Combine sweet, salty, savory, and tangy items for a well-rounded taste experience.
- Seasonal Additions: Use seasonal fruits and vegetables to keep your platter fresh and budget-friendly.
- Personal Touch: Add personal favorites or specialty items for a customized board.
A grazing picnic platter like this turns any outdoor gathering into a memorable feast. Its mix of textures and flavors will keep guests coming back for more, making your picnic both fun and delicious!
Sweet Tooth Satisfier Board

This Sweet Tooth Satisfier Board is a delightful treat for anyone with a craving for sweets. The platter is filled with an enticing mix of cookies, chocolates, and candies, making it a perfect option for a gathering or a cozy night in. Each bite is sure to bring a smile!
For a fun game night, this board doubles as a fantastic snack option. You can easily incorporate it into your Game Night Snack Board. Just imagine munching on these goodies while you cheer for your favorite team or test your skills in a board game.
If you’re hosting a party, this board can also serve as part of your themed party platter ideas. Pair it with some savory options for a balanced spread. Guests will love picking and sharing their favorite treats.
Kids will absolutely enjoy this board too! It fits perfectly with Kids’ Snack Tray Concepts. You can customize it with their favorite sweets, making it a hit at birthday parties or playdates.
Feeling creative? Try mixing in some healthy options with the sweet treats to create a Healthy Grazing Board. It’s all about balance and fun!
Ingredients:
- Cookies: Chocolate chip cookies, oatmeal raisin cookies, sugar cookies, or any of your favorites.
- Chocolates: Assorted truffles, dark chocolate squares, white chocolate bark, chocolate-covered pretzels.
- Candies: Gummy bears, jelly beans, caramels, licorice, hard candies.
- Fruits (optional): Fresh strawberries, grapes, apple slices, or dried fruits like apricots and figs.
- Extras: Marshmallows, nuts (if no allergies), popcorn drizzled with chocolate, and decorative sprinkles for extra fun.
Instructions:
- Choose Your Board: Start with a large serving board, tray, or platter that fits your gathering size.
- Create a Centerpiece: Place a larger item like a bowl of chocolates or a small cake in the center for visual impact.
- Arrange by Category: Group similar treats together:
- Arrange cookies in stacks or overlapping rows.
- Fan out chocolates and sprinkle in some decorative candies.
- Fill small bowls with gummy candies and licorice for variety.
- Add Freshness: If using fruits, arrange them in small clusters to add color and freshness.
- Fill in the Gaps: Use marshmallows, nuts, or small wrapped candies to fill any empty spaces.
- Decorate: Sprinkle extra candies or festive sprinkles over the board for added charm.
- Serve and Enjoy: Place the completed board where guests can easily reach and enjoy!
Tips for Success:
- Theme It: Adjust the candy colors and types to match seasonal or party themes.
- Keep It Fresh: Add fresh fruit just before serving to keep it crisp.
- Balanced Bites: Include a mix of sweet, crunchy, and chewy items for variety.
- DIY Fun: Add small treat bags so guests can make their own mini snack mixes.
This Sweet Tooth Satisfier Board is a guaranteed hit at any event. With its colorful, delicious mix of treats, it’s perfect for sharing and creating sweet memories together!
Protein Power Snack Board
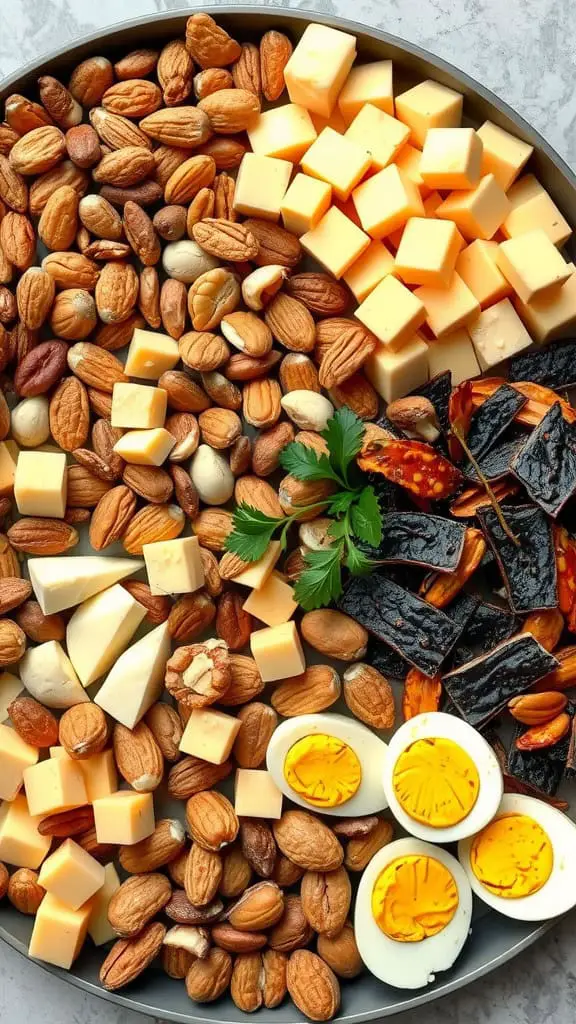
This protein-packed snack board is a delightful way to enjoy a variety of flavors and textures. It features a colorful assortment of nuts, cheeses, and even some boiled eggs for that extra boost. Each element brings its own unique taste, making it perfect for any gathering.
The layout is inviting, showcasing the nuts in different shapes and sizes, alongside cubes of cheese that are just begging to be paired together. Boiled eggs add a hearty touch, while the greenery provides a fresh pop of color, making this a visually appealing platter.
This snack board is perfect for game nights or casual get-togethers. You can easily customize it to fit your preferences or dietary restrictions. Whether you’re looking for healthy grazing board ideas or simply want to create a munchies tray concept, this spread is a fantastic option.
Ingredients:
- Nuts: Almonds, cashews, walnuts, pistachios (unsalted for a healthier option)
- Cheese Cubes: Cheddar, mozzarella, pepper jack, or your favorite varieties
- Boiled Eggs: Hard-boiled, peeled, and halved
- Dips: Hummus, Greek yogurt-based dip, or guacamole
- Crackers & Breadsticks: Whole grain or gluten-free options
- Fresh Veggies: Cherry tomatoes, cucumber slices, baby carrots, and bell pepper strips
- Fruits: Grapes, apple slices, or dried fruits like apricots and cranberries
- Garnishes: Fresh herbs like rosemary, thyme, or parsley for extra flavor and presentation
Instructions:
- Prep the Ingredients:
- Boil and peel the eggs, then halve them.
- Cut cheese into bite-sized cubes.
- Rinse and dry fruits and vegetables.
- Arrange the Board:
- Start by placing larger items like cheese cubes and boiled eggs.
- Fill gaps with nuts, fruits, and veggies for visual appeal.
- Add dips in small bowls or ramekins.
- Garnish and Serve:
- Scatter fresh herbs for a finishing touch.
- Serve immediately or cover with plastic wrap and refrigerate until needed.
Serving Tips:
- Customization: Swap out ingredients to fit dietary preferences or availability.
- Themed Boards: Create seasonal variations with holiday-themed colors or flavors.
- Portion Control: Use smaller boards for individual servings.
This protein power snack board is as nourishing as it is beautiful. Each bite offers a satisfying mix of crunchy, creamy, and savory flavors that keep guests energized and happy. Enjoy creating and sharing this versatile snack centerpiece!
