Are you tired of ending up with unevenly dried, less delicious fruits and vegetables when using your Oster Food Dehydrator? If so, we have the solution for you. In this article, we will share 10 valuable tips to help you achieve perfectly dried fruits and veggies every time. Say goodbye to inconsistency and hello to even, delicious results!
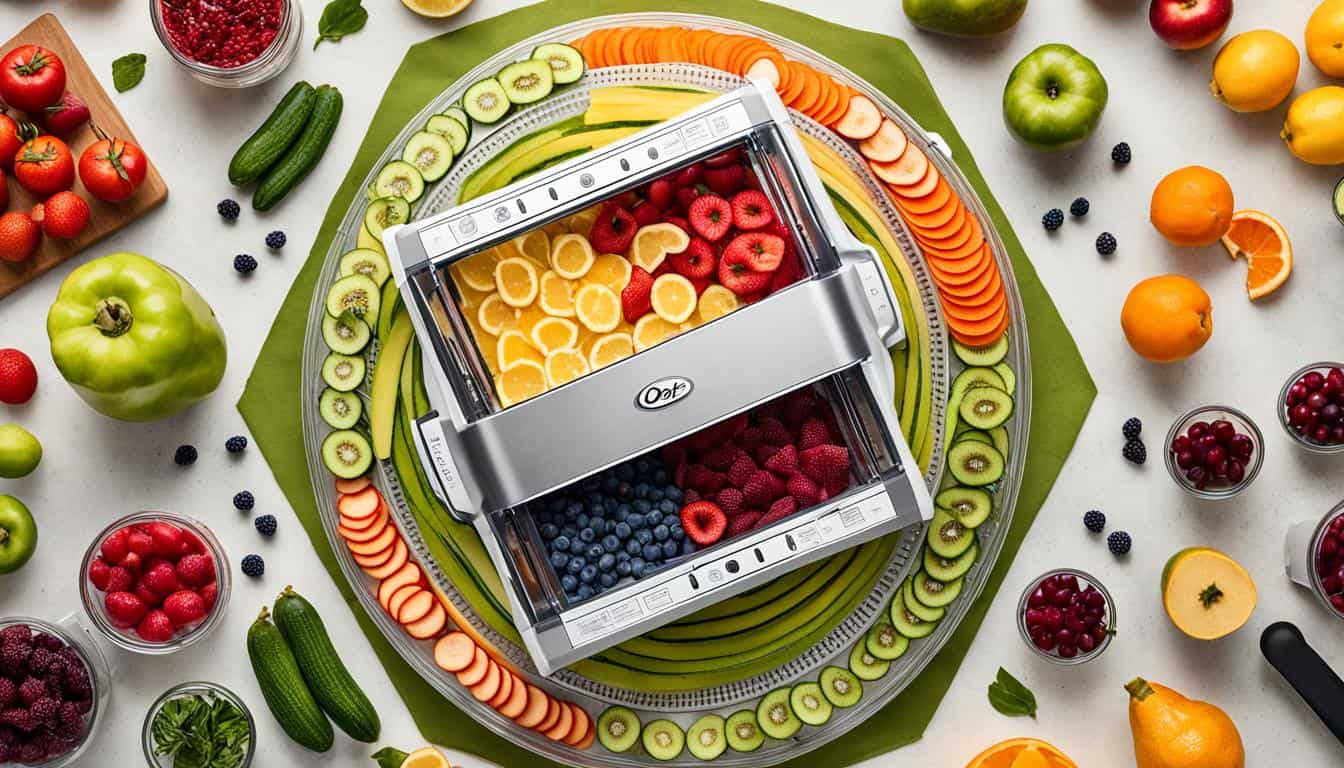
Slice It Right: Make Sure Your Fruits and Veggies Are Sliced Evenly
One key to successful dehydration is slicing your fruits and veggies evenly. This ensures that all pieces dry at the same pace, resulting in consistent and delicious dried produce. Think of it as making sure all runners in a race have the same shoes – they need to be in sync!
When it comes to drying fruits and vegetables, the thickness of your slices plays a vital role. If the slices are too thick, they may take longer to dry, and you risk having a mix of over-dried and under-dried pieces. On the other hand, if the slices are too thin, they might dry out too quickly and become crispy or even burnt.
So how do you slice it right? Start by using a sharp knife or a mandoline slicer to ensure smooth and consistent cuts. If you prefer a softer texture, go for slightly thicker slices. For a crispier result, opt for thinner cuts. Experiment and find the thickness that suits your taste preferences.
Tip: Consider the fruits and vegetables’ natural texture when deciding on the thickness of your slices. For example, denser produce like apples and carrots may require thinner slices, while softer ones like bananas and tomatoes can handle slightly thicker cuts.
Remember, consistency is key. Aim to slice all your fruits and veggies to the same thickness, ensuring they dry evenly and at the same pace. This will result in a uniform texture and flavor throughout your dehydrated goodies.
Pretreatment Party: Give Your Fruits a Quick Pretreatment Bath
Before drying, it’s essential to give your fruits a quick pretreatment bath to prevent discoloration and maintain their vibrant appearance. This pretreatment party will ensure that your dried fruits look as appetizing as they taste. There are two effective options for pretreating your fruits: lemon juice and an ascorbic acid solution.
Using Lemon Juice
Lemon juice is a natural and readily available solution that works wonders in preventing discoloration. The citric acid in lemon juice acts as a natural antioxidant, minimizing the oxidation process that leads to browning and dulling of fruit surfaces. To create a lemon juice pretreatment bath:
- Fill a clean bowl with cold water.
- Add fresh lemon juice to the water, using approximately 1 tablespoon per cup of water.
- Stir the solution well until the lemon juice is evenly distributed.
- Place your fruit slices into the lemon juice bath and soak them for 3-5 minutes. Ensure all the slices are fully submerged.
- After the pretreatment, remove the slices from the bath and gently pat them dry using a clean kitchen towel or paper towels.
Using an Ascorbic Acid Solution
If you prefer an alternative to lemon juice, you can use an ascorbic acid solution, also known as Vitamin C. Ascorbic acid is highly effective in preventing the oxidation process and maintaining the natural color of fruits. To create an ascorbic acid solution:
- Dissolve 1 teaspoon of ascorbic acid powder in 1 cup of cold water.
- Stir the solution until the ascorbic acid is completely dissolved.
- Submerge your fruit slices in the ascorbic acid solution and let them soak for 3-5 minutes.
- Remove the fruit slices from the solution and gently pat them dry using a clean kitchen towel or paper towels.
By pretreating your fruits with lemon juice or an ascorbic acid solution, you can significantly reduce discoloration and enhance the visual appeal of your dried fruits. This simple step ensures that your apples, pears, and other fruits maintain their bright colors and remain irresistibly enticing throughout the drying process. Give your fruits the pretreatment they deserve and get ready for an explosion of flavors in your perfectly dried fruits!

Temperature Matters: Check the Recommended Drying Temperatures
When it comes to fruit and veggie dehydration, temperature matters. Understanding the recommended drying temperatures for each item you’re dehydrating is crucial for achieving optimal results. Just like different recipes require specific oven temperatures, each fruit and vegetable has its own unique drying requirements.
Different fruits and vegetables contain varying amounts of moisture, fibers, and sugars. These variations directly impact the ideal drying temperature. High temperatures can quickly dry the exterior of the produce, trapping moisture inside and resulting in unevenly dried fruits or veggies with a soft center. On the other hand, low temperatures may not effectively remove moisture, leading to a longer drying process or even spoilage.
To determine the recommended drying temperature for your fruits and veggies, consult reputable sources such as Oster’s user manual or online resources specific to dehydrating foods. These sources provide valuable insights and guidelines to help you achieve the best drying outcome.
Each fruit and veggie requires its own unique temperature to ensure a successful drying process. Just as different spices give a dish its distinct flavor, the right temperature unlocks the full potential of your dried goodies.
For your convenience, we’ve compiled a table below with recommended drying temperatures for some common fruits and vegetables:
| Fruit/Vegetable | Recommended Drying Temperature |
|---|---|
| Apples | 125°F (52°C) |
| Bananas | 135°F (57°C) |
| Strawberries | 135°F (57°C) |
| Peaches | 130°F (54°C) |
| Zucchini | 125°F (52°C) |
| Tomatoes | 135°F (57°C) |
Remember, the recommended drying temperatures provided are general guidelines. Factors such as humidity levels, thickness of the slices, and personal preference may require adjustments to achieve the desired results. Monitoring the drying process closely and making necessary modifications will help you master the art of dehydrating fruits and vegetables.
Key Takeaways:
- Recommended drying temperatures vary for each fruit and vegetable due to their unique characteristics.
- High temperatures can result in uneven drying and a soft center, while low temperatures may prolong the drying process.
- Consult reputable sources to determine the recommended drying temperatures for specific fruits and veggies.
- Use the provided table as a starting point and adjust the temperatures based on your environment and preferences.
Patience Is Key: Avoid Rushing the Drying Process
When it comes to drying fruits and veggies with your Oster Food Dehydrator, patience is key to achieving the best results. It can be tempting to crank up the heat and expedite the drying process, but this can lead to undesired outcomes.
Rushing the drying process by increasing the heat can result in fruit leather on the outside and a surprise squishy center. Nobody wants to bite into a dehydrated apple slice and find it disappointingly chewy in the middle.
Heat plays a crucial role in dehydrating fruits and veggies, but it must be applied gently and evenly to ensure optimal results. By allowing the drying process to occur at the recommended temperatures and timeframe, you’ll achieve perfectly dried produce with a consistent texture, flavor, and appearance.
| Effect of Rushing the Drying Process | Importance of Patience |
|---|---|
| Uneven drying results | Consistent texture, flavor, and appearance |
| Fruit leather on the outside | Optimal dehydration without compromising quality |
| Squishy center | Enjoyable, crunchy dried fruits and veggies |
Spacing Out: Give Your Slices Some Room to Dry Evenly
When arranging your slices on the dehydrator trays, make sure to give them some room. Just like people in a crowded elevator, fruits and veggies need their personal space to dry evenly. This ensures uniform drying and prevents sticking.
Imagine being crammed into a crowded elevator, where everyone is uncomfortably close. Personal space becomes a luxury, and it’s difficult to move or breathe freely. The same principle applies when dehydrating your slices.
Spacing out your slices on the trays allows for better air circulation and prevents overcrowding. This ensures that each piece receives adequate heat and airflow, promoting even drying throughout.
Providing enough space between slices also helps prevent sticking. Fruits and veggies can release moisture during the drying process, and if they are too close together, the slices may stick together and become difficult to separate.
Take a moment to picture a crowded elevator, where people are tightly packed and each movement comes with the risk of brushing against someone else. Now, imagine the relief of stepping out into an open space, where you can stretch and move freely without restrictions.
By giving your slices some room on the dehydrator trays, you are creating an environment that allows for efficient drying and optimal results. Just like people, fruits and veggies need their personal space to thrive.

Benefits of Spacing Out:
- Promotes even drying
- Ensures adequate heat and airflow
- Prevents sticking
- Allows for optimal results
Flip, Don’t Flop: Give Your Slices a Midway Flip
Halfway through the drying process, it’s time to give your slices a little flip. Just like turning over in bed to get comfortable, flipping your fruits and veggies helps ensure even drying on both sides. This simple step is essential for achieving a uniform texture and maximizing flavor.
Flipping your slices plays a crucial role in the dehydration process. By exposing the other side to the drying airflow, you ensure that both sides of the produce receive consistent heat and airflow. This helps to prevent any uneven drying or moisture retention.
When it’s time for the midway flip, carefully remove each tray from your Oster Food Dehydrator. Remember, safety first! Gently flip over each slice before returning the trays to the dehydrator. Ensuring that your slices are flipped evenly will promote an even dryness and enhance the overall quality of your dried fruits and veggies.
Not only does flipping your slices improve the drying process, but it also contributes to the aesthetic appeal of your final product. By flipping, you prevent one side of the slice from becoming unsightly or discolored, resulting in slices that retain their vibrant colors and visual appeal.
So, don’t flop during the drying process. Remember to flip your slices midway and enjoy the benefits of even drying, enhanced flavor, and beautiful looking dried fruits and veggies!

Check and Double-Check: Monitor Drying Time and Remove Finished Pieces
As the drying time nears its end, it’s important to check on your fruit and veggie slices to ensure they dry properly. Just like a diligent chef, you’ll need to monitor the drying process and give your produce the attention it deserves. Peeking in on your dehydrating goodies allows you to gauge their progress and make necessary adjustments.
Unlike a one-size-fits-all approach, different fruits and vegetables may have varying drying times. Just as each dish requires its own cooking time, delicate berries may dry faster than chunky slices of pineapple. Keep that in mind and adjust your expectations accordingly.
By regularly checking and double-checking your drying slices, you’ll be able to remove finished pieces without delay. This avoids the risk of over-drying and ensures that your hard work doesn’t overstay its welcome in the dehydrator. No one wants a dehydrated treat that’s past its prime!
Monitoring Tips:
- Set a timer or alarm to remind you to check on your drying progress at regular intervals.
- Gently touch the slices to assess their texture. They should feel dry and slightly leathery, with no moisture remaining.
- Pay attention to the appearance of the slices. They should have a slightly shriveled appearance and no visible signs of moisture.
- Use a food thermometer to ensure that the internal temperature of the slices has reached the desired level.
Remember, a little extra effort spent on monitoring and removing finished pieces will result in perfectly dried fruits and veggies that are ready to be enjoyed or stored for later use.
| Slice | Drying Time | Appearance |
|---|---|---|
| Banana | 6-8 hours | Slightly golden color, dry and pliable |
| Apple | 8-10 hours | Semi-translucent with no moisture when pressed |
| Mango | 10-12 hours | Shriveled and leathery, with no stickiness |
| Tomato | 12-14 hours | Leathery and slightly brittle |
Use this table as a general guide for drying times and appearances of different fruits and veggies. Remember to adapt these guidelines to your specific dehydrator model, climate, and personal preferences.

Conditioning and Storage: The Final Steps for Perfectly Dried Fruits and Veggies
After drying your fruits and veggies using the Oster Food Dehydrator, it’s essential to go through the conditioning process to ensure the best results. Conditioning helps to even out the moisture content in the dried goodies, enhancing their texture and flavor.
To condition your dried fruits and veggies, transfer them to a clean and dry airtight container. Allow them to sit for a few days, gently shaking the container once a day to prevent clumping. This process helps distribute any remaining moisture evenly among the pieces, leaving you with perfectly dried treats.
Once your dried goodies are conditioned, it’s time to store them properly. Transfer them to airtight containers to keep them safe from air, moisture, and light. Choose containers that are dark or opaque to shield the dried fruits and veggies from light exposure, as light can cause them to lose their color and nutritional value.
Store the containers in a cool and dark place, such as a pantry or cupboard. Avoid exposing them to heat or sunlight, as these can degrade the quality of the dried produce. Lastly, don’t forget to label your containers with the date and contents. This simple step will help you easily identify and enjoy your favorite dried fruits and veggies in the future.
Best In Footwear.
 Hey Don't Forget About Your Feet! Click the image above - for an entire resource dedicated to the best footwear finds and advice! |
