Have you ever wondered how to preserve your favorite fruits, vegetables, and meats in a way that retains their flavors and nutritional value? Look no further than the Magic Chef Dehydrator. This powerful appliance allows you to transform your ingredients into delicious, long-lasting snacks. But where do you begin? How do you unlock the magic of dehydration?
In this article, we will guide you through the process of getting started with your Magic Chef Dehydrator.
From unpacking and assembling to understanding the controls, we’ll cover everything you need to know to embark on your drying adventure. Let’s dive in and discover the secrets of effortless dehydration with the Magic Chef Dehydrator.
Unbox with Excitement: Just Like Opening a Present
When you receive your Magic Chef Dehydrator, it’s time to unbox it with excitement and anticipation. Unwrapping your new dehydrator is like opening a present, revealing the endless possibilities of creating delicious and healthy dried foods.
Start by carefully unpacking the Magic Chef Dehydrator, just like you would unwrap a gift. Remove each piece from the packaging and place them on a clean surface, ready to be assembled. Take a moment to admire the sleek design and quality craftsmanship of your new kitchen companion.
As you unbox your Magic Chef Dehydrator, you can already envision the tasty snacks and homemade treats you’ll be able to make. Whether it’s crispy apple chips, zesty beef jerky, or flavorful dried herbs, the possibilities are endless.
Unboxing your Magic Chef Dehydrator is just the first step on your drying adventure. Next, we’ll guide you through the process of spot-checking the parts to ensure everything is ready for action. So, let’s move on to the next section and make sure you have all the essentials!
Spot Check: Make Sure You Have All the Parts
Before you begin your dehydrating journey with the Magic Chef Dehydrator, it’s important to do a quick spot check to ensure you have all the necessary parts. Just like checking your candy stash, you wouldn’t want to miss out on any goodies!
Refer to the manual for a detailed list of all the parts included with your Magic Chef Dehydrator. Take a moment to go through the list and ensure that you have each component. This will save you from any last-minute surprises and ensure a smooth and successful drying process.
Here’s a quick checklist of the major parts you should have:
- Main dehydrator unit
- Trays
- Tray liners
- Mesh screens
- Drip tray
- Instruction manual
Once you have verified that you have all the necessary parts, you’re ready to move on to the next step and start preparing your Magic Chef Dehydrator for use. Don’t worry, it’s an easy and exciting process just like unwrapping a present!

“Having all the parts of your dehydrator in place is like having all the ingredients for a delicious recipe. It ensures a successful outcome and a satisfying experience.”
Pick a Perfect Spot: Find a Nice Place for Your Dehydrator
Now that you have unpacked your Magic Chef Dehydrator and checked all the parts, it’s time to find the perfect spot for it in your kitchen. You want to ensure that your dehydrator is placed in a location where it can work its magic without any disturbances.
Look for a nice, stable surface on your counter where your Magic Chef Dehydrator can sit comfortably. Avoid areas where it can be bumped or moved, as this can affect the drying process. Ideally, you want a spot where your dehydrator can work its magic undisturbed, just like a master chef in a busy kitchen.
Consider the following factors when choosing a spot for your dehydrator:
- Avoid areas near open windows or direct sunlight, as excessive heat or sunlight can impact the drying process and the quality of your dried foods.
- Ensure there is enough space around your dehydrator for proper airflow. Good ventilation is essential for even and efficient drying.
- Keep your dehydrator away from other appliances or cooking equipment that generate heat. This will help maintain a consistent temperature within the dehydrator.
Remember, finding the right place for your Magic Chef Dehydrator is crucial for optimal performance and delicious results. It’s like finding the sweet spot in a recipe where all the flavors come together perfectly.
Magic Chef Dehydrator Placement Tips:
Here are some additional tips to help you pick the perfect spot for your dehydrator:
- Consider the noise level. Although Magic Chef Dehydrators are generally quiet, you may want to avoid placing it in close proximity to areas where you spend a lot of time.
- Make sure the location is easily accessible. You’ll want to be able to check on your dried foods and make any necessary adjustments during the drying process.
- Ensure the area is clean and free from dust or debris that could find its way into your dehydrator and affect your food.
Now that you’ve found the perfect place for your Magic Chef Dehydrator on your kitchen counter, you’re ready to move on to the next step: giving it a quick wash before its first use. This will ensure that your dehydrator is clean and ready to go when you start drying your favorite fruits, vegetables, or jerky.
Clean Before You Start: Give Your Dehydrator a Quick Wash
Before you start using your Magic Chef Dehydrator, it’s essential to give it a thorough cleaning. Ensuring that all the trays and the dehydrator itself are clean will not only guarantee the best results but also maintain the hygiene of your food.
Think of it as taking a bath before jumping into a swimming pool – a clean dehydrator is always better for your health and the taste of your dried goodies.
Pro Tip: To clean your Magic Chef Dehydrator, start by unplugging it and disassembling the trays. Wash all the removable parts with warm, soapy water and rinse them thoroughly. For stubborn stains, use a soft brush or sponge to scrub gently. Wipe the dehydrator’s exterior with a damp cloth, making sure not to get any water inside the electrical components. Allow everything to air dry completely before reassembling and using.
By following this simple step, you’ll ensure that your Magic Chef Dehydrator is ready for the most flavorful and hygienic drying experience.

Now that your dehydrator is squeaky clean, you’re all set to move on to the next step – assembly time! In the next section, we will guide you through the process of putting the trays and parts of your Magic Chef Dehydrator together, just like assembling pieces of a puzzle.
Assembly Time: Put the Trays and Parts Together
Now that you have unboxed your Magic Chef Dehydrator and completed the spot check, it’s time to assemble the trays and other parts. Think of it as putting together a puzzle – each piece has a specific place and purpose.
To ensure a seamless assembly process, carefully follow the instructions provided in the manual. Treat it like a recipe – precision is key to achieving optimal results.
Gather Your Trays and Parts
Before you begin, make sure you have all the trays and parts required for assembly. Lay them out on a clean, flat surface to organize your workspace. It’s like setting up your cooking station before diving into a recipe.
Follow the Manual’s Instructions
The manual is your ultimate guide to assembling the Magic Chef Dehydrator. Take your time to read it carefully and understand each step. Think of it as following a map – it will lead you to the successful completion of your dehydrator assembly.
Pro Tip: If you encounter any difficulties during the assembly process, refer to troubleshooting tips in the manual or contact Magic Chef customer support for assistance.
Ensure a Perfect Fit
As you assemble the trays and parts, pay close attention to ensure that each piece fits snugly and securely. It’s similar to building a sturdy structure – every connection contributes to the overall stability and functionality of your Magic Chef Dehydrator.
Take a moment to double-check that you have correctly aligned all the components. It’s like proofreading a document – accuracy matters for a smooth and successful operation.
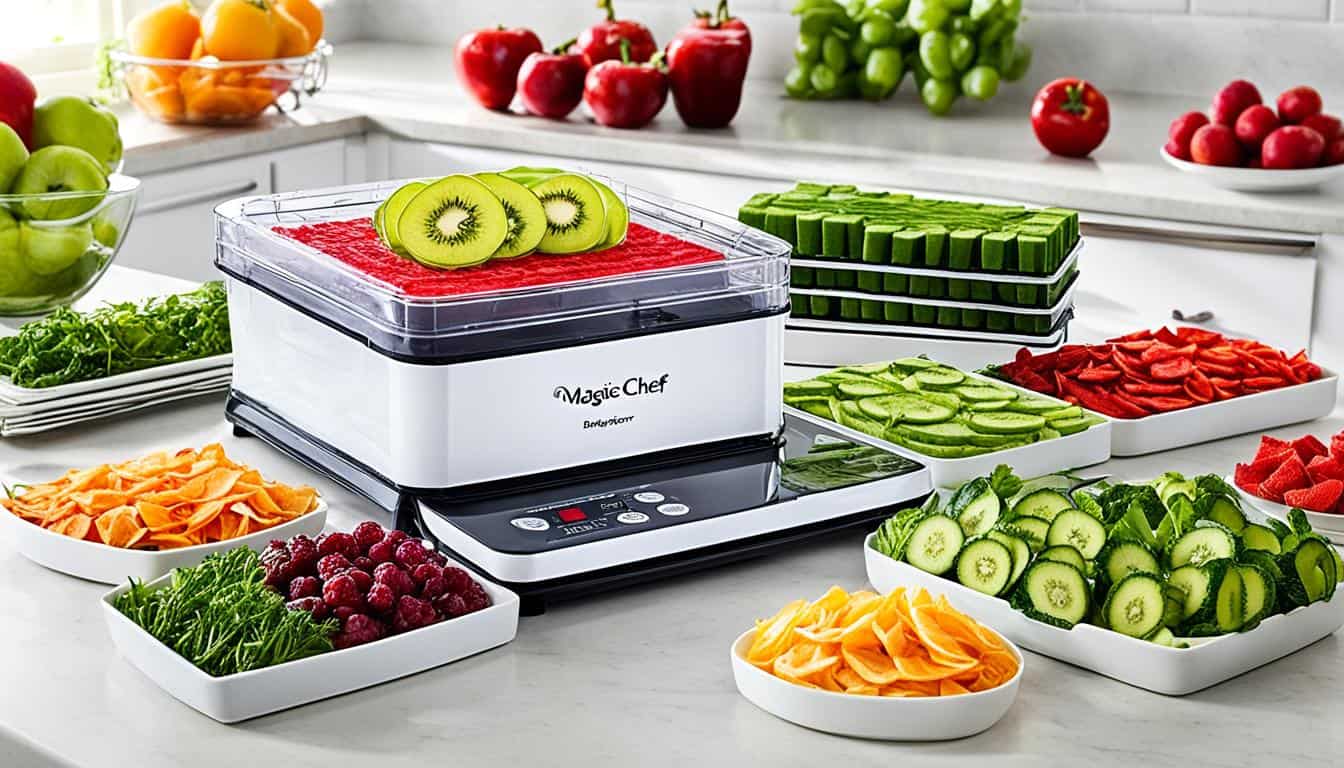
Visual Reference
Here’s an image of the Magic Chef Dehydrator for your reference as you assemble the trays and parts:

| Assembly Steps | Description |
|---|---|
| Step 1 | Attach the base tray to the main body of the dehydrator. |
| Step 2 | Place the subsequent trays on top of the base tray, ensuring they align properly. |
| Step 3 | Attach the top tray to the stack of trays, completing the assembly. |
Remember, proper assembly is crucial for the optimal performance and longevity of your Magic Chef Dehydrator. Once you have successfully assembled the trays and parts, you’re one step closer to enjoying delicious, homemade dried snacks!
Get to Know the Controls: Understand the Temperature Settings and Timer
Before you can start drying your favorite foods with your Magic Chef Dehydrator, it’s important to familiarize yourself with its temperature settings and timer. Just like learning the rules of a new video game before you start playing, understanding these controls will ensure that you achieve the best results with your dehydrator.
The temperature settings on the Magic Chef Dehydrator allow you to control the heat level during the drying process. This is crucial as different foods require different temperatures to dehydrate properly. Consult the user manual for recommended temperature ranges for various fruits, vegetables, meats, and more. By adjusting the temperature to suit your specific needs, you can preserve the flavors and nutrients of your favorite foods.
In addition to temperature control, the timer feature on the Magic Chef Dehydrator allows you to set the duration of the drying process. This ensures that your food is dried for the optimal amount of time, preventing over-drying or under-drying. It’s like having an automatic countdown that takes the guesswork out of the drying process.
Whether you’re a beginner or a seasoned dehydrator enthusiast, taking the time to understand these controls will greatly enhance your drying experience with the Magic Chef Dehydrator. So go ahead, explore the temperature settings and timer, and get ready to create delicious, homemade snacks that will impress your family and friends!

Key points to remember:
- Familiarize yourself with the temperature settings to match the recommended levels for different foods.
- Utilize the timer feature to ensure your food is dried for the perfect amount of time.
- Experiment with different temperature and time combinations to find the optimal settings for your favorite recipes.
First Test Run: Ensure Everything Is Working Perfectly
Before you start drying your food, it’s important to run a test on your Magic Chef Dehydrator to ensure everything is working perfectly. This simple step will help you avoid any disappointments and ensure that your dehydrator is ready for the real fun to begin.
To perform the test run, follow these steps:
- Plug in your Magic Chef Dehydrator and make sure it is securely connected to a power source.
- Set the temperature to the lowest possible setting. This will allow you to test the heating element without actually drying any food.
- Turn on the dehydrator and let it run empty for about 10 to 15 minutes.
- During this time, observe the dehydrator to ensure that the heat is evenly distributed and the fan is working smoothly. You should be able to feel the warm air circulating inside.
- Also, pay attention to any unusual noises, smells, or signs of malfunction. If you notice anything concerning, refer to the manual or contact customer support for assistance.
- If everything looks and sounds good, congratulations! Your Magic Chef Dehydrator is ready for its first food drying adventure.
Remember, this test run is an essential step to guarantee optimal performance and delicious results. Now that you’ve confirmed that your dehydrator is working perfectly, you can confidently move on to drying a variety of foods, from fruits and vegetables to jerky and herbs.
As you embark on your journey with the Magic Chef Dehydrator, keep in mind that each type of food may require different time and temperature settings. Refer to the user manual for specific guidelines and experiment with different recipes to find your favorite combinations.
Prep Your Food: Slice Your Ingredients Evenly
Before placing your fruits, veggies, or meats on the trays of your Magic Chef Dehydrator, it’s important to slice them evenly. This ensures consistent drying and helps your food retain its flavors. Think of it as getting all your ducks in a row – uniform pieces dry best!
Here are some tips to help you slice your ingredients evenly:
- Use a sharp knife or a mandoline slicer for precise and uniform cuts.
- Aim for consistency in thickness. Slices that are too thick may take longer to dry, while slices that are too thin may become brittle or over-dried.
- Ensure that each slice is of similar size to promote even airflow and drying.
- If dehydrating fruits or vegetables with irregular shapes, try to cut them into similar sizes to ensure even drying throughout.
By taking the time to slice your ingredients evenly, you’ll achieve optimum results with your Magic Chef Dehydrator and enjoy delicious dried snacks that are uniform in texture and taste.
Tips for Slicing Different Ingredients:
If you’re unsure about the best way to slice specific ingredients, here are some additional pointers:
| Ingredient | Slicing Technique |
|---|---|
| Fruits (such as apples, bananas, or citrus) | Slice them into thin, even rings or rounds. |
| Leafy greens (such as kale or spinach) | Remove stems and tear into bite-sized pieces. |
| Vegetables (such as carrots, zucchini, or bell peppers) | Cut into uniform-sized strips or slices. |
| Meats (such as beef, chicken, or turkey) | Slice into thin strips or bite-sized pieces. |
Remember to always handle sharp objects with care and follow proper knife safety practices to avoid accidents. Now that you’ve sliced your ingredients evenly, it’s time to move on to the next step – loading up your Magic Chef Dehydrator with your delicious creations!
Pro Tips: “Slicing your ingredients evenly is the key to achieving consistent results when using your Magic Chef Dehydrator. Take your time and aim for uniform slices to ensure even drying and a consistent texture in your dehydrated foods.” – Chef Emily Green
Load It Up: Place Your Food on the Trays
Now that you have assembled your Magic Chef Dehydrator, it’s time to load it up with delicious food for drying. Think of the trays as the seating arrangement on a bus – everyone needs a seat with a view. Make sure not to overcrowd the trays, allowing proper airflow for efficient drying.
Here are some tips for loading your Magic Chef Dehydrator:
- Arrange your food in a single layer on each tray, leaving some space between each piece for better airflow.
- If you are drying different types of food, you can use separate trays or separate the food with parchment paper to prevent flavors from mixing.
- To prevent small food pieces from falling through the trays, consider using a mesh or non-stick liner.
- For round fruits like berries, you can use a fruit leather tray to prevent them from falling through the gaps.
Proper placement of your food is essential for even and thorough dehydration. Take a moment to visualize the trays as a canvas, and let your culinary creativity shine as you arrange your food in an aesthetically pleasing manner!
Tip: Remember to refer to the manual for any specific guidelines on loading and arranging food for your specific model of Magic Chef Dehydrator.
By loading your Magic Chef Dehydrator with care and attention, you ensure that each piece of food receives the optimal drying conditions. Now that your food is ready, it’s time to set the temperature and timer and let the dehydrator work its magic! In the next section, we will guide you through the process of adjusting the temperature and timer settings.
Set It and Forget It: Adjust the Temperature and Timer
Now that you’ve loaded your Magic Chef Dehydrator with delicious ingredients, it’s time to set the temperature and timer. This step is crucial in ensuring the perfect dehydration process for your food.
Adjusting the temperature allows you to control how quickly or slowly your food dries. Different foods require different temperatures for optimal results. For example, fruits and vegetables typically dry best at temperatures between 125°F and 135°F (52°C and 57°C), while meat or jerky may require higher temperatures between 145°F and 155°F (63°C and 68°C).
The timer is equally important as it determines the duration of the drying process. Some foods may require several hours, while others may take a full day or more. It’s essential to consult specific drying guides or recipes to ensure you set the correct duration for your chosen ingredients.
Keep in mind that the drying time and temperature may also depend on factors such as the thickness of the food slices, humidity levels, and personal preference for crispiness. It may take a few trial runs to find the perfect balance, but don’t worry, you’ll become a pro in no time!
Here’s an example of how to adjust the temperature and timer on your Magic Chef Dehydrator:
1. Press the temperature button to display the current temperature setting.
2. Use the arrow buttons to increase or decrease the temperature to your desired level.
3. Press the timer button to display the current timer setting.
4. Use the arrow buttons to adjust the timer to the recommended drying duration.
5. Double-check the temperature and timer settings to ensure they are correct.
6. Close the dehydrator door to begin the drying process.
Safety First: Monitor Properly
While the “set it and forget it” phrase may imply complete absence, it’s essential to periodically check on your food during the drying process. This allows you to monitor the progress, ensuring everything is going according to plan.
It’s also worth noting that the drying time can vary depending on the quantity and moisture content of the food you’re dehydrating. Therefore, it’s crucial to keep an eye on the timer and check the food regularly to avoid over- or under-drying.
Once the timer goes off, you’ll be greeted with perfectly dehydrated food ready to be enjoyed or stored. So sit back, relax, and let your Magic Chef Dehydrator work its magic!
| Temperature | Food |
|---|---|
| 125°F – 135°F (52°C – 57°C) | Fruits and vegetables |
| 145°F – 155°F (63°C – 68°C) | Meat or jerky |
Now that you’ve set the temperature and timer, your Magic Chef Dehydrator will take care of the rest. Soon, you’ll be enjoying delicious, homemade dehydrated snacks that are perfect for on-the-go, camping trips, or simply satisfying your cravings.
Continue to the next section to learn how to check the progress of your food and the best methods for storing your dried creations!
Check Progress and Enjoy: Peek at Your Food and Store It
Now that your food is in the Magic Chef Dehydrator, it’s time to check on its progress. Monitoring the drying process is essential to ensure optimal results. Periodically peek inside the dehydrator to see how your fruits, vegetables, or meats are drying.
As you check on the progress, you’ll notice some treats might finish drying earlier than others. It’s important to remove the fully dried pieces from the trays to avoid over-drying. The Magic Chef Dehydrator allows you to easily remove individual trays, so you can access the dried food without disturbing the remaining items.
Once your food is fully dried, let it cool down before transferring it to airtight containers. This step helps preserve the flavor, texture, and nutritional value of your dried goodies. Storing your dehydrated creations in airtight containers will keep them fresh for longer periods.
Now comes the best part – enjoying your homemade treats! Whether you decide to share them with friends and family or keep them all for yourself, you can indulge in the satisfaction of knowing you made these delicious snacks using your Magic Chef Dehydrator. Don’t forget to clean your dehydrator thoroughly after each use, ensuring it is ready for your next drying adventure!
Best In Footwear.
 Hey Don't Forget About Your Feet! Click the image above - for an entire resource dedicated to the best footwear finds and advice! |
