When planning a party, food bars can be a hit that keeps guests mingling and customizing their own bites. From taco and slider stations to dessert and popcorn bars, the options are endless! This list of 25 fantastic food bar ideas will spark your creativity and help you set up a tasty spread that everyone will love.
Affiliate Disclosure: "As an Amazon Associate I earn from qualifying purchases made from the images and links in this post. We are a participant in the Amazon Services LLC Associates Program, an affiliate advertising program designed to provide a means for us to earn fees by linking to Amazon.com and other affiliated sites."
Charcuterie & Cheese Bar Delight
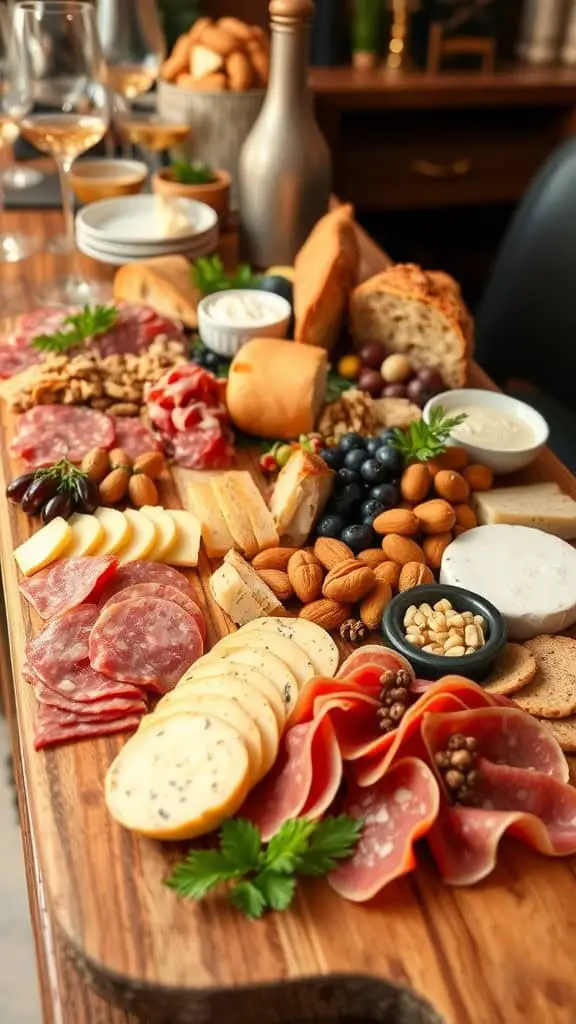
Imagine a spread that makes your mouth water! This charcuterie and cheese bar is perfect for gatherings. It showcases a variety of meats, cheeses, and accompaniments, all beautifully arranged to please the eye and the palate.
You’ll find an assortment of cured meats like salami and prosciutto, paired with creamy cheeses. Each bite offers a delightful mix of flavors and textures. Nuts and dried fruits add a nice crunch and sweetness, making this display more exciting.
Serving a charcuterie board is a fantastic idea for parties. It’s a casual way to encourage mingling. Guests can create their own combinations, making it fun and interactive. You can easily adjust this setup for any occasion, whether it’s a birthday, a holiday gathering, or even a graduation celebration.
Looking for more party food bar ideas? Consider adding a baked potato bar or a pasta bar next to your charcuterie spread. These options can elevate your gathering, letting everyone customize their plates with their favorite toppings and sauces.
This is where charcuterie inspiration shines. It’s not just about the food; it’s about creating a festive atmosphere where everyone can enjoy delicious bites together.
Ingredients:
- Meats:
- Sliced salami
- Prosciutto
- Soppressata
- Chorizo or other cured meats of choice
- Cheeses:
- Aged cheddar (sharp and crumbly)
- Brie (soft and creamy)
- Gouda (smoked or regular)
- Blue cheese (bold and tangy)
- Goat cheese log (optional for variety)
- Crackers & Bread:
- Assorted crackers (multigrain, water crackers, etc.)
- Sliced baguette or artisan bread
- Fresh Fruits:
- Grapes (red and green)
- Apple slices (lightly brushed with lemon juice to prevent browning)
- Fresh berries (strawberries, blueberries, raspberries)
- Figs (when in season)
- Dried Fruits & Nuts:
- Dried apricots
- Medjool dates
- Almonds (roasted and salted)
- Walnuts or pecans
- Extras & Garnishes:
- Olives (green and black varieties)
- Cornichons or gherkins
- Honey or fig jam
- Whole-grain mustard
- Fresh herbs like rosemary and thyme for decoration
Instructions:
- Select Your Board: Choose a large wooden board, slate, or serving tray as your base.
- Arrange the Cheeses: Start by placing the cheeses in different corners or focal points on the board. Slice some pieces ahead of time for easy grabbing.
- Add the Meats: Fold or roll cured meats for visual appeal and place them near the cheeses for easy pairing.
- Fill in with Crackers & Bread: Arrange crackers and sliced bread around the cheeses and meats.
- Incorporate Fruits and Nuts: Scatter fresh and dried fruits throughout the board. Fill empty spaces with nuts for added texture.
- Add Extras & Garnishes: Place small bowls or ramekins filled with olives, pickles, mustard, and jams. Add fresh herb sprigs for a touch of greenery.
- Finishing Touches: Make sure everything is easily accessible and visually appealing. Balance colors and textures for the best presentation.
Serving Tips:
- Keep It Fresh: Serve immediately or wrap in plastic wrap and refrigerate until ready to serve.
- Pair with Wine: Offer a variety of wines like red blends, white chardonnay, or sparkling wine for added flair.
- Customize for Guests: Add specific items based on dietary preferences, such as gluten-free crackers or plant-based cheeses.
With this thoughtfully arranged charcuterie and cheese bar, your guests will enjoy endless combinations of mouthwatering bites. It’s a simple yet elegant way to create an unforgettable food experience!
Sweet & Savory Breakfast Bar
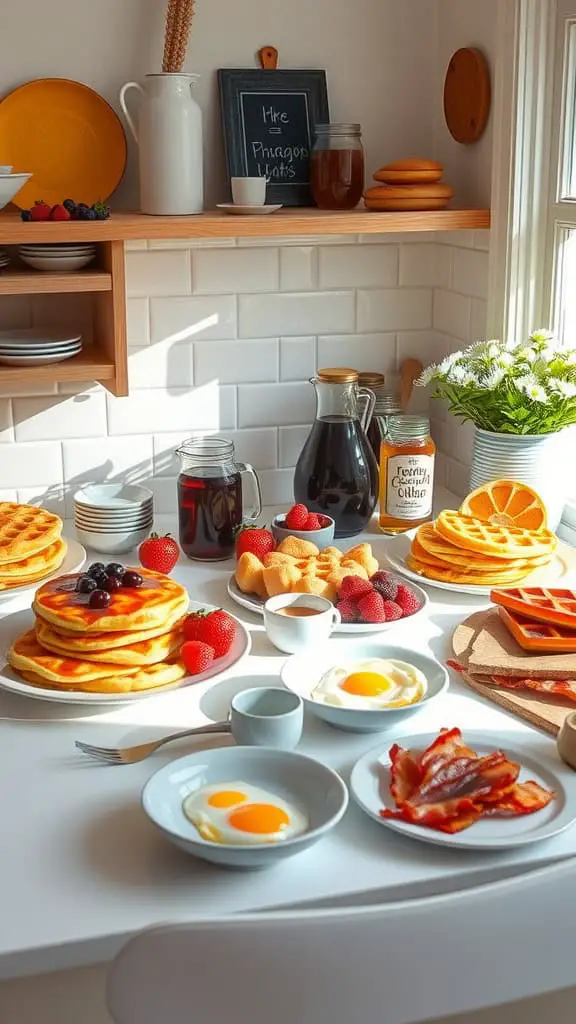
Picture a delightful breakfast spread that brings together sweet and savory flavors. This setup is perfect for anyone looking to impress guests or simply enjoy a hearty morning meal. With fluffy waffles and golden pancakes stacked high, you can easily create a sweet feast that pleases everyone’s taste buds.
Alongside the sweet treats, there are perfectly cooked eggs and crispy bacon, providing that savory balance. Add in fresh fruit like strawberries and blueberries to brighten up the plates. This combination not only looks inviting but also offers a variety of flavors to enjoy.
A breakfast bar is a great choice for gatherings. It encourages guests to customize their plates and indulge in their favorite combinations. Think about mixing this idea with a baked potato bar dinner or a pasta bar for a unique twist. Food bars are a fun way to serve meals at parties, making them interactive and enjoyable.
Setting up a sweet and savory breakfast bar is simple. Just prepare the main ingredients ahead of time, and let everyone build their perfect plate. Whether it’s a laid-back family brunch or a festive celebration, this breakfast bar will surely be a hit!
Ingredients:
Sweet Items:
- Pancake mix (or homemade batter)
- Waffle mix (or homemade batter)
- Maple syrup, honey, and fruit syrups
- Whipped cream
- Fresh berries: strawberries, blueberries, raspberries
- Sliced bananas
- Nutella, peanut butter, and other spreads
- Chocolate chips, nuts, and shredded coconut
Savory Items:
- Scrambled eggs
- Fried or poached eggs
- Crispy bacon
- Breakfast sausages
- Hash browns or home fries
- Sautéed mushrooms and spinach
- Shredded cheese (cheddar, mozzarella, feta)
- Sliced avocado
- Hot sauce, salsa, and ketchup
Extras:
- Fresh orange juice, coffee, and tea
- Bread or bagels with cream cheese and butter
- Granola and yogurt for a lighter option
Instructions:
- Prep the Sweet Side:
- Make the pancake and waffle batter ahead of time. Keep them warm in a low oven after cooking.
- Arrange syrups, spreads, and toppings in small bowls for easy serving.
- Cook the Savory Items:
- Fry or bake bacon and sausages until crispy.
- Scramble or fry eggs to preference.
- Sauté vegetables if desired.
- Set Up the Bar:
- Arrange all items in a visually appealing way on serving trays or platters.
- Use warming trays or slow cookers to keep hot items warm.
- Create a Beverage Station:
- Set up coffee, tea, and juice with cups, stirrers, and sugar/milk options.
- Serving Tips:
- Customization: Encourage guests to build their ideal plates.
- Balance: Offer both sweet and savory options for variety.
- Presentation: Use colorful bowls and trays for a festive look.
With this breakfast bar setup, every guest can enjoy their favorite combination of sweet and savory. It’s perfect for brunch gatherings, family celebrations, or holiday mornings. Enjoy creating delicious memories around the breakfast table!
Gourmet Baked Potato Bar Bliss
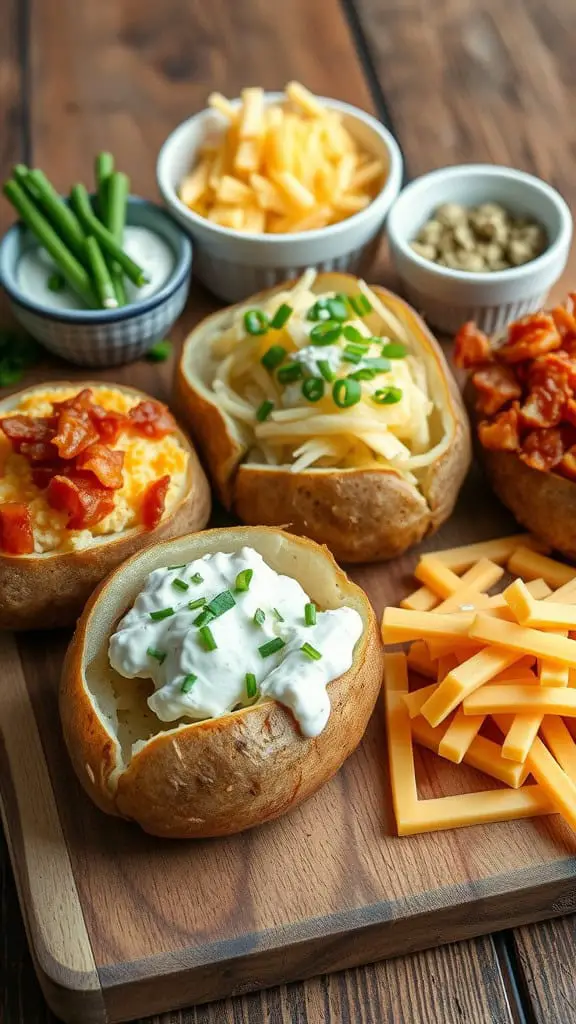
Imagine a cozy gathering with friends or family, where everyone can create their own delightful baked potato masterpiece. A baked potato bar is the perfect way to bring people together over a comforting meal. The image showcases a variety of toppings, making it easy to customize each potato just the way you like it.
In the picture, you see fluffy baked potatoes waiting to be topped with delicious options. From creamy sour cream and shredded cheese to crunchy bacon bits and green onions, the choices are endless. This setup is an ideal example of food bar ideas that cater to different tastes and preferences.
Planning a baked potato bar for your next event? Consider including popular baked potato bar toppings like cheese, sour cream, and various meats. It’s a great way to serve comfort food in a fun and interactive way. Whether it’s a birthday party or a casual get-together, a baked potato bar dinner can elevate your meal.
Ingredients:
- Large russet potatoes (1 per person)
- Olive oil (for coating)
- Salt and pepper (to taste)
Toppings:
- Shredded cheese (cheddar, mozzarella, or a blend)
- Sour cream
- Green onions, finely chopped
- Crispy bacon bits
- Butter
- Chives (optional, for garnish)
- Diced tomatoes (optional)
- Steamed broccoli florets (optional)
- Salsa (optional for a spicy twist)
- Grilled chicken or pulled pork (optional for a hearty upgrade)
Instructions:
- Preheat the oven to 400°F (200°C). Scrub and dry the potatoes thoroughly.
- Pierce each potato several times with a fork to allow steam to escape while baking.
- Rub each potato with olive oil and sprinkle with salt and pepper for extra crispy skins.
- Place the potatoes directly on the oven rack or on a baking sheet. Bake for 60-75 minutes or until tender when pierced with a fork.
- While the potatoes are baking, prepare your toppings. Cook bacon until crispy and crumble into bits, shred cheese, and chop green onions.
- When the potatoes are done, remove them from the oven and let cool slightly.
- Slice each potato lengthwise and gently fluff the insides with a fork.
- Set up your baked potato bar with all the toppings arranged in separate bowls.
- Invite guests to customize their potatoes with their favorite toppings.
Serving Tips:
- Keep It Warm: Use a slow cooker to keep the baked potatoes warm throughout the event.
- Make It Fancy: Offer gourmet toppings like caramelized onions, sautéed mushrooms, or a cheese sauce.
- Diet-Friendly Options: Include lighter toppings like Greek yogurt, fresh herbs, and mixed greens.
This baked potato bar is sure to be a hit at any gathering. The interactive setup lets everyone enjoy a personalized, satisfying meal full of flavor and warmth. Enjoy creating and sharing this ultimate comfort food experience!
DIY Salad Bar Adventure
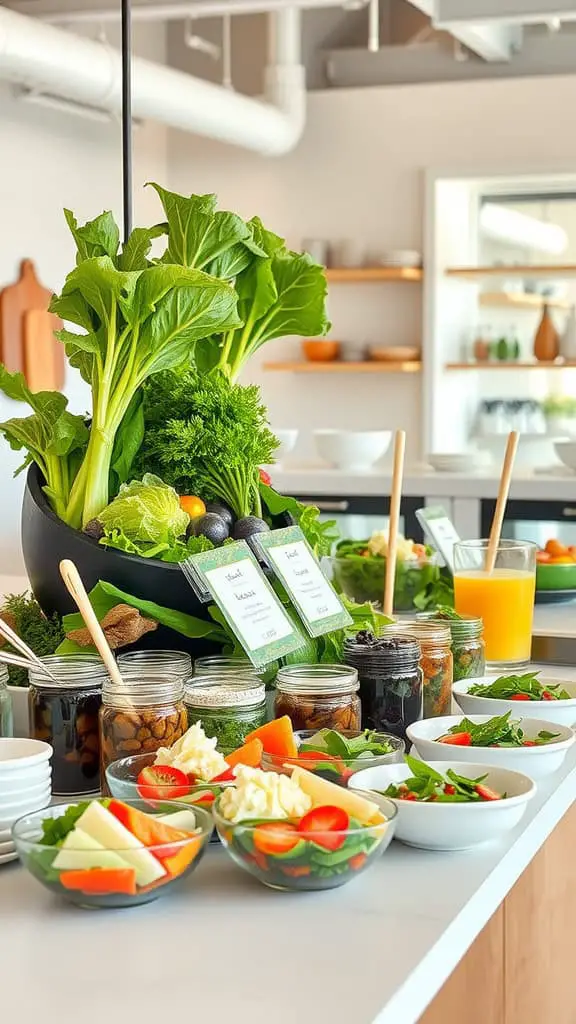
A DIY salad bar is a fantastic way to enjoy fresh, healthy foods while allowing everyone to customize their meal. This setup is colorful and inviting, perfect for any gathering. Imagine a table filled with vibrant greens, crunchy veggies, and an array of toppings.
The image shows a variety of fresh ingredients ready to be mixed and matched. There are leafy greens, bright tomatoes, and crunchy cucumbers, all beautifully arranged. Small jars are filled with different dressings and toppings, like nuts and seeds, offering plenty of choices.
This kind of setup is not just for salads. You can also think about food bar ideas like a Baked Potato Bar Dinner or a Graduation Party Pasta Bar. Mixing it up keeps the meal exciting, and everyone can build their own perfect plate.
For a fun twist, consider adding a few unique toppings to your salad bar. Think of roasted chickpeas, sliced avocados, or even some surprising fruits. This is a great way to get creative and share ideas for parties that everyone will enjoy.
Ingredients:
- Leafy Greens: Mixed greens, spinach, romaine lettuce, arugula, kale
- Fresh Vegetables: Cherry tomatoes, cucumbers, bell peppers, shredded carrots, radishes, red onions
- Proteins: Grilled chicken, hard-boiled eggs, chickpeas, black beans, tofu, shrimp
- Cheeses: Feta, shredded cheddar, mozzarella pearls, blue cheese crumbles
- Crunchy Toppings: Croutons, nuts (almonds, walnuts), seeds (sunflower, pumpkin), crispy onions
- Fruits: Sliced strawberries, apple slices, dried cranberries, mandarin oranges
- Dressings: Ranch, balsamic vinaigrette, Caesar, honey mustard, Italian, oil & vinegar
- Extras: Sliced avocado, olives, pickled vegetables, fresh herbs (basil, parsley)
Instructions:
- Set Up the Table: Arrange your salad ingredients in separate bowls or trays. Use colorful and clear containers to showcase the freshness.
- Organize by Category: Group similar ingredients together. Start with greens, followed by veggies, proteins, cheeses, and toppings.
- Label the Ingredients: Use small cards to label each item so guests can easily identify their choices.
- Provide Serving Utensils: Place tongs and spoons with each bowl to keep things clean and organized.
- Create a Dressing Station: Arrange dressings in small jars or bottles with labels. Provide ladles or squeeze bottles for easy serving.
- Offer Customization Tips: Suggest flavor combinations like a Greek salad mix (romaine, feta, olives, cucumbers) or a protein-packed option (spinach, chicken, eggs, seeds).
Serving Tips:
- Keep It Fresh: Refill ingredients as needed and keep chilled items on ice.
- Mix It Up: Offer seasonal veggies and toppings for variety.
- Add a Fun Element: Include a “Salad of the Day” suggestion for inspiration.
This DIY salad bar is guaranteed to make any meal feel like a personalized culinary adventure. Fresh, vibrant, and totally customizable—it’s a surefire hit for any gathering!
Fiesta Taco Bar Celebration
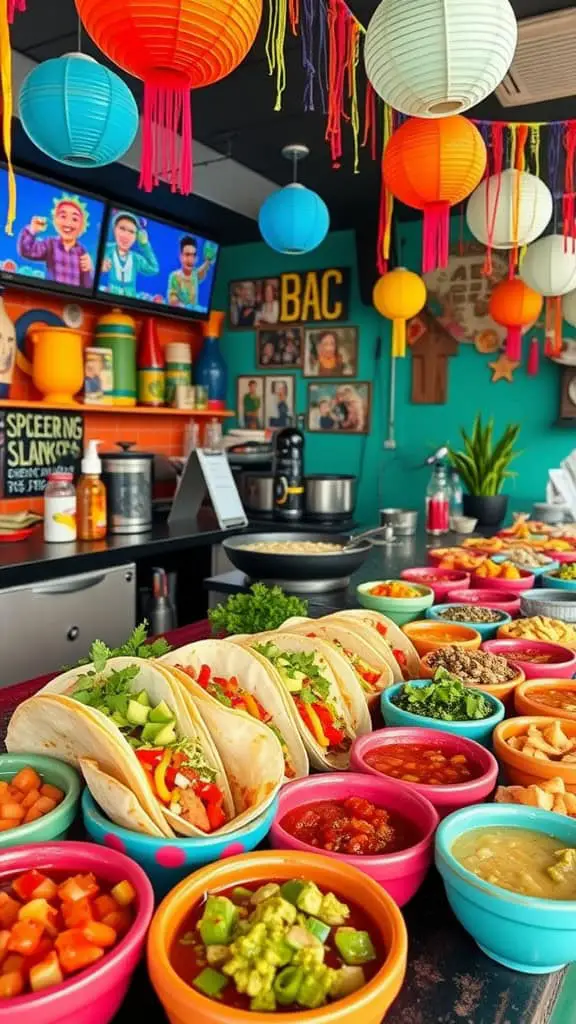
The Fiesta Taco Bar is a vibrant way to celebrate with friends and family. Imagine a table filled with colorful bowls of toppings and fresh ingredients. Each bowl invites everyone to build their own perfect taco. It’s a fun twist on party food bars, making it easy for guests to customize their meal.
Tacos are a crowd favorite, and with a variety of toppings, there’s something for everyone. Think of all the possibilities! You can include fresh veggies, zesty salsas, and savory meats. This setup not only satisfies different tastes but also sparks creativity.
If you’re looking for party food bar ideas, a taco bar is a winner. You can even pair it with other themes, like a baked potato bar or a pasta bar, for those who want to mix things up. Each option makes for a relaxed and enjoyable dining experience.
The setup is not only delicious but also visually appealing. With bright, colorful bowls and festive decorations, your taco bar will be a hit. A fun atmosphere encourages mingling and laughter while everyone enjoys their creations.
Ingredients:
- Taco Shells: Hard shells, soft tortillas (corn or flour), or lettuce wraps for a low-carb option
- Proteins:
- Seasoned ground beef
- Shredded chicken (taco-seasoned)
- Carnitas (slow-cooked pork)
- Grilled shrimp or fish (for seafood lovers)
- Black beans or refried beans for a vegetarian option
- Toppings:
- Shredded lettuce
- Diced tomatoes
- Chopped onions (red or white)
- Sliced jalapeños
- Diced avocado or guacamole
- Sliced black olives
- Fresh cilantro leaves
- Cheeses:
- Shredded cheddar
- Monterey Jack
- Cotija (for a traditional touch)
- Sauces and Salsas:
- Salsa (mild, medium, or hot)
- Pico de gallo
- Tomatillo salsa
- Hot sauce varieties
- Sour cream or Mexican crema
- Lime wedges (for a citrusy finish)
Instructions:
- Set Up the Taco Bar: Arrange all ingredients in separate serving bowls or containers. Group similar items together for easy access.
- Warm the Taco Shells: Heat taco shells in the oven at 350°F for 5-7 minutes or until warm. Keep them wrapped in foil to stay hot.
- Prepare Proteins: Cook ground beef with taco seasoning, shred and season chicken, or warm any pre-cooked meats. Keep warm in slow cookers or serving trays.
- Assemble the Toppings: Place toppings, cheeses, and sauces in colorful bowls. Add serving spoons or tongs for each item.
- Create a Festive Display: Add a fun tablecloth, festive napkins, and decorative accents like mini sombreros or string lights to enhance the theme.
- Serve and Enjoy: Let guests build their tacos however they like, encouraging creativity and conversation.
Serving Tips:
- Diet-Friendly Options: Offer low-carb shells, vegan proteins, and dairy-free toppings.
- Keep It Fresh: Refill toppings as needed to keep the selection fresh and appealing.
- Make It Interactive: Provide recipe cards with fun taco combinations for inspiration.
Your Fiesta Taco Bar will be the life of the party, with flavors and toppings that everyone will enjoy. Celebrate with great food, good friends, and lots of fun!
Ultimate Pasta Bar Extravaganza
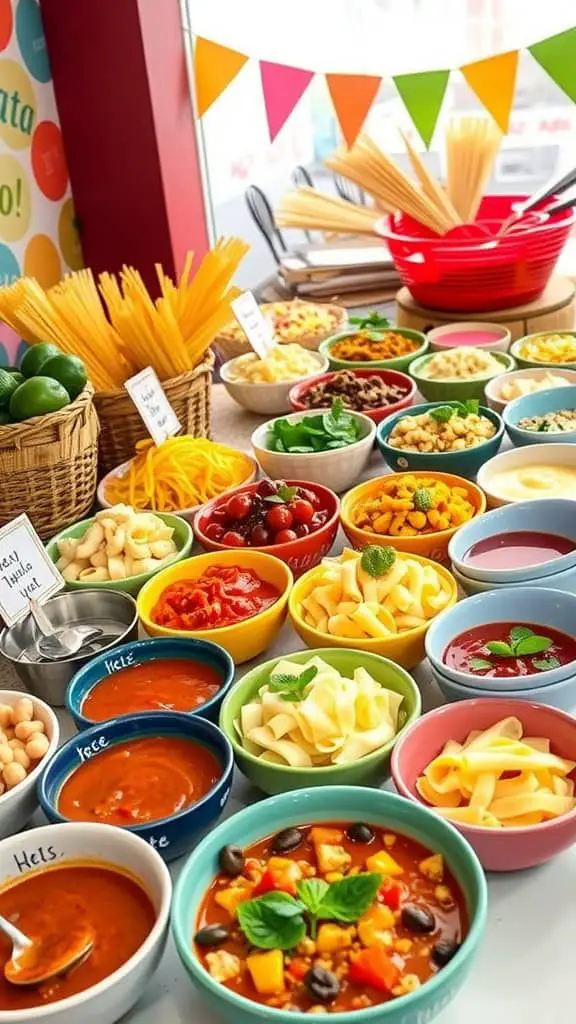
A pasta bar is a fantastic way to bring fun and flavor to your gatherings. The vibrant spread in the image captures the essence of a Pasta Bar Aesthetic, showcasing various toppings and sauces. Bright bowls filled with fresh ingredients invite guests to personalize their plates.
Imagine a table adorned with options like marinara, alfredo, and pesto sauces. You have pasta choices from penne to fettuccine. Each guest can mix and match to create their perfect dish. This setup is ideal for graduation parties or any celebration where guests can enjoy Party Food Bars.
Consider adding some baked potato bar toppings for a twist, offering options like sour cream, chives, and cheese. This combo allows for endless Pasta Bar Ideas Buffet Dinner Parties. Guests appreciate the ability to customize their meals, making it a hit for any Food Bar Ideas for Parties.
This spread not only serves as a meal but also sparks conversation. Everyone loves to share their creations, much like the Charcuterie Inspiration that brings people together over delightful food. A Graduation Party Pasta Bar can be memorable when filled with personal touches.
Ingredients:
Pasta Choices:
- Penne
- Fettuccine
- Rotini
- Spaghetti
- Gluten-free pasta (optional)
Sauces:
- Marinara sauce
- Alfredo sauce
- Pesto sauce
- Garlic and olive oil sauce
Toppings:
- Grilled chicken strips
- Meatballs
- Sautéed shrimp
- Crumbled bacon
- Italian sausage slices
Vegetables:
- Sautéed mushrooms
- Roasted bell peppers
- Sautéed spinach
- Diced tomatoes
- Red onions (thinly sliced)
- Black olives (sliced)
Cheese Options:
- Shredded mozzarella
- Grated Parmesan
- Crumbled feta
- Shaved Pecorino Romano
Herbs & Garnishes:
- Fresh basil leaves
- Chopped parsley
- Red pepper flakes
- Freshly ground black pepper
Instructions:
- Cook the Pasta: Boil each pasta type separately until al dente. Drain and toss with a bit of olive oil to prevent sticking. Keep warm in serving dishes.
- Warm the Sauces: Heat each sauce in a saucepan over medium heat until hot. Transfer to serving bowls or chafing dishes to keep warm.
- Prepare the Toppings: Cook or warm the protein options. Sauté the vegetables until tender. Arrange in bowls for easy serving.
- Set Up the Bar: Arrange the pasta, sauces, toppings, cheeses, and garnishes in a buffet-style setup. Use warming trays if possible.
- Serve and Enjoy: Allow guests to build their custom pasta bowls by choosing their favorite combinations.
Serving Tips:
- Presentation Matters: Use decorative bowls and serving utensils to enhance the visual appeal.
- Dietary Options: Label gluten-free pasta and vegan toppings for easy identification.
- Keep It Fresh: Refill popular items as needed to keep the bar well-stocked.
This Ultimate Pasta Bar Extravaganza is guaranteed to be the star of any party. It’s interactive, delicious, and brings everyone together through food and creativity!
Loaded Nacho Bar Fiesta
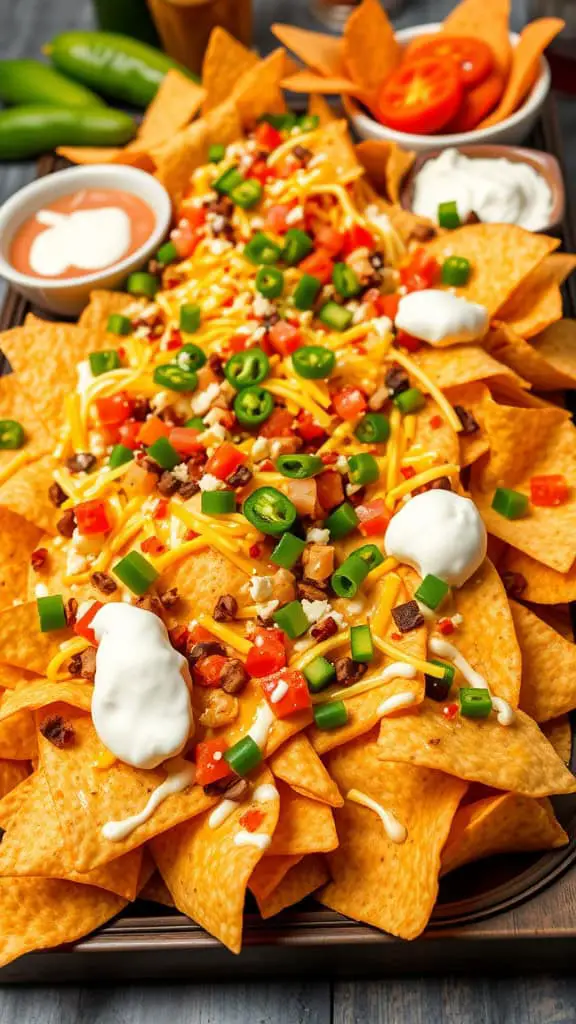
Loaded nachos are a party favorite that brings everyone together. Picture a big platter overflowing with crispy tortilla chips, melted cheese, and a rainbow of toppings.
This nacho bar is perfect for any gathering, whether it’s a birthday party, a casual get-together, or a game day feast. The combination of fresh ingredients makes it not only tasty but also visually appealing.
From classic sour cream and guacamole to spicy jalapeños and zesty salsa, there are endless options to customize your plate. It’s a great way to let guests build their own nacho masterpiece.
You can easily turn this idea into a full-fledged food bar. Think about adding a variety of dips or even integrating some baked potato bar toppings for a twist. Party food bars like this make feeding a crowd fun and interactive.
Ingredients:
- Tortilla Chips: Choose your favorite brand or use homemade chips for extra freshness.
- Cheese Options:
- Shredded cheddar
- Monterey Jack
- Pepper Jack for a spicy kick
- Queso dip (optional for drizzling)
- Protein Choices:
- Seasoned ground beef or turkey
- Shredded chicken
- Black beans or refried beans for a vegetarian option
- Fresh Toppings:
- Diced tomatoes
- Chopped onions (red or green)
- Sliced black olives
- Fresh cilantro
- Jalapeño slices (fresh or pickled)
- Diced avocado or guacamole
- Sauces and Dips:
- Sour cream
- Salsa (mild, medium, or hot)
- Pico de gallo
- Hot sauce
- Nacho cheese sauce
Instructions:
- Prepare the Ingredients:
- Preheat the oven to 375°F (190°C) if you plan to bake the nachos.
- Heat protein options if using cooked meat or beans.
- Chop and dice all fresh toppings and place them in serving bowls.
- Create the Base:
- Spread a layer of tortilla chips on a large baking sheet or oven-safe platter.
- Sprinkle shredded cheese evenly over the chips.
- Add proteins like seasoned meat or beans for a hearty base.
- Bake (Optional):
- Place the nachos in the oven for about 10 minutes or until the cheese is fully melted and bubbly.
- Build the Nacho Bar:
- Transfer the warm nacho base to a serving platter if desired.
- Arrange all toppings, sauces, and dips in separate bowls around the nachos.
- Serve and Enjoy:
- Let guests customize their plates with their favorite toppings.
- Encourage creative combinations for the ultimate nacho experience.
Serving Tips:
- Keep Warm: Use a warming tray or slow cooker to keep protein and cheese sauces warm throughout the party.
- Make Ahead: Prepare toppings and protein ahead of time to minimize last-minute prep.
- Party Presentation: Use a fun, festive serving tray or set up a DIY nacho station for added flair.
Loaded nachos are the ultimate crowd-pleaser. The combination of crispy chips, gooey cheese, and flavorful toppings makes every bite a fiesta. Enjoy the delicious chaos of building your perfect nacho plate!
Burger Bar Bonanza
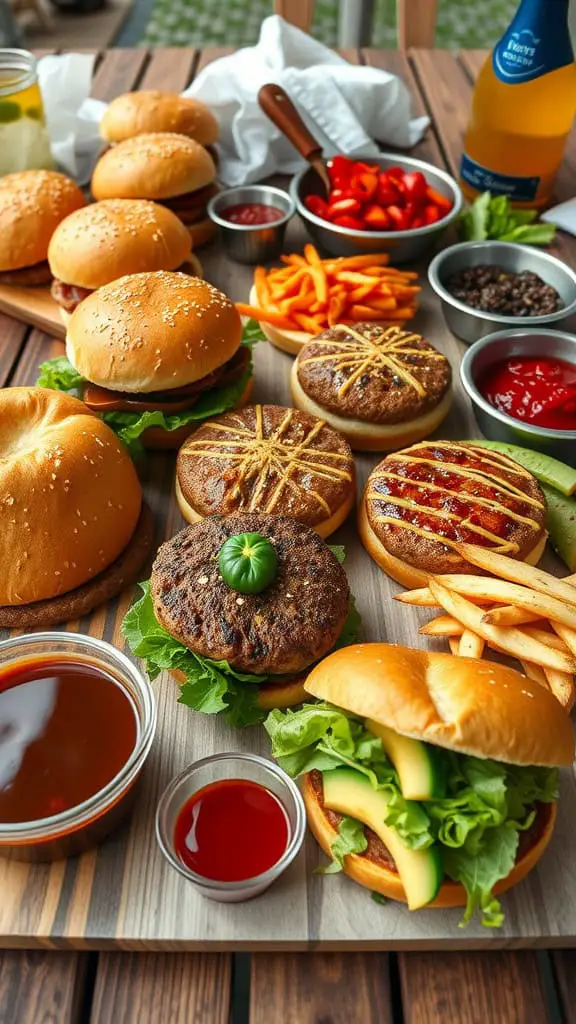
Picture a table spread with a variety of burgers and toppings, ready for a feast. This isn’t just any meal; it’s a Burger Bar Bonanza! The scene is lively with freshly baked buns, juicy patties, and colorful toppings. You can see crispy fries alongside a selection of sauces to dip and drizzle.
Each burger can be a canvas. You have the classic combinations like lettuce and tomato or more adventurous toppings like grilled pineapple and jalapeños. The choice is yours! This setup invites guests to build their dream burger with all the fixings. It’s a fun way to cater to different tastes and preferences.
If you’re planning a party, a burger bar can be the star of the show. It’s one of those party food bar ideas that encourages interaction and creativity. Guests can experiment with their combinations, making it a memorable experience. Pair it with some refreshing drinks, and you have a perfect gathering!
Ingredients:
- Burger Patties:
- Ground beef (80/20 for juiciness)
- Salt and pepper (to taste)
- Optional: ground turkey, chicken, or plant-based patties
- Buns:
- Freshly baked burger buns (sesame, brioche, whole wheat, or gluten-free options)
- Cheese Options:
- Cheddar
- Swiss
- American
- Pepper Jack
- Classic Toppings:
- Lettuce (iceberg, romaine, or mixed greens)
- Sliced tomatoes
- Sliced red onions
- Pickles (dill, bread & butter, or spicy)
- Premium Toppings:
- Grilled onions
- Sauteed mushrooms
- Bacon strips
- Avocado slices
- Grilled pineapple
- Jalapeños (fresh or pickled)
- Sauces & Condiments:
- Ketchup
- Mustard (yellow, Dijon, or whole grain)
- Mayonnaise
- BBQ sauce
- Ranch dressing
- Chipotle aioli
- Side Options:
- French fries (regular, sweet potato, or seasoned)
- Onion rings
- Coleslaw
Instructions:
- Prepare the Burger Patties:
- Season the ground beef with salt and pepper. Form into patties slightly larger than the buns, as they will shrink while cooking.
- Cook patties on a preheated grill or skillet over medium-high heat for about 3-4 minutes per side or until cooked to your desired doneness.
- Toast the Buns:
- Lightly butter the inside of each bun and toast them on the grill or in a skillet until golden brown.
- Set Up the Burger Bar:
- Arrange all toppings, sauces, and sides in separate bowls and platters for easy access.
- Create a station with labeled sections so guests can build their burgers with ease.
- Build Your Burger:
- Start with the bottom bun, add the burger patty, cheese (if desired), and layer with your favorite toppings.
- Finish with your preferred sauces and top with the bun.
Serving Tips:
- Interactive Display: Use small chalkboards or labels for each topping.
- Keep It Warm: Store cooked burger patties in a warm oven (200°F) until ready to serve.
- Theme It: Offer themed burger combinations like “Southwest BBQ” or “Hawaiian Delight.”
With this burger bar setup, everyone gets to create their masterpiece. It’s a guaranteed hit that brings fun, flavor, and endless customization to any gathering!
S’mores Dessert Bar Bliss
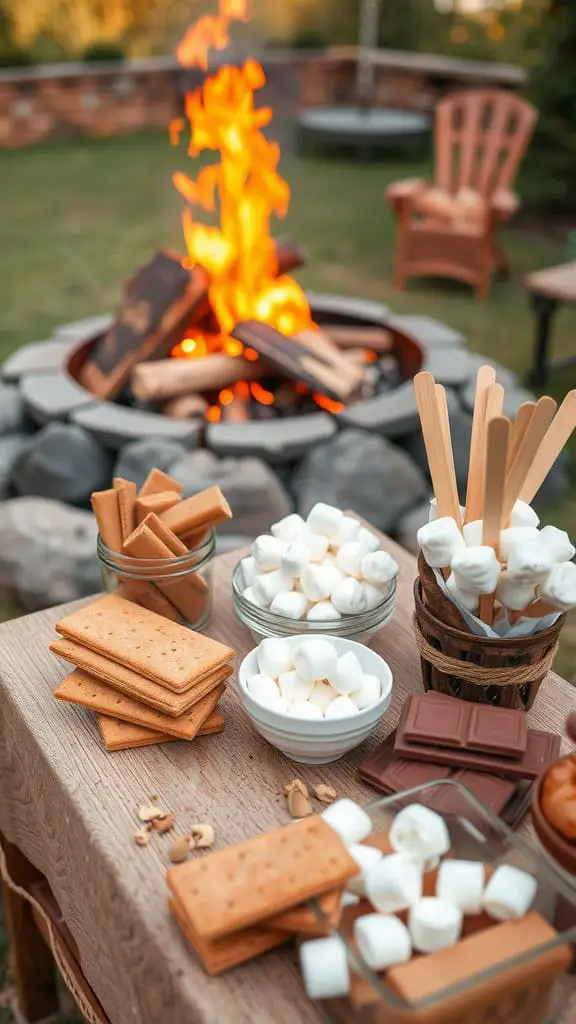
Imagine a cozy evening by the fire, surrounded by friends and family, with a s’mores dessert bar ready to delight everyone. This setup is perfect for gatherings, adding a fun twist to any gathering. You can see a beautiful fire pit in the background, creating a warm glow that invites everyone to unwind.
The table is filled with all the essentials for making the perfect s’more: graham crackers, fluffy marshmallows, and rich chocolate bars. The variety of ingredients makes it easy for everyone to customize their treat just the way they like it. It’s a great addition to your party food bars, a simple yet satisfying option that brings joy to both kids and adults alike.
Setting up a s’mores bar is straightforward. Just arrange the ingredients on a table, and let your guests get creative. Pair it with some comfy seating by the fire for a relaxed vibe. If you’re looking for ideas for parties, this is a winner. A s’mores dessert bar is not just a treat; it’s an experience that everyone will remember.
Ingredients:
- Graham crackers (regular or flavored)
- Marshmallows (standard or flavored)
- Chocolate bars (milk, dark, or white chocolate)
- Optional extras: peanut butter cups, caramel squares, flavored spreads (like Nutella), sliced strawberries, bananas, or crushed nuts
Instructions:
- Set Up the Table: Arrange all ingredients in separate bowls or trays for easy access. Group similar items together for a visually pleasing display.
- Build the S’more:
- Take a graham cracker and place a piece of chocolate on it.
- Toast a marshmallow over the fire until golden brown and melty.
- Carefully place the marshmallow on top of the chocolate.
- Add any extras like peanut butter cups or fruit if desired.
- Top with another graham cracker to complete the s’more.
- Serve and Enjoy: Encourage guests to get creative and build their own combinations. Offer skewers or roasting sticks for safe marshmallow toasting.
Tips for the Ultimate S’mores Bar:
- Keep It Warm: Use small chafing dishes or tea lights under a heat-safe tray to keep chocolate slightly melted.
- Themed Display: Use rustic trays, wooden boards, or tiered stands for a charming, campfire-inspired look.
- Flavor Boost: Include flavored marshmallows like mint or cinnamon for an extra twist.
- Safety First: If hosting indoors or without a fire pit, use a tabletop s’mores maker or indoor-safe burners.
With this setup, your s’mores dessert bar will be the highlight of the night. Guests will love the interactive experience and the chance to craft their own sweet creations by the warm glow of the fire. Enjoy the memories made around this fun and delicious treat!
Pizza Topping Bar Fun
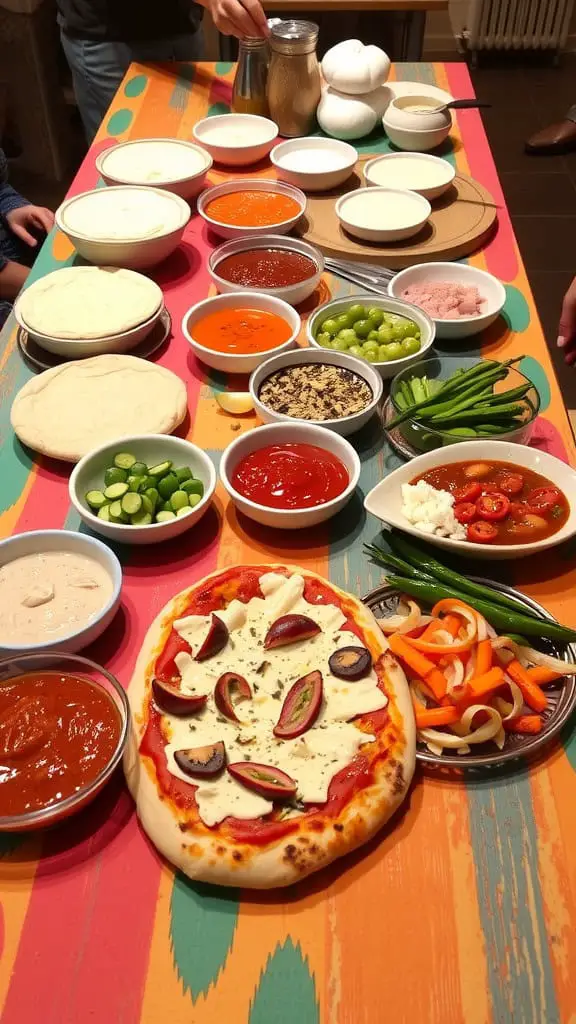
Setting up a pizza topping bar is a fantastic way to bring excitement to any gathering! Just look at this vibrant spread featuring fresh ingredients that invite creativity. Guests can enjoy customizing their pizzas with a variety of toppings, making each creation unique.
The image showcases a colorful array of ingredients. There are fresh vegetables, savory sauces, and delicious cheeses just waiting to be combined. This is perfect for a casual get-together or a birthday party. Imagine the joy on everyone’s faces as they pile on their favorite toppings!
Food bars are trendy and engaging. They encourage guests to mingle and share ideas for their perfect pizza. Plus, it’s a fun way to cater to different tastes and dietary preferences.
If you’re planning a party, consider this pizza bar as one of your party food bar ideas. It’s simple to set up and brings a festive vibe. Your friends and family will love the chance to get creative with their food!
Ingredients:
Pizza Base Options:
- Pre-made pizza dough (regular or gluten-free)
- Naan bread or flatbreads
- Cauliflower crust (for a low-carb option)
Sauces:
- Classic marinara sauce
- Pesto sauce
- Alfredo sauce
- Barbecue sauce
Cheeses:
- Mozzarella (shredded or fresh)
- Cheddar cheese
- Parmesan cheese
- Feta cheese
- Vegan cheese (optional)
Meat and Protein Toppings:
- Pepperoni slices
- Cooked sausage or ground beef
- Grilled chicken strips
- Bacon bits
- Plant-based meat alternatives
Vegetable Toppings:
- Sliced bell peppers (red, green, yellow)
- Sliced red onions
- Mushrooms
- Black olives
- Cherry tomatoes (halved)
- Spinach leaves
- Jalapeño slices (for heat)
Fresh Herbs and Extras:
- Fresh basil leaves
- Oregano
- Red pepper flakes
- Garlic powder
- Balsamic glaze
Instructions:
- Prepare the Pizza Bases:
- Preheat the oven to 450°F (230°C).
- Place pizza bases on baking sheets or pizza stones.
- Set Up the Topping Bar:
- Arrange the sauces, cheeses, meats, vegetables, and herbs in separate bowls.
- Provide spoons, tongs, and small plates for easy serving.
- Build the Pizzas:
- Let each guest spread their chosen sauce over the pizza base.
- Sprinkle on desired cheeses, followed by favorite meats and veggies.
- Add herbs and any extra seasonings for a finishing touch.
- Bake the Pizzas:
- Place assembled pizzas in the oven and bake for 10-15 minutes, or until the crust is crispy and the cheese is melted and bubbly.
- Serve and Enjoy:
- Slice pizzas and serve hot. Allow guests to try different topping combinations and share their creations.
Serving Tips:
- Label the Toppings: Use small labels for dietary-friendly options.
- Keep It Fresh: Replenish popular toppings throughout the event.
- Themed Presentation: Use wooden boards or colorful platters for added flair.
With endless topping possibilities, a pizza topping bar guarantees fun, creativity, and satisfied taste buds!
Mac & Cheese Bar Magic
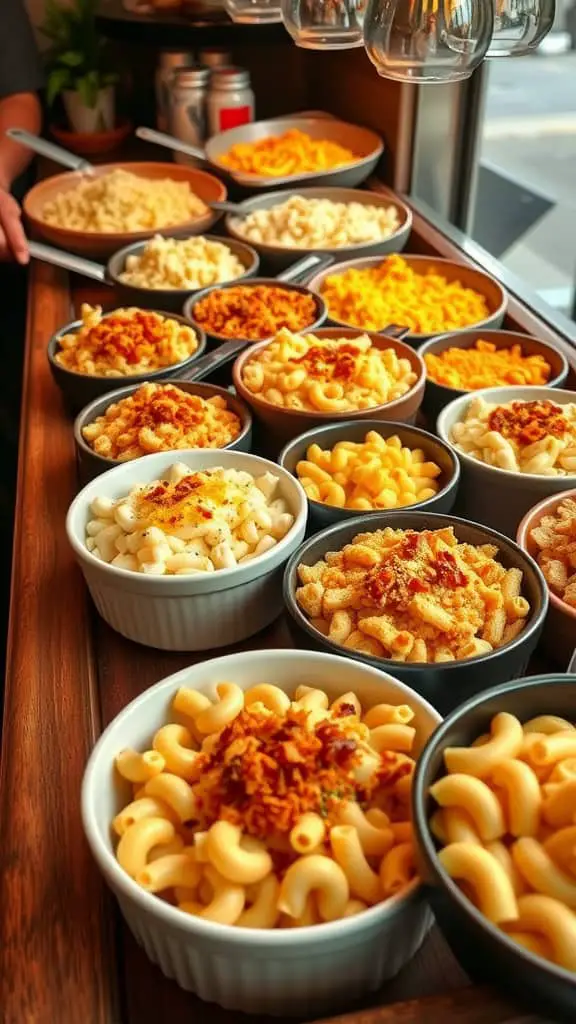
Imagine a table filled with bowls of creamy macaroni and cheese. This mac & cheese bar is a fun twist on traditional party food. Each bowl offers a different type of cheese or flavor, creating an inviting spread that everyone will love.
The variety is key. You can have classic cheddar, pepper jack, or even a rich gouda. This setup encourages guests to customize their bowls, mixing and matching toppings to create their perfect dish.
Consider adding some delicious toppings. Crispy bacon bits, fresh herbs, or spicy jalapeños can elevate the experience. A mac & cheese bar is not just a meal; it’s an interactive food experience. It fits perfectly into any party food bar theme, whether it’s a casual gathering or a celebration.
For a holiday or birthday party, this idea can be a hit. Imagine a ‘Baked Potato Bar’ alongside the mac & cheese, allowing guests to choose from a variety of toppings. Pairing these food bars creates a festive atmosphere that caters to everyone’s tastes.
This pasta bar aesthetic is sure to impress at your next gathering. Not only is it easy to set up, but it also encourages guests to get creative with their food choices. It’s a simple yet effective way to make your event memorable.
Ingredients:
For the Mac & Cheese Base:
- 1 pound elbow macaroni, cooked al dente
- 4 tablespoons unsalted butter
- 1/4 cup all-purpose flour
- 3 cups whole milk (warmed)
- 2 cups sharp cheddar cheese, shredded
- 1 cup mozzarella cheese, shredded
- 1/2 cup parmesan cheese, grated
- 1 teaspoon Dijon mustard
- 1/2 teaspoon smoked paprika (optional)
- Salt and pepper, to taste
Suggested Toppings for the Bar:
- Meats: Crispy bacon bits, grilled chicken, pulled pork, or diced ham
- Cheeses: Blue cheese crumbles, extra cheddar, or pepper jack
- Veggies: Diced tomatoes, sautéed mushrooms, green onions, or roasted red peppers
- Crunchy Toppings: Panko breadcrumbs, crushed potato chips, or fried onions
- Sauces & Extras: Hot sauce, BBQ sauce, truffle oil, or fresh herbs like parsley or chives
Instructions:
- Make the Cheese Sauce:
- In a large saucepan, melt the butter over medium heat. Add the flour, whisking continuously to create a roux. Cook for 2-3 minutes until lightly golden.
- Slowly pour in the warmed milk while whisking to avoid lumps. Continue stirring until the sauce thickens (about 5-7 minutes).
- Add the Cheese:
- Reduce the heat to low and stir in the cheddar, mozzarella, and parmesan cheeses a handful at a time. Mix until fully melted and smooth.
- Add Dijon mustard, smoked paprika (if using), salt, and pepper. Adjust seasonings to taste.
- Combine with Pasta:
- Fold in the cooked macaroni until fully coated in the creamy cheese sauce.
- Set Up the Mac & Cheese Bar:
- Transfer the mac & cheese to a large serving dish or warming tray.
- Arrange toppings in small bowls around the dish.
Serving Tips:
- Keep It Warm: Use a slow cooker or warming tray to keep the mac & cheese at the perfect serving temperature.
- Presentation: Use decorative serving bowls and trays to create an inviting spread.
- Customize & Enjoy: Let guests build their bowls with as many toppings as they like for a fun, interactive meal experience.
Your mac & cheese bar will be the star of the party, offering endless combinations of flavors and textures. It’s a guaranteed crowd-pleaser that’s easy to prep and totally fun to eat!
Waffle & Pancake Bar Party
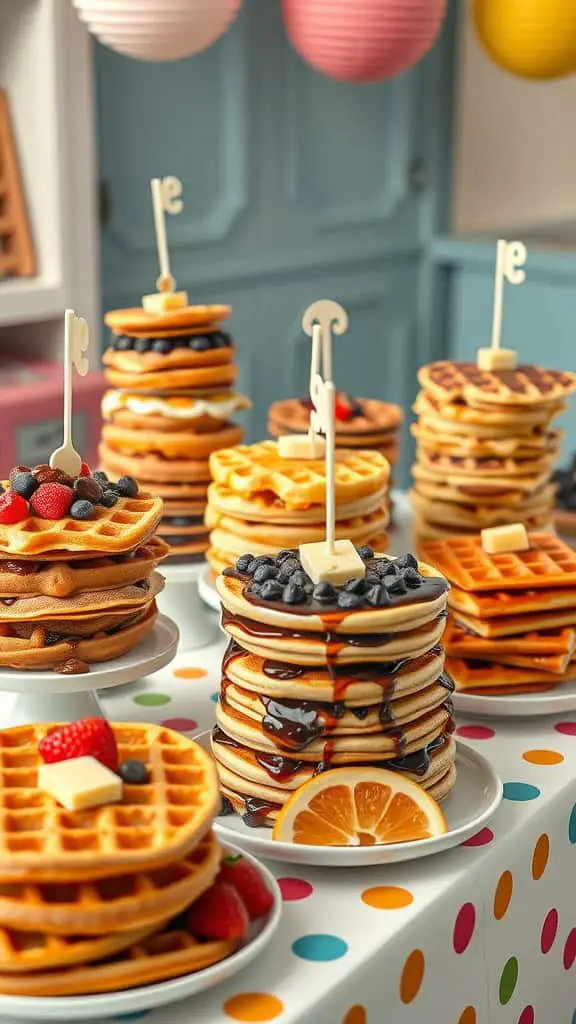
Waffle and pancake bars are a fantastic way to make any gathering feel festive and fun. Imagine a table filled with stacks of golden waffles, each one waiting for a delicious topping. The sight alone makes your mouth water!
In the image, you can see an array of waffles stacked high, showcasing various toppings like fresh fruits and syrup. This setup is perfect for a brunch party or a birthday celebration. The colorful polka dot tablecloth adds a cheerful vibe, making the whole scene inviting.
Setting up a waffle bar allows guests to customize their own creations. Include toppings like whipped cream, chocolate sauce, and seasonal fruits. It’s a great way to engage everyone and let them get creative with their food! You can also pair it with a pancake station for even more options.
Consider adding some themed decorations or fun utensils to enhance the experience. A waffle and pancake bar is an excellent idea for parties, bringing people together over tasty food. Everyone loves a good stack of waffles, and having options makes it even better!
Ingredients:
- Waffles:
- 2 cups all-purpose flour
- 2 tablespoons sugar
- 1 tablespoon baking powder
- 1/2 teaspoon salt
- 2 large eggs
- 1 3/4 cups milk
- 1/2 cup unsalted butter, melted
- 1 teaspoon vanilla extract
- Pancakes:
- 1 1/2 cups all-purpose flour
- 3 1/2 teaspoons baking powder
- 1 teaspoon salt
- 1 tablespoon sugar
- 1 1/4 cups milk
- 1 egg
- 3 tablespoons melted butter
- Toppings:
- Fresh fruits: strawberries, blueberries, bananas
- Whipped cream
- Maple syrup
- Chocolate syrup
- Nutella
- Chopped nuts (walnuts, pecans)
- Sprinkles
- Powdered sugar
Instructions:
- Make the Waffles:
- Preheat the waffle maker.
- In a large bowl, whisk together the flour, sugar, baking powder, and salt.
- In another bowl, mix eggs, milk, melted butter, and vanilla extract.
- Combine wet and dry ingredients until just blended.
- Pour batter into the waffle maker and cook until golden brown.
- Make the Pancakes:
- In a large bowl, mix flour, baking powder, salt, and sugar.
- In another bowl, whisk milk, egg, and melted butter.
- Stir wet ingredients into the dry mixture until smooth.
- Heat a non-stick skillet over medium heat and pour in pancake batter.
- Cook until bubbles form, then flip and cook until golden brown.
- Set Up the Bar:
- Arrange waffles and pancakes on serving platters.
- Place toppings in individual bowls with serving spoons.
- Use a fun tablecloth and decorative labels for toppings.
Serving Tips:
- Keep Warm: Place cooked waffles and pancakes in a low oven (200°F) while making batches.
- Custom Creations: Encourage guests to get creative with topping combinations.
- Add Drinks: Serve with coffee, tea, or a fruit juice station for a complete brunch experience.
Your waffle and pancake bar will be the star of any party. Guests will enjoy making their custom creations while savoring the delicious flavors. It’s the perfect mix of fun and tasty!
Brunch Mimosa & Bagel Bar

Imagine a lovely brunch setup featuring a mimosa and bagel bar. This image captures that perfect vibe. Fluffy bagels sit invitingly on plates, ready to be topped to your heart’s content. The fresh flowers add a nice touch, bringing a burst of color to the table.
Next to the bagels, you’ll find creamy spreads and toppings. Whether you prefer classic cream cheese or something a bit more adventurous, there’s something for everyone. The mimosas sparkle in their glasses, making this a refreshing choice for brunch.
This setup is a hit for casual gatherings. It’s easy to create, making it an excellent idea for parties. You can even mix in some charcuterie inspiration to elevate your spread. Food bars like this encourage mingling and creativity, making it a fun option for your next get-together.
If you’re thinking of other ideas for parties, consider incorporating a baked potato bar or a pasta bar for a touch of variety. Each food bar offers unique toppings, so your guests can customize their meals just the way they like them. This brunch mimosa and bagel bar surely sets the tone for a delightful and memorable occasion!
Ingredients:
Bagel Bar:
- Assorted bagels (plain, sesame, everything, etc.)
- Cream cheese varieties: plain, chive, veggie, and strawberry
- Smoked salmon or lox
- Sliced cucumbers, tomatoes, red onions
- Capers and fresh dill
- Avocado slices or guacamole
- Sliced cheeses: cheddar, Swiss, and provolone
- Deli meats: turkey, ham, or salami (optional)
- Butter and jam varieties
Mimosa Bar:
- Chilled sparkling wine or champagne
- Assorted juices: orange, pineapple, cranberry, and mango
- Fresh fruit garnishes: strawberries, raspberries, blueberries, and orange slices
Instructions:
- Prep the Bagel Bar:
- Slice bagels in half and arrange them on a large serving board or tray.
- Place cream cheese spreads in small bowls with serving spoons.
- Arrange toppings like smoked salmon, sliced veggies, and capers in separate dishes.
- Add fresh herbs like dill or parsley for garnish.
- Set Up the Mimosa Bar:
- Chill sparkling wine or champagne and juices ahead of time.
- Arrange wine bottles in a bucket of ice.
- Pour juices into clear carafes and label them.
- Display fresh fruit in small bowls for easy access.
- Create the Perfect Brunch Table:
- Decorate the table with fresh flowers and a tablecloth that matches your theme.
- Arrange plates, napkins, and utensils within easy reach.
- Add a decorative sign inviting guests to build their custom bagel and mimosa creations.
Serving Tips:
- Keep It Fresh: Refill the bagel and mimosa bars as needed throughout the event.
- Theme It Up: Add seasonal touches like festive tablecloths, themed napkins, or holiday-inspired fruit choices.
- Encourage Creativity: Provide recipe cards or suggestions for unique bagel and mimosa combinations.
This mimosa and bagel bar makes any brunch gathering feel special. Guests will enjoy crafting their personalized creations, ensuring a fun and flavorful experience!
Hot Dog Bar Bash
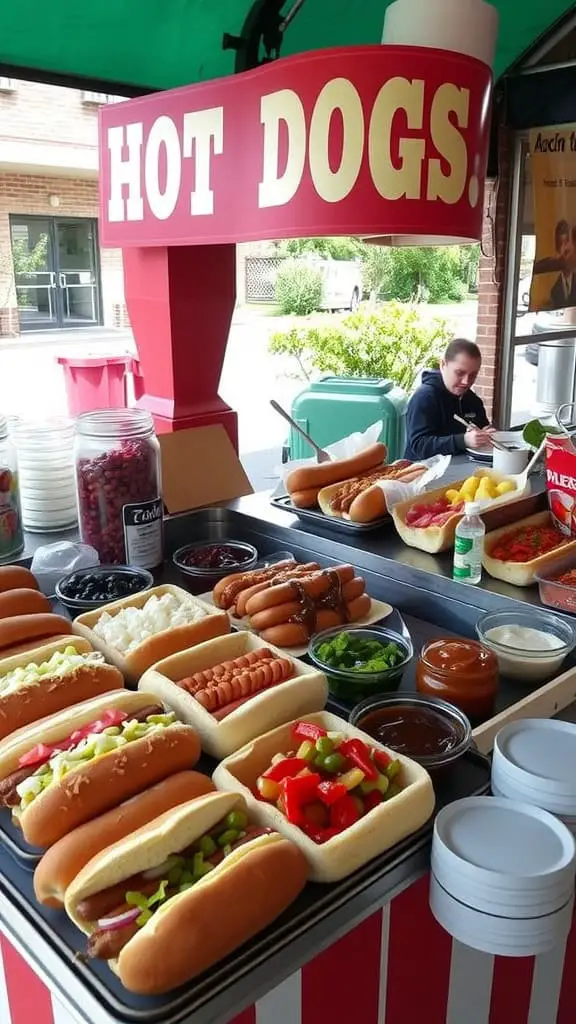
Hot dog bars are a fun and easy way to add excitement to any gathering. Just look at this colorful setup! You have a variety of toppings ready to go, making it simple for guests to create their own masterpiece. Everyone loves customizing their food, and a hot dog bar is the perfect way to let creativity shine.
Picture a sunny day with friends and family gathered around, ready to dig into delicious hot dogs. The vibrant toppings—from chopped veggies to different sauces—invite people to mix and match. This could inspire ideas for parties, especially for casual get-togethers or game day celebrations.
What’s great about this idea is that it’s not limited to just hot dogs. You can easily incorporate other food bar ideas, like a pasta bar or a baked potato bar. Each guest can choose their toppings, ensuring everyone gets their fill of flavors. Plus, it makes serving food fun and engaging!
So, if you’re planning an event, consider a party food bar. It’s simple to set up, and the clean-up is a breeze. Just gather your ingredients, lay them out, and let the fun begin!
Ingredients:
- Hot Dogs: Beef, chicken, or veggie hot dogs (allow 1-2 per person).
- Buns: Classic hot dog buns or brioche rolls.
Toppings:
- Cheese: Shredded cheddar, mozzarella, or pepper jack.
- Veggies: Chopped onions, diced tomatoes, shredded lettuce, sliced jalapeños, and avocado slices.
- Pickles & Relishes: Dill pickles, sweet pickle relish, or spicy giardiniera.
- Condiments: Ketchup, mustard, mayo, BBQ sauce, hot sauce, and sriracha.
- Crunchy Extras: Crispy bacon bits, fried onions, crushed tortilla chips, or potato sticks.
- Special Additions: Chili, sauerkraut, coleslaw, or mac and cheese for hearty options.
Instructions:
- Prep the Ingredients:
- Grill, boil, or pan-fry the hot dogs until fully cooked.
- Warm the buns lightly on the grill or in the oven.
- Arrange all toppings in separate bowls or containers for easy access.
- Set Up the Bar:
- Place the hot dogs and buns at the start of the bar.
- Follow with bowls of toppings arranged by category (cheese, veggies, condiments, etc.).
- Provide utensils like tongs, spoons, and serving forks.
- Include napkins, paper plates, and hot dog trays if available.
- Serve & Enjoy:
- Encourage guests to build their perfect hot dogs by layering their favorite toppings.
- Offer suggestions like a “Classic Dog” with ketchup and mustard or a “Spicy Dog” with jalapeños and sriracha.
Hosting Tips:
- Theme It: Create a themed hot dog bar with regional styles like Chicago, New York, or Tex-Mex.
- Keep It Warm: Use a slow cooker or warming tray to keep hot dogs at the right temperature.
- Fun Add-Ons: Include a toppings suggestion board with creative combinations.
With a hot dog bar, the possibilities are endless. Guests will love customizing their meals while enjoying a laid-back, fun atmosphere. It’s the ultimate party food that’s as enjoyable to create as it is to eat!
DIY Sandwich & Wrap Bar
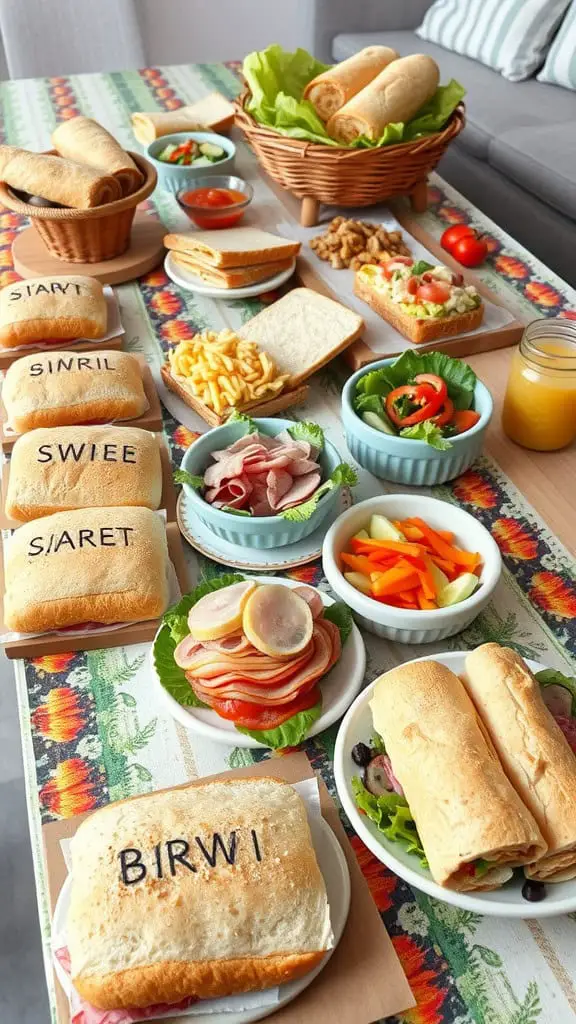
Creating a DIY sandwich and wrap bar is a fun and interactive way to cater to everyone’s taste. The image shows a vibrant spread filled with various ingredients, making it easy for guests to customize their meals.
On the table, you can see different types of bread, including fresh rolls and slices, ready to be filled. There are also an array of toppings ranging from fresh vegetables to savory meats. This setup encourages creativity, so everyone can make their own perfect sandwich or wrap.
Accompanying the bread is a selection of delicious sides. Colorful bowls filled with fresh salad, crispy snacks, and tasty dips add to the excitement. This kind of setup is not only great for casual gatherings but also perfect for party food bars, ensuring that guests always have something delightful to enjoy.
For those planning a graduation or birthday party, this food bar concept can be tailored to fit any theme. Consider adding themed decorations or specific ingredients that match the celebration. With choices like a baked potato bar or a pasta bar, the ideas for parties are endless!
In a nutshell, a DIY sandwich and wrap bar is about sharing good food, laughter, and memories with friends and family. It’s an easy way to make any gathering special!
Ingredients:
- Breads: Whole-grain rolls, ciabatta, sourdough slices, wraps, and pita pockets
- Proteins: Sliced turkey, ham, roast beef, grilled chicken, tuna salad, egg salad, and vegetarian options like hummus or falafel
- Cheeses: Cheddar, Swiss, mozzarella, provolone, and pepper jack
- Vegetables: Lettuce, spinach, arugula, sliced tomatoes, cucumbers, red onions, bell peppers, shredded carrots, and avocado slices
- Condiments: Mayonnaise, mustard, Dijon mustard, ranch dressing, balsamic glaze, pesto, and chipotle sauce
- Extras: Pickles, olives, banana peppers, jalapeños, sprouts, and fresh herbs like basil or cilantro
- Sides: Mixed green salad, coleslaw, potato chips, pretzels, and a selection of dips like salsa, guacamole, and hummus
Instructions:
- Set Up the Table: Arrange the breads, proteins, cheeses, vegetables, and condiments in separate bowls or trays. Use tiered stands or wooden boards for an appealing presentation.
- Create a Flow: Organize ingredients from left to right in the order they would typically be assembled: breads first, followed by proteins, cheeses, vegetables, condiments, and extras.
- Label Everything: Use small chalkboard signs or printed labels to identify each ingredient for easy selection.
- Keep It Fresh: Provide tongs, spoons, and serving utensils for hygiene and convenience. Keep cold items on ice if outdoors.
- Personalize It: Encourage guests to create their sandwiches or wraps by layering their favorite ingredients. Offer recipe suggestion cards for inspiration.
- Serve and Enjoy: Arrange finished sandwiches on a large platter or let guests enjoy their creations directly at the bar.
Serving Tips:
- Theme It: Match your ingredients to your event’s theme, such as Mediterranean, Italian, or classic deli-style.
- Add Drinks: Offer refreshing beverages like iced tea, lemonade, or sparkling water to complement the meal.
- Dessert Option: Include a dessert station with cookies, brownies, or fruit platters to complete the experience.
A DIY sandwich and wrap bar brings joy and customization to any gathering. With endless combinations and flavors, it’s sure to be a crowd-pleaser that guests will remember fondly!
Build-Your-Own Pasta Bar Night
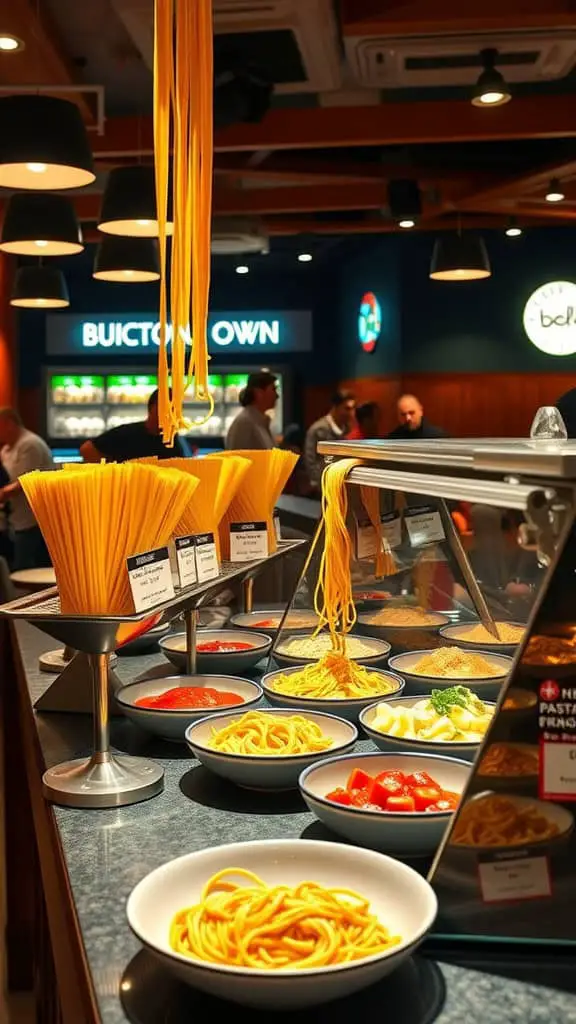
Picture a fun evening filled with laughter and delicious smells. A build-your-own pasta bar makes this possible. The image shows an inviting setup that features endless options for pasta lovers. Long strands of spaghetti hang beautifully, ready to be cooked to perfection.
This pasta bar offers an array of tasty toppings. Bright bowls filled with fresh ingredients like tomatoes, broccoli, and various sauces create a visual feast. Guests can mix and match to create their favorite dishes. It’s a great way to encourage creativity and cater to different tastes.
Hosting a pasta graduation party bar is a fantastic idea. It brings a relaxed vibe and allows everyone to create something unique. Consider adding a few side options, like garlic bread or a simple salad, to round out the meal. Easy, fun, and delicious—what more could you ask for?
Don’t forget to label everything! Clear signs for each topping help guests quickly decide on their favorite pasta bar toppings. This small detail adds to the excitement and keeps things organized. So grab your favorite pasta and let the pasta bar fun begin!
Ingredients:
Pasta Options:
- Spaghetti
- Penne
- Fettuccine
- Rotini
- Gluten-free pasta (optional)
Sauces:
- Marinara sauce
- Alfredo sauce
- Pesto sauce
- Garlic and olive oil
- Bolognese sauce (optional for meat lovers)
Proteins:
- Grilled chicken strips
- Italian sausage slices
- Meatballs
- Shrimp (cooked and peeled)
- Tofu or plant-based protein (optional)
Vegetables:
- Sautéed bell peppers
- Steamed broccoli
- Cherry tomatoes (halved)
- Spinach leaves
- Mushrooms (sautéed or raw)
- Roasted zucchini or squash
Cheeses:
- Shredded mozzarella
- Parmesan (grated or shaved)
- Feta cheese crumbles
- Ricotta (for creamy pasta blends)
Extras:
- Fresh basil leaves
- Chopped parsley
- Crushed red pepper flakes
- Garlic bread or breadsticks
- Mixed green salad (as a side)
Instructions:
- Cook the Pasta: Boil each type of pasta separately according to package instructions. Drain and toss with a bit of olive oil to prevent sticking. Keep warm.
- Prepare the Toppings: Arrange sauces, proteins, vegetables, cheeses, and extras in individual bowls or serving trays.
- Set Up the Bar: Create a well-organized layout. Place cooked pasta at the start, followed by sauces, proteins, vegetables, and finishing touches like cheeses and herbs.
- Label Everything: Use small labels or cards to identify each item. This helps guests build their bowls with ease.
- Serve and Enjoy: Let guests assemble their pasta bowls however they like. Encourage mixing and matching for unique flavor combinations.
Hosting Tips:
- Warm It Up: Keep sauces warm in slow cookers or warming trays.
- Family Style: If hosting a small gathering, serve pasta and toppings family-style at the table.
- Themed Night: Add an Italian-themed décor for extra fun.
A build-your-own pasta bar guarantees a fun, interactive dining experience. Guests will love crafting their perfect pasta bowls, and you’ll enjoy how easy and stress-free hosting can be!
Holiday Baked Potato Bar Feast

Imagine gathering friends and family around a cozy table filled with delicious baked potatoes. A holiday baked potato bar is a fun and interactive way to celebrate. Everyone can create their own perfect potato masterpiece.
The spread in the image showcases a variety of toppings that are sure to please every palate. From creamy sour cream to crispy bacon bits, you can mix and match to your heart’s content. Fresh veggies add a nice crunch, while cheese brings that comforting meltiness.
Setting up a baked potato bar is easy and welcoming. Start with perfectly baked potatoes, then lay out an array of toppings. This could include classic options like butter and chives, or you might like to throw in some more adventurous toppings like chili or barbecue chicken. A baked potato bar dinner is ideal for holiday gatherings or even a laid-back birthday celebration.
For those looking for food bar ideas, consider pairing your baked potato spread with other options like a pasta bar for graduation parties. This way, guests have a choice and can enjoy a feast that feels both casual and festive.
Ingredients:
- Baked Potatoes:
- Large russet potatoes (1 per person)
- Olive oil (for coating)
- Kosher salt (for seasoning)
- Classic Toppings:
- Butter (salted and unsalted)
- Sour cream
- Shredded cheddar or Monterey Jack cheese
- Crispy bacon bits
- Fresh chives (finely chopped)
- Green onions (sliced)
- Protein Options:
- Grilled or shredded chicken
- Slow-cooked chili
- Pulled pork or barbecue beef
- Black beans or seasoned ground turkey for a healthier twist
- Vegetable Additions:
- Steamed broccoli florets
- Sautéed mushrooms
- Roasted bell peppers and onions
- Fresh spinach leaves
- Sauces & Extras:
- Ranch dressing
- Barbecue sauce
- Hot sauce or Sriracha
- Salsa or pico de gallo
- Guacamole
- Crunchy Toppings:
- Tortilla strips
- Crispy fried onions
- Crushed potato chips
- Toasted nuts or sunflower seeds (optional)
Instructions:
- Prepare the Potatoes: Preheat the oven to 425°F (220°C). Scrub the potatoes clean and pat them dry. Rub each potato with olive oil and sprinkle generously with kosher salt.
- Bake the Potatoes: Place the prepared potatoes directly on the oven rack or on a baking sheet. Bake for 50-60 minutes, or until the skins are crispy and the insides are tender when pierced with a fork.
- Set Up the Bar: Arrange all toppings in bowls or serving dishes. Use small labels or tags for each topping if hosting a larger crowd.
- Serve: Slice the potatoes down the middle and gently fluff the insides with a fork. Allow guests to top their potatoes with their favorite ingredients.
Serving Tips:
- Keep Warm: Use a slow cooker set to “warm” to keep baked potatoes hot throughout the event.
- Diet-Friendly Options: Offer low-fat cheese, Greek yogurt as a sour cream substitute, and plenty of fresh veggies.
- Theme Décor: Add holiday-themed tablecloths, napkins, or placemats for a festive touch.
A holiday baked potato bar is the ultimate comfort food experience. With its mix-and-match possibilities, everyone gets exactly what they want. It’s cozy, customizable, and perfect for creating lasting holiday memories.
Loaded Fry Bar Indulgence
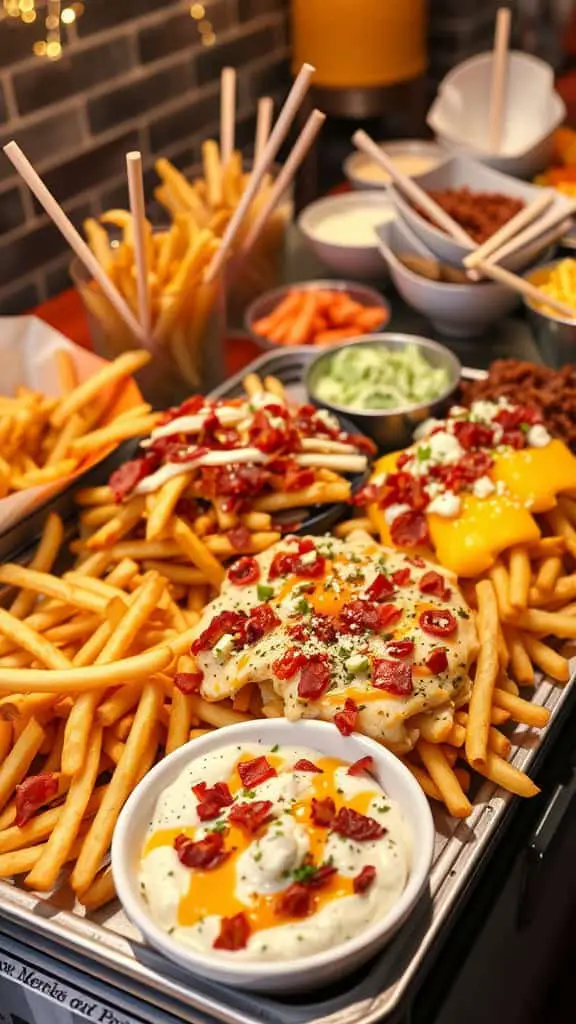
A loaded fry bar is the perfect way to treat your guests to something fun and delicious. Imagine a spread of crispy fries topped with all kinds of tasty ingredients. It’s a feast that invites creativity and personalization!
The image showcases a mouthwatering assortment of fries topped with cheese, crispy bacon, and drizzled with sauces. This combination is a hit at any gathering. Whether it’s a birthday bash or a casual get-together, a fry bar can elevate your party food game.
For those planning a celebration, consider including different toppings. Options like jalapeños, sour cream, or even guacamole can give your loaded fries a unique twist. This makes it easy to cater to various tastes. Plus, it pairs well with other food bar ideas for parties, like a pasta bar or a baked potato bar.
Setting up a loaded fry bar is simple. Just lay out the fries in a large tray and provide an array of toppings. Guests can choose their favorites, making dining interactive and fun. If you’re thinking about a graduation party or a holiday get-together, a fry bar fits right in!
Ingredients:
- 2 lbs frozen fries (crinkle-cut, waffle, or shoestring)
- 1 cup shredded cheddar cheese (or your favorite blend)
- 1 cup cooked, crumbled bacon
- 1 cup sour cream
- 1 cup guacamole (optional)
- 1/2 cup sliced green onions
- 1/2 cup diced tomatoes
- 1/4 cup pickled jalapeños (optional for extra heat)
- 1/4 cup chopped cilantro (optional)
- Various dipping sauces: ranch, barbecue sauce, chipotle mayo, or cheese sauce
Instructions:
- Prepare the Fries: Bake or air-fry the fries according to the package instructions until crispy and golden brown.
- Set Up the Bar: Arrange the fries on a large serving tray or several smaller plates to create an inviting spread.
- Add Core Toppings: Sprinkle fries with shredded cheese while still hot, allowing the cheese to melt slightly.
- Layer the Favorites: Add crumbled bacon, diced tomatoes, green onions, and any optional toppings like jalapeños or cilantro.
- Serve the Dips: Place sour cream, guacamole, and dipping sauces in small bowls around the fry tray.
- Personalize the Experience: Let guests customize their fries with their favorite toppings and sauces.
Serving Tips:
- Keep Warm: Use a warming tray or serve fries in batches to keep them hot and crispy.
- Theme It: Consider a themed fry bar with toppings like chili, pulled pork, or even a breakfast version with scrambled eggs and sausage.
- Party Style: Add fun labels or small chalkboard signs identifying each topping.
A loaded fry bar turns a simple snack into a memorable experience. With endless topping combinations, your guests will have fun creating their ultimate fry masterpiece!
Cupcake Decorating Bar Fun

Imagine a table filled with colors and sweet treats! A cupcake decorating bar is the perfect way to add some fun to any gathering. Guests can unleash their creativity and design their own cupcakes with a variety of toppings.
The image shows a delightful setup with cupcakes in different flavors, showcasing vibrant frosting styles. There are also small jars filled with various toppings, like sprinkles and chocolate chips. This array not only looks great but also invites everyone to join in the decorating fun.
Setting up a cupcake bar is simple. Just gather cupcakes, frosting, and toppings. You could include fruit, nuts, or even little candies to make the options endless. It’s a fantastic idea for birthday parties or any festive occasion. Everyone loves a chance to customize their dessert!
For a more themed approach, consider matching your cupcake designs to the event. A graduation party might feature school colors, while a holiday gathering could focus on seasonal flavors. Whichever you choose, a cupcake decorating bar creates lasting memories and delicious treats.
Ingredients:
- Cupcakes: Vanilla, chocolate, red velvet, or your favorite flavors
- Frosting: Vanilla buttercream, chocolate ganache, cream cheese frosting, and tinted frostings in assorted colors
- Toppings:
- Sprinkles: rainbow, chocolate, metallic
- Candy: mini marshmallows, gummy bears, M&M’s, chocolate chips
- Fruit: fresh berries, sliced strawberries, diced pineapple
- Nuts: chopped peanuts, almonds, walnuts (optional for nut-free events)
- Decorative extras: edible glitter, fondant shapes, colored sugar
Instructions:
- Set Up the Decorating Bar: Arrange a table with cupcakes placed on decorative trays or stands.
- Prepare Frosting Stations: Fill piping bags with various frostings or use small bowls with spreading knives for easy application.
- Display Toppings: Place toppings in small bowls or jars with spoons or tongs for easy access.
- Create a Decorating Zone: Include a flat surface or disposable placemats where guests can decorate without mess.
- Offer Creative Tools: Provide toothpicks, decorating tips, and stencils for more detailed designs.
- Decorate and Enjoy: Let guests choose their cupcakes, frostings, and toppings. Encourage creativity and have fun!
Serving Tips:
- Themed Setup: Customize the topping selection and decoration colors to match your event theme.
- Display Ready: Arrange finished cupcakes on a tiered stand for a professional look.
- Interactive Fun: Turn the decorating activity into a contest with small prizes for categories like “Most Creative” or “Best Theme.”
With a cupcake decorating bar, everyone gets to be a pastry chef. The endless combinations of flavors and decorations ensure that each treat is unique and unforgettable!
Ice Cream Sundae Bar Delight
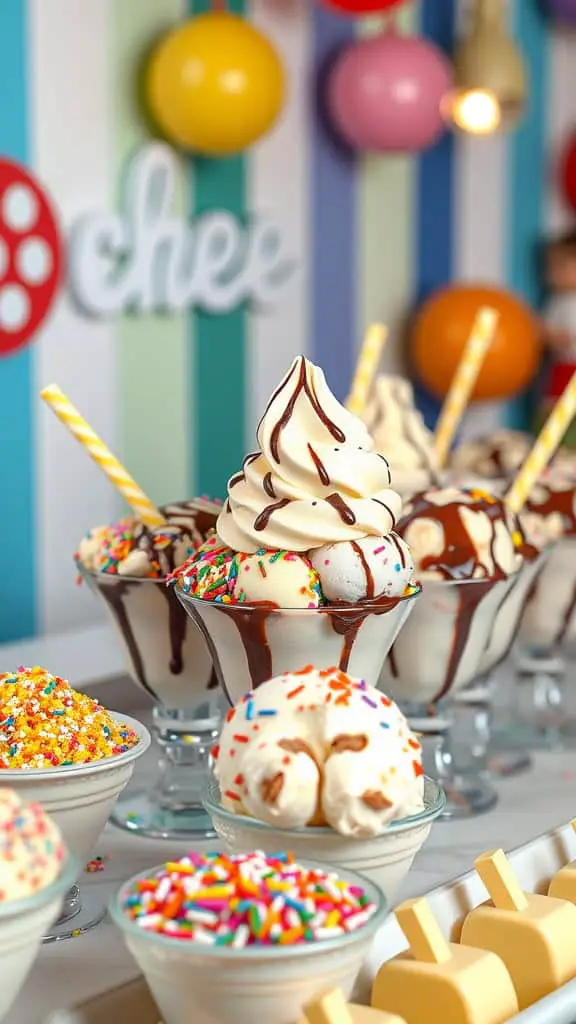
Picture this: a colorful ice cream sundae bar loaded with delightful toppings. This setup invites everyone to create their own sweet concoctions. Each bowl is a canvas waiting for your creativity!
The soft-serve ice cream swirls high, drizzled with rich chocolate sauce. Sprinkles in every color sit nearby, ready to add a fun crunch. There are scoops of ice cream waiting to be paired with toppings galore.
This ice cream bar is perfect for any occasion, from birthday parties to summer gatherings. It’s a hit for kids and adults alike. Just like a Baked Potato Bar Birthday Party or a Pasta Bar For Graduation Party, this setup can cater to a crowd while making for a memorable experience.
Thinking of ideas for parties? An ice cream sundae bar fits right in with other food bars. Combine it with a Holiday Baked Potato Bar for a fun and varied menu. Everyone loves choosing their own toppings!
So grab your ingredients and set up your own sundae station. Add some fun bowls and spoons, and let the creations begin!
Ingredients:
- Ice Cream: Vanilla, chocolate, strawberry, or any favorite flavors
- Sauces: Hot fudge, caramel, strawberry sauce, peanut butter sauce
- Toppings:
- Sprinkles (rainbow, chocolate, or themed)
- Chopped nuts (peanuts, almonds, walnuts)
- Crushed cookies (Oreos, graham crackers)
- Candies (M&Ms, gummy bears, Reese’s pieces)
- Fresh fruits (sliced bananas, strawberries, blueberries)
- Whipped cream
- Maraschino cherries
- Mini marshmallows
- Shredded coconut
Instructions:
- Set Up the Bar: Arrange all ingredients in individual bowls or jars with small serving spoons.
- Scoop the Ice Cream: Pre-scoop ice cream into cups or bowls and keep them in the freezer until ready to serve.
- Warm the Sauces: Heat the hot fudge and caramel sauces gently until pourable, keeping them warm during serving.
- Create a Topping Station: Line up toppings in an easy-to-access layout, grouping similar items together for better flow.
- Serve and Enjoy: Let guests build their own sundaes by choosing from the ice cream and toppings. Offer fun extras like colorful bowls, themed napkins, and decorative spoons.
Serving Tips:
- Keep It Cold: Use a cooler or ice-filled containers to keep ice cream from melting too quickly.
- Theme It Up: Decorate the bar according to your party’s theme for added flair.
- Customize for Diets: Include dairy-free and sugar-free options for guests with dietary restrictions.
- Interactive Fun: Add a chalkboard sign with “Sundae Bar” written on it to enhance the display.
An ice cream sundae bar is more than a dessert—it’s an experience. With endless combinations, everyone gets to craft their perfect sweet treat. Happy scooping!
Mediterranean Mezze Bar Escape
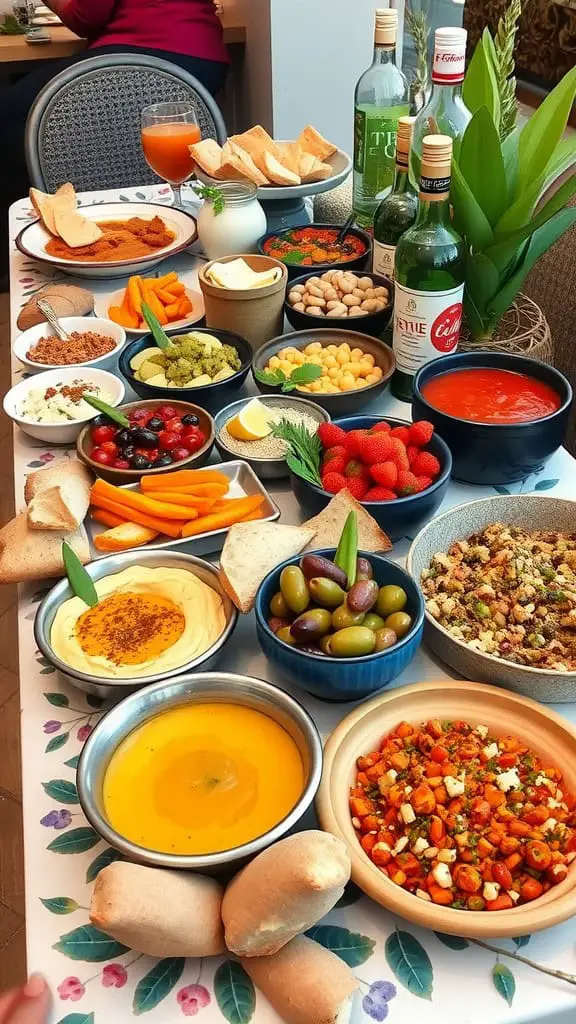
Picture a table bursting with vibrant colors and delicious aromas. This Mediterranean mezze bar is a feast for the senses. Plates filled with fresh veggies, dips, and breads create an inviting spread. Perfect for sharing, it’s an ideal setup for gatherings, making it a hit for any celebration.
Included on the table are classic Mediterranean staples like hummus, olives, and roasted vegetables. The variety of textures and flavors invites everyone to sample a bit of everything. Add a few tasty drinks, and you have a casual yet stylish dining experience.
This setup is not just for a special occasion. It shines at graduation parties, birthdays, or holiday dinners. Consider pairing it with ideas like a Baked Potato Bar Dinner or a Pasta Bar for Graduation Party to keep the fun going. Food bars are a fantastic way to let guests customize their meals. This mezze display fits right in among popular Party Food Bars ideas, offering a fresh twist everyone will love.
Ingredients:
- Dips & Spreads:
- Hummus (classic, roasted red pepper, or garlic)
- Baba ganoush
- Tzatziki
- Muhammara (red pepper and walnut dip)
- Fresh Vegetables:
- Cherry tomatoes
- Cucumber slices
- Bell pepper strips (red, yellow, green)
- Carrot sticks
- Radishes (halved)
- Proteins & Cheeses:
- Marinated olives (green and black)
- Feta cheese (cubed or crumbled)
- Grilled chicken skewers (optional for added protein)
- Falafel balls
- Breads & Crackers:
- Pita bread (sliced into wedges)
- Pita chips
- Lavash crackers
- Extras & Garnishes:
- Grape leaves (stuffed with rice)
- Roasted nuts (almonds, pistachios)
- Fresh herbs (parsley, mint, dill)
- Lemon wedges
Instructions:
- Prep the Ingredients: Wash and slice all vegetables. Arrange them on a large platter or cutting board.
- Arrange the Dips & Spreads: Transfer dips into small serving bowls. Place them around the veggies.
- Add the Proteins & Cheeses: Arrange falafel, chicken skewers, feta cheese, and olives in separate sections for variety.
- Include the Breads & Crackers: Stack pita bread, pita chips, and lavash crackers in baskets or on trays for easy grabbing.
- Finish with Extras & Garnishes: Scatter grape leaves, roasted nuts, and fresh herbs throughout the platter for added flavor and presentation.
- Serve & Enjoy: Provide small plates, napkins, and serving utensils so guests can create their own perfect mezze plates.
Serving Tips:
- Make It Ahead: Prep ingredients a few hours before your event and assemble just before serving.
- Add Variety: Swap in marinated artichoke hearts, sun-dried tomatoes, or roasted garlic.
- Themed Drinks: Consider serving Mediterranean-inspired drinks like sparkling water with lemon and mint or a light white wine.
This Mediterranean mezze bar is a visually stunning, delicious, and customizable spread that’s sure to impress any crowd. Enjoy the relaxed and flavorful dining experience!
DIY Sushi Roll Bar Experience
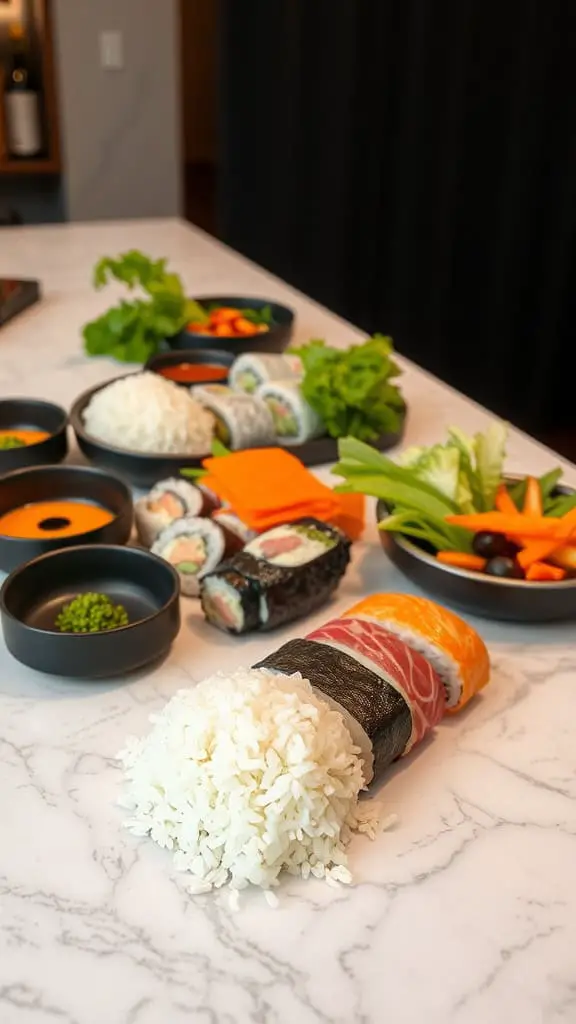
Setting up a DIY sushi roll bar is an exciting way to bring friends and family together. Imagine a beautiful spread of fresh ingredients laid out on a stylish table. In this image, you can see a lovely arrangement of sushi rolls, rice, and vibrant vegetables, perfect for creating your own rolls.
The centerpiece is a mound of fluffy white rice, essential for any sushi creation. Surrounding it are colorful options like cucumbers, carrots, and leafy greens. You can also spot delicious sushi rolls ready to be enjoyed. This setup invites everyone to get creative and build their own unique rolls.
This concept is similar to other fun food bars, like a pasta bar or a baked potato bar. It’s all about letting guests customize their meals. Food bar ideas like this add a personal touch to gatherings, making it a memorable experience. Whether you’re hosting a graduation party or just a casual get-together, a sushi roll bar is a fantastic way to make mealtime fun!
Ingredients:
- Rice: 4 cups sushi rice, cooked and seasoned with rice vinegar, sugar, and salt.
- Seaweed Sheets (Nori): 10-12 sheets for rolling.
- Protein Options:
- Fresh sushi-grade fish (salmon, tuna, or yellowtail)
- Cooked shrimp or imitation crab
- Tofu or tempeh for a vegetarian option
- Vegetables:
- Cucumber, julienned
- Carrots, julienned
- Avocado, sliced
- Bell peppers, thinly sliced
- Scallions, finely chopped
- Radish sprouts or microgreens (optional)
- Condiments & Toppings:
- Soy sauce
- Wasabi
- Pickled ginger
- Spicy mayo
- Sesame seeds
- Sriracha (optional)
Instructions:
- Prepare the Rice: Cook sushi rice according to package instructions. Once cooked, season with a mix of rice vinegar, sugar, and salt while still warm. Spread the rice on a wide dish to cool.
- Arrange the Ingredients: Place the prepared vegetables, protein options, and toppings in separate bowls or plates for easy access.
- Set Up the Rolling Station:
- Lay out bamboo mats covered with plastic wrap for easy rolling.
- Provide sharp knives for cutting the rolls.
- Place small bowls of water for dipping fingers to prevent sticking.
- Roll the Sushi:
- Lay a sheet of nori, shiny side down, on the bamboo mat.
- Spread a thin, even layer of rice on the nori, leaving a 1-inch border at the top.
- Add desired fillings in a horizontal line about 1 inch from the bottom edge.
- Roll tightly using the bamboo mat, pressing gently but firmly.
- Seal the edge with a bit of water.
- Slice and Serve: Use a sharp, wet knife to slice the rolls into even pieces. Arrange on a serving platter.
- Serve and Enjoy: Offer dipping sauces and extra toppings on the side for customization.
Serving Tips:
- Create a Visual Display: Use serving platters and bowls in different sizes and textures for a stylish presentation.
- Make it Interactive: Provide recipe cards with suggested sushi combinations for inspiration.
- Offer Refreshing Drinks: Serve green tea, sparkling water, or sake to complement the sushi experience.
A DIY sushi roll bar transforms a meal into an interactive and memorable experience. With fresh ingredients, fun customization, and a beautifully arranged spread, it’s sure to be a hit at your next gathering!
DIY Soup & Bread Bar Comfort
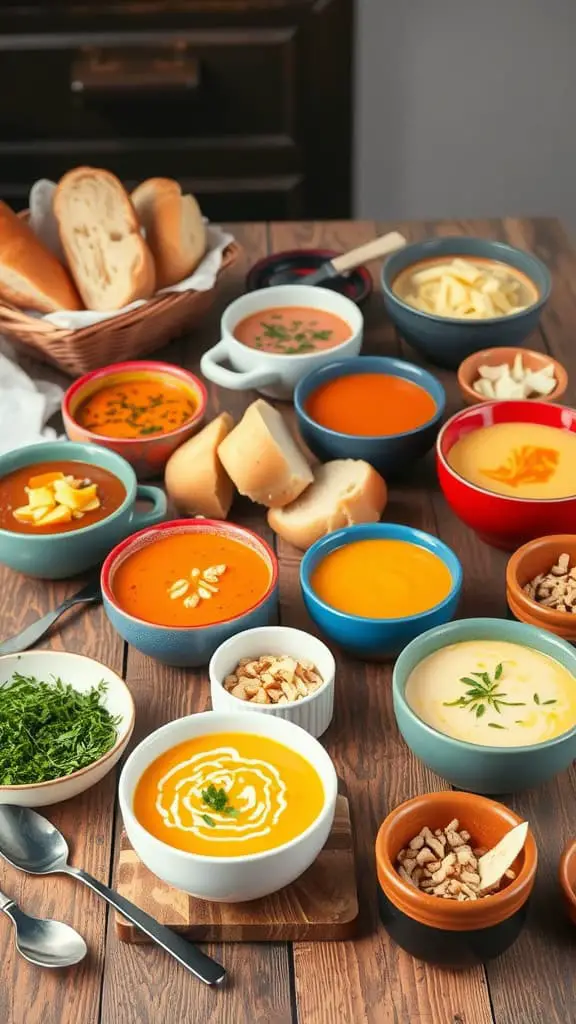
Setting up a DIY soup and bread bar can be a cozy way to gather friends and family. This image showcases a delightful spread of vibrant soups in various bowls, inviting everyone to mix and match. A basket of fresh bread sits nearby, perfect for dipping and savoring.
When planning your bar, think about including a variety of soup options. Classic choices like tomato, creamy potato, and hearty vegetable work well. Don’t forget to add unique flavors like spicy butternut squash or a rich mushroom soup. Each soup can have its own toppings too, such as croutons, herbs, or cheese, allowing guests to customize their bowls.
Pairing these soups with different types of bread makes the experience even better. Consider including crusty baguettes, soft rolls, or even a baked potato bar for a fun twist. With a spread like this, everyone can create their own comforting meal! The casual nature of a soup and bread bar also makes it perfect for any gathering, from a family dinner to a laid-back party.
Ingredients:
Soups:
- Tomato Basil Soup: 4 cups canned crushed tomatoes, 1 cup vegetable broth, 1/2 cup heavy cream, fresh basil, salt, and pepper.
- Creamy Potato Soup: 4 large potatoes (peeled and cubed), 1 onion (diced), 4 cups chicken broth, 1 cup milk, salt, and pepper.
- Hearty Vegetable Soup: 2 carrots (sliced), 2 celery stalks (diced), 1 onion (diced), 4 cups vegetable broth, 1 cup diced tomatoes, salt, and pepper.
- Spicy Butternut Squash Soup: 1 butternut squash (peeled and cubed), 1 onion (diced), 4 cups chicken broth, 1 tsp cayenne pepper, salt, and pepper.
- Rich Mushroom Soup: 2 lbs mushrooms (sliced), 1 onion (diced), 4 cups chicken broth, 1 cup heavy cream, salt, and pepper.
Toppings:
- Croutons
- Shredded cheese (cheddar, mozzarella, parmesan)
- Fresh herbs (parsley, thyme, basil)
- Sour cream or plain Greek yogurt
- Crispy bacon bits
Breads:
- Crusty baguettes (sliced)
- Soft dinner rolls
- Artisan whole-grain loaves
- Breadsticks
Instructions:
- Prepare the Soups:
- Follow individual recipes for each soup, simmering until flavors meld and desired consistency is reached.
- Keep soups warm in slow cookers or large pots on the stove.
- Set Up the Bread Bar:
- Arrange the bread selection in a large basket or wooden board.
- Provide a bread knife for self-service or pre-slice for convenience.
- Create the Topping Station:
- Arrange toppings in small bowls with spoons for easy serving.
- Label each topping for clarity.
- Serve and Enjoy:
- Invite guests to fill their bowls with their soup of choice.
- Add toppings and grab fresh bread for dipping.
Hosting Tips:
- Keep It Warm: Use slow cookers with a warm setting to keep soups at the perfect temperature.
- Add a Fun Twist: Consider including a baked potato bar for extra comfort food options.
- Personal Touch: Offer personalized name cards for guests to label their creations.
This DIY soup and bread bar turns any gathering into a warm, cozy experience. It’s a simple, hearty way to bring everyone together for a memorable meal.
Popcorn & Snack Bar Station
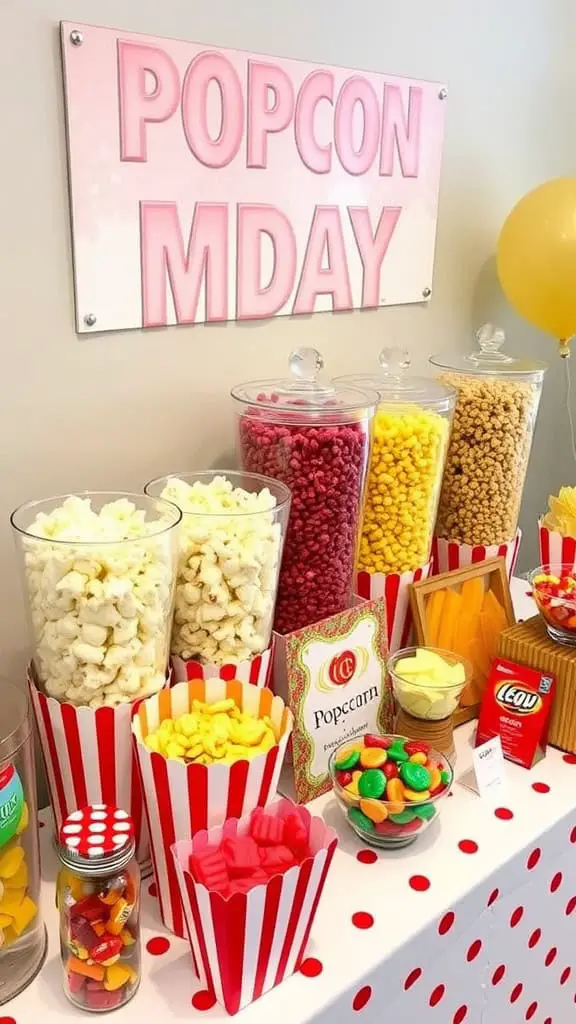
This popcorn and snack bar station is a fun centerpiece for any gathering. The bright sign reading ‘POPCON MDAY’ sets a cheerful tone, inviting guests to indulge in a variety of tasty treats. The setup includes several clear containers filled with different popcorn flavors, creating a colorful display.
The striped containers add a playful touch, making it feel like a mini carnival. You can find white, yellow, and even pink popcorn, appealing to different tastes. Alongside the popcorn, there are various candies in vibrant colors, making it a perfect spot for those with a sweet tooth.
For anyone planning a party, this setup can inspire food bar ideas that are simple and engaging. Think about adding a baked potato bar for a birthday party or a pasta bar for a graduation celebration. These options can complement the snack bar beautifully, offering guests a range of choices while keeping the vibe fun and casual.
Ingredients:
- Popcorn:
- 8 cups plain popped popcorn (air-popped or lightly salted)
- 2 cups caramel popcorn
- 2 cups cheese-flavored popcorn
- 2 cups kettle corn (for a hint of sweetness)
- Sweet Add-Ins:
- 1 cup mini marshmallows
- 1 cup chocolate candies (M&Ms or similar)
- 1 cup gummy candies
- 1 cup candy-coated pretzels
- Savory Add-Ins:
- 1 cup mixed nuts (optional for a salty crunch)
- 1 cup mini pretzels
- 1 cup cheese crackers
Instructions:
- Set Up the Station:
- Arrange large clear bowls or containers for each type of popcorn and snack.
- Use smaller bowls or jars for candy and savory add-ins.
- Place scoops or tongs in each container for easy serving.
- Create a Display:
- Use colorful labels or chalkboard signs to name each snack.
- Add decorative elements like bunting, string lights, or a themed sign to complete the festive look.
- Serving Tip:
- Provide striped or themed paper bags or cups so guests can create their snack mixes.
Customization Ideas:
- Themed Popcorn Mix: Try adding a specific color scheme using candy-coated chocolates.
- Seasonal Touch: Include seasonal treats like candy canes for Christmas or heart-shaped candies for Valentine’s Day.
- Healthier Options: Swap candies for dried fruit or whole-grain crackers.
Hosting Tip:
Keep the snack bar replenished throughout the event and encourage guests to mix and match their favorite flavors. This interactive setup will be the hit of any party!
DIY Fruit & Yogurt Parfait Bar
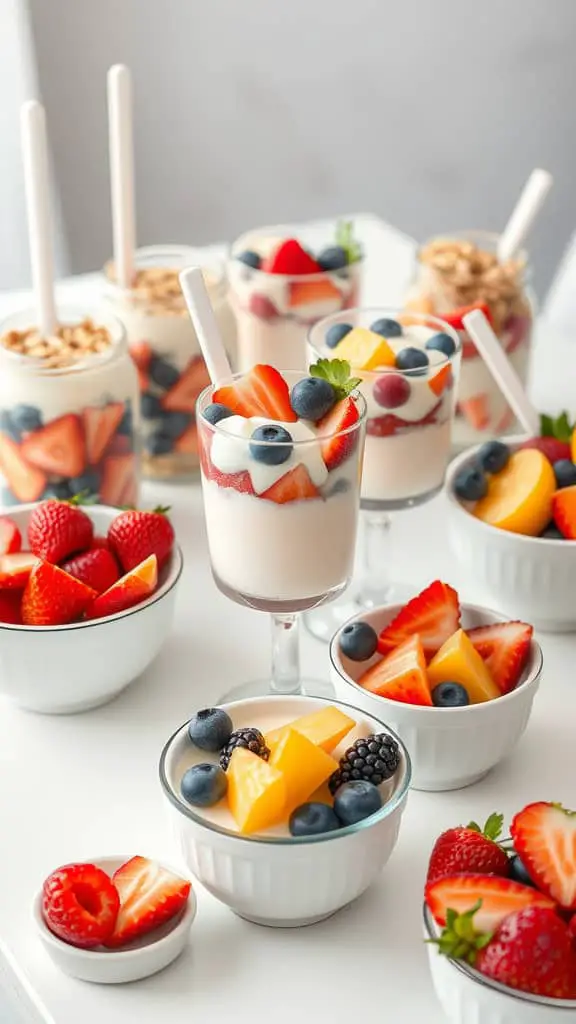
Create your own delicious fruit and yogurt parfaits with a DIY bar that’s perfect for any gathering. The image showcases an inviting display of yogurt cups layered with fresh fruits, making it a colorful and tasty option for guests.
Start with a base of creamy yogurt. Use plain, Greek, or flavored yogurt to suit everyone’s taste. Next, add layers of your favorite fruits. Options like strawberries, blueberries, mangoes, and blackberries not only add flavor but also a burst of color.
To enhance the parfait, consider toppings like granola, nuts, or a drizzle of honey. This flexibility allows your guests to customize their parfaits, which is a fun way to serve food at parties.
Whether you’re planning a birthday party, a graduation celebration, or just a casual get-together, this fruit and yogurt parfait bar fits right in with other party food bars. It pairs well with ideas for parties focused on healthy snacks or lighter fare.
Ingredients:
- Yogurt: plain, Greek, or flavored (vanilla, strawberry, or honey)
- Fresh fruits: strawberries, blueberries, blackberries, raspberries, mangoes, kiwi, pineapple
- Toppings:
- Granola (regular or low-sugar)
- Nuts and seeds (almonds, walnuts, chia seeds, flaxseeds)
- Sweeteners (honey, maple syrup, agave nectar)
- Coconut flakes (unsweetened or lightly toasted)
- Mini chocolate chips (optional for a sweet twist)
- Dried fruits (cranberries, raisins, apricots)
Instructions:
- Set Up the Bar: Arrange bowls of yogurt, fruits, and toppings on a large table or counter.
- Create a Layering Station: Provide clear cups, glasses, or small bowls for building parfaits.
- Build the Parfait:
- Start with a layer of yogurt.
- Add a handful of mixed fruits.
- Sprinkle granola or nuts for crunch.
- Drizzle with honey or maple syrup for added sweetness.
- Repeat layers as desired.
- Serve and Enjoy: Let guests build their custom parfaits. Offer small spoons and napkins nearby for easy serving.
Tips for Success:
- Pre-Cut Fruits: Prep fruits in advance to save time.
- Dairy-Free Option: Provide a non-dairy yogurt alternative for guests with dietary restrictions.
- Theme It: Use matching serving bowls and labels to fit your event’s theme.
- Chill It: Keep fruits and yogurt cool with a chilled serving tray or ice packs underneath.
This DIY fruit and yogurt parfait bar is a fresh and customizable option that guests of all ages will love. The mix of creamy yogurt, juicy fruits, and crunchy toppings makes every bite delightful. Enjoy hosting your healthy and fun gathering!
