Have you ever wondered how to make your own delicious dehydrator biltong at home? Imagine being able to savor the mouth-watering flavors and chewy texture of this South African specialty anytime you like, without having to rely on store-bought options. Well, the wait is over!
In this comprehensive step-by-step guide, we will take you through the entire process of making your own dehydrator biltong. From selecting the perfect cut of beef to creating your own tantalizing spice blend, marinating to perfection, and achieving the ideal drying time, we’ve got you covered.
So, put on your apron, grab your dehydrator, and get ready to embark on a culinary adventure that will leave your taste buds begging for more. Are you ready to discover the art of crafting your very own dehydrator biltong masterpiece? Let’s get started!
")
Choose Your Meat: Pick a Lean Cut of Beef
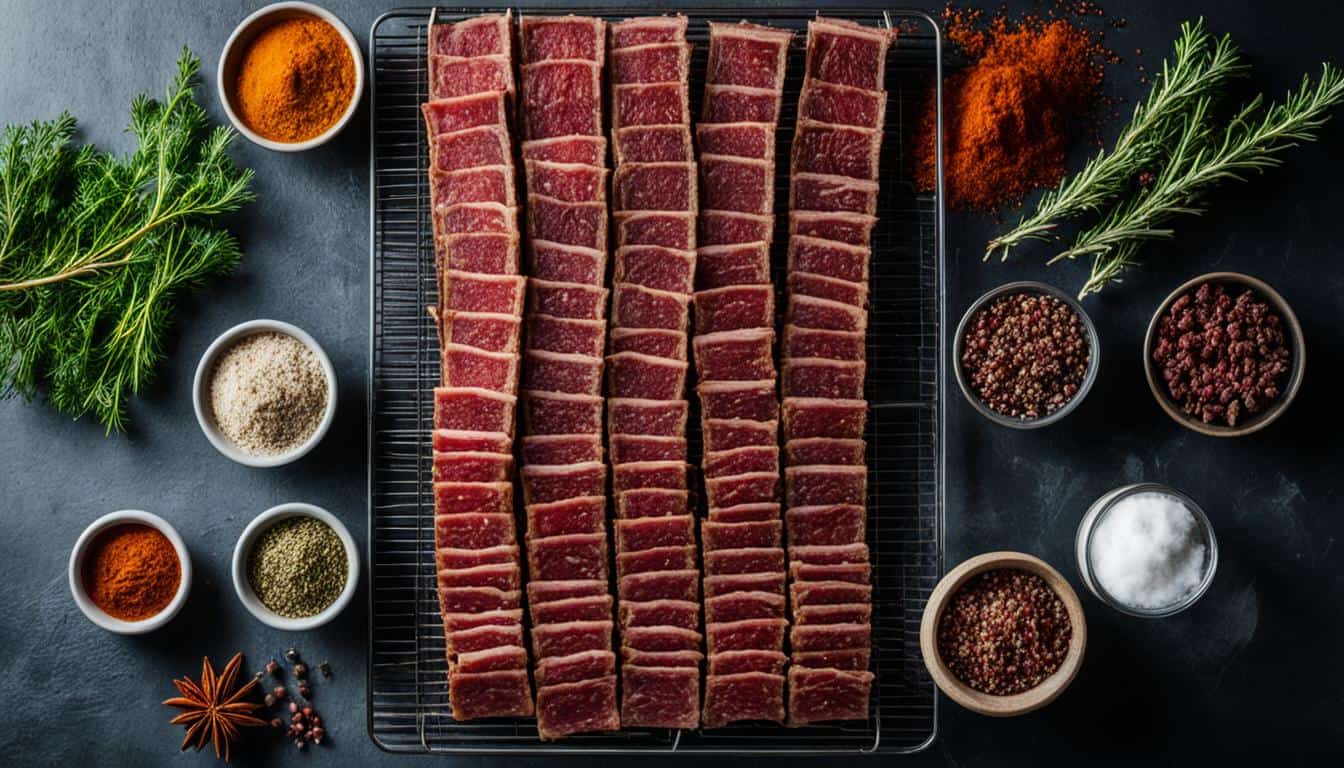
When making Dehydrator Biltong, selecting the right cut of beef is crucial for achieving the perfect texture and flavor. Opting for a lean cut ensures that your biltong will be tender, flavorful, and free from excessive fat. Two popular choices for biltong are sirloin and top round, both of which offer the ideal balance of tenderness and leanness.
Sirloin, also known as “top butt,” is a popular choice for biltong due to its tenderness and rich flavor. This cut comes from the back of the cow, just above the short loin, and is typically well-marbled, making it juicy and flavorful when dehydrated.
Top round, on the other hand, is a lean cut that comes from the hindquarters of the cow. With less marbling than sirloin, top round is an excellent option for those seeking a leaner biltong. Its firm texture and mild flavor make it a versatile choice when it comes to seasoning and marinating.
Regardless of the cut you choose, it’s essential to select meat that is fresh and of high quality. Look for cuts with minimal visible fat, as excess fat can hinder the drying process and affect the overall texture of your biltong.
Tip: When selecting your meat, ask your local butcher for advice and recommendations. They can provide valuable insights into the best cuts available and help you make an informed decision.
To visually illustrate the difference between sirloin and top round, refer to the table below:
| Sirloin | Top Round |
|---|---|
| Tenderness | Firm |
| Marbling | Well-marbled |
| Flavor | Rich |
| Lean | Lean |
By carefully choosing your meat and opting for a lean cut like sirloin or top round, you’ll set the foundation for delicious Dehydrator Biltong. Now that you’ve selected the perfect cut, it’s time to move on to the next step: preparing the meat.
Prepare the Meat: Slice It Just Right
To create delicious Dehydrator Biltong, the first step is to prepare the meat by slicing it into perfect strips or pieces. The thickness of the beef slices is crucial for achieving the desired texture and taste.
When slicing the beef, aim for pieces that are around half an inch thick. This thickness allows for optimal dehydration while retaining the tender and juicy qualities of the meat. Slicing your beef too thin may result in dry and brittle biltong, while thicker slices may take longer to dehydrate and may not achieve the desired texture.
It’s essential to ensure that the slices are uniform in thickness to promote even dehydration. This will help guarantee consistent flavor and texture throughout the batch. For best results, use a sharp knife and take your time to slice the beef precisely.
Remember, the quality of the slicing will directly impact the overall quality of your Dehydrator Biltong. So, take care and put in the effort to slice your beef into strips or pieces that are half an inch thick.
“The thickness of the beef slices is crucial for achieving the desired texture and taste.”
Here’s an example visualization of perfectly sliced beef for your Dehydrator Biltong:

| Beef Slicing Tips |
|---|
| Use a sharp knife for clean and precise cuts. |
| Freeze the meat for a short period before slicing to make it easier to handle. |
| Remove any excess fat or connective tissue before slicing for a leaner biltong. |
| Ensure uniform thickness throughout for even dehydration. |
| Take your time to slice the beef carefully to avoid uneven pieces. |
Spice It Up: Create Your Biltong Spices
When it comes to biltong, the seasoning is what truly brings out the rich flavors and enhances your taste experience. You have two options – you can either use a ready-made spice mix or create your own custom blend. Let’s dive into the world of biltong spices and explore the possibilities to spice up your dehydrator biltong.
If you prefer convenience and consistency, a ready-made spice mix is a great choice. These mixes are specially crafted with a harmonious balance of flavors, ensuring that you get that authentic biltong taste every time. Simply coat your meat with the ready-made spice mix, and you’re good to go. No hassle, no guesswork.
On the other hand, if you’re feeling adventurous and want to add a personal touch to your biltong, creating your own spice blend is a fantastic option. One essential ingredient in biltong spices is coriander – it brings a unique aroma and adds depth to the flavor. Combine it with other traditional biltong spices like black pepper and salt to create a well-rounded taste profile.
Here’s a simple recipe to get you started:
DIY Biltong Spice Mix:
- 3 tablespoons coriander seeds
- 1 tablespoon black peppercorns
- 1 teaspoon sea salt
- 1 teaspoon vinegar
To create your own spice mix, start by toasting the coriander seeds and black peppercorns in a dry pan until fragrant. Once cooled, grind them into a fine powder using a mortar and pestle or a spice grinder. Mix in the sea salt and vinegar, and you’ll have a delicious homemade biltong spice blend.
Remember, when creating your own spice mix, feel free to adjust the quantities and experiment with additional flavors that tickle your taste buds. The beauty of biltong is that you can tailor it to your liking.
Whether you choose a ready-made spice mix or venture into creating your own blend, the spices you choose will infuse your dehydrator biltong with mouthwatering flavors. So go ahead, spice it up, and make your biltong truly unforgettable.
| Ready-Made Spice Mix | DIY Spice Mix |
|---|---|
| Convenient and consistent | Add a personal touch |
| Authentic biltong taste | Experiment with flavors |
| Time-saving | Customize to your liking |
Marinate: Give It a Spa Day
Marinating is a crucial step in creating flavorful and tender Dehydrator Biltong. During this marinating process, the meat becomes infused with a combination of spices and flavors, ensuring a delicious end result. One popular method is to use a spice mix specifically designed for biltong, which combines a balanced blend of herbs and seasonings.
However, if you prefer a more personalized touch, you can create your own spice mix. This allows you to customize the flavors and tailor them to your individual preferences. A simple combination of coriander, black pepper, salt, and vinegar can work wonders in enhancing the taste of your biltong.
When marinating your meat, it’s essential to give it the proper treatment it deserves. Just like a relaxing spa day, your biltong needs time to soak up the flavors. One technique that aids both flavor infusion and preservation is the use of a vinegar bath. This not only adds a tangy note to the meat but also helps inhibit the growth of bacteria, extending the shelf life of your biltong.
Preservation is another valuable benefit of marinating your biltong. By combining the right amount of spices, vinegar, and marinating time, you create an environment that not only enhances flavor but also helps prolong the shelf life of your dehydrated meat. So, be sure to marinate your biltong thoroughly to achieve the best results.
| Benefits of Marinating | Steps for Marinating |
|---|---|
| Infuses flavors into the meat | 1. Prepare your chosen spice mix or use a ready-made blend |
| Enhances tenderness | 2. Coat the meat evenly with the spice mix |
| Inhibits bacterial growth | 3. Place the spiced meat in a container or bag |
| Extends shelf life | 4. Add vinegar to create a marinade |
| 5. Ensure the meat is fully submerged in the marinade | |
| 6. Cover the container or seal the bag tightly | |
| 7. Refrigerate for at least 24 hours, allowing the flavors to develop |
Dry Off: Pat It Down
After the meat has been marinating in delicious flavors and spices, it’s time to dry off any excess moisture before moving on to the next step. Drying off the meat is a crucial part of the process as it helps promote proper dehydration and ensures the biltong turns out perfectly.
To dry off the meat, gently pat the meat dry using paper towels. Take each piece of meat and gently press the paper towel against it, absorbing any moisture that may be present. Make sure to reach all sides of the meat, ensuring that it is completely dry.
The process of patting the meat dry not only removes excess moisture but also helps to create a better surface for the biltong to dry on. The drier the meat, the more effective the drying process will be.
By using paper towels to dry off the meat, you can easily remove any remaining marinade that may be clinging to the surface. This allows the marinade to fully penetrate the meat during the dehydration process, enhancing the overall flavor.
Take your time and be thorough when drying off the meat. Ensuring that each piece is properly dried will contribute to a more successful and delicious batch of dehydrator biltong.
Now that you’ve successfully dried off the meat, it’s time to move on to the next step – arranging the meat on the dehydrator trays. This step is essential to ensure even drying and a consistent texture throughout the biltong.

| Benefits of Drying Off the Meat |
|---|
| Dries out excess moisture |
| Allows marinade flavors to fully penetrate the meat |
| Creates a better surface for drying |
| Contributes to a successful and delicious batch of dehydrator biltong |
Arrange the Meat: Give Them Space
Once you have prepared your meat strips, it’s time to arrange them on the dehydrator trays. Properly spacing the meat ensures that each strip receives adequate airflow for even drying. Here are some key tips for arranging the meat:
- Dehydrator Trays: Place the dehydrator trays on a clean, flat surface and make sure they are dry.
- No Touching or Overlapping: Lay each meat strip on the tray, making sure they don’t touch or overlap. This avoids moisture retention and promotes even drying.
- Personal Space: Give each strip its own personal space on the tray. This allows air circulation around the meat, aiding in the dehydration process.
“Properly arranging the meat strips ensures that each strip dries evenly, resulting in delicious and flavorful biltong.”
By giving the meat strips their own space on the dehydrator trays, you can achieve consistent drying and prevent any moisture build-up. This step is crucial for producing high-quality dehydrator biltong with the perfect texture and flavor.

Dehydration Time: Patiently Waiting
Once you have arranged your meat strips on the dehydrator trays, it’s time to set the dehydrator to the optimal temperature for drying. For dehydrating biltong, it is recommended to set the dehydrator to a temperature of 140°F (60°C) to ensure the meat is thoroughly dried without cooking it.
The drying time will vary depending on several factors, including the thickness of your meat slices, the humidity in your environment, and personal preferences for chewiness or crispiness. On average, the drying process can take anywhere from 4 to 12 hours.
Remember, patience is key during this stage as the dehydration time will determine the final texture of your biltong. If you prefer a chewy texture, you can shorten the drying time. On the other hand, if you prefer a crispy texture, you can extend the drying time.
While waiting for your biltong to dry, resist the temptation to constantly check on it. Opening the dehydrator prematurely can disrupt the drying process and extend the overall drying time. Instead, have confidence in your preparation and exercise patience.
Recommended Dehydration Time:
- Chewy Biltong: 4 to 8 hours
- Crispy Biltong: 8 to 12 hours
During the dehydration time, you can take this opportunity to relax or engage in other activities while the flavors develop and the meat transforms into delicious biltong.

Plan your dehydration time according to your schedule. You can set the dehydrator in the evening and let it work its magic overnight, or you can set it in the morning and enjoy the anticipation of having your homemade biltong ready by evening.
Remember, drying time may vary, so it is essential to check the strips periodically to ensure they have reached your desired texture. The biltong should have a firm texture and feel dense to the touch. If it feels soft or spongy, it needs more time in the dehydrator.
Now that you’ve set the dehydrator and patiently waited for the meat to dry, it’s time to move on to the next section: Check and Taste: It’s All Coming Together.
Check and Taste: It’s All Coming Together
After patiently waiting for the Dehydrator Biltong to dry, it’s time to check and taste the results. This step is crucial to ensuring that your biltong has reached the desired texture and flavor.
To check the readiness of your biltong, start by examining its appearance. It should have a firm texture and a dark, rich color. The outer layer should be slightly crispy, while the center remains chewy. This combination creates a delightful contrast that makes biltong a unique and satisfying snack.
Using a sharp knife, cut a small piece from the thickest part of the biltong. Feel its density and firmness. A well-made biltong should have a dense cake-like consistency that holds together when cut.
Now, it’s time to taste your creation. Take a bite and savor the flavors. Biltong should have a robust and savory taste with a hint of the biltong spices you used during the marinating process.
Remember, the taste and texture of biltong can vary based on personal preference. Some prefer a chewier texture, while others enjoy it slightly crispier. Adjust the drying time in your future batches to achieve your desired result.
Table: Desired Texture of Dehydrator Biltong
| Texture | Description |
|---|---|
| Firm and Dense | The biltong should have a cake-like density, holding together when cut. |
| Chewy | The center of the biltong should be chewy, requiring some effort to bite through. |
| Slightly Crispy | The outer layer should have a light crispiness, providing a pleasant contrast to the chewiness. |
Once you have confirmed a satisfactory texture and taste, you can proudly enjoy your homemade Dehydrator Biltong.
Store Properly and Enjoy
Once your dehydrator biltong is ready, it’s important to store it properly to maintain its freshness and flavor. Choosing the right storage containers and considering refrigeration can help extend its shelf life and ensure you can enjoy it for longer.
Airtight containers are ideal for storing your dehydrator biltong. These containers help keep out moisture, which can cause the biltong to become stale or moldy. Make sure to transfer your biltong into clean, dry containers that seal tightly, such as glass jars or resealable bags. This will help preserve its texture and taste.
If you live in a hot or humid climate, storing your dehydrator biltong in the fridge can further enhance its shelf life. The cool temperature of the fridge helps inhibit bacterial growth, keeping your biltong safe to consume for a longer period. Simply place your airtight containers of biltong in the refrigerator to ensure its freshness.
Now that your dehydrator biltong is properly stored, it’s time to savor and enjoy the delicious results of your homemade creation.
Whether you snack on it during a movie night, pack it for a hiking trip, or share it with friends, take a moment to appreciate the flavors and textures you’ve achieved. Enjoy the satisfaction of knowing you can make your own delectable biltong anytime, and share the joy with others.
Best In Footwear.
 Hey Don't Forget About Your Feet! Click the image above - for an entire resource dedicated to the best footwear finds and advice! |