Chocolate-covered snacks are a delightful treat that can satisfy any sweet tooth and add a fun twist to your favorite nibbles. From fruits to crunchy bites, there are so many tasty options to choose from. Ready to mix up your snack game? Here are 25 chocolate-covered snack ideas to inspire your next indulgence!
Affiliate Disclosure: "As an Amazon Associate I earn from qualifying purchases made from the images and links in this post. We are a participant in the Amazon Services LLC Associates Program, an affiliate advertising program designed to provide a means for us to earn fees by linking to Amazon.com and other affiliated sites."
Peanut Butter-Filled Chocolate Dates

If you’re on the hunt for a sweet treat that combines the rich flavors of chocolate and peanut butter, look no further than these peanut butter-filled chocolate dates. These chocolate-draped bites are a perfect snack for satisfying your cravings.
The dates are first pitted and then stuffed with creamy peanut butter, creating a delightful center. They’re then coated in luscious dark chocolate, making them chocolate-encased bites that are hard to resist. A drizzle of chocolate on top adds a gourmet touch, while a sprinkle of sea salt enhances the flavor even further.
To make these tasty treats, you’ll need some pitted Medjool dates, creamy peanut butter, dark chocolate, and a pinch of sea salt for that extra kick. Simply stuff the dates, dip them in melted chocolate, and let them set for a sweet indulgence. These chocolate-laden snacks are perfect for sharing or enjoying all by yourself!
Ingredients:
- 12 pitted Medjool dates
- 1/2 cup creamy peanut butter (natural or regular)
- 1 cup dark chocolate chips or chopped dark chocolate
- 1 tablespoon coconut oil (optional, for smoother melting)
- Sea salt flakes (for sprinkling)
Instructions:
- Prepare the Dates: Slice each date lengthwise on one side and gently open them without splitting completely.
- Fill with Peanut Butter: Use a small spoon or piping bag to fill each date with about 1 teaspoon of peanut butter. Close the dates slightly to enclose the filling.
- Melt the Chocolate: In a microwave-safe bowl, combine the dark chocolate and coconut oil (if using). Microwave in 20-second intervals, stirring in between, until smooth and fully melted.
- Dip the Dates: Use a fork or skewer to dip each peanut butter-filled date into the melted chocolate, ensuring it’s fully coated. Let the excess chocolate drip off before placing the dates on a parchment-lined baking sheet.
- Drizzle and Sprinkle: Drizzle extra melted chocolate over the dates for a decorative finish. Sprinkle with sea salt flakes while the chocolate is still wet.
- Set and Serve: Place the baking sheet in the refrigerator for about 15-20 minutes, or until the chocolate has hardened. Serve immediately or store in an airtight container in the fridge for up to a week.
Tips from Me:
- Make It Neat: I use a piping bag for the peanut butter to avoid messy overfilling.
- Upgrade the Filling: Sometimes I mix a pinch of cinnamon or crushed nuts into the peanut butter for extra flavor.
- Easy Cleanup: Lining the baking sheet with parchment paper makes cleanup a breeze.
- Batch It: I love making a double batch and freezing half—they’re perfect for a quick, satisfying snack anytime!
Chocolate-Covered Pretzel Bites

Chocolate-covered pretzel bites are the perfect blend of sweet and salty. These treats are visually appealing, with their chocolate coating and delicate drizzles of white chocolate on top. The crunchy pretzels give a satisfying snap with every bite.
To make your own chocolate-coated morsels, you’ll need small pretzels, chocolate chips, and a bit of white chocolate for drizzling. Melt the chocolate in a bowl, dip the pretzels, and let them cool on parchment paper. A sprinkle of sea salt can add an extra kick!
These chocolate-draped bites are great for parties or as an everyday snack. When you set them out, everyone will be drawn to their enticing look and delicious flavor. They are a fun treat that kids and adults alike will love.
Ingredients:
- 2 cups small pretzels (mini twists or rods)
- 1 cup semi-sweet chocolate chips (or dark chocolate if you prefer)
- 1/2 cup white chocolate chips (for drizzling)
- 1 tbsp coconut oil or shortening (optional, for smoother chocolate)
- Sea salt or sprinkles (optional, for garnish)
Instructions:
- Prepare the Baking Sheet: Line a large baking sheet with parchment paper or wax paper for easy cleanup.
- Melt the Chocolate:
- In a microwave-safe bowl, melt the semi-sweet chocolate chips in 30-second intervals, stirring after each interval until smooth.
- If using, stir in the coconut oil to thin the chocolate.
- Dip the Pretzels:
- Using a fork or dipping tool, dip each pretzel into the melted chocolate, ensuring it’s fully coated.
- Shake off the excess chocolate by tapping the fork gently on the bowl’s edge.
- Place the dipped pretzels on the prepared baking sheet.
- Drizzle with White Chocolate:
- Melt the white chocolate chips the same way as the semi-sweet chocolate.
- Use a spoon or piping bag to drizzle the white chocolate over the pretzels.
- Add Garnish (Optional):
- Sprinkle with sea salt or festive sprinkles while the chocolate is still wet.
- Let Them Set:
- Allow the pretzels to set at room temperature or place them in the refrigerator for about 20 minutes until firm.
- Serve or Store:
- Transfer the set pretzel bites to a serving plate or store them in an airtight container at room temperature for up to a week.
Tips:
- Stay Neat: I always place my parchment paper close to the dipping station to avoid chocolate drips on the counter.
- Customize: I like experimenting with different chocolates like milk, dark, or even caramel chips.
- Quick Clean-Up: If the chocolate hardens while dipping, I pop it back in the microwave for 10-15 seconds.
- Make Ahead: I usually make a big batch the night before a party—they store beautifully!
These chocolate-covered pretzel bites are such a joy to make. The mix of salty and sweet keeps everyone coming back for more. Trust me, they disappear fast!
Crispy Chocolate-Covered Rice Treats
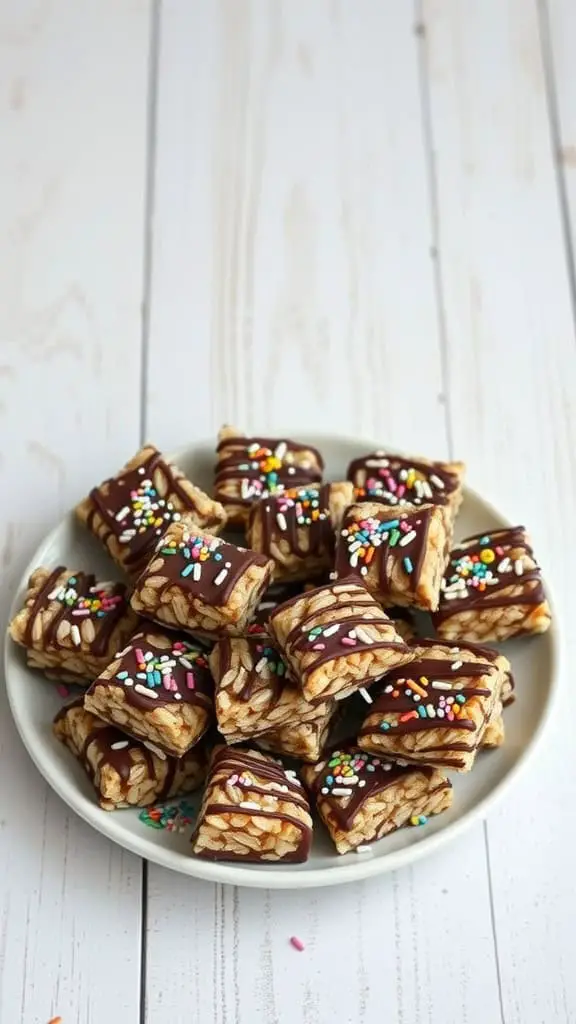
Get ready to enjoy crispy chocolate-covered rice treats that are both fun and tasty! These chocolate-cloaked treats are perfect for satisfying your sweet tooth. Each bite is a delightful mix of chewy rice and smooth chocolate.
Made with simple ingredients, these chocolate-blanketed bites are easy to whip up at home. Start with classic rice cereal, marshmallows, and a drizzle of chocolate. Once everything is combined, shape them into little squares, and don’t forget the colorful sprinkles on top for a festive touch!
These chocolate-coated morsels make a great snack for kids and adults alike. Whether you’re having a movie night or hosting a party, these treats are sure to impress. They are not just chocolate-dipped treats, but a fun adventure in every bite!
So, grab your ingredients and start creating these chocolate-smothered goodies. They’re quick to make and even quicker to disappear!
Ingredients:
- 6 cups crispy rice cereal
- 1 package (10 oz) mini marshmallows
- 3 tbsp unsalted butter
- 1 cup semi-sweet chocolate chips
- 2 tbsp coconut oil (optional, for smoother chocolate)
- Colorful sprinkles for decorating
Instructions:
- Prepare the Pan: Line a 9×13-inch baking dish with parchment paper or lightly grease it.
- Make the Base: In a large saucepan, melt the butter over low heat. Add the marshmallows and stir continuously until fully melted and smooth.
- Mix in the Cereal: Turn off the heat and quickly stir in the crispy rice cereal until fully coated.
- Press into Pan: Transfer the mixture to the prepared baking dish. Use a greased spatula or lightly oiled hands to press the mixture evenly into the pan.
- Melt the Chocolate: In a microwave-safe bowl, combine the chocolate chips and coconut oil (if using). Microwave in 30-second intervals, stirring between each, until fully melted and glossy.
- Coat and Decorate: Pour the melted chocolate over the rice mixture, spreading evenly with a spatula. Immediately sprinkle with colorful sprinkles.
- Set and Slice: Allow the treats to set at room temperature or chill in the refrigerator for faster setting. Once the chocolate hardens, slice into squares or bars.
Tips from Me:
- Keep It Fresh: I always store these in an airtight container at room temperature to keep them fresh and crispy.
- Get Creative: Sometimes, I mix in peanut butter with the chocolate for a delicious twist.
- Even Layers: Pressing the mixture into the pan with wax paper or a silicone spatula prevents sticking and keeps the top smooth.
- Sprinkle Fun: If I’m making these for a party, I use themed sprinkles to match the occasion. They’re always a hit!
These crispy chocolate-covered rice treats are pure joy in every bite. Once you try making them, you’ll see how easy it is to whip up a batch that everyone will love!
Chocolate-Dipped Banana Slices
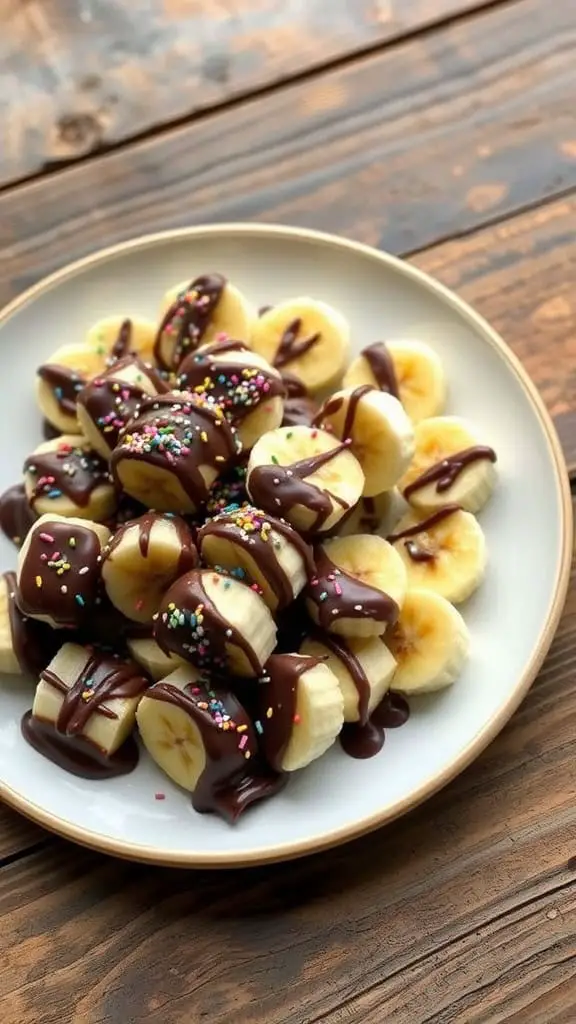
Chocolate-dipped banana slices are a simple and delightful treat that combines the sweetness of ripe bananas with rich chocolate. These chocolate-coated bites are not just tasty; they’re also a fun way to add a bit of flair to your snack time.
To make this yummy creation, start with some ripe bananas. Slice them into bite-sized pieces and prepare your favorite chocolate for dipping. You can melt dark, milk, or even white chocolate—whatever suits your fancy. Once the chocolate is melted, dip each banana slice into the warm chocolate, making sure it’s well-coated. For an extra touch, sprinkle on some colorful sprinkles or nuts before the chocolate sets.
These chocolate-draped bites are perfect for parties, kids’ snacks, or a sweet treat for yourself. Enjoy them fresh, or freeze them for a refreshing chocolate-blanketed bite on a hot day. They are sure to please anyone with a sweet tooth!
Ingredients:
- 3 ripe bananas, sliced into 1-inch pieces
- 1 cup semisweet or dark chocolate chips
- 1 tbsp coconut oil (optional, for smoother melting)
- Toppings of your choice: sprinkles, crushed nuts, shredded coconut, or sea salt
- Parchment paper or silicone baking mat
Instructions:
- Line a baking sheet with parchment paper or a silicone baking mat.
- Peel and slice the bananas into 1-inch pieces. Set them aside.
- In a microwave-safe bowl, combine the chocolate chips and coconut oil (if using). Microwave in 30-second intervals, stirring after each, until smooth and fully melted.
- Using a fork or skewer, dip each banana slice into the melted chocolate, making sure it’s well-coated. Let any excess chocolate drip off.
- Place the chocolate-dipped banana slices on the prepared baking sheet.
- While the chocolate is still wet, sprinkle your choice of toppings over the slices.
- Once all the banana slices are dipped and topped, place the baking sheet in the freezer for at least 2 hours or until the chocolate is firm.
- Serve straight from the freezer for a cool, refreshing treat.
Tips from Me:
- Go Nuts: I love adding crushed almonds or peanuts for extra crunch.
- Mix It Up: Sometimes I dip half the banana slice in chocolate and leave the other half plain for variety.
- Keep It Sweet: If you’re feeling fancy, drizzle white chocolate over the dark chocolate for a pretty two-tone effect.
- Storage Tip: I always store leftovers in an airtight container in the freezer—they stay fresh and ready for when I want a quick treat.
These chocolate-dipped banana slices are my go-to snack when I’m craving something sweet yet simple. They’re fun to make and even more fun to eat!
Chocolate-Coated Coconut Macaroons
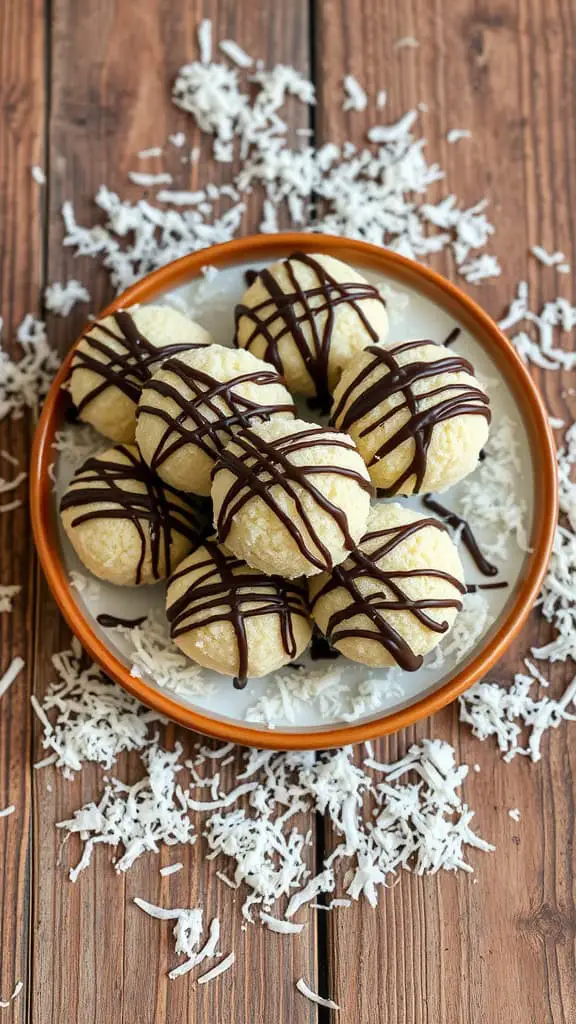
Chocolate-coated coconut macaroons are a treat that brings together the chewy texture of coconut and the rich flavor of chocolate. These delightful bites are not just fun to make, but they also look stunning on any dessert table. The combination of sweet, moist coconut with a chocolate drizzle makes these treats irresistible.
To make these chocolate-laden snacks, you’ll need shredded coconut, sweetened condensed milk, and a bit of vanilla. Once mixed, shape the coconut mixture into small mounds and bake until golden. After cooling, dip them in melted chocolate for that perfect chocolate-covered finish. A drizzle of chocolate on top adds an extra touch of decadence.
These macaroons are perfect for parties, snacks, or just a sweet treat at home. Serve them on a plate surrounded by coconut flakes for a charming presentation. The chocolate-soaked nibbles are sure to please anyone with a sweet tooth!
Ingredients:
- 3 cups sweetened shredded coconut
- 1 can (14 oz) sweetened condensed milk
- 1 tsp vanilla extract
- 2 large egg whites
- 1/4 tsp salt
- 8 oz semi-sweet or dark chocolate, melted (for dipping)
- Optional: extra melted chocolate for drizzling
Instructions:
- Preheat the oven to 325°F (163°C). Line a baking sheet with parchment paper.
- In a large bowl, mix the shredded coconut, sweetened condensed milk, and vanilla extract until evenly combined.
- In a separate bowl, beat the egg whites with the salt until stiff peaks form.
- Gently fold the beaten egg whites into the coconut mixture until fully incorporated.
- Using a tablespoon or cookie scoop, form mounds of the mixture and place them on the prepared baking sheet, leaving about an inch of space between each.
- Bake for 20-25 minutes or until the macaroons are golden brown on the edges.
- Remove from the oven and let them cool completely on a wire rack.
- Once cooled, dip the bottoms of the macaroons into the melted chocolate and place them back on the parchment paper.
- Drizzle extra melted chocolate over the tops if desired. Let the chocolate set completely before serving.
Tips:
- Use Fresh Ingredients: I always make sure my coconut is fresh and not dried out to keep the macaroons moist.
- Prevent Sticking: I lightly grease my hands when shaping the macaroons to prevent sticking.
- Cool Completely: I let the macaroons cool fully before dipping them in chocolate to avoid a mess.
- Storage Tip: I store any leftovers in an airtight container at room temperature for up to 5 days—or in the fridge if I want them extra firm.
- Make-Ahead: If I’m prepping for a party, I make these a day in advance, and they taste just as delicious.
These chocolate-coated coconut macaroons are a perfect blend of chewy, sweet, and chocolatey. They’re always a hit, whether I’m sharing them at a party or indulging at home!
Dark Chocolate Almond Clusters
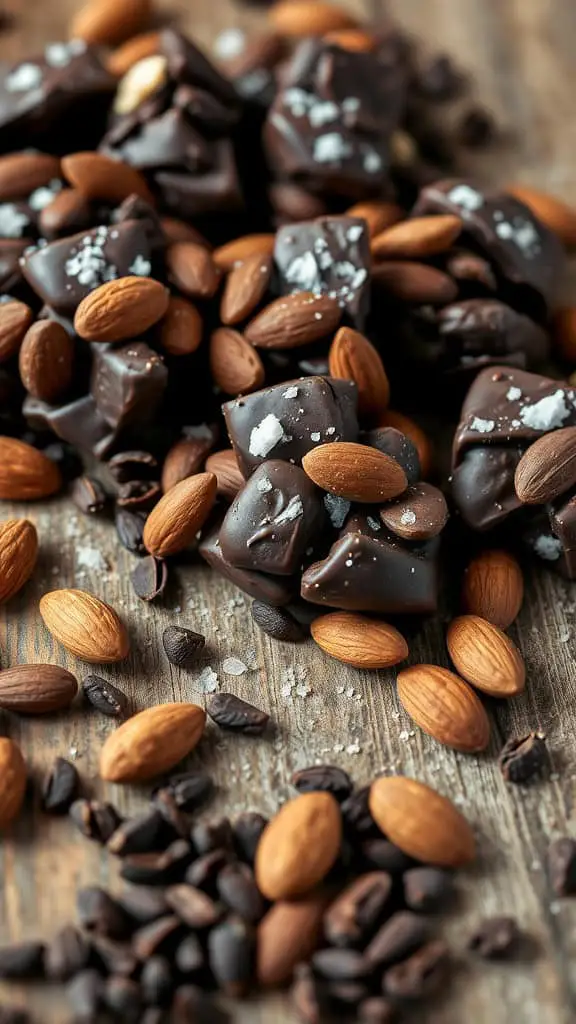
Dark Chocolate Almond Clusters are a delightful treat that combines the rich flavor of chocolate with the crunch of almonds. These chocolate-coated bites are perfect for snacking or sharing with friends. Each bite offers a satisfying crunch and a touch of sweetness, making them a hit at any gathering.
To make these tasty nibbles, you’ll need some simple ingredients. Gather almonds, dark chocolate, and a sprinkle of sea salt. Melt the chocolate until smooth, then mix in the almonds until they’re completely coated. Drop spoonfuls onto a baking sheet, sprinkle with salt, and let them set. It’s that easy!
These clusters can be stored for a quick snack or an impressive dessert. They are not just chocolate-soaked nibbles; they are also packed with nutrients from the almonds. Enjoy them as a treat or give them as a gift—everyone loves chocolate-embellished snacks!
Ingredients:
- 2 cups whole almonds (raw or roasted)
- 8 oz dark chocolate (70% cocoa or higher), chopped
- 1/2 tsp sea salt (optional, for sprinkling)
Instructions:
- Prepare the Baking Sheet: Line a baking sheet with parchment paper or a silicone baking mat.
- Toast the Almonds (Optional): If using raw almonds, toast them in a dry skillet over medium heat for 5-7 minutes, stirring frequently until fragrant. Let them cool completely.
- Melt the Chocolate: In a microwave-safe bowl, melt the dark chocolate in 30-second intervals, stirring after each interval until fully melted and smooth. Alternatively, use a double boiler on the stove.
- Coat the Almonds: Add the almonds to the melted chocolate and stir until they are thoroughly coated.
- Form the Clusters: Use a spoon to scoop small mounds of the chocolate-covered almonds onto the prepared baking sheet. Leave a little space between each cluster.
- Sprinkle with Sea Salt (Optional): Lightly sprinkle sea salt on top of each cluster for added flavor.
- Set the Clusters: Allow the clusters to set at room temperature for 1-2 hours or place them in the refrigerator for about 30 minutes until firm.
- Store and Serve: Transfer the clusters to an airtight container. They can be stored at room temperature for up to a week or in the fridge for longer freshness.
Tips from Me:
- Choose Quality Chocolate: The better the chocolate, the tastier the clusters. I love using dark chocolate with at least 70% cocoa for a rich flavor.
- Mix-Ins: Sometimes, I add dried cranberries or shredded coconut for extra texture and flavor.
- Gift-Worthy: These clusters make fantastic edible gifts. I package them in cute tins or treat bags for holidays and special occasions.
- Small Batches: If I’m craving just a few, I make a half batch to keep things fresh.
These dark chocolate almond clusters are one of my favorite go-to snacks. They’re simple to make, irresistibly delicious, and offer the perfect balance of crunch, sweetness, and a hint of salt. Enjoy!
Chocolate-Dipped Orange Segments
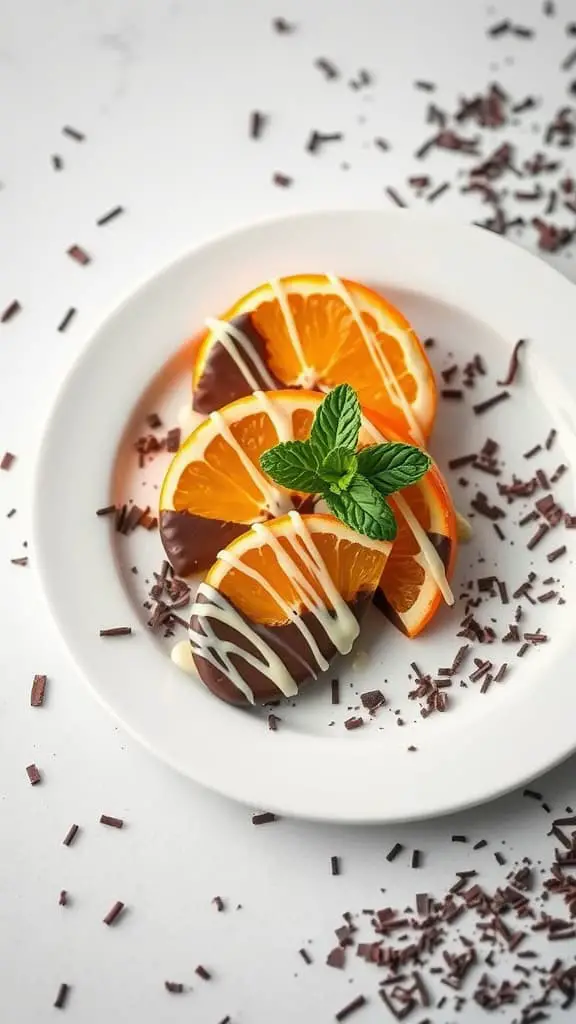
Chocolate-dipped orange segments are a delightful treat that perfectly combines sweet and tart flavors. The juicy, citrusy orange slices are cleverly dipped in rich chocolate, making them a perfect choice for chocolate-covered nibbles. This simple yet elegant snack is sure to impress at any gathering.
To make these chocolate-embellished snacks, you’ll need fresh oranges and your choice of chocolate. Dark chocolate offers a rich contrast to the sweetness of the orange, while milk or white chocolate gives a creamy finish. Simply slice the oranges, dip them in melted chocolate, and let them set. Drizzle some extra chocolate over the top for a fun touch.
This treat is not just about taste; it’s also visually appealing. The vibrant orange contrasts beautifully with the chocolate coating, creating a tempting dish. Garnish with a mint leaf for an extra pop of color. Whether serving them at a party or enjoying them as a sweet snack, chocolate-dipped orange segments are a delicious way to enjoy fruit.
Ingredients:
- 4 large oranges, peeled and segmented
- 8 oz (225g) dark, milk, or white chocolate (your choice)
- 1 tbsp coconut oil (optional, for smoother chocolate)
- Optional toppings: sea salt flakes, chopped nuts, shredded coconut, or sprinkles
- Fresh mint leaves for garnish (optional)
Instructions:
- Prepare the Oranges:
- Peel the oranges carefully and separate them into individual segments.
- Pat the orange segments dry with paper towels to help the chocolate stick better.
- Melt the Chocolate:
- Break the chocolate into pieces and place in a microwave-safe bowl.
- Add coconut oil if using.
- Microwave in 30-second intervals, stirring after each, until fully melted and smooth.
- Dip the Oranges:
- Line a baking sheet with parchment paper.
- Dip each orange segment halfway into the melted chocolate, letting the excess drip off.
- Place the dipped segments on the prepared baking sheet.
- Add Toppings (Optional):
- Before the chocolate sets, sprinkle toppings like sea salt, nuts, or coconut over the dipped segments for extra flavor and texture.
- Set and Serve:
- Allow the chocolate to set at room temperature or refrigerate for quicker results.
- Once the chocolate is firm, transfer the segments to a serving plate.
Tips from Me:
- Choose the Right Oranges: Go for firm, sweet oranges like navels. Their natural sweetness pairs well with dark chocolate.
- Skip the Mess: Use a fork or skewer for dipping to keep your fingers clean.
- Customize the Look: Drizzle extra chocolate over the dipped segments for a fancy finish.
- Storage Tip: Keep leftovers in an airtight container in the fridge for up to 2 days (if they last that long!).
Trust me, these chocolate-dipped orange segments are a total crowd-pleaser. The mix of juicy citrus and creamy chocolate is simply irresistible. Enjoy every bite!
Chocolate-Covered Marshmallow Pops

Chocolate-covered marshmallow pops are a fun and playful treat that everyone loves. They consist of fluffy marshmallows dipped in a rich chocolate coating and placed on a stick, making them easy to enjoy. Each pop can be decorated with colorful sprinkles or drizzles of contrasting chocolate, creating an eye-catching display.
The image showcases a delightful array of chocolate-coated sweets. You see marshmallow cubes wrapped in various chocolate layers, from classic dark to creamy white. Some pops are dressed with vibrant sprinkles, while others boast lovely drizzles, adding flair and flavor. These chocolate-draped bites are perfect for parties or casual snacking.
Making these treats is simple! Start with your favorite marshmallows and melt some chocolate. Dip each marshmallow into the melted chocolate, allowing the excess to drip off. Before the chocolate sets, sprinkle on your toppings. Let them cool on a parchment-lined tray, and you’ll have chocolate-enrobed delights ready to impress!
Ingredients:
- 12 large marshmallows (or marshmallow cubes)
- 1 cup semi-sweet chocolate chips (or milk/white chocolate)
- 1 tbsp coconut oil (optional, for smoother melting)
- Assorted sprinkles, crushed nuts, or candy decorations
- 12 lollipop sticks or sturdy skewers
- Parchment paper
Instructions:
- Line a baking sheet with parchment paper to prevent sticking.
- Insert a lollipop stick into each marshmallow, pushing it about halfway through to ensure stability.
- In a microwave-safe bowl, melt the chocolate chips with coconut oil (if using) in 30-second intervals, stirring between each until smooth and glossy.
- Dip each marshmallow into the melted chocolate, twirling it gently to coat evenly. Let the excess drip off.
- Immediately sprinkle with your chosen toppings while the chocolate is still wet.
- Place the coated marshmallows on the prepared baking sheet.
- Allow them to set at room temperature or refrigerate for quicker results.
- Once the chocolate hardens, arrange the marshmallow pops on a serving plate and enjoy!
Tips:
- Customize It: I love experimenting with different chocolates—dark, milk, or even colored candy melts.
- Sprinkle Smart: I keep a variety of sprinkles on hand to match party themes or holidays.
- Mess-Free Dipping: I find using a tall glass for the melted chocolate makes dipping easier and less messy.
- Make Ahead: I prep these a day in advance and store them in an airtight container.
- Quick Cleanup: I always lay out extra parchment paper to catch stray sprinkles and chocolate drips.
These chocolate-covered marshmallow pops are a delightful mix of creamy, crunchy, and sweet. They’re so fun to make and even more fun to eat—perfect for any occasion!
Chocolate-Covered Graham Cracker Sandwiches
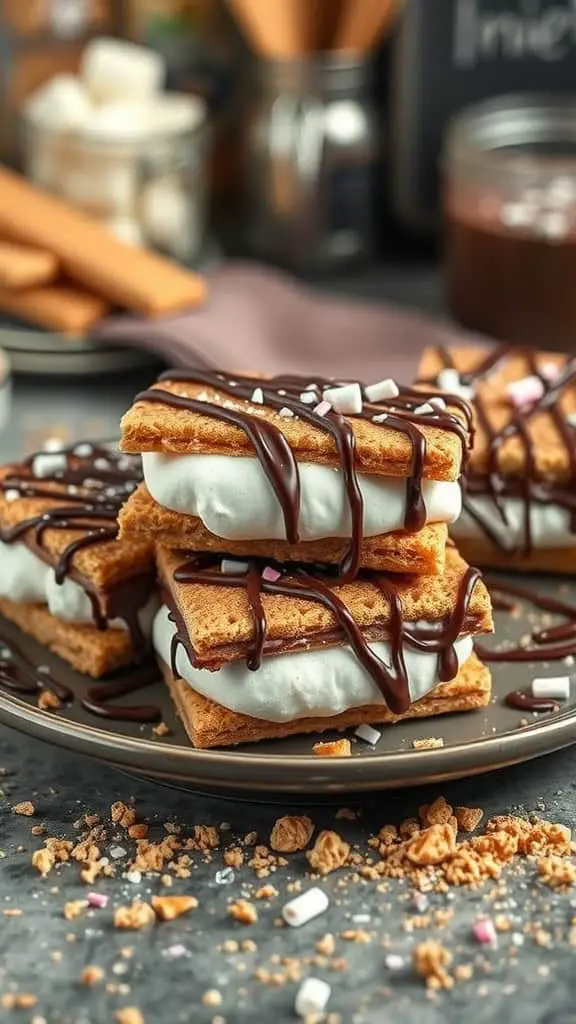
Chocolate-covered graham cracker sandwiches are a delightful treat that combines crunch and creaminess. Picture two graham crackers hugging a layer of fluffy marshmallow or whipped cream, all drizzled with rich chocolate. These chocolate-coated bites are perfect for satisfying your sweet tooth.
To make these tasty snacks, you’ll need graham crackers, marshmallow fluff or whipped cream, and your favorite chocolate for drizzling. Simply spread the marshmallow between two crackers, then generously drizzle melted chocolate on top. For added flair, sprinkle some colorful bits or crushed candies.
These chocolate-draped bites are great for parties or just a cozy night in. They are easy to prepare and offer a fun way to enjoy chocolate-layered sweets. The combination of textures and flavors makes each bite a little piece of happiness!
Ingredients:
- 1 package graham crackers (about 12 full crackers, broken in halves)
- 1 cup marshmallow fluff or whipped cream
- 1 1/2 cups semi-sweet chocolate chips (or your favorite melting chocolate)
- 1 tablespoon coconut oil (optional, for smoother melting)
- Sprinkles, crushed candies, or chopped nuts for garnish
Instructions:
- Prepare the Filling: Spread about 1 tablespoon of marshmallow fluff or whipped cream onto one half of a graham cracker. Top with another graham cracker to make a sandwich. Repeat with remaining crackers.
- Melt the Chocolate: In a microwave-safe bowl, melt the chocolate chips and coconut oil (if using) in 30-second intervals, stirring until smooth.
- Dip the Sandwiches: Use a fork or tongs to dip each graham cracker sandwich into the melted chocolate, making sure to coat it fully. Let excess chocolate drip off before placing the sandwich on a parchment-lined baking sheet.
- Decorate: While the chocolate is still wet, sprinkle with your choice of colorful bits, crushed candies, or nuts.
- Set the Chocolate: Allow the sandwiches to rest at room temperature or place them in the refrigerator for 15-20 minutes until the chocolate hardens.
- Serve & Enjoy: Once the chocolate has set, transfer the sandwiches to a serving plate.
Tips from Me:
- Keep It Neat: I like to use a spoon to drizzle extra chocolate on top for a bakery-style finish.
- Mix It Up: Sometimes, I swap the marshmallow fluff for peanut butter or Nutella for a fun twist.
- Make Ahead: If I’m prepping for a party, I make these the night before and keep them chilled until serving.
- Storage Tip: If there are any leftovers (which is rare!), I store them in an airtight container in the fridge for up to a week.
These chocolate-covered graham cracker sandwiches are an irresistible mix of crunchy, creamy, and chocolatey goodness. Every bite is pure joy!
Chocolate-Dipped Strawberry Kabobs

Chocolate-dipped strawberry kabobs are a delightful treat that combines the natural sweetness of strawberries with the rich, sweet allure of chocolate. These chocolate-coated bites are perfect for parties, picnics, or even a cozy night in. Just look at that vibrant platter of juicy strawberries, each one dipped in smooth chocolate and elegantly drizzled with more chocolate for that extra flair.
Making these chocolate-draped bites is simple and fun! Start with fresh strawberries, wash and dry them, and then dip each one in melted chocolate. For a little twist, you can drizzle some contrasting chocolate over the top. Once they’re set, skewer them onto sticks for easy handling. These chocolate-embellished snacks are sure to impress your friends and family.
Serve these chocolate-infused bites on a colorful platter, and watch them disappear in no time. They make for a fantastic dessert that adds a touch of elegance to any gathering, showing that sometimes, the simplest ideas are the most delightful. Enjoy!
Ingredients:
- 16 fresh strawberries, washed and dried
- 1/2 cup dark chocolate chips (or semi-sweet)
- 1/4 cup white chocolate chips (for drizzling, optional)
- 8 wooden skewers
Instructions:
- Melt the dark chocolate chips in a microwave-safe bowl in 20-30 second intervals, stirring in between until smooth.
- Line a baking sheet with parchment paper for easy cleanup.
- Dip each strawberry halfway into the melted chocolate, letting the excess drip off.
- Place the dipped strawberries on the parchment paper.
- Melt the white chocolate in the same way and drizzle over the strawberries using a spoon or a piping bag.
- Let the strawberries set at room temperature or refrigerate for faster results.
- Once set, skewer two strawberries on each stick for easy serving.
Serving Tips:
- Make Ahead: I always make these a few hours before the party. Refrigerating them keeps them fresh and firm.
- Add Some Crunch: Roll the chocolate-dipped strawberries in crushed nuts or sprinkles before the chocolate hardens for extra texture.
- Presentation Idea: I like arranging them on a decorative tray with fresh mint leaves for a classy touch.
These chocolate-dipped strawberry kabobs are fun, delicious, and perfect for sharing. They’re a sweet treat that’s easy to make yet looks like something straight out of a fancy dessert menu! Enjoy every bite!
Trail Mix Chocolate Bark
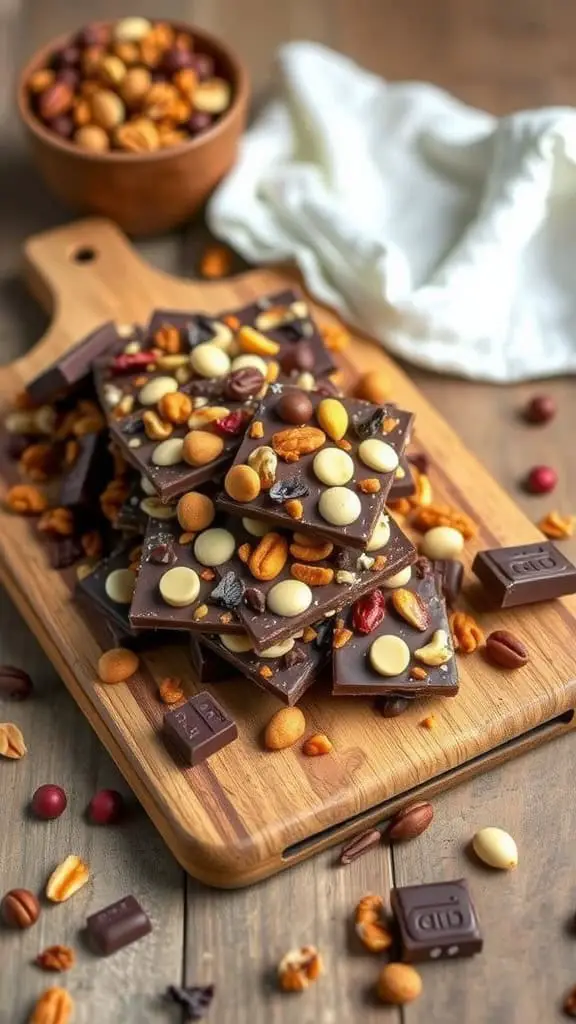
Trail Mix Chocolate Bark is a delightful way to combine your favorite snacks into a sweet treat. This version features a rich chocolate base topped with crunchy nuts and colorful dried fruits. It’s the perfect mix of textures and flavors.
In the image, you can see a beautiful stack of chocolate bark layered with chocolate-coated morsels and sprinkled with various nuts. The vibrant colors of the toppings contrast beautifully with the dark chocolate, making it visually appealing and tempting.
To make this delicious bark, you’ll need a few simple ingredients: dark chocolate, a variety of nuts, and some dried fruits. Melt the chocolate and spread it on a baking sheet. Scatter your chocolate-coated goodies and nuts on top while the chocolate is still warm. Let it cool, break it into pieces, and enjoy your chocolate-laden snacks anytime!
Ingredients:
- 1 cup dark chocolate chips (or your favorite chocolate)
- 1/2 cup mixed nuts (almonds, walnuts, pecans)
- 1/4 cup dried cranberries or raisins
- 1/4 cup dried apricots, chopped
- 2 tablespoons pumpkin seeds (or sunflower seeds)
- 2 tablespoons shredded coconut (optional for extra sweetness)
Instructions:
- Line a baking sheet with parchment paper for easy cleanup.
- Melt the dark chocolate chips in a microwave-safe bowl in 20-30 second intervals, stirring until smooth.
- Pour the melted chocolate onto the prepared baking sheet and spread it into an even layer using a spatula.
- Sprinkle the mixed nuts, dried fruits, pumpkin seeds, and shredded coconut evenly over the chocolate while it’s still warm. Press them down gently to set.
- Let the bark cool at room temperature for about 2 hours or refrigerate for faster setting.
- Once hardened, break the bark into uneven pieces.
Serving Tips:
- Customize It: I love switching up the toppings depending on what I have in my pantry—think pretzels, seeds, or even a sprinkle of sea salt for extra flair.
- Gift-Worthy: Wrap pieces in clear bags tied with a ribbon for an easy homemade gift.
- Snack On the Go: I keep a jar of these bark pieces in the pantry for quick, energy-boosting snacks.
Trail Mix Chocolate Bark is a perfect balance of sweet and savory, crunchy and chewy. It’s an easy treat to whip up and enjoy any time of the day!
Chocolate-Covered Apple Slices
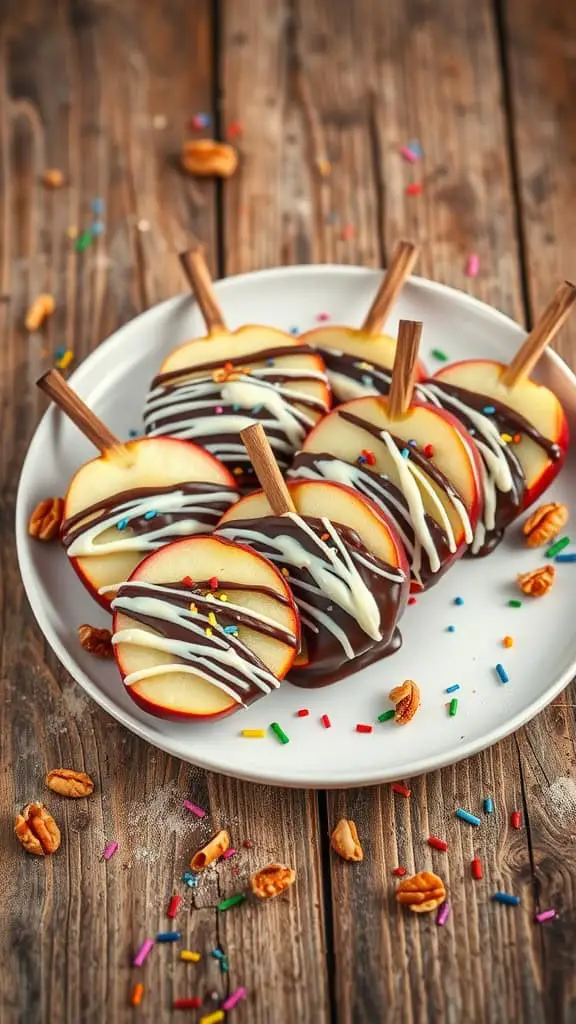
Chocolate-covered apple slices are a delightful treat that combines the crispness of fresh apples with the rich taste of chocolate. These chocolate-dipped treats are perfect for satisfying your sweet tooth without feeling too guilty.
The image shows beautifully arranged apple slices, each one generously coated in chocolate and artfully drizzled with white chocolate. With colorful sprinkles scattered around, these chocolate-cloaked treats look both inviting and festive. They are perfect for parties or just a fun snack at home.
To make these chocolate-embellished snacks, you’ll need just a few ingredients: crisp apples, your favorite chocolate for dipping, and optionally some white chocolate for drizzle. Start by slicing the apples and inserting a popsicle stick for easy handling. Melt the chocolate, dip each slice, and let them cool on parchment paper. A sprinkle of toppings adds a fun touch!
Ingredients:
- 2 large crisp apples (Honeycrisp or Granny Smith work well)
- 1 cup dark chocolate chips (or milk chocolate if preferred)
- 1/2 cup white chocolate chips (optional for drizzling)
- Assorted toppings: sprinkles, crushed nuts, mini chocolate chips, or coconut flakes
- Wooden sticks or popsicle sticks
Instructions:
- Wash and dry the apples thoroughly. Slice them into 1/2-inch thick wedges. Remove seeds but keep the skin on for crunch.
- Insert a wooden stick into each apple slice for easy dipping.
- Melt the dark chocolate chips in a microwave-safe bowl in 20-30 second intervals, stirring until smooth.
- Dip each apple slice into the melted chocolate, coating about two-thirds of the way. Let excess chocolate drip off.
- Place dipped slices on a parchment-lined baking sheet.
- Melt the white chocolate chips if using and drizzle over the chocolate-covered apple slices using a spoon or piping bag.
- Add toppings while the chocolate is still wet. Be generous for extra crunch and fun!
- Allow the apples to set at room temperature or chill in the refrigerator for faster hardening.
Serving Tips:
- Keep It Fresh: I like making these right before serving for maximum crispness, but they hold well for a few hours if refrigerated.
- Flavor Twist: For a caramel-chocolate combo, drizzle with caramel sauce before adding toppings.
- Presentation Idea: Arrange the slices on a rustic wooden tray or platter for a charming, homemade look.
These chocolate-covered apple slices are the perfect combination of sweet and crunchy. They’re fun to make, delicious to eat, and guaranteed to be a hit at any party or cozy night in! Enjoy!
Chocolate-Covered Espresso Beans

Chocolate-covered espresso beans are a delightful treat that combines the rich flavor of coffee with the sweetness of chocolate. These chocolate-glossed goodies are perfect for a quick energy boost or a sweet snack. Each bite offers a satisfying crunch from the coffee bean, enveloped in a creamy chocolate coating.
Making these treats at home is simple. Start with fresh espresso beans and your favorite chocolate, whether dark, milk, or white. Melt the chocolate gently, and then coat the beans thoroughly. Let them cool on parchment paper for the chocolate to set. You’ll end up with chocolate-coated morsels that are irresistible!
This combination is not only tasty but also gives you a nice caffeine kick. They make great gifts or can be enjoyed during movie nights or coffee breaks. Grab a handful of thesec hocolate-dipped treats to energize your day!
Ingredients:
- 1 cup fresh espresso beans (roasted, not ground)
- 1 cup dark chocolate chips (or your favorite chocolate)
- 1/2 cup white or milk chocolate chips (optional for drizzling)
- Parchment paper for easy cleanup
Instructions:
- Melt the dark chocolate chips in a microwave-safe bowl in 20-30 second intervals, stirring until smooth.
- Add the espresso beans to the melted chocolate and stir until fully coated.
- Use a fork or slotted spoon to lift out the coated beans, allowing excess chocolate to drip off.
- Spread the beans in a single layer on a parchment-lined baking sheet, ensuring they don’t stick together.
- If using white or milk chocolate, melt it the same way and drizzle over the beans for extra flair.
- Let the beans set at room temperature or refrigerate until hardened.
- Once the chocolate has fully set, break apart any clusters and store the beans in an airtight container.
Serving Tips:
- Make It Fancy: I like packaging these in small jars or gift bags tied with a ribbon—they make great gifts!
- Extra Flavor: Sprinkle a pinch of sea salt or a dusting of cocoa powder on top before the chocolate sets for a gourmet touch.
- Snack Hack: I keep a stash in the fridge for a quick pick-me-up during busy days.
These chocolate-covered espresso beans are the perfect blend of rich, bold coffee and creamy chocolate. They’re crunchy, sweet, and a little addictive—just the thing for coffee lovers looking for a tasty energy boost!
Double Chocolate-Covered Popcorn

Double chocolate-covered popcorn is a snack that truly satisfies your sweet tooth. This treat features fluffy popcorn drizzled with rich chocolate. It’s the perfect blend of crunchy goodness and smooth chocolate-laden snacks.
The image shows a delightful bowl filled with popcorn, each piece generously coated with chocolate. You’ll notice chocolate drizzled over the top, enhancing the visual appeal. Little chunks of chocolate candies add extra flavor and texture, making this a winner for movie nights or casual snacking.
To make this delicious treat, you only need a few ingredients. Start with freshly popped popcorn, then melt your favorite chocolate. Pour it over the popcorn and toss to coat. For a fun twist, sprinkle some chocolate-coated morsels on top. Let it cool, and you’ve got a bowl of chocolate-enrobed delights ready to enjoy!
Ingredients:
- 8 cups freshly popped popcorn (air-popped or stovetop)
- 1 cup dark chocolate chips (for coating)
- 1/2 cup white chocolate chips (for drizzling, optional)
- 1/2 cup mini chocolate candies (like M&M’s or chocolate chunks)
- 1 tablespoon coconut oil (optional, for smoother melting)
Instructions:
- Spread the popcorn on a large parchment-lined baking sheet, making an even layer.
- Melt the dark chocolate chips in a microwave-safe bowl in 20-30 second bursts, stirring until smooth. Add coconut oil if needed for a silkier texture.
- Drizzle the melted dark chocolate over the popcorn and gently toss until evenly coated.
- Melt the white chocolate chips the same way and drizzle over the chocolate-covered popcorn for added contrast.
- Sprinkle mini chocolate candies or chocolate chunks on top while the chocolate is still wet.
- Let the popcorn sit at room temperature or chill in the fridge for faster setting. Break apart any large clusters before serving.
Serving Tips:
- Make It Extra Fun: I like adding a sprinkle of sea salt on top for a sweet-salty twist.
- Movie Night Ready: Serve in individual snack cups or paper cones for easy grab-and-go snacking.
- Gift-Worthy: Pack in cellophane bags tied with ribbons for party favors or holiday gifts.
This double chocolate-covered popcorn is the perfect sweet and crunchy snack. It’s simple to make, hard to resist, and always a hit at movie nights or family gatherings. Enjoy every chocolate-drenched bite!
Chocolate-Covered Granola Bars
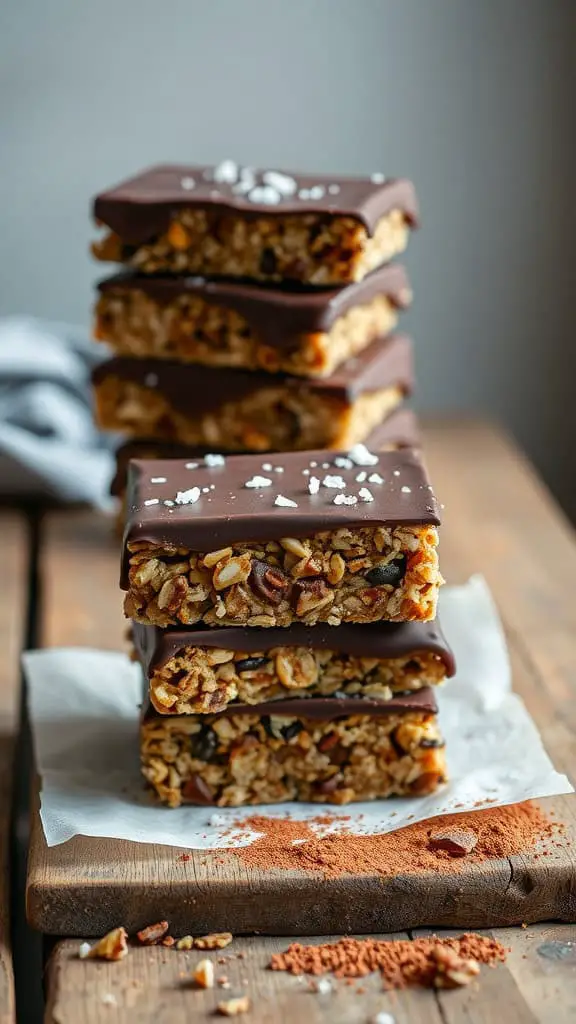
Chocolate-covered granola bars are the perfect mix of health and indulgence. They combine the crunchy goodness of oats and nuts with the sweet richness of chocolate. These chocolate-coated morsels are not only delicious but also make for a great snack any time of the day.
Making your own chocolate-covered granola bars is simple. Start with rolled oats, nuts, honey, and your favorite mix-ins like dried fruit or chocolate chips. Press the mixture into a baking dish and let it set. Once firm, cut into bars and dip them in melted chocolate. The result? Chocolate-swathed treats that are perfect for a quick energy boost.
Don’t forget to sprinkle a little sea salt on top for that sweet and salty flavor combo that everyone loves. These chocolate-drizzled delights are sure to satisfy your cravings while keeping you fueled throughout the day.
Ingredients:
- 2 cups rolled oats
- 1/2 cup chopped almonds (or your favorite nuts)
- 1/2 cup unsweetened shredded coconut
- 1/2 cup dried cranberries or raisins
- 1/4 cup flaxseeds or chia seeds (optional for extra nutrition)
- 1/2 cup peanut butter (or almond butter)
- 1/2 cup honey (or maple syrup for a vegan option)
- 1 teaspoon vanilla extract
- 1/2 teaspoon ground cinnamon (optional for extra flavor)
- 1/4 teaspoon salt
- 1 cup dark chocolate chips (for coating)
- Sea salt flakes (for sprinkling)
Instructions:
- Preheat the oven to 350°F (175°C). Line a 9×9-inch baking dish with parchment paper.
- In a large mixing bowl, combine oats, nuts, coconut, dried fruit, seeds, cinnamon, and salt.
- In a small saucepan over medium heat, melt peanut butter, honey, and vanilla extract until smooth. Remove from heat.
- Pour the wet mixture over the dry ingredients and stir until well combined.
- Press the mixture firmly into the prepared baking dish, using a spatula or your hands.
- Bake for 15-20 minutes or until golden brown. Let cool completely before cutting into bars.
- Melt dark chocolate chips in a microwave-safe bowl in 20-30 second intervals, stirring until smooth.
- Dip half of each bar into the melted chocolate, letting excess drip off. Place on parchment paper.
- Sprinkle the chocolate-covered side with sea salt flakes.
- Let the bars set at room temperature or refrigerate for faster results.
Serving Tips:
- Make It Your Way: I love swapping out cranberries for chopped dates or dried apricots for a different flavor profile.
- Add Some Crunch: Toss in some crushed pretzels for an irresistible salty-sweet combo.
- Grab-and-Go: I wrap these individually in parchment paper, making them perfect for on-the-go snacking.
These chocolate-covered granola bars strike the perfect balance between wholesome and indulgent. They’re filling, delicious, and exactly what you need for a satisfying energy boost. Enjoy!
Chocolate-Dipped Pineapple Chunks

Chocolate-dipped pineapple chunks are a delightful treat that blends the sweetness of fresh fruit with the richness of chocolate. This combination offers a refreshing snack that’s perfect for any occasion.
In the image, you can see vibrant chunks of pineapple, many of them adorned with a chocolate coating. Some pieces are drizzled with white chocolate, adding a lovely contrast. The fresh mint leaves bring a touch of color and a hint of freshness, making this dish even more appealing. Sprinkles scattered around provide a playful feel, perfect for parties or a fun family snack.
Making these chocolate-coated bites is simple. Start by cutting fresh pineapple into chunks. Melt your favorite chocolate, dip the pineapple pieces, and let them cool on parchment paper. Drizzle with melted white chocolate for an extra special touch. Enjoy these chocolate-laden snacks as a sweet treat or a light dessert!
Ingredients:
- 2 cups fresh pineapple chunks, patted dry
- 1/2 cup dark or semi-sweet chocolate chips
- 1/4 cup white chocolate chips (optional for drizzling)
- 2 tablespoons colorful sprinkles (optional)
- Fresh mint leaves (for garnish)
Instructions:
- Melt the dark chocolate chips in a microwave-safe bowl, stirring every 20-30 seconds until smooth.
- Line a baking sheet with parchment paper for easy cleanup.
- Dip each pineapple chunk halfway into the melted chocolate, allowing any extra chocolate to drip off.
- Place the dipped chunks on the parchment paper.
- If using white chocolate, melt it the same way and drizzle over the dipped pineapple using a spoon or a piping bag.
- Sprinkle with colorful sprinkles while the chocolate is still wet.
- Let the chocolate set at room temperature or refrigerate for quicker results.
- Arrange the chocolate-dipped pineapple chunks on a serving plate and garnish with fresh mint leaves.
Serving Tips:
- Keep It Fresh: I like serving these chilled straight from the fridge—they’re extra refreshing that way!
- Add Some Crunch: Try rolling the dipped pineapple in crushed nuts or coconut flakes for extra texture.
- Party Ready: For an elegant display, I arrange them on a white platter with mint leaves tucked in between for added freshness and color.
These chocolate-dipped pineapple chunks are juicy, sweet, and perfectly balanced with the smooth richness of chocolate. They’re always a hit at parties, making snacking both fun and fancy! Enjoy!
Chocolate-Covered Peanut Clusters
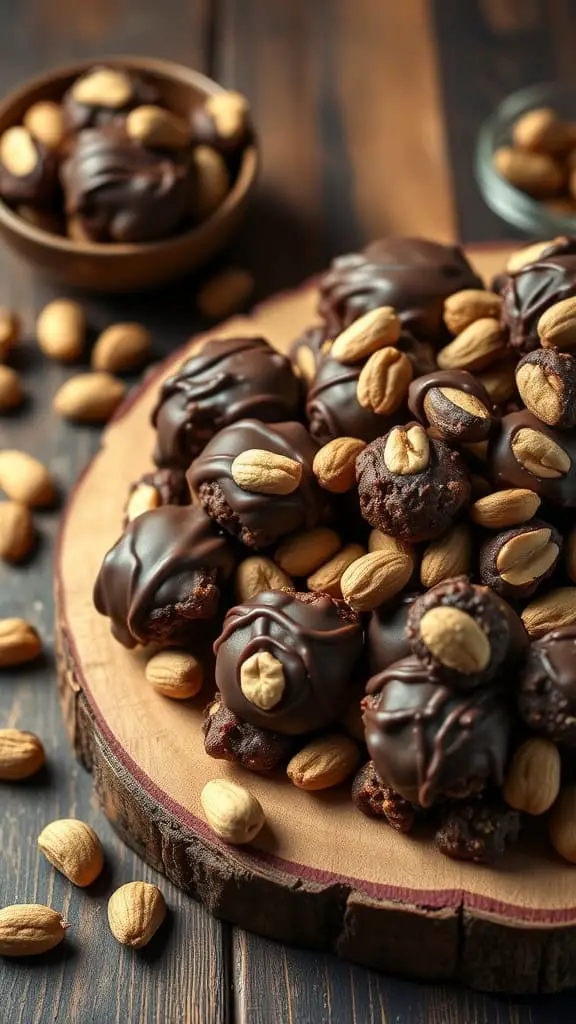
Chocolate-covered peanut clusters are a delightful treat that combines rich chocolate with crunchy peanuts. These chocolate-enrobed delights are perfect for snacking at any time of day. The image showcases a beautiful arrangement of these chocolate-coated bites, topped with whole peanuts for that extra crunch.
Making these snacks is simple and fun. Start with your favorite nuts, like roasted peanuts, and mix them with a sweet base, such as melted chocolate. Once you form small clusters, pop them into the fridge to set. In no time, you’ll have chocolate-coated sweets that everyone will love!
These chocolate-glazed snacks are great for parties or just as a simple dessert. Their rich flavor and satisfying texture make them a hit. So, gather your ingredients and treat yourself to these chocolate-dipped treats that are sure to please your taste buds.
Ingredients:
- 2 cups roasted, salted peanuts (or your favorite nuts)
- 1 cup semi-sweet chocolate chips
- 1/2 cup milk chocolate chips (for added sweetness)
- 1/4 cup white chocolate chips (optional, for drizzling)
Instructions:
- Line a baking sheet with parchment paper for easy cleanup.
- In a microwave-safe bowl, melt the semi-sweet and milk chocolate chips in 20-30 second intervals, stirring in between until smooth.
- Add the peanuts to the melted chocolate and stir until they are fully coated.
- Using a spoon, drop small clusters of the chocolate-peanut mixture onto the prepared baking sheet.
- If desired, melt the white chocolate chips and drizzle over the clusters for a decorative touch.
- Let the clusters set at room temperature or refrigerate for 1-2 hours until firm.
Serving Tips:
- Make Ahead: I like making these a day in advance. They store well in an airtight container for up to a week.
- Add Some Flair: Try adding a sprinkle of sea salt on top before the clusters set—it’s a game changer!
- Gift Idea: I sometimes pack these in decorative bags or tins for a thoughtful homemade gift.
These chocolate-covered peanut clusters are crunchy, sweet, and utterly satisfying. They’re the perfect balance of salty and sweet, making them a go-to treat for parties or quiet evenings at home. Enjoy every crunchy bite!
Chocolate-Covered Pretzel Rods
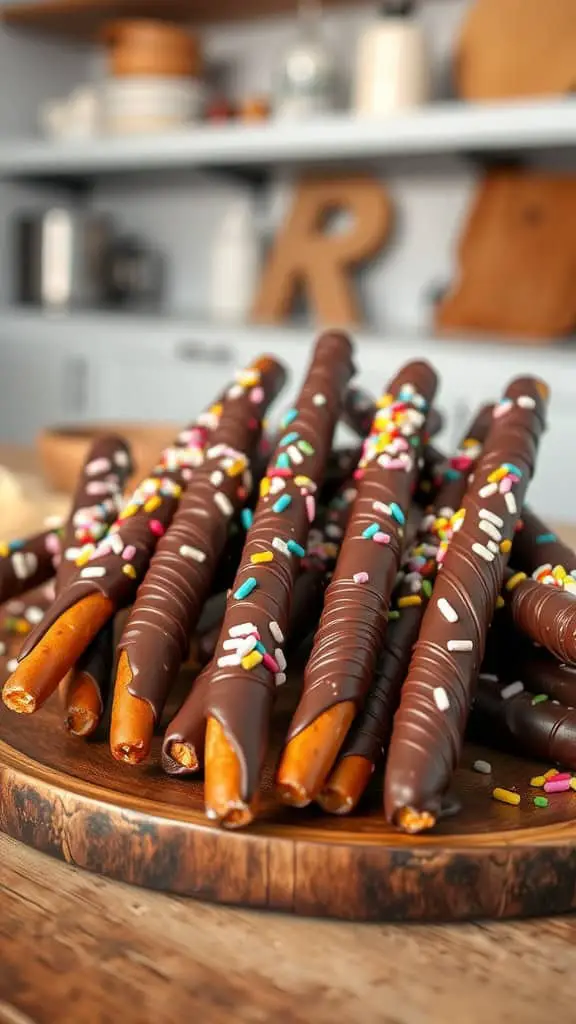
Chocolate-covered pretzel rods are a delightful treat that combines the crunch of pretzels with the sweetness of chocolate. These chocolate-coated morsels are easy to make and perfect for any occasion.
The image showcases a beautiful array of pretzel rods, dipped generously in rich chocolate and sprinkled with colorful toppings. These chocolate-draped bites not only look appealing but also offer a satisfying blend of sweet and salty.
To whip up these chocolate-blanketed bites, you’ll need a handful of simple ingredients: pretzel rods, your favorite chocolate for melting, and colorful sprinkles for that extra flair. Melt the chocolate, dip each pretzel rod, and then sprinkle on the toppings before the chocolate sets. It’s that simple!
These chocolate-smothered goodies are great for parties, gifts, or just a tasty snack at home. Enjoy them with friends or keep them all to yourself—no judgment here!
Ingredients:
- 12 large pretzel rods
- 1 cup semi-sweet chocolate chips (or milk/dark chocolate)
- 1/2 cup white chocolate chips (optional for drizzling)
- Assorted sprinkles, crushed nuts, or candy bits
Instructions:
- Line a baking sheet with parchment paper for easy cleanup.
- Melt the semi-sweet chocolate chips in a microwave-safe bowl in 20-30 second intervals, stirring in between until smooth.
- Dip each pretzel rod about two-thirds of the way into the melted chocolate, twirling gently to coat evenly.
- Place the dipped pretzel rods on the parchment paper.
- While the chocolate is still wet, sprinkle toppings generously over each pretzel.
- For added flair, melt white chocolate chips and drizzle them over the coated pretzels using a spoon or piping bag.
- Let the pretzels set at room temperature or refrigerate for faster hardening.
Serving Tips:
- Party-Ready: I love arranging these in a tall glass or a decorative jar for a fun party centerpiece.
- Gift Idea: Wrap them individually in clear cellophane bags tied with ribbon for festive party favors.
- Flavor Twist: Try using peanut butter chips or caramel drizzle for a fun flavor twist!
These chocolate-covered pretzel rods are the perfect balance of salty crunch and sweet decadence. They’re quick to make and a guaranteed hit at any gathering!
Chocolate-Dipped Cheesecake Bites

Chocolate-dipped cheesecake bites are a treat that combines rich flavors with a delightful texture. These chocolate-coated bites look so inviting, topped with drizzles of chocolate and colorful sprinkles. Each bite promises a creamy cheesecake center wrapped in a layer of chocolate, making them irresistible.
To make these chocolate-infused bites, you’ll need cream cheese, sugar, and vanilla for the cheesecake filling. Then, dip each bite in melted chocolate and let them cool. The chocolate shell creates a beautiful contrast with the creamy filling, offering a perfect balance of flavors.
These chocolate-enrobed delights are perfect for parties or as a sweet snack at home. Whether you serve them chilled or at room temperature, they’re sure to impress anyone with a sweet tooth. Enjoy the fun of popping one in your mouth and savoring the chocolate-soaked nibbles!
Ingredients:
- 8 oz cream cheese, softened
- 1/2 cup granulated sugar
- 1 tsp vanilla extract
- 1 cup crushed graham crackers (for coating, optional)
- 1 cup dark or semi-sweet chocolate chips (for dipping)
- 1/2 cup white chocolate chips (for drizzling, optional)
- Colorful sprinkles (optional, for garnish)
Instructions:
- In a mixing bowl, beat the cream cheese, sugar, and vanilla extract until smooth and creamy.
- Scoop small portions using a spoon or cookie scoop, rolling them into bite-sized balls.
- If using graham crackers, roll each ball in the crumbs for extra texture.
- Place the bites on a parchment-lined baking sheet and freeze for about 1 hour or until firm.
- Melt the dark chocolate chips in the microwave in 20-30 second intervals, stirring until smooth.
- Dip each frozen cheesecake bite into the melted chocolate, covering it completely. Use a fork to lift and tap off excess chocolate.
- Place the dipped bites back on the parchment paper.
- Melt the white chocolate chips and drizzle over the bites using a spoon or piping bag.
- Sprinkle with colorful sprinkles before the chocolate sets.
- Refrigerate for 1-2 hours or until the chocolate hardens completely.
Serving Tips:
- Make Ahead: I like making these a day before to let the flavors fully develop in the fridge.
- Flavor Twists: Swap vanilla for almond or lemon extract for a fun twist.
- Presentation Idea: Arrange them on a decorative plate with mini cupcake liners for a fancy dessert display.
These chocolate-dipped cheesecake bites are creamy, rich, and impossible to resist. They’re perfect for any occasion, and you’ll love how easy they are to make. Just one bite, and you’re hooked!
Chocolate-Covered Cherry Bombs

Chocolate-covered cherry bombs are a delightful treat that combines the sweetness of cherries with the richness of chocolate. These chocolate-coated morsels are perfect for any occasion, whether it’s a party or a sweet snack at home.
In the image, you can see these chocolate-draped bites beautifully arranged on a plate. The glistening chocolate exterior looks tempting, while the bright red cherries peeking out add a pop of color. One of the chocolate-wrapped nibbles has been bitten into, revealing a luscious cherry filling that promises a burst of flavor.
Making chocolate-covered cherry bombs is quite simple. You’ll need fresh cherries, chocolate for melting, and perhaps a drizzle of white chocolate for an extra touch. Start by pitting the cherries and dipping them in melted chocolate. Let them set before enjoying these chocolate-infused bites.
Whether you’re serving them at a gathering or enjoying them as a treat for yourself, these chocolate-layered sweets are sure to please. They’re a fantastic way to combine fruit with chocolate in a fun and tasty way!
Ingredients:
- 20 fresh cherries, washed and pitted
- 1/2 cup dark or semi-sweet chocolate chips
- 1/4 cup white chocolate chips (optional for drizzling)
- 1 tablespoon coconut oil (optional for smoother chocolate)
Instructions:
- Prep the Cherries: Wash and pat the cherries completely dry after pitting them. Moisture can cause the chocolate to seize.
- Melt the Chocolate: In a microwave-safe bowl, melt the dark chocolate chips with coconut oil (if using) in 20-30 second intervals, stirring until smooth.
- Dip the Cherries: Hold each cherry by the stem (or use a toothpick) and dip it into the melted chocolate, swirling to coat evenly.
- Set the Cherries: Place the dipped cherries on a parchment-lined baking sheet.
- Drizzle Extra Chocolate: Melt the white chocolate the same way and drizzle over the cherries for a decorative touch.
- Chill and Serve: Let the cherries set at room temperature or refrigerate for 20-30 minutes until the chocolate is firm.
Serving Tips:
- Make Them Fancy: I love sprinkling some crushed nuts, shredded coconut, or sprinkles on the chocolate while it’s still wet for added flair.
- Sweet Surprise: Try stuffing the cherries with a small piece of marzipan or a dab of cream cheese before dipping for a fun twist.
- Presentation Tip: Arrange the chocolate-covered cherry bombs on a pretty plate with a few extra cherries and mint leaves for a festive look.
These chocolate-covered cherry bombs are the perfect mix of juicy fruit and velvety chocolate. They’re an irresistible treat that’s easy to make yet looks impressively gourmet! Enjoy every sweet bite!
Chocolate-Covered Biscotti Sticks
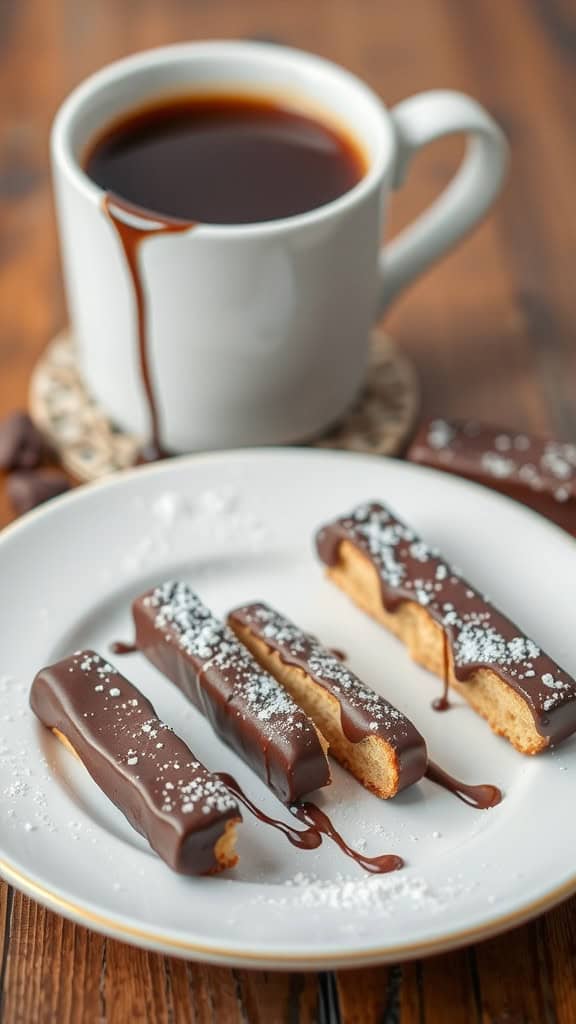
Chocolate-covered biscotti sticks are a delightful treat that combines the crunchiness of biscotti with the sweetness of chocolate. These chocolate-coated morsels are perfect for dipping into a warm cup of coffee or tea.
In the image, you see beautifully chocolate-draped bites arranged on a white plate. The glossy chocolate coating adds an appealing shine, making them irresistible. A sprinkle of powdered sugar gives these treats a touch of elegance.
Making these delicious snacks is easy! Just dip your baked biscotti in melted chocolate until fully coated. Allow them to cool on parchment paper for the chocolate to set. You’ll have chocolate-enrobed delights ready in no time.
These chocolate-coated sweets are perfect for sharing or enjoying on your own. They make great gifts or can be served at gatherings. Give them a try, and you’ll see how quick and rewarding it is to create these chocolate-filled snacks!
Ingredients:
- 12 biscotti sticks (store-bought or homemade)
- 1 cup dark chocolate chips (or milk chocolate, if preferred)
- 1/2 cup white chocolate chips (for drizzling, optional)
- 2 tablespoons powdered sugar (for garnish, optional)
Instructions:
- Melt the dark chocolate chips in a microwave-safe bowl in 20-30 second intervals, stirring until smooth.
- Line a baking sheet with parchment paper for easy cleanup.
- Dip each biscotti stick halfway into the melted chocolate, allowing excess to drip off.
- Place the dipped biscotti on the parchment paper.
- Melt the white chocolate separately and drizzle it over the chocolate-coated biscotti using a spoon or a piping bag for a decorative effect.
- Let the biscotti cool at room temperature or refrigerate them until the chocolate is fully set.
- Sprinkle with powdered sugar just before serving for an extra elegant touch.
Serving Tips:
- Coffee Pairing: I love serving these alongside a steaming cup of coffee or espresso for the perfect dipping experience.
- Add Some Crunch: Before the chocolate sets, sprinkle crushed nuts, toffee bits, or even sea salt on the biscotti for extra texture and flavor.
- Gift Idea: Wrap them in cellophane bags tied with ribbons for a thoughtful homemade gift.
These chocolate-covered biscotti sticks are a deliciously crunchy treat with just the right amount of sweetness. They’re simple to make and perfect for satisfying a sweet tooth or sharing with friends! Enjoy!
Chocolate-Dipped Dried Apricots

If you’re looking for a simple yet delightful treat, chocolate-dipped dried apricots are a fantastic choice. These chocolate-coated bites combine the sweet, chewy texture of dried apricots with the rich flavor of chocolate, creating a perfect harmony.
To whip up these chocolate-swathed treats, you’ll need just a few ingredients: dried apricots, dark or white chocolate, and optional toppings like nuts or sprinkles. Melt your chocolate in a bowl, dip each apricot until it’s nicely coated, and then let them cool on parchment paper.
These chocolate-draped bites aren’t just tasty; they also pack a nutritional punch. Dried apricots are rich in vitamins and fiber, making them a sweet yet healthy snack. Add some chocolate, and you’ve got a beautifully indulgent snack!
Whether you serve these chocolate-embellished snacks at a party or keep them all to yourself, they’re sure to impress. Enjoy your chocolate-dipped treats with a cup of tea or coffee for that extra cozy feel.
Ingredients:
- 20 dried apricots
- 1/2 cup dark chocolate chips (or milk chocolate if you prefer)
- 1/4 cup white chocolate chips (for drizzling, optional)
- 1/4 cup chopped nuts (e.g., almonds, pistachios, or walnuts – optional)
- Parchment paper
Instructions:
- Melt the dark chocolate chips in a microwave-safe bowl in 20-30 second bursts, stirring between intervals until smooth.
- Line a baking sheet with parchment paper for easy cleanup.
- Dip each dried apricot halfway into the melted chocolate, letting the excess drip off.
- Place the dipped apricots on the parchment paper.
- If using white chocolate, melt it the same way and drizzle it over the dipped apricots using a spoon or a piping bag.
- Sprinkle chopped nuts over the chocolate while still wet if desired.
- Let the apricots set at room temperature or refrigerate them to speed up the process.
Serving Tips:
- Make Ahead: I like making these a day before a party; they keep well in an airtight container.
- Flavor Boost: Sometimes, I add a sprinkle of sea salt on top for a sweet-and-salty twist.
- Elegant Presentation: Arrange them on a wooden tray with fresh herbs or edible flowers for a rustic, elegant touch.
These chocolate-dipped dried apricots are the perfect mix of chewy, sweet, and rich. They’re easy to make, look elegant, and taste even better than they look. Enjoy every decadent bite!
Chocolate-Covered Fig Bites

Chocolate-covered fig bites are a delightful treat that combines the sweetness of figs with the rich taste of chocolate. These chocolate-draped bites are not only visually appealing but also burst with flavor. Each piece is a perfect balance of soft, chewy fig wrapped in a chocolate shell.
To make these chocolate-coated bites, you’ll need fresh figs and your favorite chocolate. Simply melt the chocolate, dip each fig, and let them set on a parchment-lined tray. A sprinkle of sea salt on top adds a nice touch!
These chocolate-glossed goodies are great for snacking or serving at gatherings. They impress guests with their unique combination of flavors and textures. Plus, they’re a healthier alternative to many other chocolate snacks.
Ingredients:
- 8 fresh figs, halved
- 1/2 cup dark chocolate chips (or your favorite type)
- 1 tablespoon coconut oil (optional, for smoother melting)
- Sea salt flakes (for sprinkling, optional)
Instructions:
- Line a baking sheet with parchment paper for easy cleanup.
- Melt the dark chocolate chips with coconut oil in a microwave-safe bowl, heating in 20-30 second intervals and stirring until smooth.
- Dip each fig half into the melted chocolate, covering halfway or entirely, depending on your preference.
- Place the dipped figs on the parchment-lined baking sheet.
- While the chocolate is still wet, sprinkle a pinch of sea salt on top if desired.
- Let the chocolate set at room temperature or refrigerate for faster results.
Serving Tips:
- Make It Fancy: I like drizzling some melted white chocolate over the top for extra visual appeal.
- Add Some Crunch: Before the chocolate hardens, sprinkle chopped nuts like pistachios or almonds for added texture.
- Presentation Tip: Arrange the bites on a rustic wooden board with fresh fig slices for a stunning display.
These chocolate-covered fig bites are sweet, rich, and irresistibly elegant. They’re the perfect combination of chewy, juicy figs and smooth, velvety chocolate—an easy yet impressive treat that never fails to wow!
Chocolate-Covered Rice Krispie Squares
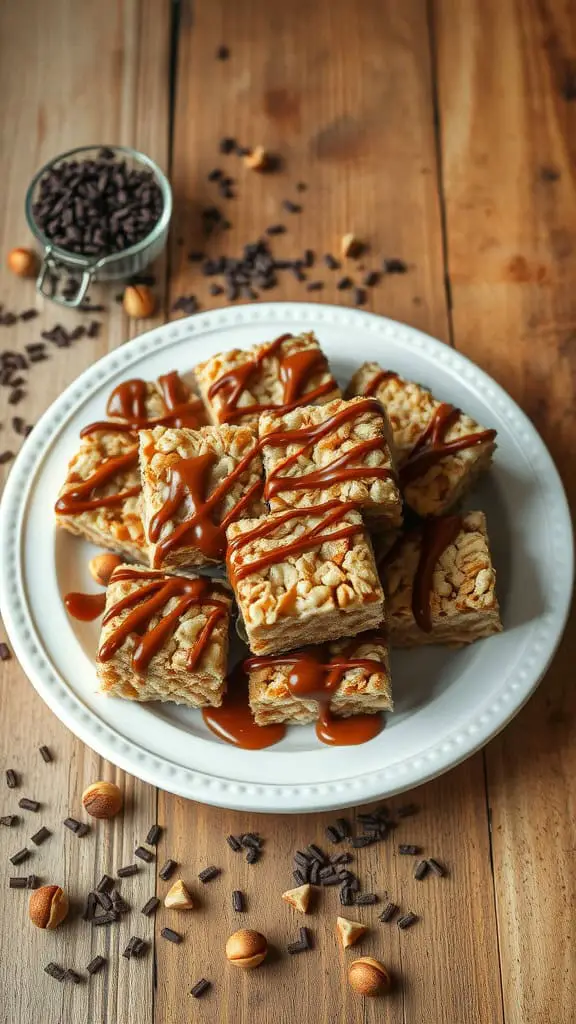
These chocolate-covered Rice Krispie squares are a delightful treat for anyone who loves chocolate-layered sweets. They combine the classic crunch of Rice Krispies with a rich chocolate coating, making them an instant favorite.
To make these chocolate-slathered treats, you only need a few ingredients: Rice Krispies, marshmallows, butter, and of course, chocolate for that luscious coating. The best part? They’re super easy to whip up!
Start by melting the butter and marshmallows together until smooth. Then, mix in the Rice Krispies until they are evenly coated. Once your mixture is ready, press it into a pan and let it cool. After cutting it into squares, it’s time for the chocolate bath!
Melt your chocolate and dip each square until it’s fully chocolate-coated. You can even drizzle some extra chocolate on top for that chocolate-drizzled delight. Sprinkling them with nuts or sprinkles adds a fun crunch, too!
These chocolate-cloaked treats are perfect for parties, snacks, or even as a sweet surprise for lunchboxes. Everyone will love these chocolate-coated morsels!
Ingredients:
- 6 cups Rice Krispies cereal
- 10 oz marshmallows (about 40 large or 4 cups mini)
- 3 tablespoons unsalted butter
- 1 cup semi-sweet chocolate chips (for coating)
- 1/2 cup caramel sauce (optional for drizzling)
- 1/4 cup chopped nuts or chocolate sprinkles (optional for topping)
Instructions:
- Grease a 9×13-inch pan with non-stick spray or line it with parchment paper.
- In a large saucepan, melt the butter over low heat.
- Add the marshmallows and stir continuously until fully melted and smooth.
- Remove from heat and immediately stir in the Rice Krispies until well combined.
- Press the mixture evenly into the prepared pan using a greased spatula or wax paper. Let it cool completely.
- Once set, cut the Rice Krispie mixture into squares.
- Melt the chocolate chips in a microwave-safe bowl in 20-30 second intervals, stirring until smooth.
- Dip each square halfway or fully into the melted chocolate and place them on parchment paper.
- If using, drizzle caramel sauce over the squares and sprinkle nuts or chocolate sprinkles on top before the chocolate hardens.
- Let the squares set at room temperature or refrigerate for quicker results.
Serving Tips:
- Make Ahead: I like making these the night before. Store them in an airtight container for freshness.
- Add Extra Flavor: Mix in peanut butter or a pinch of sea salt for a sweet-salty twist.
- Party-Ready Presentation: I arrange them on a platter with extra sprinkles and nuts around for a fun, festive look.
These chocolate-covered Rice Krispie squares are crispy, chewy, and totally addictive. They’re perfect for sharing — or keeping all to yourself! Enjoy every crunchy, chocolatey bite!
Chocolate-Dipped Caramel Pretzel Bites

Chocolate-dipped caramel pretzel bites are a delightful treat that brings together sweet and salty flavors in the best way possible. Picture crunchy pretzels enveloped in a rich layer of chocolate, with a gooey caramel center waiting to be discovered. These chocolate-coated bites are perfect for satisfying your snack cravings.
To make these treats, you’ll need some small pretzels, soft caramel candies, and your favorite chocolate. Start by melting the chocolate, then dip each pretzel into it, covering it generously. Place a caramel piece inside before sealing it with another pretzel. After that, give them a final dip in chocolate and let them cool. The result is a chocolate-enrobed delight that will have everyone reaching for more!
Don’t forget to sprinkle a little sea salt on top to enhance those flavors. These chocolate-laden snacks are not just eye-catching; they are a crowd-pleaser at parties and a fantastic way to indulge your sweet tooth. Enjoy these chocolate-dipped treats as a fun dessert or a tasty afternoon pick-me-up!
Ingredients:
- 40 small pretzels (round or classic twist shape)
- 20 soft caramel candies (like Werther’s or Kraft)
- 1 cup dark or semi-sweet chocolate chips
- 1/2 cup white chocolate chips (optional for drizzling)
- Sea salt flakes (for sprinkling)
Instructions:
- Preheat the oven to 250°F (120°C). Line a baking sheet with parchment paper.
- Arrange half of the pretzels on the baking sheet. Place one caramel candy on top of each pretzel.
- Bake for 3-4 minutes until the caramels are soft but not melted.
- Carefully press another pretzel on top of each softened caramel to create a sandwich. Let them cool completely.
- Melt the dark chocolate chips in a microwave-safe bowl in 30-second intervals, stirring until smooth.
- Dip each pretzel sandwich halfway into the melted chocolate, letting the excess drip off.
- Place the chocolate-dipped pretzels back on the parchment paper. If using white chocolate, melt it and drizzle over the pretzels.
- Sprinkle sea salt flakes over the dipped pretzels before the chocolate sets.
- Allow the pretzels to cool until the chocolate is firm (refrigerate for quicker results).
Serving Tips:
- Add Some Crunch: I sometimes roll the edges in crushed nuts or toffee bits for extra flavor.
- Sweet & Salty Twist: For variety, use peanut butter chips or caramel drizzle instead of white chocolate.
- Party-Ready: I love arranging these bites in a decorative tin or on a rustic wooden platter for a festive touch.
These chocolate-dipped caramel pretzel bites are the ultimate sweet and salty indulgence. They’re easy to make, deliciously addictive, and guaranteed to disappear fast. Enjoy every bite!
