Planning a baby shower and need some cool appetizer ideas? Look no further! Here are 15 refreshing and easy-to-make cold appetizers that are perfect for celebrating the little one on the way. From bite-sized treats to classy platters, these recipes will keep your guests happy and satisfied while adding a fun touch to your gathering.
Affiliate Disclosure: "As an Amazon Associate I earn from qualifying purchases made from the images and links in this post. We are a participant in the Amazon Services LLC Associates Program, an affiliate advertising program designed to provide a means for us to earn fees by linking to Amazon.com and other affiliated sites."
Deviled Egg Salad Lettuce Cups
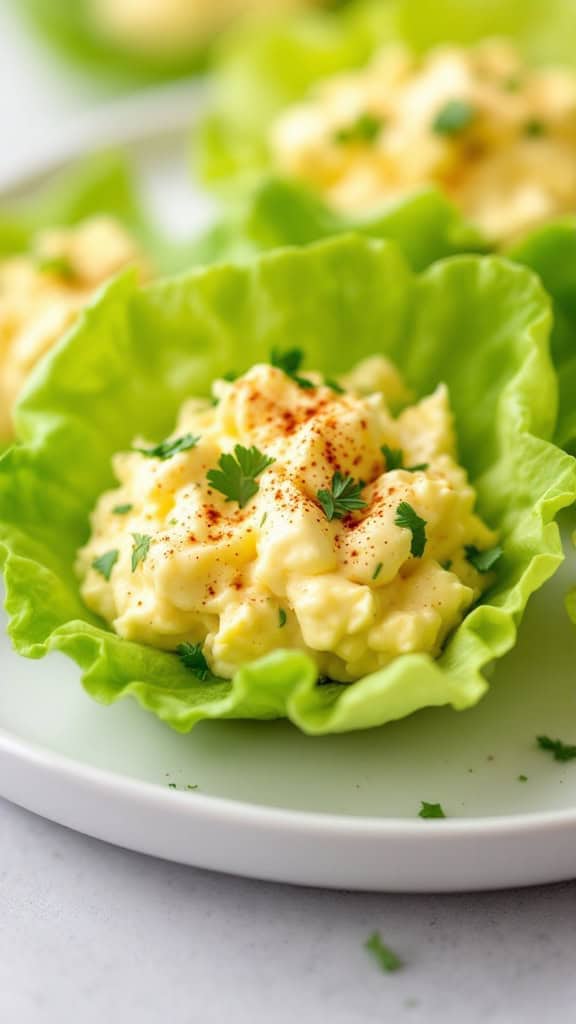
Deviled egg salad lettuce cups are a fresh twist on a classic favorite. These tasty bites are perfect for baby shower finger foods or any gathering. With their creamy filling and crisp lettuce, they make a great addition to your list of healthy cold appetizer ideas.
Ingredients Breakdown
Let’s make these tasty Deviled Egg Salad Lettuce Cups that are both delicious and under 250 calories per serving. Perfect for light snacking or as a standout appetizer!
For the Egg Salad:
- 6 large eggs (hard-boiled, peeled, and chopped)
- 2 tbsp Greek yogurt (adds creaminess without extra fat)
- 1 tbsp light mayonnaise (classic deviled egg taste)
- 1 tsp Dijon mustard (for a tangy kick)
- 1 tsp apple cider vinegar (brightens the flavor)
- 1/2 tsp paprika (smoky and flavorful)
- 1/4 tsp garlic powder (adds depth)
- Salt and pepper to taste (for seasoning)
For the Lettuce Cups:
- 1 head of butter or Bibb lettuce (leaves separated and rinsed)
- Fresh chives (finely chopped for garnish)
- Paprika (for extra sprinkle on top)
How to Make It:
- Prepare the Eggs: Hard-boil the eggs and cool them in an ice bath. Peel and chop them into small pieces.
- Mix the Salad: In a mixing bowl, combine Greek yogurt, light mayonnaise, Dijon mustard, apple cider vinegar, paprika, garlic powder, salt, and pepper. Stir until smooth and creamy.
- Add the Eggs: Gently fold in the chopped eggs until fully coated with the creamy mixture.
- Assemble the Cups: Lay out the lettuce leaves on a serving platter. Spoon a generous portion of the egg salad into each cup.
- Garnish: Sprinkle with fresh chives and a dash of paprika for a pop of color and flavor.
Why It’s Amazing:
- Fresh and Crisp: The lettuce cups provide a crunchy, refreshing base.
- Classic Flavors: Deviled egg-inspired filling with a healthier twist.
- Perfectly Light: Greek yogurt keeps it creamy but light.
These Deviled Egg Salad Lettuce Cups are easy to make, full of flavor, and perfect for any gathering. Enjoy the satisfying blend of creamy and crisp in every bite!
Mini Caprese Skewers
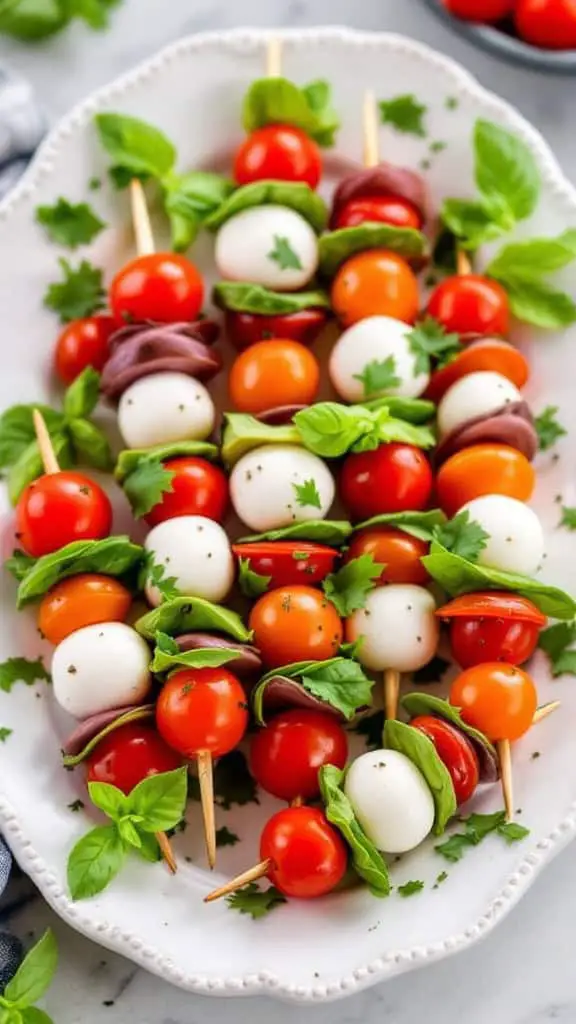
Mini caprese skewers are a fun and colorful addition to any gathering. These little bites combine fresh tomatoes, mozzarella, and basil for a delicious treat. They’re perfect as baby shower finger foods or healthy cold appetizer ideas that everyone will love!
Ingredients Breakdown
Let’s build these tasty little bites that are under 250 calories per serving. They’re fresh, flavorful, and incredibly easy to make!
For the Skewers:
- 1 pint cherry tomatoes (juicy and sweet)
- 8 oz mozzarella balls (preferably bocconcini or ciliegine for perfect bite-size portions)
- Fresh basil leaves (aromatic and bright)
- 2 tbsp extra virgin olive oil (for richness)
- 1 tbsp balsamic glaze (optional but adds a sweet tang)
- Salt and freshly ground black pepper (to taste)
- Wooden cocktail skewers (for assembling)
How to Make It:
- Prep the Ingredients: Rinse the cherry tomatoes and pat dry. Drain the mozzarella balls and gently pat dry with paper towels. Wash and dry the basil leaves.
- Assemble the Skewers:
- Take a skewer and slide on a cherry tomato.
- Fold a basil leaf in half and skewer it next.
- Add a mozzarella ball.
- Repeat the sequence until you fill the skewer, leaving a small handle at the end.
- Season and Dress: Place the assembled skewers on a serving platter. Drizzle with olive oil and balsamic glaze (if using). Sprinkle with salt and freshly ground black pepper.
- Serve and Enjoy: Serve immediately, or chill for up to 2 hours before serving.
Why They’re Amazing:
- Fresh and Simple: The classic Caprese combo is timeless and universally loved.
- Light and Healthy: Packed with protein, vitamins, and healthy fats.
- Easy to Make: Minimal prep and no cooking required.
These mini Caprese skewers are the ultimate fresh appetizer, perfect for baby showers, picnics, or any casual gathering. They’re as tasty as they are pretty!
Cold Vegetable Spring Rolls with Peanut Dipping Sauce
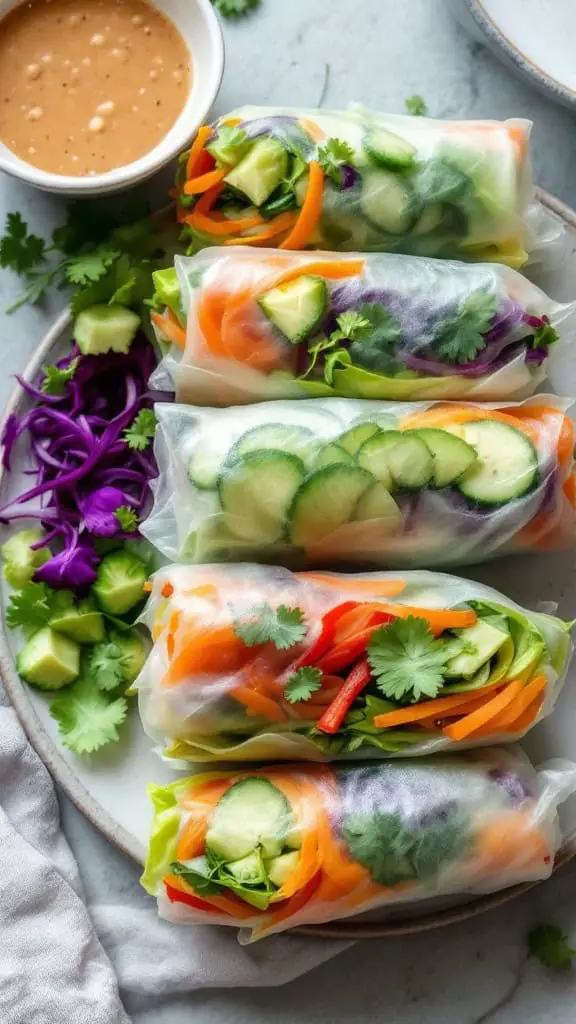
These cold vegetable spring rolls are fresh, crunchy, and super easy to make. Pair them with a tasty peanut dipping sauce for that perfect flavor boost. Perfect for baby shower finger foods or healthy cold appetizer ideas, they’ll impress your guests!
Ingredients Breakdown
Let’s dive into what makes these cold vegetable spring rolls so fresh, satisfying, and under 250 calories per serving. They’re light, crunchy, and paired with a savory peanut dipping sauce that’s downright addictive.
For the Spring Rolls:
- 8 rice paper wrappers (soft, chewy, and the perfect wrap)
- 1 cup shredded purple cabbage (crunch and color)
- 1 cup julienned carrots (sweet and crisp)
- 1 cup cucumber strips (cool and refreshing)
- 1/2 cup bell pepper strips (for a hint of sweetness)
- 1/2 cup fresh cilantro leaves (adds freshness)
- 1/4 cup fresh mint leaves (for a burst of flavor)
- 1/2 cup cooked vermicelli noodles (optional but filling)
For the Peanut Dipping Sauce:
- 1/4 cup natural peanut butter (creamy and rich)
- 2 tbsp low-sodium soy sauce (for depth of flavor)
- 1 tbsp rice vinegar (adds tanginess)
- 1 tbsp honey (balances the savory notes)
- 1 tbsp lime juice (for brightness)
- 1 tsp grated ginger (adds warmth)
- 1 clove garlic, minced (for a savory kick)
- 2-3 tbsp warm water (to thin the sauce to your liking)
How to Make It:
- Prep the Veggies: Julienne or thinly slice all the vegetables to ensure even filling.
- Soften the Wrappers: Dip each rice paper wrapper in warm water for 10-15 seconds until pliable but not too soft.
- Assemble the Rolls: Lay the softened wrapper on a clean surface. Place a small handful of each vegetable and herbs in the center. Add a bit of vermicelli noodles if using.
- Wrap It Up: Fold the sides over the filling, then roll tightly from the bottom up, like wrapping a burrito.
- Make the Peanut Sauce: Whisk together all sauce ingredients in a small bowl until smooth. Adjust water for desired consistency.
- Serve and Enjoy: Arrange the spring rolls on a platter, garnish with extra cilantro and purple cabbage, and serve with the peanut dipping sauce.
Why They’re Amazing:
- Fresh and Crunchy: A rainbow of fresh veggies keeps every bite crisp.
- Balanced Flavors: The peanut sauce brings savory, sweet, and tangy together.
- Healthy and Light: These rolls are low in calories but big on taste.
These cold vegetable spring rolls are the perfect guilt-free appetizer or light meal. They’re as fun to make as they are to eat!
Shrimp Cocktail Shooters
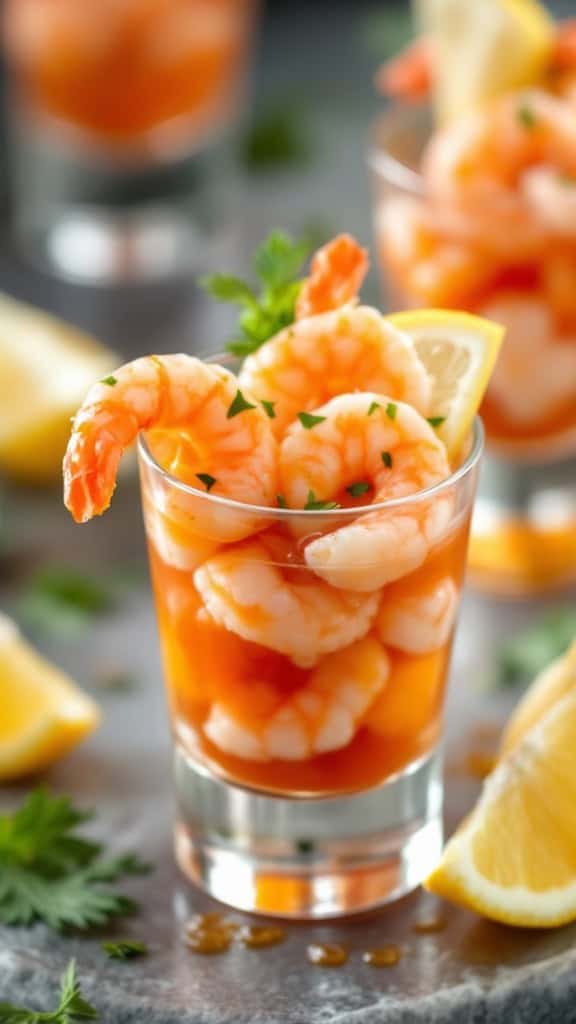
Shrimp cocktail shooters are a fun and tasty way to serve shrimp. These little glasses pack a punch with the sweet shrimp and zesty cocktail sauce. Perfect for baby shower finger foods, they pair nicely with other appetizers like mini avocado shrimp cups and deviled egg salad lettuce cups.
Ingredients Breakdown
Let’s dive into what makes these shrimp cocktail shooters irresistible yet light, staying under 250 calories per serving.
For the Shrimp:
- 1 lb large shrimp, peeled and deveined (fresh or frozen, thawed)
- 1 tbsp olive oil (for a light sauté or grill)
- 1 tsp Old Bay seasoning (for a flavor boost)
- 1/2 tsp garlic powder (adds depth of flavor)
- Salt and pepper to taste
For the Cocktail Sauce:
- 1/2 cup ketchup (the classic base)
- 2 tbsp prepared horseradish (for a zesty kick)
- 1 tbsp lemon juice (for brightness)
- 1 tsp Worcestershire sauce (for extra umami)
- A dash of hot sauce (optional, for heat)
For Garnish and Assembly:
- 1 lemon, sliced into thin wedges (for garnish)
- Fresh parsley, finely chopped (for a pop of green)
- Small shooter glasses (for serving)
How to Make It:
- Cook the Shrimp:
- Toss shrimp with olive oil, Old Bay seasoning, garlic powder, salt, and pepper.
- Grill or sauté over medium-high heat for 2-3 minutes per side until pink and fully cooked.
- Let the shrimp cool slightly.
- Make the Cocktail Sauce:
- In a small bowl, whisk together ketchup, horseradish, lemon juice, Worcestershire sauce, and hot sauce if using.
- Adjust seasoning to taste.
- Assemble the Shooters:
- Add 2-3 tablespoons of cocktail sauce to each shooter glass.
- Place one or two cooked shrimp on the rim of each glass.
- Garnish with a lemon wedge and a sprinkle of parsley.
Why They’re Amazing:
- Fresh and Flavorful: Juicy shrimp paired with tangy cocktail sauce hit all the right notes.
- Low-Calorie & Guilt-Free: Each serving is light yet satisfying.
- Party-Perfect Presentation: The shooters are as fun to look at as they are to eat.
These shrimp cocktail shooters aren’t just an appetizer—they’re a guaranteed hit at any celebration!
Cucumber Bites with Cream Cheese and Dill
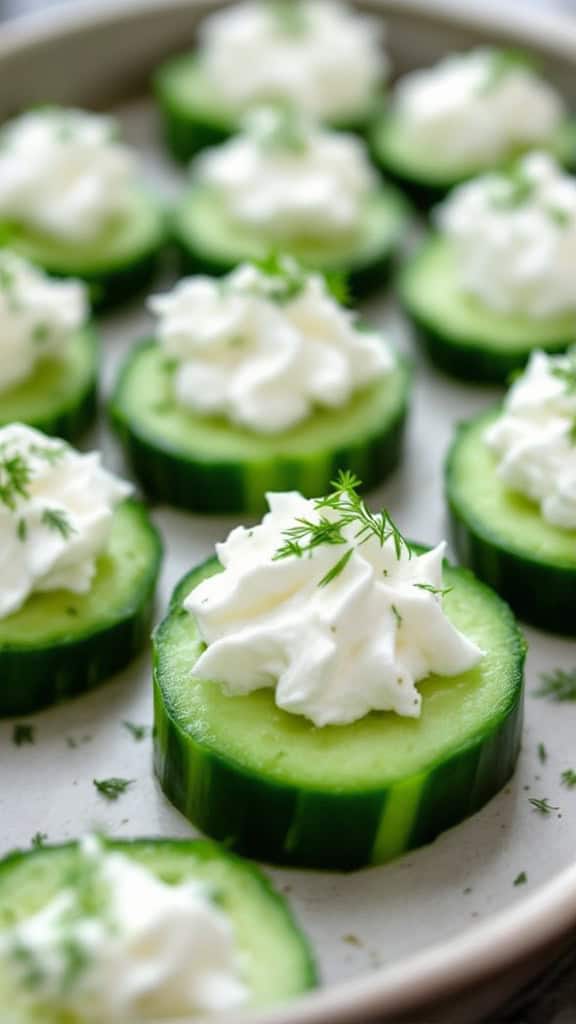
Cucumber bites topped with cream cheese and dill are a refreshing snack perfect for any gathering. These easy cold appetizer recipes add a light touch to your menu, making them ideal for baby showers or casual get-togethers. Pair them with fruit kabobs with yogurt dip or smoked salmon pinwheels for a delightful spread!
Ingredients Breakdown
Let’s dive into what makes these cucumber bites so refreshing and delicious. They’re light, flavorful, and under 250 calories per serving—perfect for guilt-free snacking.
For the Cucumber Bites:
- 2 large cucumbers (crisp and hydrating)
- 8 oz light cream cheese, softened (for a creamy base)
- 2 tbsp sour cream (adds tang and smoothness)
- 1 tsp lemon juice (for a zesty kick)
- 1 garlic clove, minced (a hint of savory flavor)
- 2 tbsp fresh dill, chopped (for herbal freshness)
- Salt and pepper to taste (balances the flavors)
For Garnish:
- Fresh dill sprigs (for extra flair)
- Smoked paprika or red pepper flakes (optional, for a touch of spice)
How to Make It:
- Prepare the Cucumbers: Wash the cucumbers thoroughly and slice them into 1/2-inch rounds. Pat dry with paper towels to prevent sogginess.
- Make the Cream Cheese Topping: In a medium bowl, beat the softened cream cheese, sour cream, lemon juice, minced garlic, chopped dill, salt, and pepper until smooth and well combined.
- Assemble the Bites: Using a piping bag or a spoon, dollop a small amount of the cream cheese mixture onto each cucumber slice.
- Garnish and Serve: Sprinkle additional dill and a pinch of smoked paprika or red pepper flakes for a pop of color and spice.
Why They’re Amazing:
- Refreshing and Crisp: The cucumbers provide a satisfying crunch.
- Creamy and Flavorful: The cream cheese mixture is smooth with a tangy, herby twist.
- Quick and Easy: Minimal prep makes these perfect for last-minute gatherings.
Serve these cucumber bites at your next party, and watch them disappear! They’re a simple, elegant way to add a refreshing, healthy option to your appetizer spread.
Smoked Salmon and Cream Cheese Pinwheels
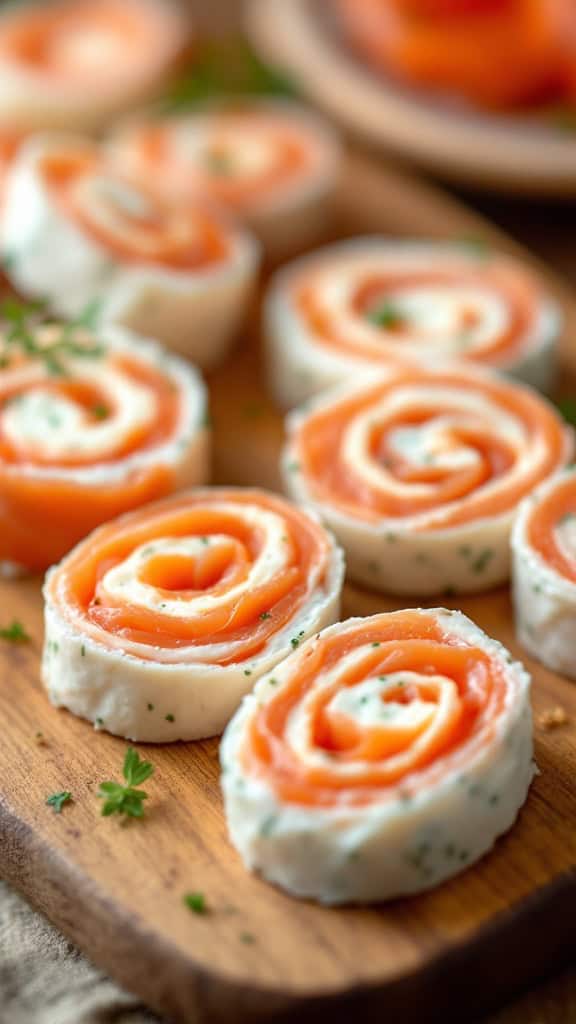
Smoked salmon and cream cheese pinwheels are a fun and tasty choice for any gathering. They’re simple to make and perfect for serving alongside other easy cold appetizer recipes like mini Greek salad cups or shrimp cocktail shooters. These pinwheels make a delightful addition to your table and are sure to impress your guests!
Ingredients Breakdown
Let’s dive into what makes these smoked salmon and cream cheese pinwheels so irresistible. They’re light, savory, and full of fresh flavor, all while being an elegant addition to any party spread.
For the Pinwheels:
- 4 large whole-wheat tortillas (soft and sturdy for easy rolling)
- 8 oz light cream cheese, softened (smooth and spreadable)
- 6 oz smoked salmon slices (rich, smoky flavor)
- 1/4 cup capers, drained (adds a tangy bite)
- 1/2 red onion, thinly sliced (for a sharp, fresh crunch)
- 1/2 cup fresh spinach leaves (adds a touch of green and extra nutrients)
- 2 tbsp fresh dill, chopped (for a burst of herbal freshness)
- 1 tbsp lemon juice (brightens the flavors)
- Salt and pepper to taste
How to Make It:
- Prepare the Spread: In a small bowl, mix cream cheese, lemon juice, dill, salt, and pepper until smooth and creamy.
- Assemble the Pinwheels:
- Lay a tortilla flat on a clean surface.
- Spread a thin, even layer of the cream cheese mixture over the tortilla.
- Arrange smoked salmon slices evenly on top.
- Sprinkle with capers and red onion slices.
- Add spinach leaves, making sure not to overfill.
- Roll It Up: Tightly roll the tortilla from one end to the other, keeping the filling secure.
- Chill and Slice: Wrap the rolled tortilla in plastic wrap and refrigerate for at least 1 hour to set. Once chilled, use a sharp knife to slice into 1-inch pinwheels.
- Serve and Enjoy: Arrange the pinwheels on a platter and garnish with extra dill if desired. Serve immediately or keep refrigerated until ready to serve.
Why They’re Amazing:
- Fresh and Flavorful: The balance of smoky salmon, creamy cheese, and zesty lemon is divine.
- Perfect for Entertaining: Easy to prepare ahead and serve cold.
- Wholesome Ingredients: Using whole-wheat tortillas and light cream cheese keeps them light yet satisfying.
These pinwheels are an effortless way to impress your guests with minimal prep. They’re the perfect blend of creamy, smoky, and fresh—guaranteed to disappear fast at any gathering!
Chicken Salad Stuffed Endive Leaves

Chicken salad stuffed endive leaves are a fun and healthy way to enjoy a classic dish. These little bites are perfect as make-ahead cold appetizers for any gathering. Pair them with cucumber bites with cream cheese or mini avocado shrimp cups for a delightful spread!
Ingredients Breakdown
Let’s dive into what makes these chicken salad stuffed endive leaves both tasty and guilt-free. They’re light, fresh, and under 250 calories per serving—perfect for snacking or entertaining.
For the Chicken Salad:
- 2 cups cooked, shredded chicken breast (protein-packed base)
- 1/2 cup plain Greek yogurt (for a creamy, healthy binder)
- 1/4 cup light mayonnaise (for added creaminess)
- 1 tsp Dijon mustard (a tangy kick)
- 1/2 tsp garlic powder (adds depth)
- 1/2 tsp onion powder (for extra flavor)
- Salt and pepper to taste (season as you like)
- 1/4 cup diced celery (for crunch)
- 1/4 cup diced red grapes (a hint of sweetness)
- 2 tbsp chopped fresh parsley (for freshness)
- 1 tbsp lemon juice (to brighten the flavors)
For Assembly:
- 12-16 endive leaves, washed and separated (nature’s perfect edible cups)
- Optional garnish: chopped chives, paprika, or extra parsley (for presentation)
How to Make It:
- Prepare the Chicken Salad: In a large bowl, combine the Greek yogurt, light mayonnaise, Dijon mustard, garlic powder, onion powder, lemon juice, salt, and pepper. Stir until smooth.
- Mix the Filling: Add the shredded chicken, celery, grapes, and parsley. Fold everything together gently to keep the texture light.
- Assemble the Bites: Spoon the chicken salad into each endive leaf, filling them generously but not overloading.
- Garnish and Serve: Sprinkle with chopped chives, paprika, or extra parsley for a polished look. Arrange on a platter and serve chilled.
Why You’ll Love It:
- Low-Calorie & Satisfying: Greek yogurt keeps it light while maintaining a creamy texture.
- Refreshing & Crunchy: Endive leaves provide a crisp contrast to the savory filling.
- Make-Ahead Friendly: Assemble in advance and refrigerate until ready to serve.
These chicken salad stuffed endive leaves aren’t just pretty—they’re flavorful, wholesome, and perfect for impressing guests while keeping things light and healthy!
Tomato and Mozzarella Bruschetta
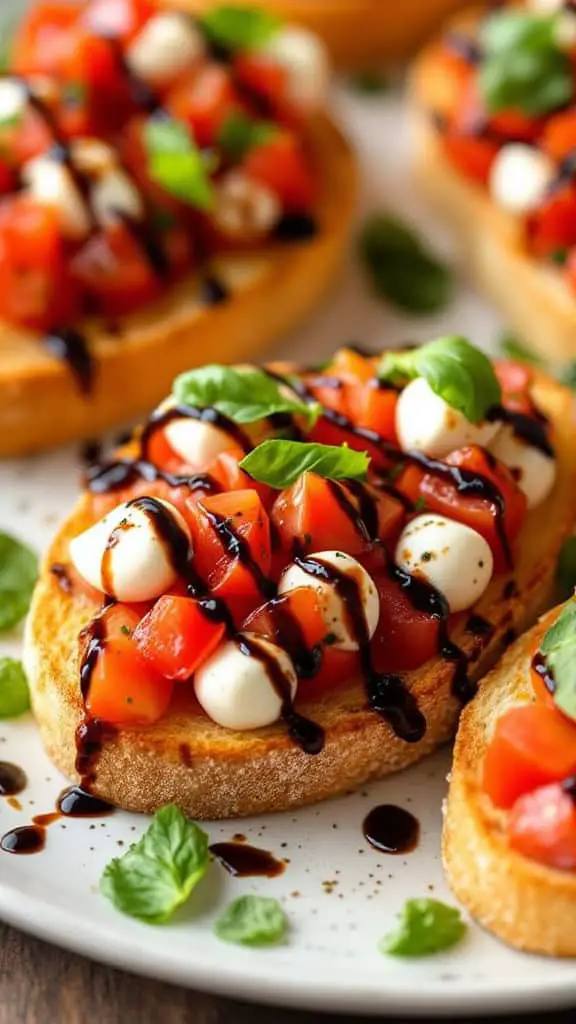
Tomato and mozzarella bruschetta is a crowd-pleaser that’s perfect for any gathering. These tasty bites are fresh, colorful, and easy to make ahead of time. Pair them with other baby shower finger foods like cucumber bites with cream cheese or mini caprese skewers for a delightful spread.
Ingredients Breakdown
Let’s dive into what makes this bruschetta so irresistible. Every ingredient works together for a fresh and flavorful bite, all while keeping it under 250 calories per serving.
For the Bruschetta Topping:
- 2 cups cherry tomatoes, diced (juicy and sweet)
- 8 oz fresh mozzarella, diced (creamy and mild)
- 1/4 cup fresh basil leaves, chopped (aromatic and peppery)
- 1 tbsp extra virgin olive oil (adds richness)
- 1 tbsp balsamic glaze (for a touch of tangy sweetness)
- Salt and pepper to taste (enhances all the flavors)
For the Bread:
- 1 baguette, sliced into 1/2-inch rounds (crispy and sturdy)
- 2 tbsp olive oil (for a golden, toasty finish)
- 1 clove garlic, peeled and halved (for a hint of garlicky goodness)
How to Make It:
- Prepare the Topping:
- In a large bowl, combine diced cherry tomatoes, mozzarella, and fresh basil.
- Drizzle with olive oil and balsamic glaze.
- Season with salt and pepper. Toss gently to combine.
- Toast the Bread:
- Preheat the oven to 400°F (200°C).
- Arrange baguette slices on a baking sheet. Brush both sides with olive oil.
- Bake for 8-10 minutes until golden and crispy.
- Assemble the Bruschetta:
- While the bread is still warm, rub each slice with the cut side of the garlic for extra flavor.
- Spoon the tomato and mozzarella mixture generously onto each slice.
- Drizzle more balsamic glaze if desired.
- Serve and Enjoy:
- Arrange on a platter and garnish with extra basil leaves for a fresh look.
Why It’s Amazing:
- Fresh and Flavorful: Juicy tomatoes, creamy mozzarella, and fragrant basil create a mouthwatering combo.
- Perfect Balance: The balsamic glaze ties it all together with just the right amount of tang.
- Light and Satisfying: A guilt-free appetizer that’s perfect for parties or a casual gathering.
These tomato and mozzarella bruschetta bites are the ultimate appetizer—easy, elegant, and packed with Mediterranean-inspired goodness!
Mini Greek Salad Cups
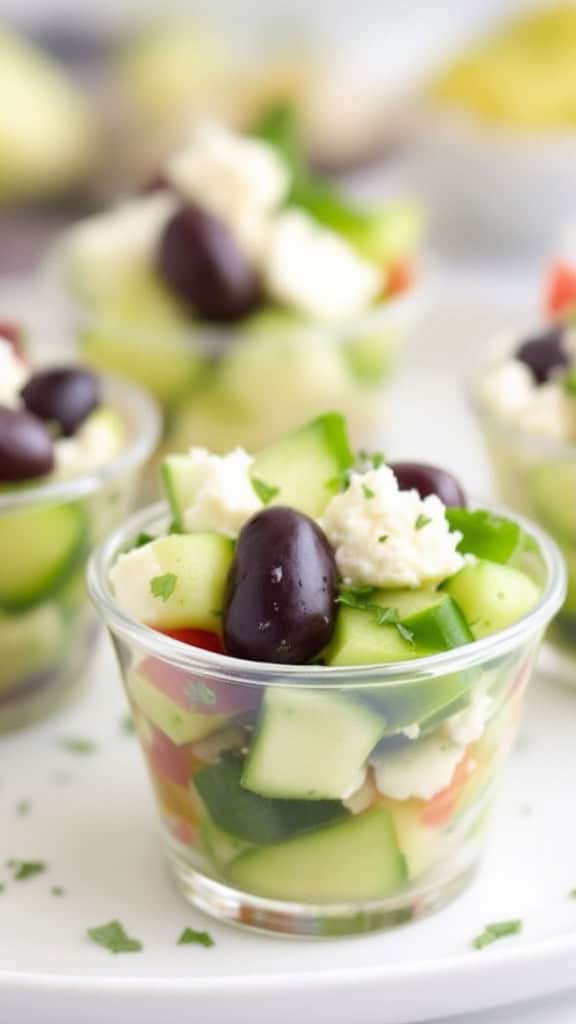
Mini Greek salad cups are a delightful way to enjoy a fresh and healthy snack. These easy cold appetizer recipes are perfect for parties or casual get-togethers. Each cup is packed with cucumber, tomatoes, olives, and feta cheese, making them a colorful and tasty choice!
Ingredients Breakdown
Let’s dive into what makes these Mini Greek Salad Cups so refreshing and flavorful. Each ingredient brings its unique taste, creating a perfect balance of tang, crunch, and creaminess—all while keeping it under 250 calories per serving.
For the Salad Cups:
- 1 large cucumber, diced (fresh crunch)
- 1 cup cherry tomatoes, halved (juicy sweetness)
- 1/2 cup Kalamata olives, sliced (salty and savory)
- 1/2 cup feta cheese, crumbled (creamy and tangy)
- 1/4 cup red onion, finely diced (adds a zesty bite)
- 1/4 cup bell peppers, diced (extra crunch and color)
For the Dressing:
- 3 tbsp extra virgin olive oil (heart-healthy richness)
- 2 tbsp red wine vinegar (for a tangy kick)
- 1 tsp dried oregano (classic Greek flavor)
- 1/2 tsp garlic powder (mild savory depth)
- Salt and pepper to taste (balances the flavors)
For Assembly:
- Clear plastic cups or small serving bowls (for easy presentation)
- Fresh parsley, chopped (optional garnish)
How to Make It:
- Prep the Ingredients: Dice the cucumber, tomatoes, olives, red onion, bell peppers, and feta cheese. Keep everything bite-sized for easy scooping.
- Make the Dressing: In a small bowl, whisk together olive oil, red wine vinegar, oregano, garlic powder, salt, and pepper until well combined.
- Assemble the Cups: In each clear cup, layer cucumber, tomatoes, olives, red onion, bell peppers, and feta cheese. Try to create even, colorful layers.
- Add the Dressing: Drizzle a bit of the dressing over each cup, ensuring every layer gets some flavor.
- Garnish and Serve: Sprinkle fresh parsley on top for extra color and freshness. Serve immediately or chill for up to 2 hours before serving.
Why It’s Amazing:
- Portable and Mess-Free: Perfect for grab-and-go snacking.
- Fresh and Healthy: Packed with veggies and heart-healthy fats.
- Crowd-Pleaser: A hit at parties, picnics, or even as a light lunch.
These Mini Greek Salad Cups are not just easy—they’re a fun and flavorful way to enjoy a classic Greek salad in a portable, party-ready form!
Fruit Kabobs with Honey Yogurt Dip
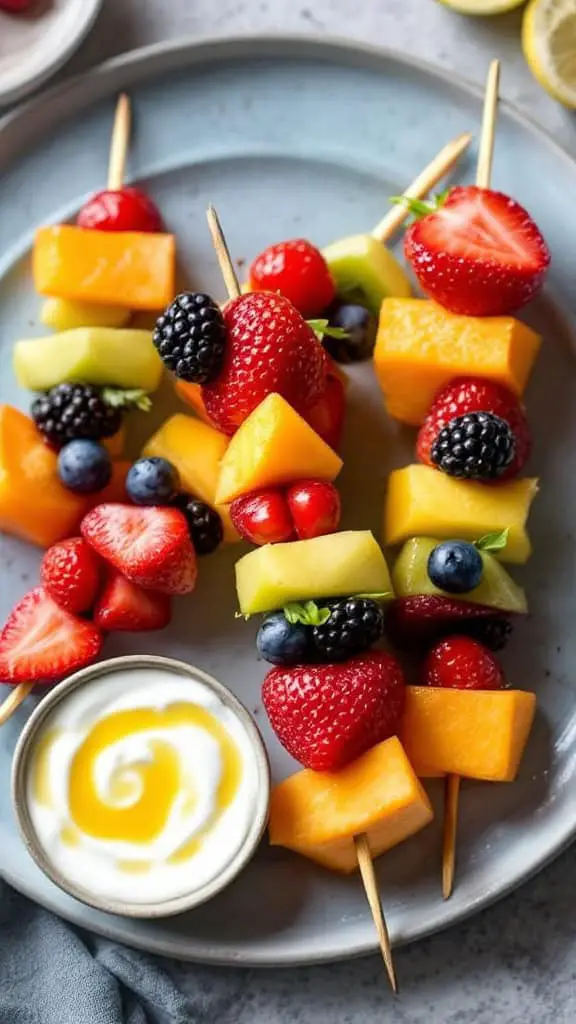
Fruit kabobs with yogurt dip are a fun and colorful treat. These tasty skewers are perfect for baby showers or any gathering where you want easy cold appetizer recipes. Simply mix your favorite fruits and serve them with a creamy honey yogurt dip for a refreshing snack!
Ingredients Breakdown
Let’s build these fun fruit kabobs with a creamy honey yogurt dip. They’re light, refreshing, and perfect for any gathering!
For the Fruit Kabobs:
- 1 cup strawberries (hulled and halved)
- 1 cup blueberries (fresh and juicy)
- 1 cup cantaloupe (cubed)
- 1 cup honeydew melon (cubed)
- 1 cup pineapple (cubed)
- 1 cup grapes (red or green, seedless)
- Wooden skewers (soak in water for 10 minutes to prevent burning if grilling)
For the Honey Yogurt Dip:
- 1 cup low-fat Greek yogurt (rich and creamy)
- 2 tbsp honey (for natural sweetness)
- 1 tsp vanilla extract (enhances the flavor)
- Zest of 1 lemon (optional, for a citrus twist)
How to Make It:
- Prep the Fruit: Wash and dry all the fruit. Cut into similar-sized pieces for even skewering.
- Assemble the Kabobs: Thread fruit pieces onto skewers in a fun, alternating pattern. Mix up colors for visual appeal.
- Make the Dip: In a small bowl, whisk together Greek yogurt, honey, vanilla extract, and lemon zest until smooth.
- Serve and Enjoy: Arrange kabobs on a platter with the dip in the center. Serve chilled for the best experience.
Why It’s Amazing:
- Naturally Sweet: Fresh fruit and honey provide just the right amount of sweetness.
- Wholesome and Light: Packed with vitamins, fiber, and protein.
- Quick and Easy: Minimal prep for maximum flavor and presentation.
This refreshing treat is not just delicious—it’s a fun, healthy snack that’s always a hit at any event!
Cold Tortilla Roll-Ups with Turkey and Cheese

These cold tortilla roll-ups are a fun and easy option for any gathering. Packed with turkey and cheese, they make perfect baby shower finger foods or easy cold appetizer recipes. Serve them alongside fruit kabobs with yogurt dip for a colorful and tasty spread!
Ingredients Breakdown
Let’s talk about what makes these cold tortilla roll-ups so irresistible. They’re simple, tasty, and under 250 calories per serving—a perfect snack that’s light yet satisfying.
For the Roll-Ups:
- 4 large whole-wheat tortillas (soft and nutritious)
- 8 oz deli-sliced turkey breast (lean protein)
- 4 oz reduced-fat cream cheese (smooth and creamy base)
- 1/2 cup shredded low-fat cheddar cheese (adds cheesy goodness)
- 1/4 cup Greek yogurt (for extra creaminess and a tangy kick)
- 1 tsp Dijon mustard (adds a mild, zesty bite)
- 1/2 tsp garlic powder (for extra flavor)
- 1/4 tsp salt (balances the flavors)
- Fresh spinach leaves (adds crunch and nutrition)
For Serving (Optional):
- Assorted fresh veggies like carrot sticks, bell pepper slices, and cucumber rounds (for a colorful side)
- Fruit kabobs with yogurt dip (for a sweet pairing)
How to Make It:
- Prepare the Filling: In a mixing bowl, blend cream cheese, Greek yogurt, Dijon mustard, garlic powder, and salt until smooth.
- Assemble the Roll-Ups:
- Lay a tortilla flat on a clean surface.
- Spread a thin layer of the cream cheese mixture evenly over the tortilla.
- Place turkey slices over the spread, followed by shredded cheddar and fresh spinach leaves.
- Roll and Slice:
- Tightly roll up the tortilla, pressing gently to keep everything in place.
- Slice into 1-inch pieces using a sharp knife.
- Chill and Serve: Arrange the roll-ups on a serving platter. Chill for at least 30 minutes before serving to allow the flavors to meld.
Why They’re Awesome:
- Easy to Make: No cooking required—just assemble, roll, and slice!
- Nutritious and Balanced: Packed with protein, fiber, and healthy fats.
- Party-Ready: Perfect as an appetizer or snack for any gathering.
These cold tortilla roll-ups are the perfect blend of savory and creamy, making them a guaranteed hit at any event!
Hummus and Veggie Platter Cones
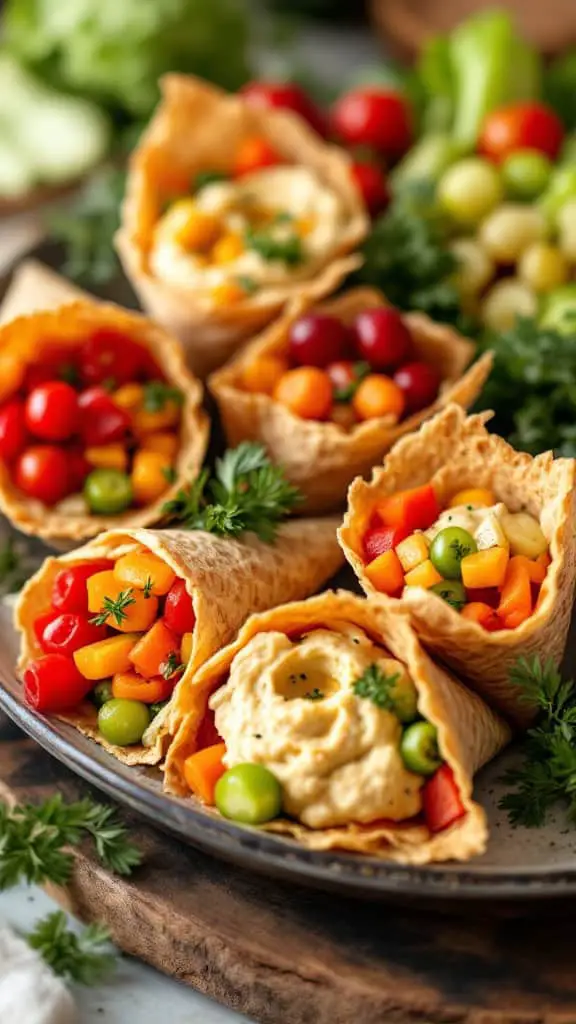
Hummus veggie platter cones are a fun and tasty way to serve healthy snacks. These little cones are filled with fresh veggies and creamy hummus, making them perfect for any gathering. They fit right in with other baby shower finger foods, like mini Greek salad cups and cold tortilla roll-ups!
Ingredients Breakdown
These hummus and veggie platter cones are as nutritious as they are fun. Each cone is loaded with fresh veggies and creamy hummus, making every bite satisfying yet light—under 250 calories per serving!
For the Cones:
- 8 small whole wheat tortillas (for a wholesome base)
- 1 tbsp olive oil (to crisp the cones)
- 1 tsp garlic powder (for added flavor)
- 1 tsp smoked paprika (optional, for a smoky touch)
- Pinch of salt (to enhance taste)
For the Hummus Filling:
- 1 cup classic hummus (store-bought or homemade)
- 1 tbsp lemon juice (for extra brightness)
- 1/2 tsp ground cumin (for warmth and depth)
- 1 tbsp olive oil (for creaminess)
For the Veggie Mix:
- 1/2 cup cherry tomatoes, halved (for a burst of sweetness)
- 1/2 cup cucumber sticks (cool and refreshing)
- 1/2 cup bell pepper strips (colorful and crunchy)
- 1/2 cup carrot sticks (naturally sweet and crisp)
- 1/4 cup red onion slices (for a bit of zing)
- Fresh parsley or cilantro (optional garnish)
How to Make It:
- Prepare the Cones:
- Preheat the oven to 375°F (190°C).
- Brush tortillas with olive oil, then sprinkle with garlic powder, paprika, and a pinch of salt.
- Roll tortillas into cone shapes and secure with toothpicks.
- Bake on a lined baking sheet for 8-10 minutes or until golden and crisp. Let cool and remove toothpicks.
- Make the Hummus Mixture:
- In a bowl, mix hummus, lemon juice, cumin, and olive oil until smooth and well-blended.
- Assemble the Cones:
- Fill each tortilla cone halfway with the hummus mixture.
- Carefully layer in cucumber sticks, carrot sticks, bell pepper strips, cherry tomatoes, and red onion slices.
- Serve:
- Arrange the filled cones upright on a serving platter.
- Garnish with fresh parsley or cilantro for added freshness.
Why You’ll Love These:
- Healthy and Delicious: Fresh veggies and creamy hummus make for a flavorful, guilt-free snack.
- Easy to Make: Minimal prep with maximum presentation.
- Perfect for Parties: They’re portable, colorful, and fun to eat!
These hummus and veggie platter cones are guaranteed to be a hit at your next gathering—fresh, flavorful, and irresistibly fun!
Cold Spinach and Artichoke Tartlets

These spinach artichoke tartlets are a hit for any gathering! They’re super easy to make ahead and perfect for serving at baby showers or casual parties. Pair them with mini caprese skewers or cucumber bites with cream cheese for a delightful spread.
Ingredients Breakdown
Let’s dive into what makes these tartlets so irresistibly good while keeping them under 250 calories per serving.
For the Filling:
- 1 cup fresh spinach, finely chopped (for that fresh, earthy flavor)
- 1/2 cup canned artichoke hearts, chopped (adds a savory, tangy punch)
- 1/2 cup reduced-fat cream cheese (for creaminess without the extra calories)
- 1/4 cup Greek yogurt (adds tang and keeps it light)
- 1/4 cup grated Parmesan cheese (for that delicious cheesy depth)
- 1 garlic clove, minced (a hint of savory goodness)
- 1/4 tsp salt (balances the flavors)
- 1/4 tsp black pepper (for a mild kick)
For the Tart Shells:
- 12 mini phyllo shells (store-bought for ease and perfect crispness)
For Garnish:
- Fresh parsley, chopped (for a pop of color and freshness)
- A sprinkle of paprika (optional, for added flair)
How to Make It:
- Mix the Filling: In a medium bowl, combine cream cheese, Greek yogurt, Parmesan, garlic, salt, and pepper. Stir until smooth.
- Add the Veggies: Fold in the spinach and artichokes until well incorporated.
- Assemble the Tartlets: Spoon the spinach-artichoke mixture into the mini phyllo shells, filling them generously.
- Chill and Serve: Place the filled tartlets on a serving tray and refrigerate for at least 1 hour to allow the flavors to meld.
- Garnish: Before serving, sprinkle chopped parsley and a touch of paprika on top for extra color and flavor.
Why They’re Amazing:
- Quick and Easy: Minimal prep with maximum flavor.
- Healthy Yet Indulgent: Greek yogurt and reduced-fat cream cheese keep it creamy without being heavy.
- Crowd-Pleaser: These bite-sized treats are perfect for any event!
Serve these cold spinach and artichoke tartlets at your next gathering and watch them disappear in no time!
Caprese Salad Stuffed Cherry Tomatoes
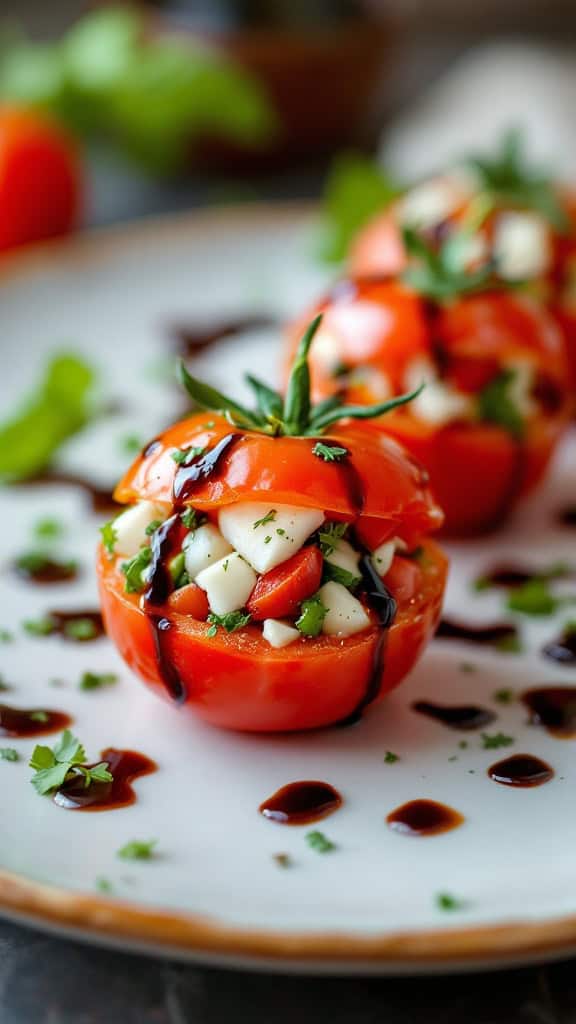
Caprese stuffed cherry tomatoes are a fun and fresh twist on a classic salad. These little bites are perfect for any gathering and are a great addition to your list of healthy cold appetizer ideas. With their vibrant colors and burst of flavor, they’ll definitely impress your guests!
Ingredients Breakdown
Let’s dive into what makes these Caprese stuffed cherry tomatoes so irresistible. They’re fresh, flavorful, and under 250 calories per serving—perfect for snacking or entertaining.
For the Tomatoes:
- 1 pint cherry tomatoes (ripe and firm, the perfect little cups)
For the Filling:
- 1 cup fresh mozzarella pearls (soft and creamy bites)
- 1/2 cup fresh basil leaves, finely chopped (herby freshness)
- 2 tbsp extra virgin olive oil (smooth and silky)
- 1 tbsp balsamic vinegar (for that tangy punch)
- Salt and pepper to taste (enhances all the flavors)
For the Garnish:
- Balsamic glaze (drizzle for a sweet, tangy finish)
- Fresh basil leaves (for a pop of green)
How to Make It:
- Prepare the Tomatoes: Slice the tops off the cherry tomatoes and gently scoop out the insides using a small spoon or melon baller. Be careful not to pierce the bottoms.
- Mix the Filling: In a bowl, combine mozzarella pearls, chopped basil, olive oil, balsamic vinegar, salt, and pepper. Toss gently to coat everything evenly.
- Stuff the Tomatoes: Use a small spoon to fill each tomato with the mozzarella mixture, packing it gently but not overfilling.
- Plate and Garnish: Arrange the stuffed tomatoes on a serving platter. Drizzle balsamic glaze over the top and sprinkle with fresh basil leaves for extra flair.
Why They’re Amazing:
- Fresh and Light: Cherry tomatoes are juicy and sweet.
- Perfect Flavor Combo: Mozzarella, basil, and balsamic are a classic Italian trio.
- Bite-Sized and Elegant: They’re beautiful, easy to eat, and a guaranteed hit.
These Caprese stuffed cherry tomatoes are a must-try for your next gathering. They’re fresh, flavorful, and oh-so-simple to make!
Mini Avocado and Shrimp Cups
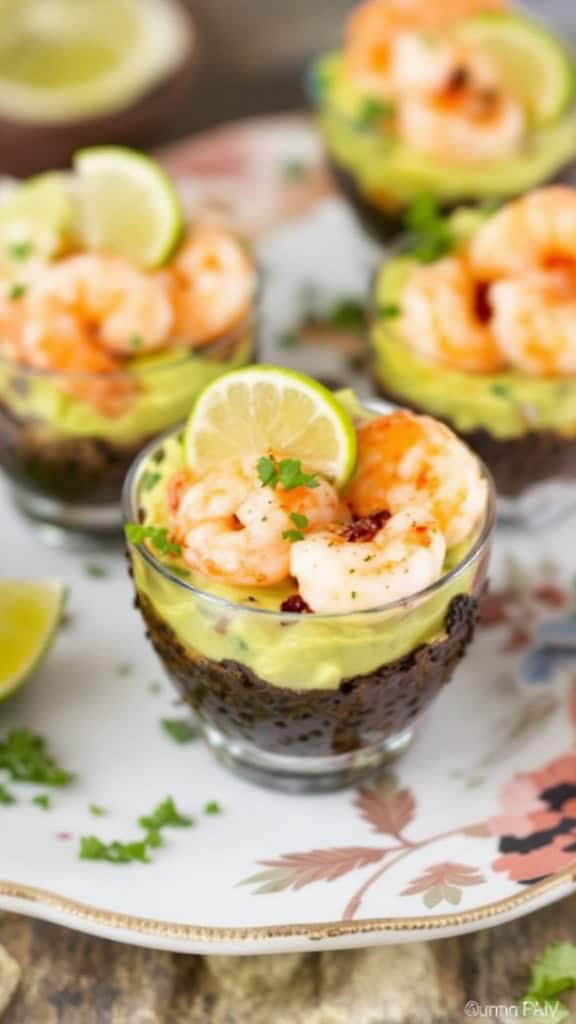
These mini avocado and shrimp cups are a fun and healthy twist on classic shrimp cocktail shooters. The creamy avocado pairs perfectly with the tender shrimp, making them a hit at any gathering. Plus, they’re an easy make-ahead cold appetizer that everyone will love!
Ingredients Breakdown
Let’s dive into what makes these mini avocado and shrimp cups so irresistible. They’re light, refreshing, and packed with flavor—all under 250 calories per serving!
For the Avocado Base:
- 2 large ripe avocados (creamy and smooth)
- 1 tbsp lime juice (keeps the avocado fresh and adds zing)
- 1/2 tsp garlic powder (for a hint of savoriness)
- Salt and pepper to taste (balances the flavors)
For the Shrimp Topping:
- 12 large shrimp, cooked and peeled (juicy and tender)
- 1 tsp olive oil (for a light coating)
- 1/2 tsp smoked paprika (adds depth and mild heat)
- 1/4 tsp cayenne pepper (optional for extra kick)
- Pinch of salt (enhances the shrimp’s natural sweetness)
For Garnish:
- Fresh cilantro leaves (adds a burst of freshness)
- Lime slices or wedges (for an extra citrusy finish)
How to Make It:
- Prepare the Avocado Mixture:
- Scoop out the avocados and mash them in a bowl until smooth.
- Add lime juice, garlic powder, salt, and pepper. Mix well and adjust seasoning as needed.
- Season the Shrimp:
- Toss the cooked shrimp with olive oil, smoked paprika, cayenne pepper (if using), and salt.
- Assemble the Cups:
- Spoon the avocado mixture into mini serving cups or small glasses.
- Top each cup with a seasoned shrimp.
- Garnish and Serve:
- Add fresh cilantro leaves and a slice of lime on each cup for a pop of color and flavor.
Why They’re a Hit:
- Creamy Meets Juicy: The avocado and shrimp combo creates a perfect texture balance.
- Fresh and Zesty: Lime juice and cilantro bring a fresh, citrusy kick.
- Low-Calorie Delight: Enjoy a light yet satisfying appetizer packed with healthy fats and protein.
These mini avocado and shrimp cups are the ultimate crowd-pleasers—fresh, flavorful, and so easy to make!


