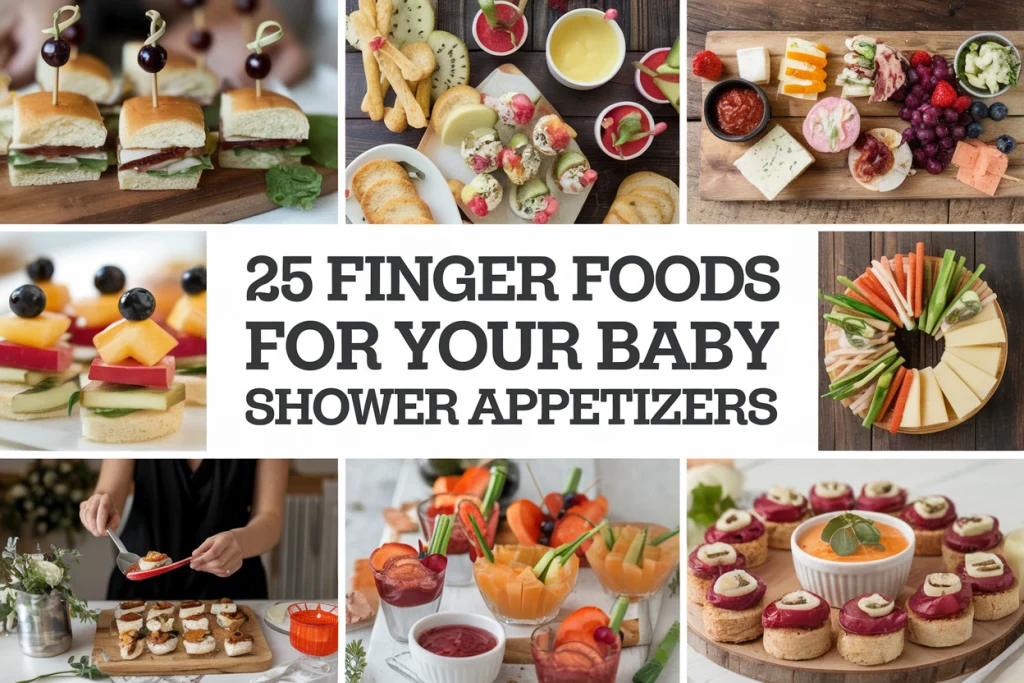
Planning a baby shower for a little girl? You’ll want some tasty appetizers to keep the guests happy and munching throughout the celebration. Here are 15 creative ideas that are not only simple to prepare but also delightful enough to impress everyone—perfect for adding a bit of fun to the festivities!
Affiliate Disclosure: "As an Amazon Associate I earn from qualifying purchases made from the images and links in this post. We are a participant in the Amazon Services LLC Associates Program, an affiliate advertising program designed to provide a means for us to earn fees by linking to Amazon.com and other affiliated sites."
Smoked Salmon and Cream Cheese Pinwheels
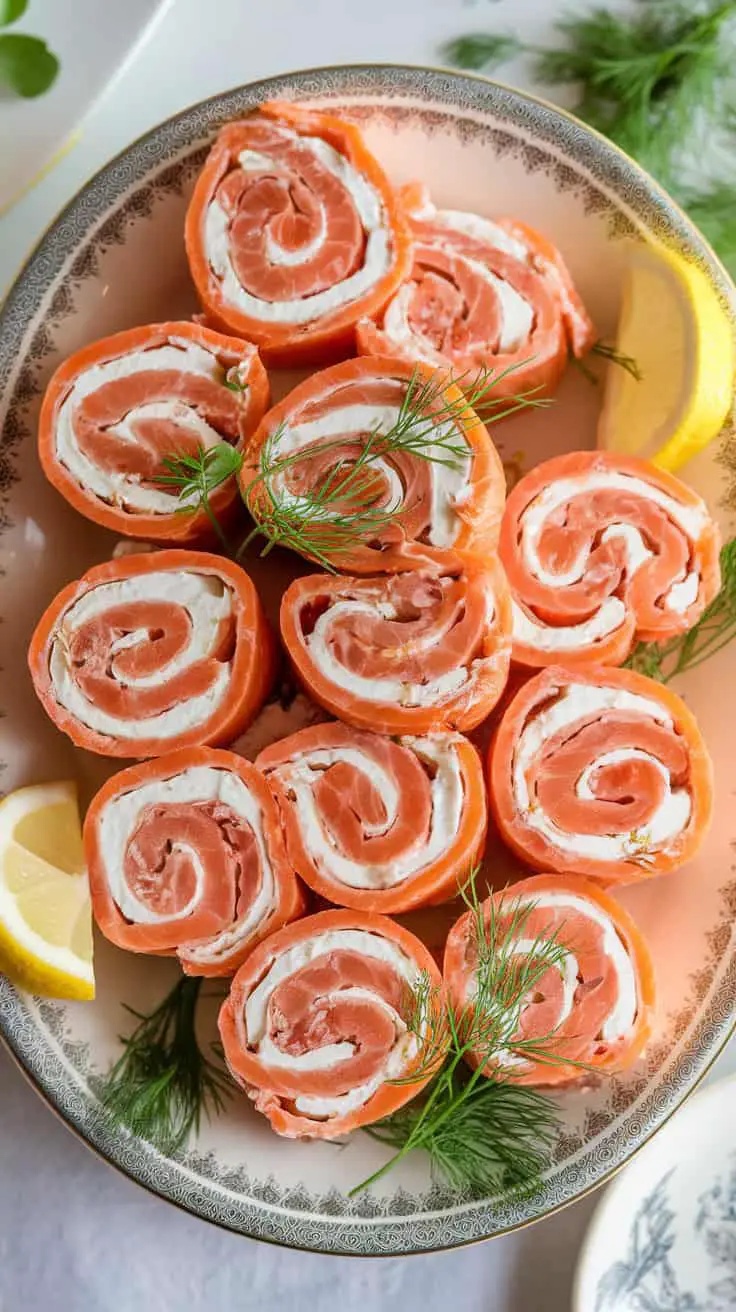
These smoked salmon and cream cheese pinwheels are a real treat. They look stunning and taste amazing. The combination of rich salmon and creamy cheese creates a delightful bite.
To make these pinwheels, you simply need smoked salmon, cream cheese, fresh herbs like dill, and a squeeze of lemon. Start by spreading the cream cheese evenly over the salmon slices. Then, roll them up tightly and slice into pieces. It’s that easy!
These pinwheels are perfect for gatherings or as a light snack. They’re colorful and inviting, making them a great addition to any platter. Serve them with some lemon wedges and extra herbs for a fresh touch.
Ingredients Breakdown
Let’s dive into what makes these smoked salmon and cream cheese pinwheels irresistibly delicious. They’re light, flavorful, and perfect for any occasion—all while keeping things under 250 calories per serving.
For the Pinwheels:
- 6 oz smoked salmon (rich, savory base)
- 4 oz low-fat cream cheese (smooth and creamy)
- 1 tbsp fresh dill, finely chopped (for a burst of freshness)
- 1 tbsp chives, finely chopped (adds mild onion flavor)
- 1 tsp lemon juice (brightens the flavors)
- 1/4 tsp black pepper (a touch of spice)
- 4 whole wheat tortillas or low-carb wraps (light and nutritious)
For Garnish:
- Extra dill sprigs (for visual appeal)
- Lemon wedges (optional, for added zest)
How to Make It:
- Prepare the Filling: In a bowl, mix the cream cheese, dill, chives, lemon juice, and black pepper until smooth and well combined.
- Assemble the Pinwheels:
- Lay a tortilla flat on a clean surface.
- Spread a thin, even layer of the cream cheese mixture over the entire surface.
- Arrange smoked salmon slices evenly on top.
- Roll and Slice:
- Gently but tightly roll the tortilla from one edge to the other.
- Use a sharp knife to slice the rolled tortilla into 1-inch pinwheels.
- Serve and Enjoy:
- Arrange the pinwheels on a platter.
- Garnish with extra dill sprigs and lemon wedges for a fresh finish.
Why They’re Amazing:
- Balanced Flavors: The smoky salmon and creamy cheese create a perfect harmony.
- Fresh Herbs: Dill and chives add a pop of freshness that lifts the entire dish.
- Quick & Easy: Simple ingredients and minimal prep time make these great for last-minute gatherings.
These pinwheels are more than just a snack—they’re a sophisticated yet simple treat that’s sure to impress your guests or brighten up your lunch break!
Raspberry Brie Phyllo Cups

These Raspberry Brie Phyllo Cups are a delightful treat perfect for any gathering. The image showcases a beautiful platter filled with golden, flaky phyllo pastry cups. Each cup is generously filled with creamy brie and topped with vibrant raspberries.
The combination of the sweet raspberries and rich brie creates a tasty contrast. The fresh mint leaves add a nice pop of color and hint of freshness, making them visually appealing and inviting.
To make these cups, you’ll need phyllo dough, brie cheese, fresh raspberries, and mint for garnish. Start by preparing the phyllo cups, then fill them with warm brie. Top with the juicy raspberries and a sprig of mint for that extra touch.
These bites are not only easy to prepare but also pack a punch of flavor. They’re perfect for parties, brunches, or just a cozy night in with friends. Enjoy the blend of textures and tastes in every bite!
Ingredients Breakdown
Let’s dive into what makes these Raspberry Brie Phyllo Cups a hit at any gathering. They’re simple, elegant, and under 250 calories per serving—perfect for indulging without guilt.
For the Phyllo Cups:
- 12 sheets of phyllo dough (thawed, for that signature flaky texture)
- 2 tbsp unsalted butter (melted, to keep the layers crispy)
For the Filling:
- 8 oz brie cheese (creamy and rich)
- 1/2 cup raspberry preserves (for a touch of sweetness)
- Fresh raspberries (for garnish and a burst of juicy flavor)
For Garnish:
- Fresh mint leaves (optional, but they add a refreshing touch)
- A sprinkle of powdered sugar (for a light dusting of sweetness)
How to Make It:
- Prepare the Phyllo Cups:
- Preheat oven to 375°F (190°C).
- Cut phyllo dough into 3-inch squares.
- Layer three squares together, brushing melted butter between each layer.
- Press layered squares into a mini muffin tin, creating little cups.
- Bake for 8-10 minutes until golden brown. Let cool.
- Fill the Cups:
- Cut the brie into small cubes.
- Place a piece of brie in each phyllo cup.
- Add a dollop of raspberry preserves on top.
- Bake Again:
- Return to the oven for 5-7 minutes, or until the brie is melted and bubbly.
- Garnish and Serve:
- Top each cup with a fresh raspberry.
- Add a sprig of mint for color and a sprinkle of powdered sugar if desired.
Why They’re Amazing:
- Crunchy and Creamy: The crispy phyllo dough paired with melty brie is a match made in heaven.
- Sweet and Savory: Raspberry preserves bring sweetness, perfectly complementing the savory cheese.
- Elegant and Easy: They look fancy but are simple enough for even last-minute hosting.
Serve these delightful Raspberry Brie Phyllo Cups at your next event and watch them disappear in no time!
Pink Deviled Eggs with Beet-Dyed Whites
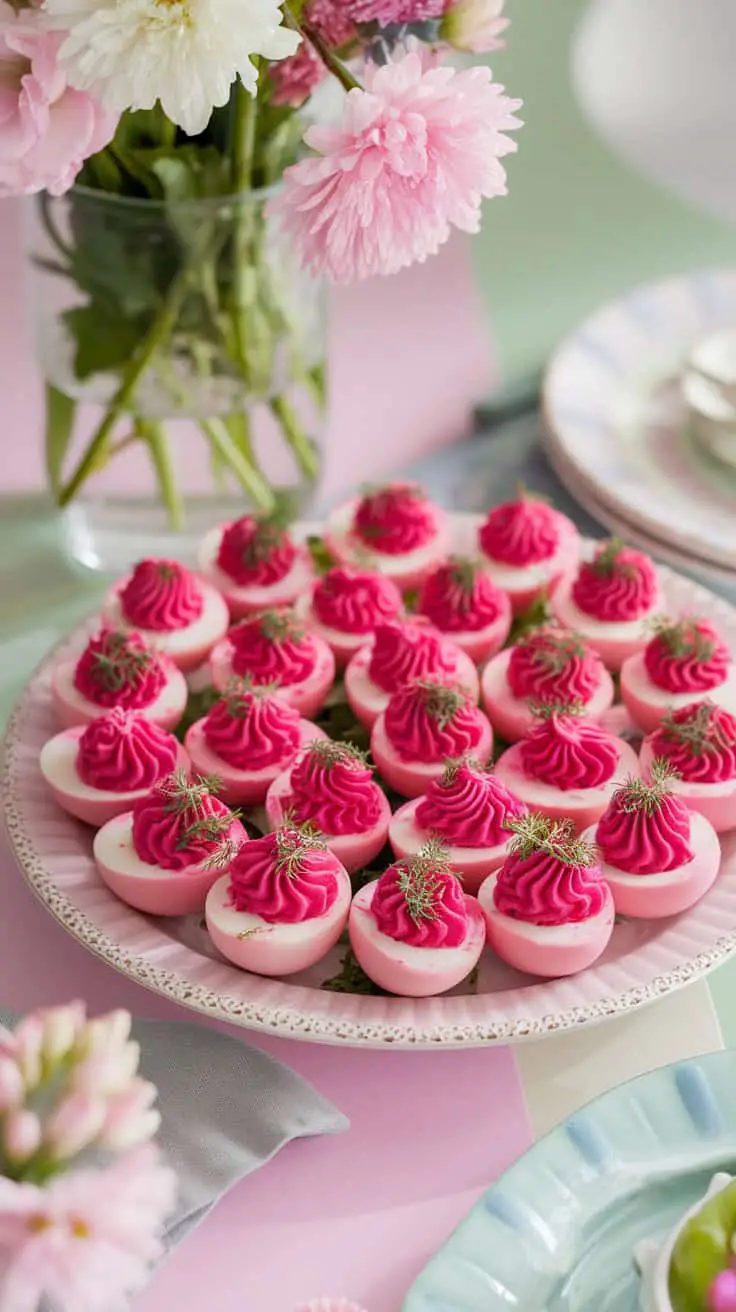
These pink deviled eggs are a delightful twist on a classic favorite. The vibrant beet-dyed whites give them a fun and festive look, making them perfect for any gathering. The bright color grabs attention and adds a cheerful vibe to your table.
Each egg is filled with a creamy, flavorful yolk mixture, topped with a fluffy pink filling that is both delicious and easy to make. A hint of dill on top adds a lovely touch and enhances the presentation. Whether it’s a party, picnic, or brunch, these eggs are sure to impress your guests.
To make these treats, start with hard-boiled eggs. Once peeled, soak the whites in a beet juice mixture to achieve that stunning pink color. Prepare the yolk filling using mayonnaise, mustard, and spices, then pipe it back into the whites. Garnish with fresh herbs for an extra pop of flavor.
This creative dish is not just visually appealing; it’s a tasty treat everyone will love. Enjoy these pink deviled eggs as a fun appetizer or a side dish during your next meal!
Ingredients Breakdown
Let’s dive into what makes these pink deviled eggs so irresistible. They’re fun, flavorful, and perfect for any occasion.
For the Beet-Dyed Egg Whites:
- 6 large eggs (hard-boiled and peeled)
- 1 cup beet juice (from canned beets or freshly juiced)
- 1 cup water (for diluting the beet juice if needed)
- 1 tbsp white vinegar (helps set the color)
For the Deviled Egg Filling:
- 6 hard-boiled egg yolks (from the peeled eggs)
- 3 tbsp mayonnaise (for creaminess)
- 1 tsp Dijon mustard (adds a tangy kick)
- 1 tsp white vinegar (for extra brightness)
- 1/4 tsp salt (balances flavors)
- 1/8 tsp ground black pepper (for depth)
For Garnish:
- Fresh dill sprigs (for an herbaceous touch)
- Smoked paprika (optional, for a pop of color and smoky flavor)
How to Make It:
- Dye the Egg Whites:
- In a bowl, combine beet juice, water, and white vinegar.
- Carefully place the peeled egg whites into the mixture.
- Let them soak for 1-2 hours, depending on your desired pink intensity.
- Remove and pat dry with paper towels.
- Prepare the Filling:
- In a mixing bowl, mash the egg yolks until smooth.
- Stir in mayonnaise, Dijon mustard, white vinegar, salt, and pepper.
- Mix until creamy and fluffy.
- Assemble the Eggs:
- Spoon or pipe the yolk mixture into the beet-dyed egg whites.
- Use a piping bag with a star tip for a fancy look.
- Garnish and Serve:
- Top each egg with fresh dill sprigs.
- Sprinkle a dash of smoked paprika if using.
- Arrange on a serving platter and enjoy!
Why You’ll Love Them:
- Visual Appeal: The beet-dyed whites are stunning and festive.
- Balanced Flavor: Tangy, creamy filling with a hint of mustard and herbs.
- Simple Yet Elegant: Easy to make but fancy enough for special gatherings.
These pink deviled eggs aren’t just pretty—they’re a flavorful, crowd-pleasing dish that’s sure to be the talk of the table!
Watermelon and Feta Skewers with Mint
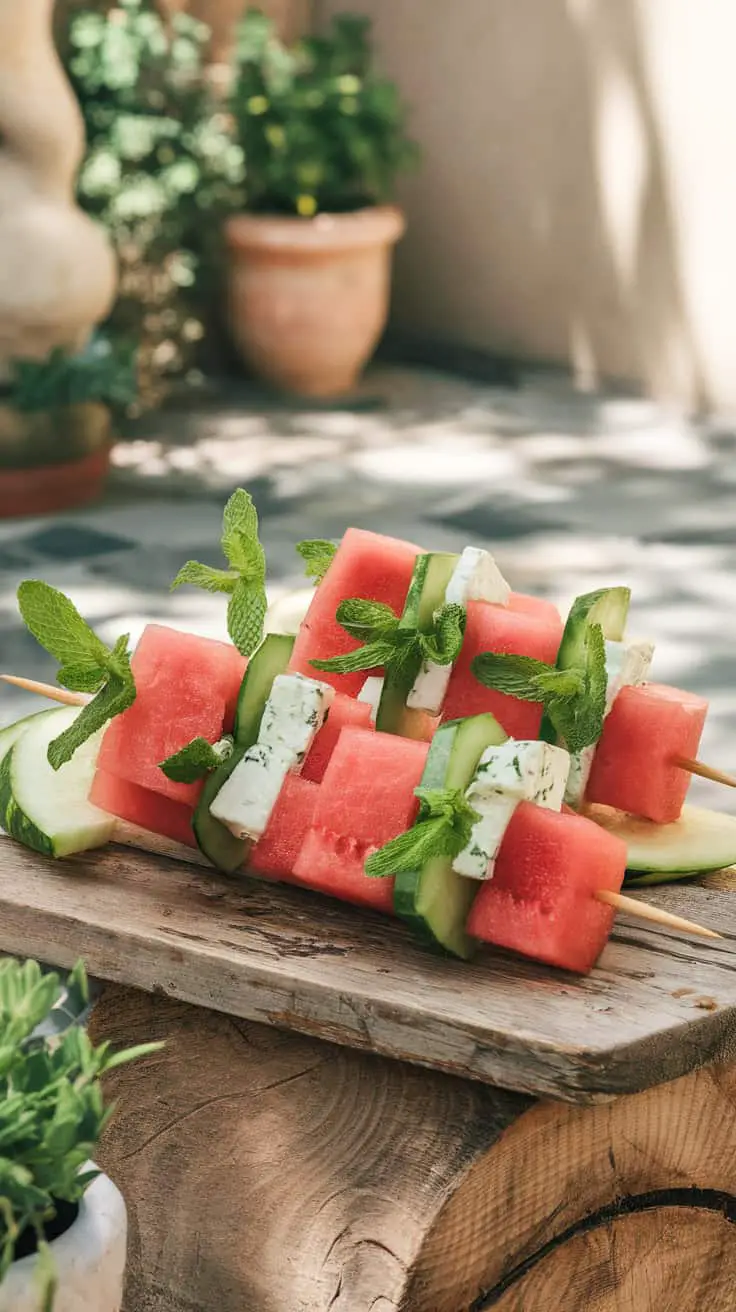
These watermelon and feta skewers are a refreshing treat for any occasion. The bright colors of the juicy watermelon, creamy feta, and vibrant mint make a lovely presentation. Not only do they look great, but they also pack a punch of flavor.
To make these delightful skewers, you’ll need ripe watermelon, feta cheese, fresh mint leaves, and cucumber for an extra crunch. Start by cutting the watermelon into cubes and the feta into similar-sized pieces. Slice the cucumber for added texture. Thread them onto skewers, alternating between the watermelon, feta, and cucumber.
Finish off each skewer with a sprig of mint for that extra pop of freshness. These skewers are perfect for summer gatherings, picnics, or as a light appetizer. They are easy to prepare and sure to impress your guests!
Ingredients Breakdown
Let’s talk about what makes these watermelon and feta skewers a perfect balance of sweet, salty, and refreshing flavors. Each bite is a delightful mix of textures, all under 250 calories per serving.
For the Skewers:
- 2 cups ripe watermelon (cut into 1-inch cubes for juicy sweetness)
- 1 cup feta cheese (cut into similar-sized cubes for a salty, creamy contrast)
- 1 large cucumber (sliced into thick half-moons for a crisp bite)
- Fresh mint leaves (whole, for an aromatic burst)
- Wooden skewers (for easy serving)
For the Optional Drizzle:
- 1 tbsp balsamic glaze (adds a tangy, sweet touch)
- 1 tbsp extra virgin olive oil (for a subtle richness)
How to Make It:
- Prepare the Ingredients:
- Cut the watermelon and feta into evenly sized cubes.
- Slice the cucumber into half-moon shapes.
- Rinse and pat dry the mint leaves.
- Assemble the Skewers:
- Thread the ingredients onto wooden skewers, alternating between watermelon, feta, cucumber, and mint leaves. Repeat the pattern until the skewer is full.
- Add a Finishing Touch:
- Arrange the skewers on a serving platter.
- Drizzle with balsamic glaze and olive oil, if using, for extra flavor.
Why They’re Amazing:
- Refreshing and Light: Watermelon and cucumber keep things hydrating and crisp.
- Balanced Flavors: The salty feta perfectly complements the sweet watermelon.
- Easy and Elegant: A simple recipe with a stunning presentation.
These skewers are a hit for any summer gathering, light lunch, or as a refreshing snack. They’re proof that simple ingredients can create an unforgettable dish!
Strawberry and Cream Cheese Puff Pastry Bites
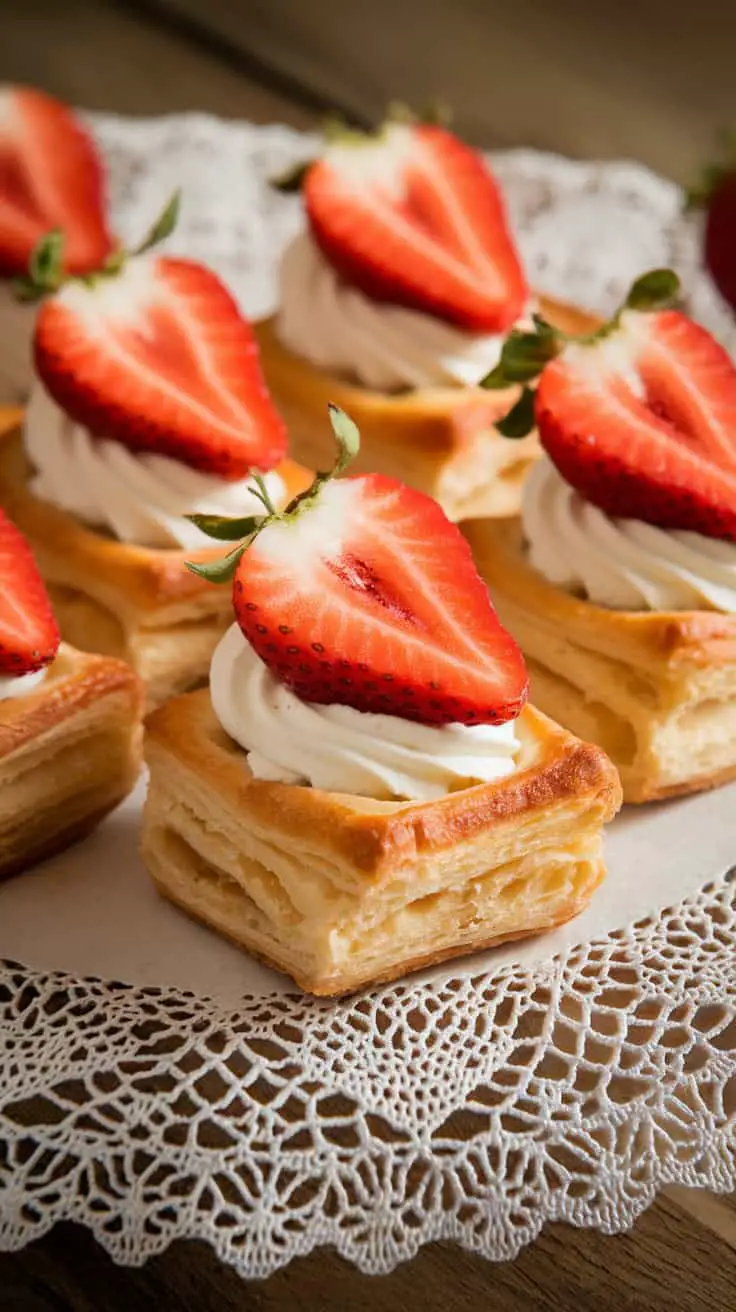
These strawberry and cream cheese puff pastry bites are a delightful treat that looks as good as it tastes. Each bite features a flaky pastry base topped with a swirl of creamy frosting and fresh strawberry slices. The vibrant red strawberries not only add color but also a refreshing sweetness that perfectly complements the rich cream cheese.
If you’re looking to make these at home, you’ll need some puff pastry, cream cheese, powdered sugar, and fresh strawberries. Start by baking the puff pastry until it’s golden and flaky. While it cools, mix cream cheese with powdered sugar for a sweet filling. Pipe the cream cheese onto the cooled pastry and finish with a fresh strawberry on top. It’s an easy and fun dessert that’s perfect for gatherings or simply to enjoy at home.
These pastry bites are not just tasty; they’re also a feast for the eyes. Arranged on a lovely lace doily, they create an inviting display that makes any occasion special. Whether you’re serving them at a party or enjoying them with a cup of coffee, these puff pastry bites are sure to impress!
Ingredients Breakdown
Let’s dive into what makes these strawberry and cream cheese puff pastry bites irresistibly good. They’re easy to assemble, perfectly sweet, and under 250 calories per serving.
For the Puff Pastry Base:
- 1 sheet of puff pastry (store-bought or homemade, thawed if frozen)
- 1 egg (for egg wash, gives a golden finish)
- 1 tbsp water (to mix with the egg wash)
For the Cream Cheese Filling:
- 4 oz reduced-fat cream cheese (softened for easy mixing)
- 2 tbsp powdered sugar (for just the right sweetness)
- 1 tsp vanilla extract (for extra depth of flavor)
For the Topping:
- 8-10 fresh strawberries (thinly sliced)
- 1 tbsp honey or light fruit glaze (optional for added shine)
- Fresh mint leaves (optional for garnish)
How to Make It:
- Prepare the Puff Pastry:
- Preheat the oven to 400°F (200°C).
- Roll out the puff pastry sheet on a lightly floured surface.
- Cut into 12 equal squares and place them on a baking sheet lined with parchment paper.
- Whisk the egg with water and brush over the tops for a shiny, golden finish.
- Bake the Pastry:
- Bake for 12-15 minutes or until puffed and golden brown.
- Remove from the oven and let cool completely on a wire rack.
- Make the Cream Cheese Filling:
- Beat the softened cream cheese, powdered sugar, and vanilla extract until smooth and creamy.
- Assemble the Bites:
- Gently press down the centers of each puff pastry square to create a small well.
- Pipe or spoon the cream cheese mixture into the wells.
- Top each with strawberry slices, layering them for a pretty presentation.
- Add Finishing Touches:
- Drizzle lightly with honey or fruit glaze for shine (optional).
- Garnish with fresh mint leaves for a pop of color.
Why You’ll Love Them:
- Flaky and Buttery: The puff pastry is golden, crisp, and oh-so-flaky.
- Sweet and Creamy: The cream cheese filling is smooth and perfectly sweetened.
- Fresh and Fruity: The strawberries add a refreshing burst of natural sweetness.
These strawberry and cream cheese puff pastry bites aren’t just treats; they’re tiny works of art that brighten any occasion. Enjoy them at brunch, tea parties, or as a delightful after-dinner dessert!
Mini Caprese Salad Cups with Pink Balsamic Drizzle
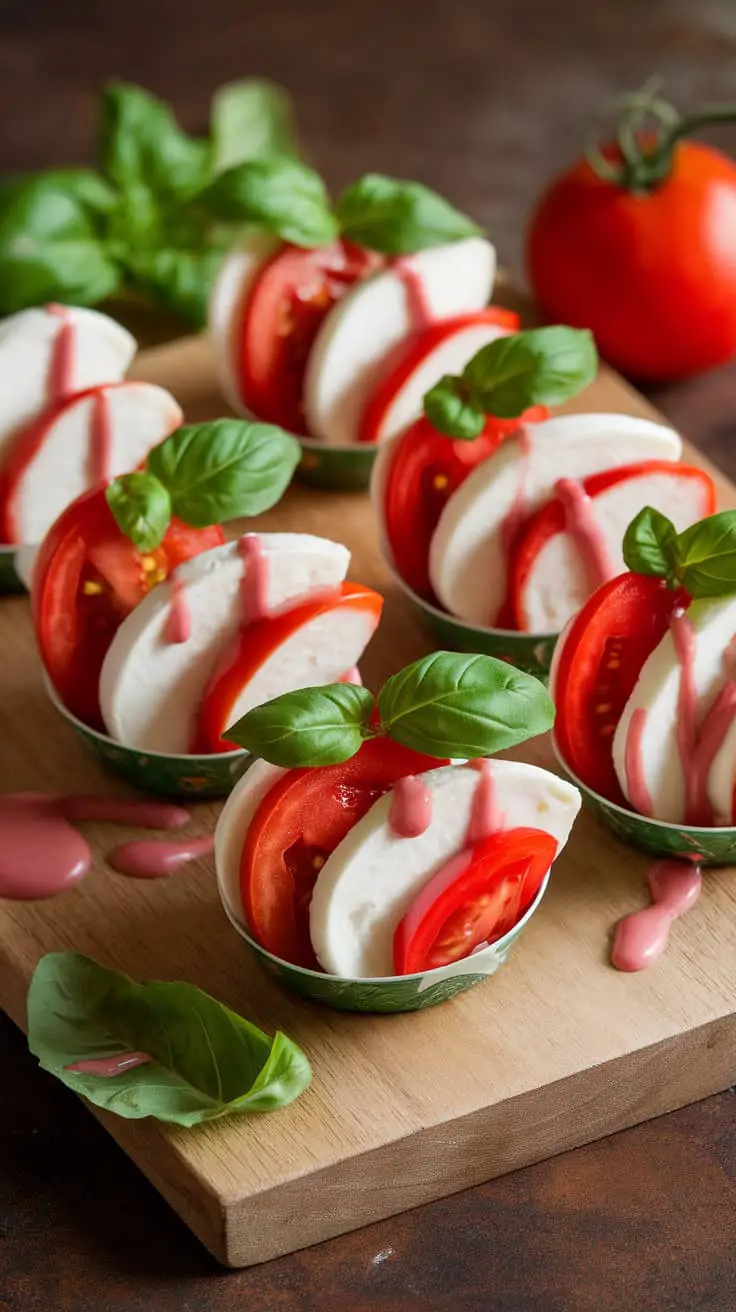
These Mini Caprese Salad Cups are a delightful twist on a classic dish. Perfectly arranged, each cup features fresh slices of mozzarella, ripe tomatoes, and fragrant basil. The vibrant colors make them a feast for the eyes, bringing a touch of freshness to any table.
The star of this dish is the pink balsamic drizzle. It adds a sweet and tangy flavor that complements the creamy mozzarella and juicy tomatoes beautifully. The drizzle not only enhances the taste but also elevates the presentation, making these cups look as good as they taste.
To make these tasty treats, you’ll need fresh mozzarella, ripe tomatoes, fresh basil, and a simple pink balsamic reduction. Layer the ingredients in small cups for easy serving. This recipe is perfect for parties or as a light appetizer.
Ingredients Breakdown
Let’s dive into what makes these Mini Caprese Salad Cups so irresistible. They’re light, flavorful, and perfect for any gathering while staying under 250 calories per serving.
For the Salad Cups:
- 1 cup fresh mozzarella pearls (soft, creamy texture)
- 1 cup cherry tomatoes, halved (sweet and juicy)
- 1/2 cup fresh basil leaves (fragrant and peppery)
- 12 mini cups or shot glasses (for serving)
For the Pink Balsamic Drizzle:
- 1/2 cup white balsamic vinegar (light and tangy base)
- 2 tbsp pomegranate juice (for natural sweetness and pink hue)
- 1 tbsp honey (balances acidity)
- Pinch of salt (enhances flavors)
How to Make It:
- Prepare the Drizzle: In a small saucepan over medium heat, combine white balsamic vinegar, pomegranate juice, honey, and salt. Simmer for 8-10 minutes until reduced by half and syrupy. Let it cool.
- Assemble the Cups:
- Place a few mozzarella pearls at the bottom of each mini cup.
- Add cherry tomato halves.
- Tuck in fresh basil leaves for added color and aroma.
- Drizzle and Serve:
- Drizzle the cooled pink balsamic reduction over each cup.
- Serve immediately or chill for up to 2 hours before serving.
Why They’re Amazing:
- Fresh and Flavorful: The combination of creamy mozzarella, juicy tomatoes, and fragrant basil creates a burst of freshness.
- Visually Stunning: The pink balsamic drizzle adds a pop of color that’s both elegant and inviting.
- Simple Yet Sophisticated: These cups are easy to make but look gourmet, perfect for impressing guests.
These Mini Caprese Salad Cups aren’t just pretty—they’re a delicious, healthy, and fun way to enjoy a timeless favorite in a new, elegant style!
Rose-Shaped Ham and Cheese Puff Pastries
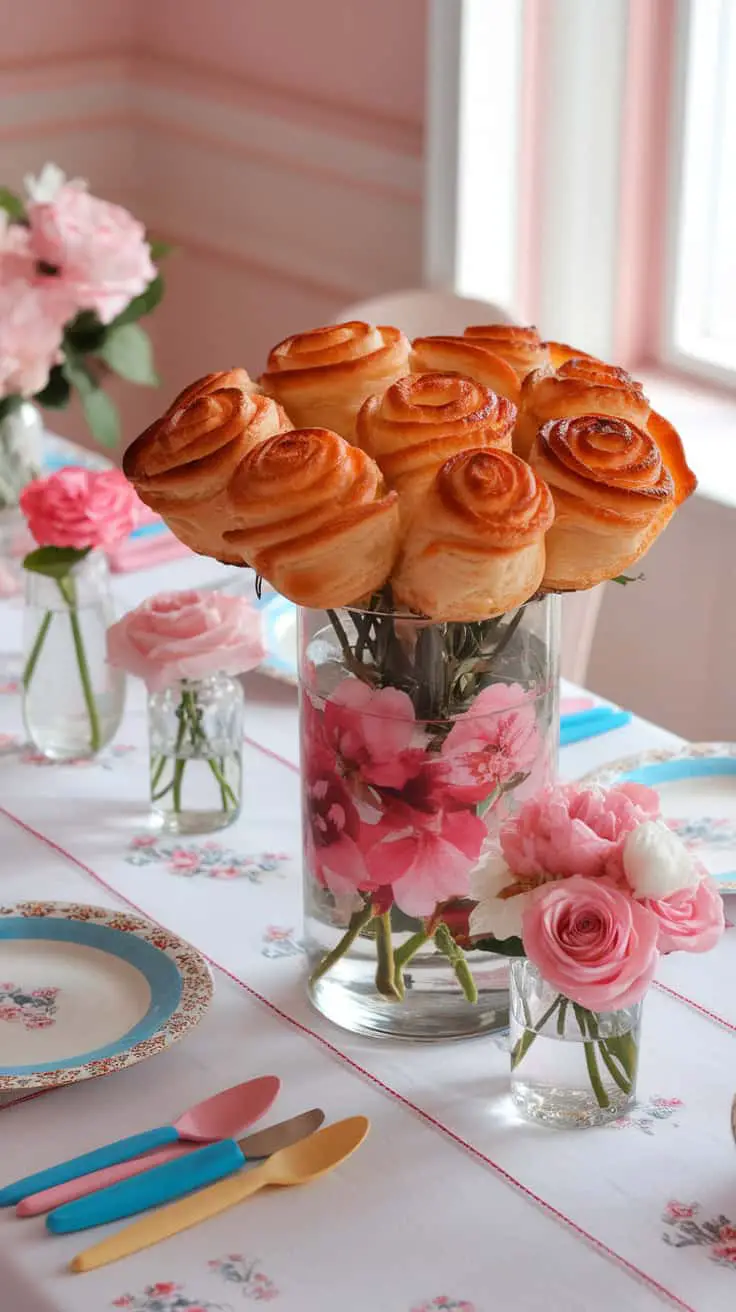
Picture a stunning table set with delicate flowers and charming dishes. The centerpiece is a delightful display of rose-shaped ham and cheese puff pastries. These pastries not only look beautiful but also promise a burst of flavor in every bite.
The pastries are crafted with flaky dough, shaped into perfect roses, showcasing a lovely golden-brown hue. Each layer reveals savory ham and creamy cheese, making them irresistible. They’re not just snacks; they add a touch of elegance to any gathering.
To make these treats, start with puff pastry sheets. Roll them out, layer with ham and cheese, and then twist and shape them into roses. Bake until golden, and watch them impress your guests! Perfect for brunch, tea parties, or just a cozy night in.
Ingredients Breakdown
These rose-shaped ham and cheese puff pastries are as delicious as they are elegant. Here’s what you’ll need to craft these show-stopping treats:
For the Pastries:
- 1 sheet puff pastry (thawed but still cold for easy handling)
- 6-8 slices deli ham (thinly sliced for easy rolling)
- 6-8 slices cheese (Swiss or cheddar work well for meltiness and flavor)
- 1 large egg (beaten, for sealing and brushing)
- 1 tbsp Dijon mustard (optional, for a hint of sharpness)
- Fresh thyme or rosemary (optional, for garnish)
How to Make It:
- Prepare the Puff Pastry: Roll out the puff pastry on a lightly floured surface to smooth it out. Cut into 2-inch wide strips.
- Layer the Filling: Spread a thin layer of Dijon mustard on each strip if using. Lay ham and cheese slices along the top edge of each strip, allowing them to overlap slightly and peek out over the edge.
- Roll into Roses: Gently roll each pastry strip from one end to the other, creating a rose-like shape. Secure the end with a dab of egg wash.
- Brush and Bake: Place the rolled pastries in a muffin tin to help hold their shape. Brush the tops with beaten egg for a glossy finish.
- Bake: Bake at 400°F (200°C) for 20-25 minutes, or until the pastries are puffed and golden brown.
- Garnish and Serve: Sprinkle with fresh thyme or rosemary for an extra touch of elegance.
Why They’re Amazing:
- Flaky Perfection: Puff pastry bakes into a beautifully crisp and golden treat.
- Savory Layers: The ham and cheese create a rich, savory filling.
- Show-Stopping Presentation: Shaped like roses, these pastries add instant sophistication.
Serve these at your next brunch or gathering, and watch your guests be amazed by their flavor and elegance!
Pink Shrimp Cocktail Shots
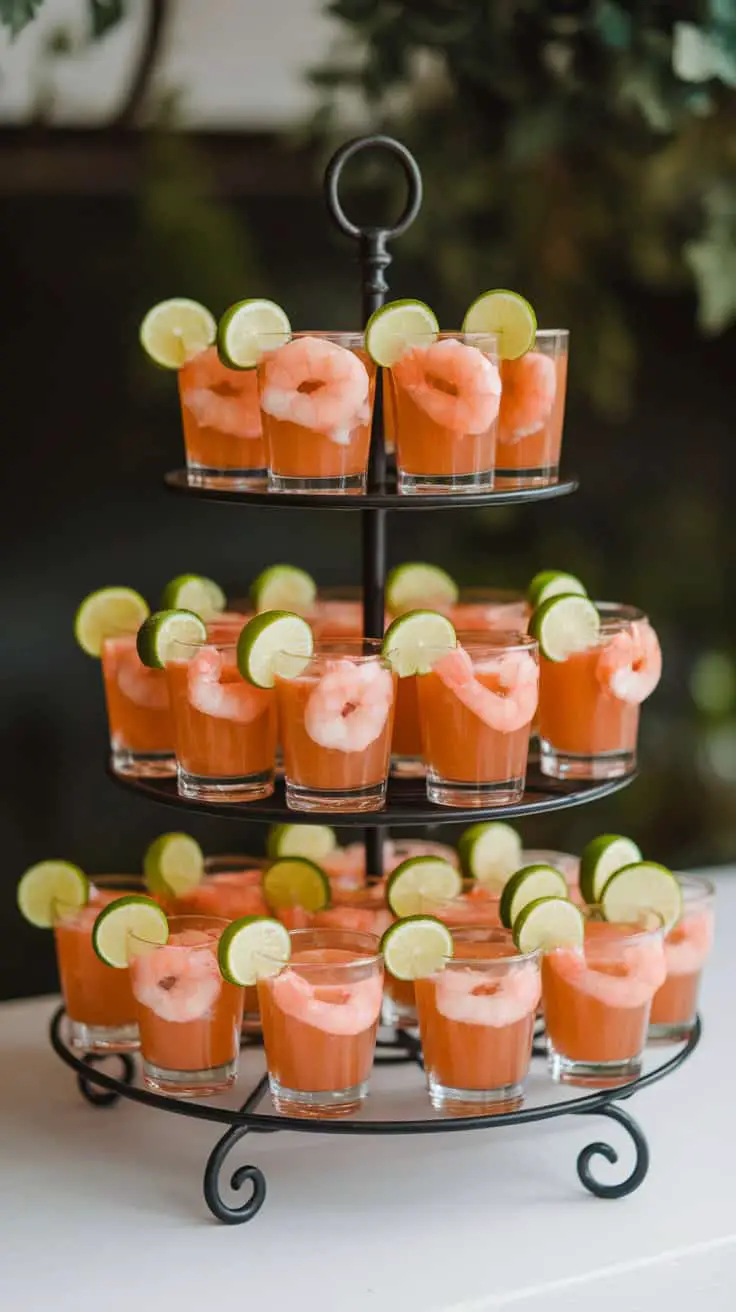
These pink shrimp cocktail shots are a fun and tasty twist on a classic appetizer. Perfect for gatherings, they bring a burst of color and flavor to any table. Each shot glass is filled with a zesty cocktail mixture, topped with a plump shrimp and a slice of lime for that refreshing kick.
The presentation is simply delightful. Arranged on a stylish stand, these shots invite guests to indulge. The vibrant pink of the cocktail, combined with the green of the lime, creates an eye-catching display that’s hard to resist.
Making these shrimp cocktail shots is easier than it looks. You’ll need cooked shrimp, cocktail sauce, lime juice, and shot glasses. Simply mix the sauce with lime juice, pour it into the glasses, and garnish with the shrimp and lime. Serve chilled, and watch them disappear!
Ingredients Breakdown
Let’s dive into what makes these shrimp cocktail shots so irresistible. Every bite is a perfect blend of tangy, zesty, and savory flavors—ideal for any party or casual gathering.
For the Cocktail Sauce:
- 1 cup tomato ketchup (the flavorful base)
- 2 tbsp prepared horseradish (for a spicy kick)
- 1 tbsp fresh lemon juice (for brightness)
- 1 tbsp Worcestershire sauce (adds depth)
- 1 tsp hot sauce (optional, for extra heat)
- Salt and pepper to taste (enhances all the flavors)
For the Shrimp:
- 1 lb cooked large shrimp, peeled and deveined (tail on for presentation)
- 1 tbsp olive oil (keeps shrimp moist and glossy)
- 1 tsp garlic powder (for extra savory notes)
- Pinch of smoked paprika (adds a hint of smokiness)
For Garnishing:
- Fresh lime slices (for a zesty finish)
- Fresh parsley or cilantro leaves (for color and freshness)
How to Make It:
- Prepare the Cocktail Sauce: In a bowl, mix ketchup, horseradish, lemon juice, Worcestershire sauce, hot sauce, salt, and pepper. Stir until well combined and chill for at least 30 minutes to let the flavors meld.
- Season the Shrimp: Toss the cooked shrimp with olive oil, garlic powder, and smoked paprika. This step boosts the shrimp’s natural flavor and adds a touch of spice.
- Assemble the Shots:
- Fill each shot glass halfway with the chilled cocktail sauce.
- Place one shrimp on the rim of each glass, tail up.
- Add a lime slice on the side and sprinkle with fresh herbs for extra flair.
- Serve and Enjoy: Arrange the shrimp cocktail shots on a tiered stand or platter. Serve immediately, keeping them chilled until ready to enjoy.
Why They’re a Hit:
- Bursting with Flavor: The spicy, tangy cocktail sauce pairs perfectly with the juicy shrimp.
- Easy to Make: Minimal prep, maximum presentation.
- Party-Ready: The tiered display makes them a show-stopper on any buffet table.
These pink shrimp cocktail shots are more than just appetizers—they’re a conversation starter and a guaranteed crowd-pleaser. Simple, elegant, and full of flavor!
Mini Pancake Stacks with Strawberry Syrup
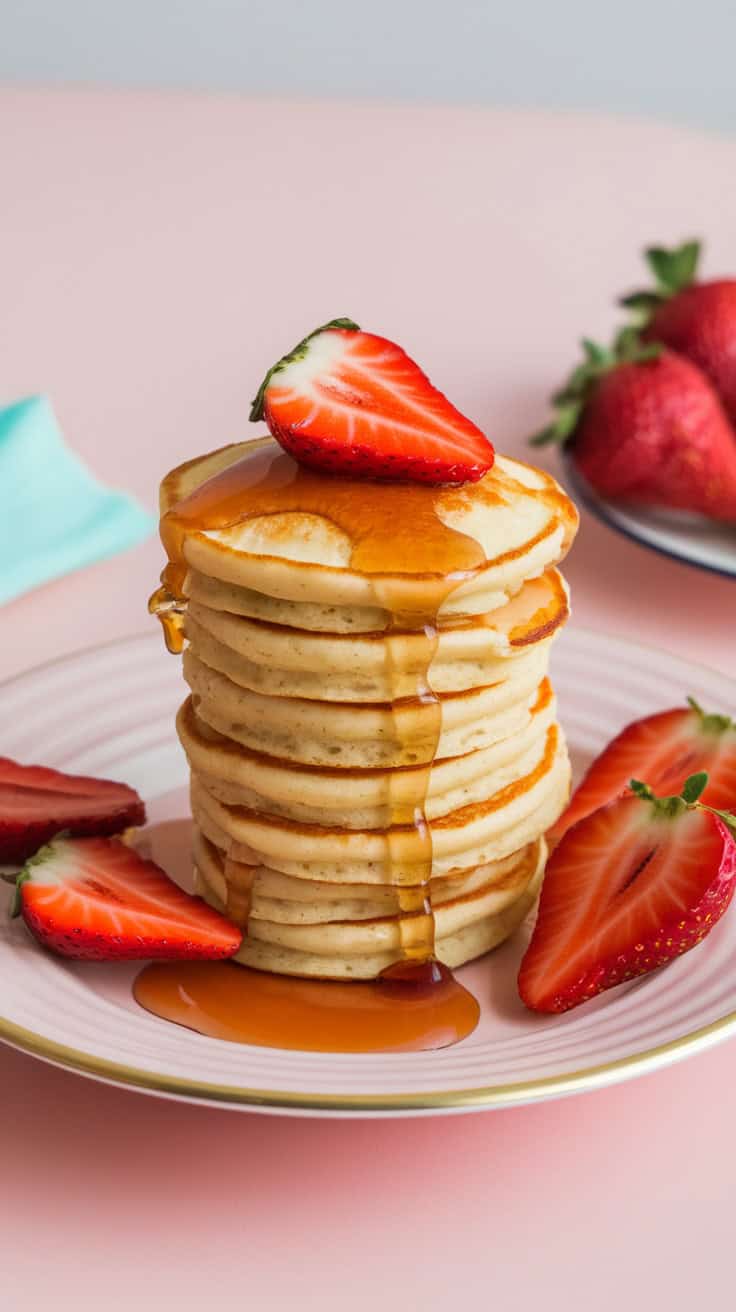
Mini pancake stacks are a delightful breakfast treat that brings joy to any morning. These fluffy pancakes are perfectly layered, creating a cute and inviting tower. Topped with fresh strawberries and a drizzle of syrup, they look almost too good to eat!
The simple ingredients make them easy to whip up. Just mix flour, eggs, milk, and a pinch of baking powder to create a batter that’s light and airy. Cooking them on a skillet gives each pancake a nice golden-brown finish.
Strawberry syrup adds a sweet and fruity touch that pairs beautifully with the pancakes. You can make the syrup by simmering fresh strawberries with sugar and a splash of water until it thickens. This adds a burst of flavor and makes the dish feel special.
Whether it’s a cozy breakfast at home or a fun brunch with friends, these mini pancake stacks with strawberry syrup are sure to impress. They’re perfect for sharing, and everyone loves a stack of pancakes!
Ingredients Breakdown
Let’s dive into what makes these mini pancake stacks so irresistible. They’re light, fluffy, and under 250 calories per serving—perfect for a satisfying breakfast without the guilt.
For the Pancakes:
- 1 cup all-purpose flour (for the perfect pancake base)
- 1 tbsp sugar (just enough sweetness)
- 1 tsp baking powder (helps them rise)
- 1/2 tsp baking soda (adds extra fluffiness)
- 1/4 tsp salt (balances the flavors)
- 1 large egg (for structure and richness)
- 3/4 cup low-fat milk (keeps them light)
- 1 tbsp unsalted butter, melted (for a hint of buttery goodness)
- 1 tsp vanilla extract (adds warmth and depth)
For the Strawberry Syrup:
- 2 cups fresh strawberries, chopped (bursting with natural sweetness)
- 2 tbsp sugar (to enhance the berry flavor)
- 1 tbsp lemon juice (for brightness)
- 1/4 cup water (helps create the syrup consistency)
For Garnish:
- Fresh strawberries, sliced (extra freshness and color)
- Powdered sugar (optional, for a light dusting)
- Mint leaves (optional, for a fresh touch)
How to Make It:
- Prepare the Pancake Batter: In a large bowl, whisk together flour, sugar, baking powder, baking soda, and salt. In another bowl, beat the egg, milk, melted butter, and vanilla extract. Pour the wet ingredients into the dry ingredients and stir until just combined (don’t overmix!).
- Cook the Pancakes: Heat a non-stick skillet over medium heat. Grease lightly with cooking spray or a small amount of butter. Drop tablespoon-sized amounts of batter onto the skillet to create mini pancakes. Cook until bubbles form on the surface, then flip and cook until golden brown.
- Make the Strawberry Syrup: In a small saucepan over medium heat, combine strawberries, sugar, lemon juice, and water. Simmer, stirring occasionally, until the mixture thickens into a syrup-like consistency (about 10-15 minutes). Mash slightly with a fork for a chunky texture or blend for a smooth syrup.
- Assemble the Stacks: Stack 3-4 mini pancakes on a plate. Drizzle warm strawberry syrup generously over the top.
- Add the Final Touch: Garnish with fresh strawberries, a sprinkle of powdered sugar, and a few mint leaves if you like.
Why You’ll Love Them:
- Light and Fluffy: The perfect combination of baking powder and baking soda ensures a soft texture.
- Naturally Sweet: Fresh strawberry syrup makes this dish irresistibly fruity.
- Picture-Perfect: These mini stacks are almost too cute to eat—but you won’t be able to resist!
Whether you’re making a special weekend breakfast or a fun brunch treat, these mini pancake stacks with strawberry syrup are sure to impress and delight!
Pink Veggie Platter with Beet Hummus Dip
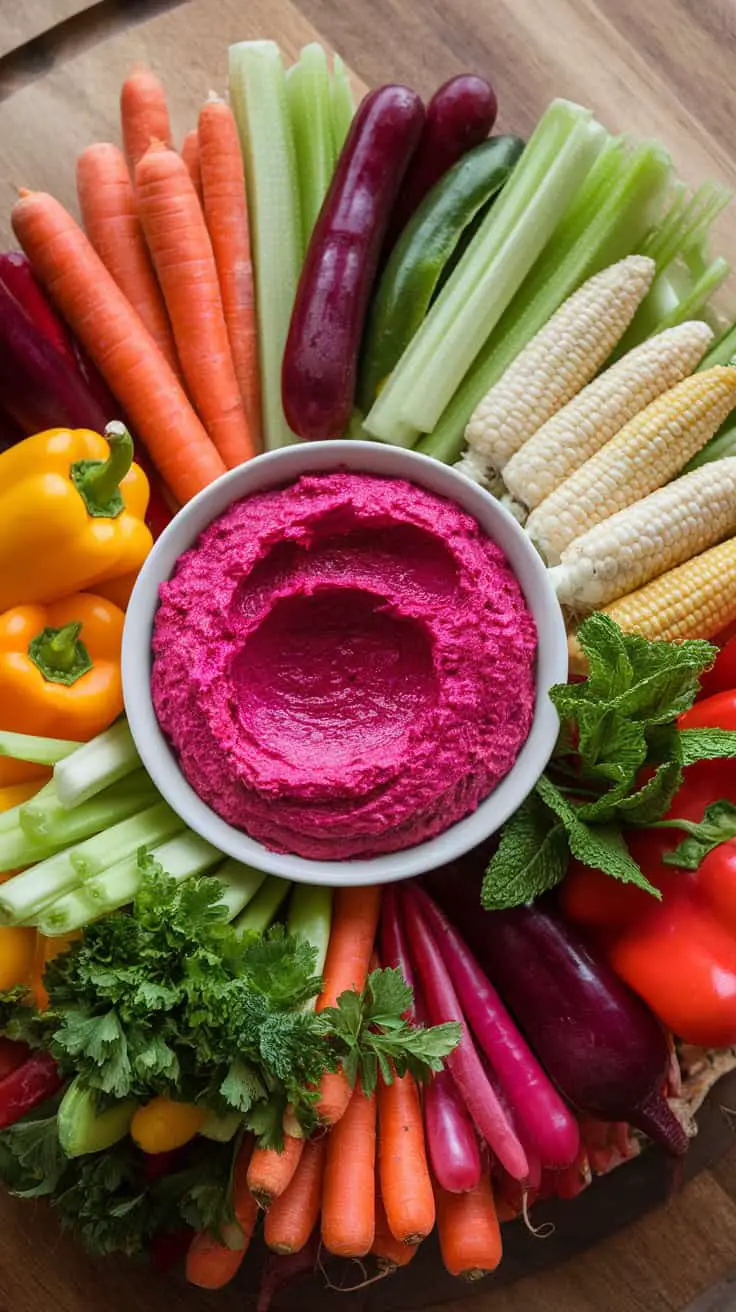
This vibrant veggie platter is a feast for the eyes and the taste buds. The star of the show is the bright pink beet hummus, sitting in the center of a colorful arrangement of fresh veggies.
The platter features an assortment of crunchy carrots, crisp celery, and sweet mini corn, all beautifully arranged around the dip. Bright yellow bell peppers add an inviting pop of color, while radishes and eggplants bring depth to the presentation.
This dish is perfect for gatherings, offering a healthy and appealing option for snacking. Whether you’re hosting a party or just looking for a fun way to enjoy veggies, this platter is sure to impress.
Ingredients Breakdown
Let’s dive into what makes this vibrant veggie platter truly irresistible. It’s colorful, healthy, and under 250 calories per serving!
For the Beet Hummus Dip:
- 1 medium beet (roasted or boiled, peeled, and chopped)
- 1 cup canned chickpeas (rinsed and drained)
- 2 tbsp tahini (for creaminess)
- 1 garlic clove (minced)
- 2 tbsp lemon juice (for brightness)
- 1 tbsp olive oil (for richness)
- 1/2 tsp ground cumin (for warmth)
- Salt and pepper (to taste)
For the Veggie Platter:
- 2 large carrots (peeled and sliced into sticks)
- 2 celery stalks (cut into sticks)
- 1 yellow bell pepper (sliced into strips)
- 4-5 radishes (sliced thinly)
- 1 cup mini corn (blanched if desired)
- 1 small eggplant (sliced into rounds, optional for grilling)
How to Make It:
- Prepare the Beet Hummus:
- In a food processor, blend the roasted beet, chickpeas, tahini, garlic, lemon juice, olive oil, and cumin until smooth.
- Season with salt and pepper to taste. Adjust lemon juice and olive oil for desired texture and flavor.
- Assemble the Platter:
- Choose a large serving tray or cutting board.
- Place the beet hummus in a bowl at the center.
- Arrange the vegetables around the bowl in colorful sections for an eye-catching presentation.
Why You’ll Love It:
- Nutrient-Packed: Beets are rich in vitamins, while chickpeas provide protein and fiber.
- Vibrant and Inviting: The bright pink dip adds a fun, festive touch to your table.
- Flavorful and Fresh: The veggies provide a satisfying crunch while balancing the creamy dip.
This platter isn’t just a snack—it’s a healthy, beautiful centerpiece for any gathering!
Mini Chicken Salad Sliders with Cranberry Sauce
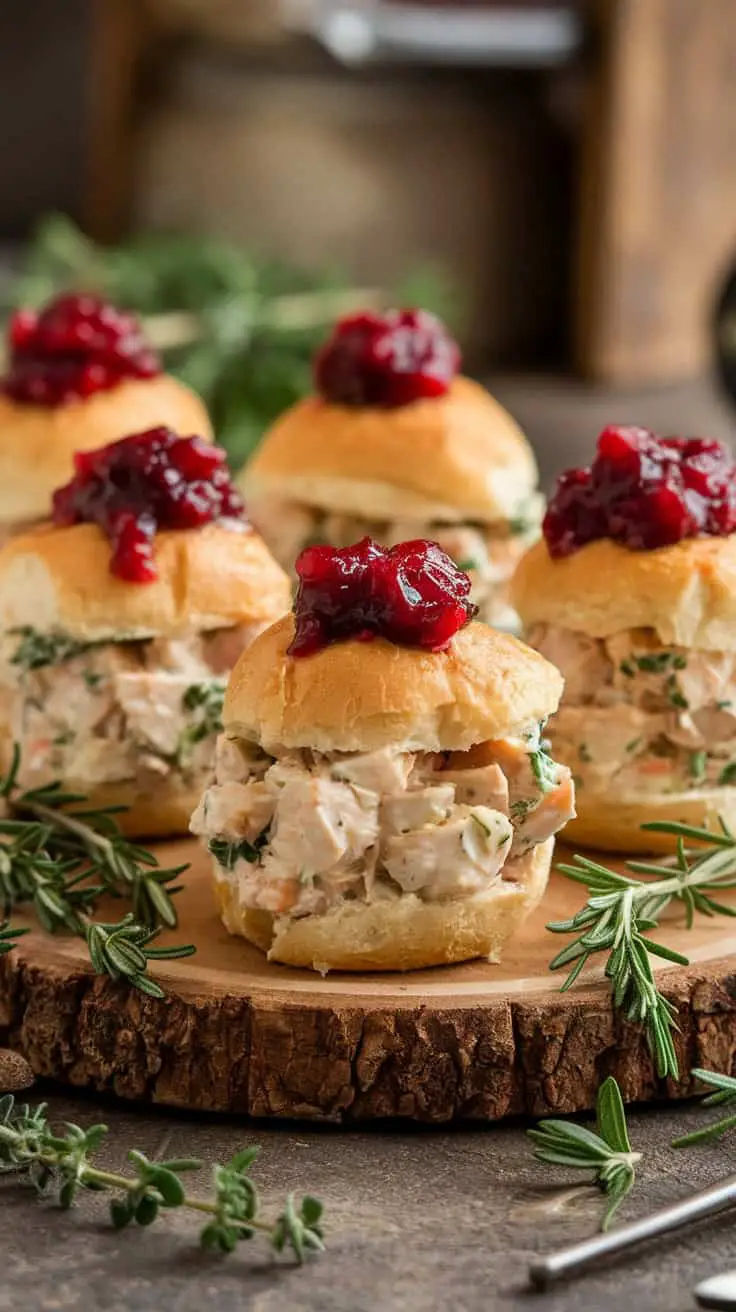
These mini chicken salad sliders are a delightful twist on a classic dish. Each slider features tender chicken salad packed with fresh herbs and a hint of seasoning, all stuffed into soft, fluffy buns. The addition of cranberry sauce on top adds a burst of sweetness and a pop of color, making them as appealing to the eye as they are to the taste buds.
Perfect for gatherings or a cozy night in, these sliders are easy to make and even easier to enjoy. They can be served warm or cold, making them versatile for any occasion. The combination of savory chicken salad and tart cranberry sauce creates a balanced flavor profile that everyone will love.
To make these sliders, start with cooked chicken, finely chopped herbs, and your favorite seasonings. Mix them together with mayonnaise for creaminess, and don’t forget the cranberry sauce on top for that extra zing. Serve them on small buns for a perfect bite-sized treat!
Ingredients Breakdown
Let’s dive into what makes these mini chicken salad sliders so irresistible. They’re flavorful, satisfying, and still light enough to enjoy without guilt.
For the Chicken Salad:
- 2 cups cooked, shredded chicken (for a hearty base)
- 1/2 cup light mayonnaise (for creaminess without extra calories)
- 1/4 cup plain Greek yogurt (adds tang and keeps it light)
- 1 tbsp Dijon mustard (for a slight kick)
- 1/2 cup diced celery (for crunch)
- 1/4 cup finely chopped red onion (for a burst of flavor)
- 2 tbsp chopped fresh parsley (for freshness)
- 1 tbsp chopped fresh dill (optional, for extra herbaceousness)
- Salt and pepper to taste (for balance)
For the Cranberry Sauce:
- 1/2 cup canned whole cranberry sauce (for sweetness and tang)
- 1 tbsp orange juice (for added brightness)
- 1 tsp honey (optional, for extra sweetness)
For Assembly:
- 8-10 mini slider buns (light and fluffy)
- Lettuce leaves or baby spinach (for added freshness)
How to Make It:
- Prepare the Chicken Salad: In a large bowl, combine shredded chicken, mayonnaise, Greek yogurt, Dijon mustard, celery, red onion, parsley, and dill. Season with salt and pepper to taste. Mix well until everything is evenly coated.
- Make the Cranberry Sauce: In a small bowl, mix the cranberry sauce with orange juice and honey (if using). Stir until smooth.
- Assemble the Sliders: Slice the mini buns in half. Place a lettuce leaf or some baby spinach on the bottom half of each bun. Scoop a generous portion of the chicken salad onto the lettuce.
- Add the Cranberry Sauce: Spoon a dollop of cranberry sauce on top of the chicken salad for that perfect sweet-tart finish.
- Finish and Serve: Place the top half of the bun over the filling and gently press down. Serve immediately or chill in the fridge until ready to enjoy.
Why They’re a Hit:
- Savory & Sweet: The contrast between the savory chicken salad and tangy cranberry sauce is irresistible.
- Fresh & Crunchy: The veggies add freshness and texture.
- Bite-Sized Perfection: They’re easy to grab and eat, making them party-friendly.
These mini chicken salad sliders are the perfect mix of comfort and elegance. Whether you’re hosting a party or making a special family dinner, they’ll be the star of the table!
Baby Pink Macarons with Savory Filling
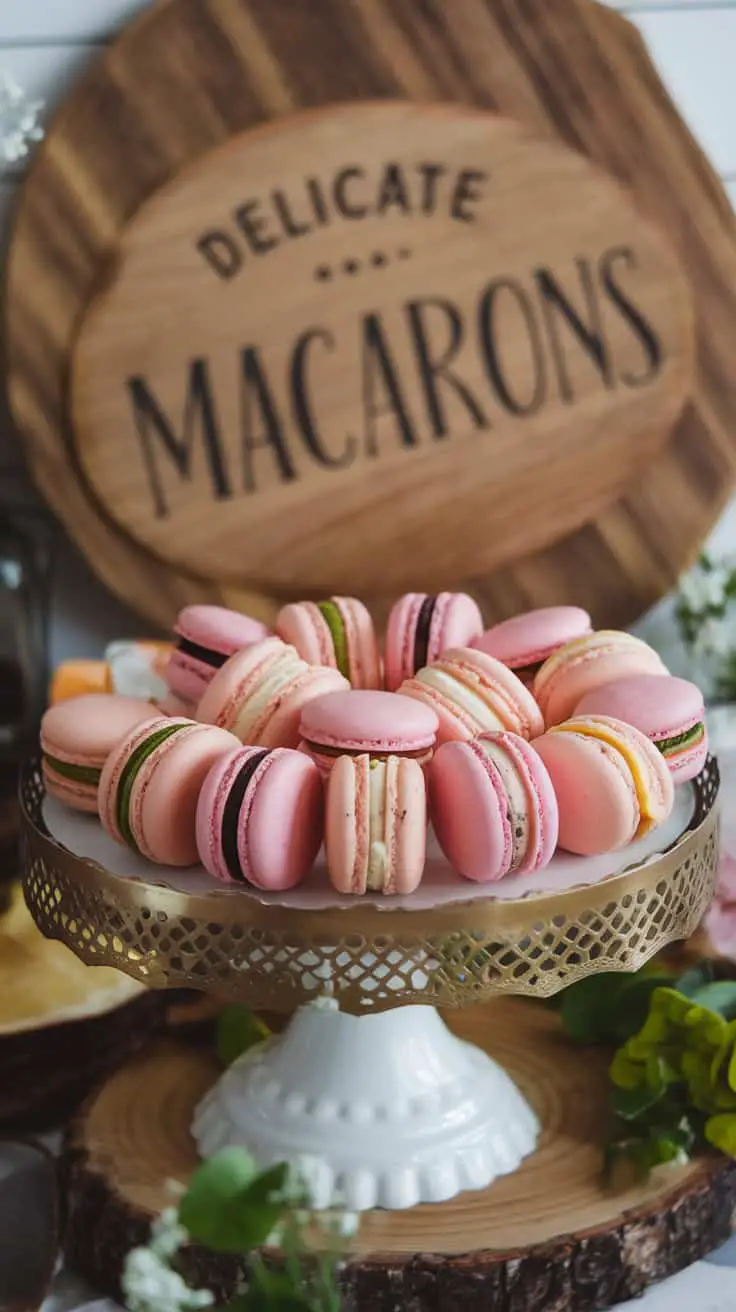
These lovely baby pink macarons are not just a treat for the eyes; they’re a delightful addition to any dessert table. With their delicate appearance, they catch your attention right away. The soft pastel color is inviting and adds a charming touch.
What makes them unique is their savory filling. Imagine a light, creamy center that balances the sweetness of the macaron shell. Ingredients like goat cheese or herbed cream cheese can create a surprising and delicious contrast to the traditional sweet flavors.
Serving these macarons is a breeze. Place them on a decorative cake stand, as seen in the image. This presentation showcases their beauty and makes them the star of any gathering. Pair them with a cup of tea or coffee for a perfect snack.
Ingredients Breakdown
Let’s dive into what makes these macarons irresistibly good yet surprisingly balanced with a savory twist.
For the Macaron Shells:
- 1 3/4 cups almond flour (for a smooth, delicate texture)
- 1 1/4 cups powdered sugar (adds sweetness and keeps them light)
- 3 large egg whites, room temperature (for structure and lift)
- 1/4 cup granulated sugar (stabilizes the meringue)
- 1/2 tsp cream of tartar (for meringue stability)
- Pink gel food coloring (for that signature baby pink hue)
For the Savory Filling Options:
Goat Cheese and Herb Filling:
- 4 oz goat cheese (creamy and tangy base)
- 2 tbsp cream cheese (adds smoothness)
- 1 tsp honey (a touch of sweetness)
- 1 tbsp finely chopped chives or thyme (for freshness)
- Salt and pepper to taste (balance the flavors)
Herbed Cream Cheese Filling:
- 4 oz reduced-fat cream cheese (light and creamy)
- 1 tbsp sour cream (for tang)
- 1 tsp lemon zest (brightens the filling)
- 1 tbsp finely chopped parsley, dill, or chives (for herby goodness)
- Salt and pepper to taste (enhance the flavor)
How to Make Them:
- Make the Macaron Shells: Sift the almond flour and powdered sugar together. In a separate bowl, whip the egg whites with cream of tartar until foamy. Slowly add granulated sugar, beating until stiff peaks form. Gently fold in the dry ingredients and add a few drops of pink gel food coloring until evenly mixed.
- Pipe and Rest: Transfer the batter into a piping bag with a round tip. Pipe 1-inch circles onto a parchment-lined baking sheet. Tap the tray firmly on the counter to release air bubbles. Let them rest for 30-45 minutes until a skin forms.
- Bake: Preheat the oven to 300°F (150°C). Bake the macarons for 14-16 minutes or until set but not browned. Let them cool completely before filling.
- Prepare the Filling: Choose your savory filling and mix all ingredients until smooth and well combined.
- Assemble: Pair similar-sized macaron shells. Pipe the filling onto one shell and gently press the other shell on top.
- Presentation Tip: Arrange them on a decorative stand for an elegant touch. Pair with tea or coffee for a sophisticated treat.
Why You’ll Love Them:
- Elegant Appearance: The delicate pink shells are show-stoppers.
- Surprising Flavor: The savory filling balances the sweetness perfectly.
- Versatile Options: Choose from herb-infused goat cheese or creamy herbed fillings.
These baby pink macarons with savory fillings are sure to impress. They’re not just pretty—they’re perfectly delicious too!
Spinach and Feta Stuffed Pastry Rolls
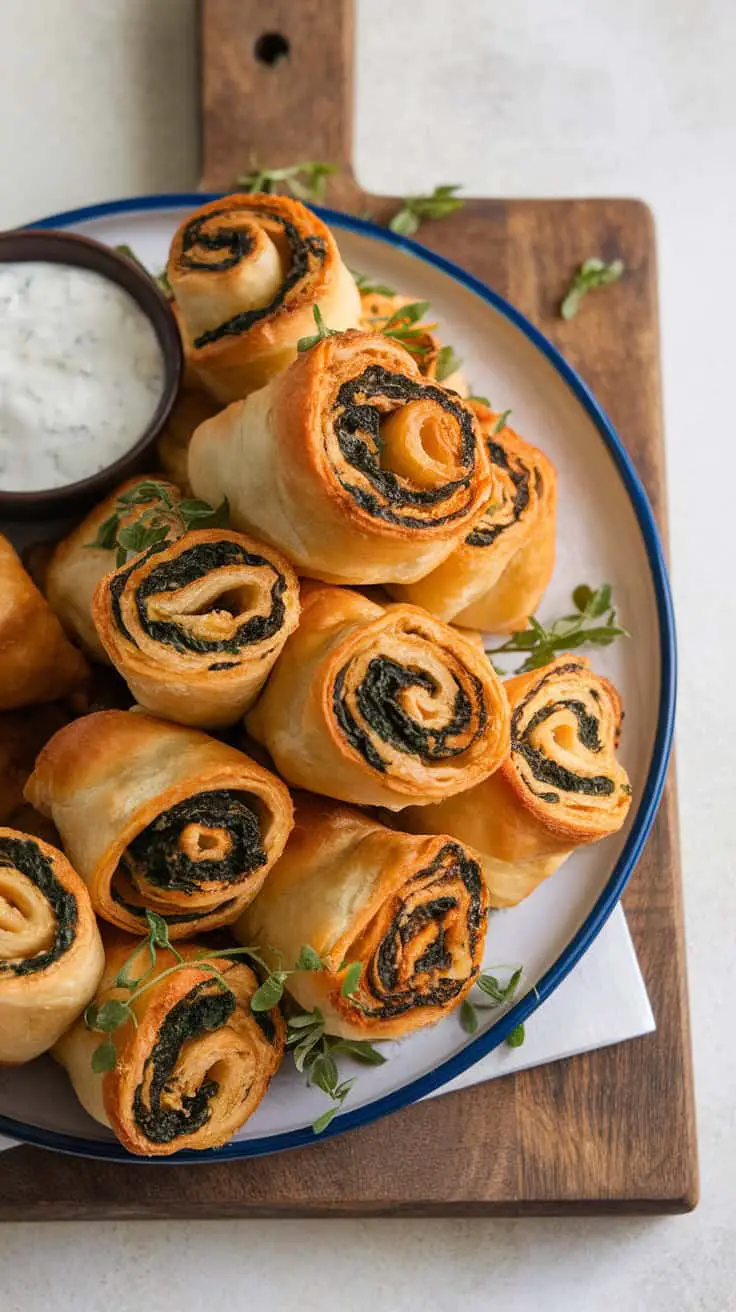
Check out these delightful spinach and feta stuffed pastry rolls! They look as good as they taste. The golden-brown pastry is perfectly crisp on the outside, while the inside is filled with a savory mixture of spinach and creamy feta cheese. Each roll is a little spiral of goodness.
These rolls are not just tasty; they are also easy to make. You can enjoy them as a snack, appetizer, or even a light meal. Serve them with a cool yogurt dip for a refreshing contrast. The combination of flavors and textures is sure to please everyone at your table.
To make these, you’ll need fresh spinach, feta cheese, and pastry dough. Start by sautéing the spinach until wilted and mixing it with crumbled feta. Roll the mixture up in the pastry and bake until golden. It’s a straightforward recipe that delivers impressive results!
Ingredients Breakdown
Let’s dive into what makes these spinach and feta stuffed pastry rolls irresistible. They’re crispy, savory, and under 250 calories per serving—perfect for any occasion.
For the Filling:
- 2 cups fresh spinach, chopped (for a nutritious base)
- 1 cup crumbled feta cheese (salty and creamy)
- 1 small onion, finely chopped (adds depth of flavor)
- 1 garlic clove, minced (for extra savory notes)
- 1 tbsp olive oil (for sautéing)
- 1 tsp dried dill or fresh dill, chopped (adds a hint of freshness)
- 1/2 tsp ground nutmeg (enhances the spinach)
- Salt and pepper to taste (balances the flavors)
For the Pastry:
- 1 sheet puff pastry (store-bought or homemade, thawed if frozen)
- 1 large egg, beaten (for an appealing golden crust)
For the Yogurt Dip:
- 1 cup plain Greek yogurt (creamy and tangy)
- 1 tbsp lemon juice (for brightness)
- 1 tsp dried mint or fresh mint, chopped (for a cooling effect)
- Salt and pepper to taste (to enhance the dip)
How to Make It:
- Prepare the Filling: Heat olive oil in a skillet over medium heat. Sauté the onion and garlic until softened and fragrant. Add the chopped spinach, cooking until wilted. Stir in the dill, nutmeg, salt, and pepper. Remove from heat and mix in crumbled feta.
- Assemble the Rolls: Roll out the puff pastry on a lightly floured surface. Spread the spinach-feta mixture evenly over the pastry, leaving a small border. Roll the pastry tightly into a log and slice into 1-inch pieces.
- Bake to Perfection: Place the rolls cut-side down on a parchment-lined baking sheet. Brush with beaten egg for a golden finish. Bake at 400°F (200°C) for 18-22 minutes or until golden brown and puffed.
- Make the Yogurt Dip: While the rolls bake, whisk together Greek yogurt, lemon juice, mint, salt, and pepper in a small bowl. Chill until ready to serve.
Why They’re Amazing:
- Crispy & Golden: The puff pastry bakes up beautifully crisp and golden.
- Flavor-Packed: The spinach-feta filling is savory and perfectly seasoned.
- Balanced & Light: The yogurt dip adds a cool, tangy contrast.
These spinach and feta stuffed pastry rolls aren’t just a snack—they’re a bite-sized celebration of flavor and texture!
Mini Pink Lemonade Jello Cups
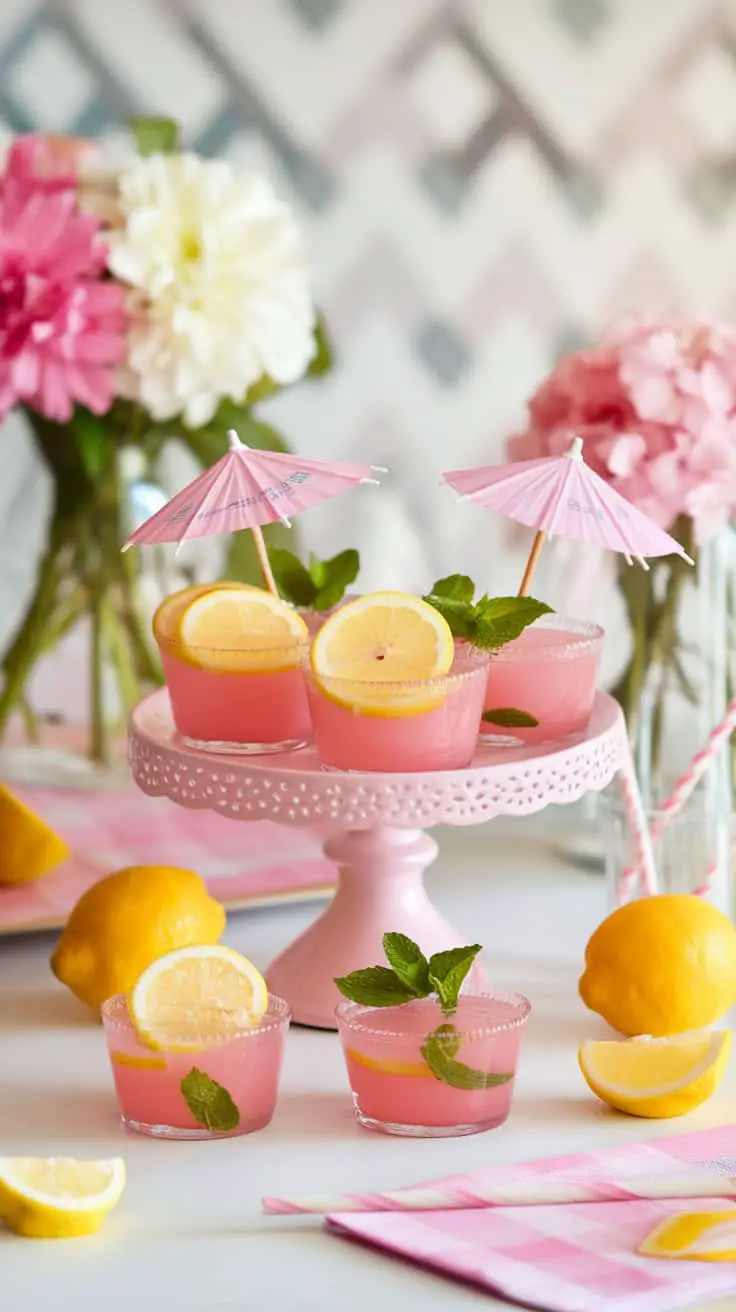
These adorable Mini Pink Lemonade Jello Cups are the perfect treat for any gathering. With their vibrant pink hue and refreshing taste, they are sure to brighten up any table. Each cup features a slice of lemon and a sprig of mint, adding a touch of elegance.
The presentation is key here! The jello cups are displayed on a cute pink stand, making them not only tasty but visually appealing. Surrounding the cups are fresh lemons and pink flowers, creating a cheerful atmosphere.
Making these treats is simple. Just gather your ingredients: lemonade, gelatin, and optional food coloring for that perfect shade. Follow the steps to whip up a delightful batch, chill until set, and serve with mini umbrellas for that fun touch.
Ingredients Breakdown
Let’s dive into what makes these Mini Pink Lemonade Jello Cups so refreshingly delightful. They’re light, flavorful, and perfect for a low-calorie treat.
For the Jello Cups:
- 2 cups pink lemonade (freshly made or store-bought, sugar-free preferred)
- 2 tbsp unflavored gelatin (for that perfect jello consistency)
- 1 tbsp honey or agave syrup (optional for extra sweetness)
- A few drops of pink food coloring (if you want a bolder color)
For Garnish:
- Lemon slices (thinly cut for a fresh, citrusy touch)
- Fresh mint leaves (for a refreshing pop of green)
- Edible flowers (optional but lovely for presentation)
How to Make It:
- Prepare the Lemonade Mix: In a medium saucepan, warm 1 cup of pink lemonade over low heat (do not boil). Sprinkle the gelatin evenly over the surface and let it bloom for 2-3 minutes.
- Dissolve the Gelatin: Stir the mixture continuously until the gelatin is fully dissolved. Add honey or agave if using.
- Mix and Color: Remove from heat and stir in the remaining cup of cold pink lemonade. Add food coloring if you prefer a more vivid pink.
- Pour into Cups: Carefully pour the mixture into mini serving cups or dessert glasses.
- Chill and Set: Place the cups in the fridge for at least 4 hours or until fully set.
- Garnish Before Serving: Add a thin lemon slice and a fresh mint leaf on top of each cup. Sprinkle edible flowers around the display for an extra special touch.
Why You’ll Love Them:
- Refreshing and Light: The pink lemonade base keeps these treats tangy and invigorating.
- Low-Calorie Sweetness: Minimal sugar, making them a guilt-free indulgence.
- Eye-Catching Presentation: The garnishes turn a simple dessert into a stunning showpiece.
These Mini Pink Lemonade Jello Cups aren’t just treats; they’re a feast for the eyes and the taste buds—perfect for any gathering where fun and freshness are on the menu!
Strawberry Basil Bruschetta on Crostini
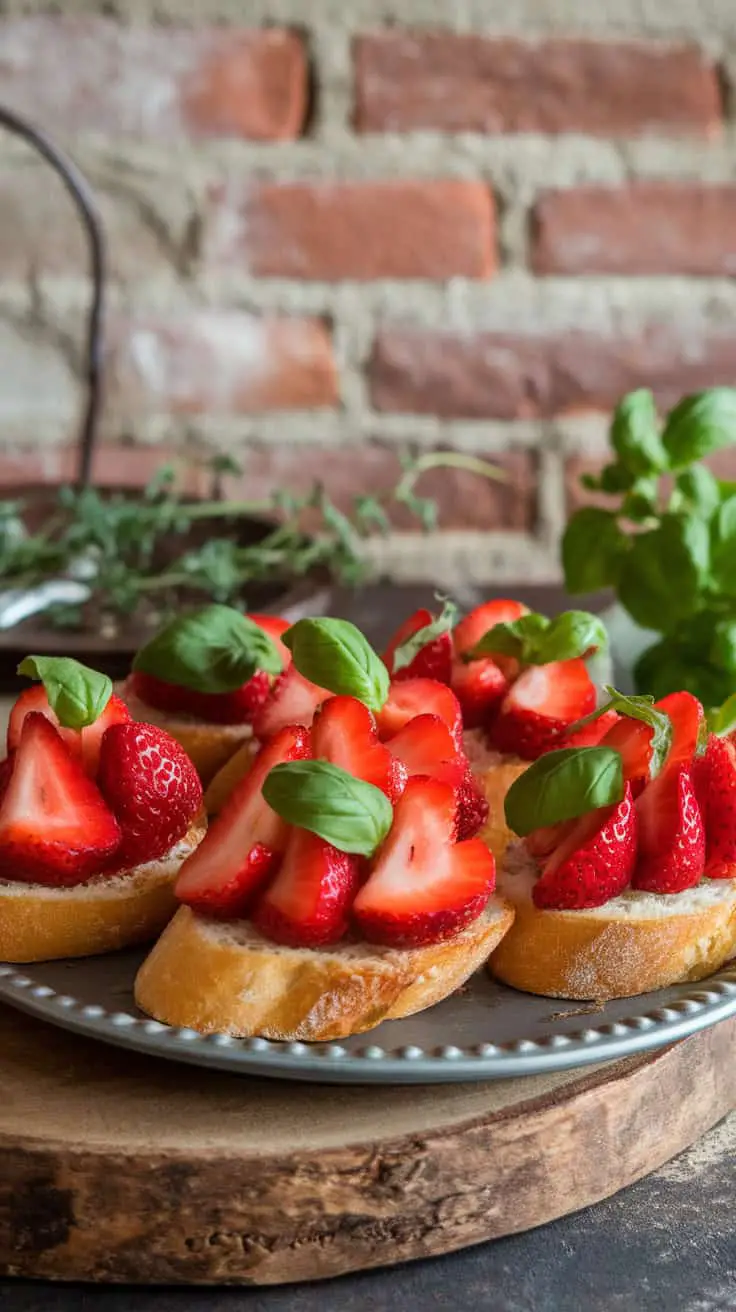
Check out this vibrant dish of Strawberry Basil Bruschetta served on crispy crostini. The bright red strawberries pop against the golden-brown bread, making it visually appealing. Each slice is topped with fresh basil, adding a lovely green touch and a hint of aromatic flavor.
This bruschetta is perfect as an appetizer or a light snack. The combination of sweet strawberries and fragrant basil creates a delightful contrast. It’s an easy recipe that can impress your guests during gatherings or simply brighten up your day.
To make it, slice fresh baguette, toast until golden, and layer with cream cheese or ricotta. Top with sliced strawberries and fresh basil leaves for a refreshing bite. Enjoy this fun twist on traditional bruschetta!
Ingredients Breakdown
Let’s dive into what makes this Strawberry Basil Bruschetta so irresistible. It’s fresh, flavorful, and under 250 calories per serving—a perfect balance of sweet, savory, and herby goodness.
For the Crostini:
- 1 small baguette (whole grain for extra fiber if preferred)
- 1 tbsp olive oil (for crispy, golden perfection)
For the Topping:
- 1 cup fresh strawberries, diced (sweet and juicy for that pop of flavor)
- 1/4 cup fresh basil leaves, thinly sliced (adds an aromatic, peppery taste)
- 2 oz light cream cheese or ricotta (smooth and creamy base)
- 1 tsp balsamic glaze (optional but enhances sweetness)
- Pinch of sea salt (balances the flavors)
- Freshly ground black pepper (for a little kick)
How to Make It:
- Prep the Crostini: Preheat the oven to 375°F (190°C). Slice the baguette into 1/2-inch thick rounds. Arrange on a baking sheet and brush lightly with olive oil. Bake for 8-10 minutes until golden and crisp.
- Prepare the Topping: In a bowl, gently toss the diced strawberries with a pinch of sea salt, black pepper, and balsamic glaze if using.
- Assemble the Bruschetta: Spread a thin layer of cream cheese or ricotta on each crostini slice. Top with a generous spoonful of the strawberry mixture.
- Add the Final Touch: Sprinkle the fresh basil on top. Serve immediately for the best flavor and crunch.
Why It’s Amazing:
- Fresh & Flavorful: The strawberries and basil create a mouthwatering contrast.
- Crispy & Creamy: The crostini stays crunchy while the creamy base adds richness.
- Sweet & Savory: A perfect balance of natural sweetness and a hint of tang.
This Strawberry Basil Bruschetta is more than just an appetizer—it’s a little bite of sunshine, perfect for any gathering or a special treat for yourself!