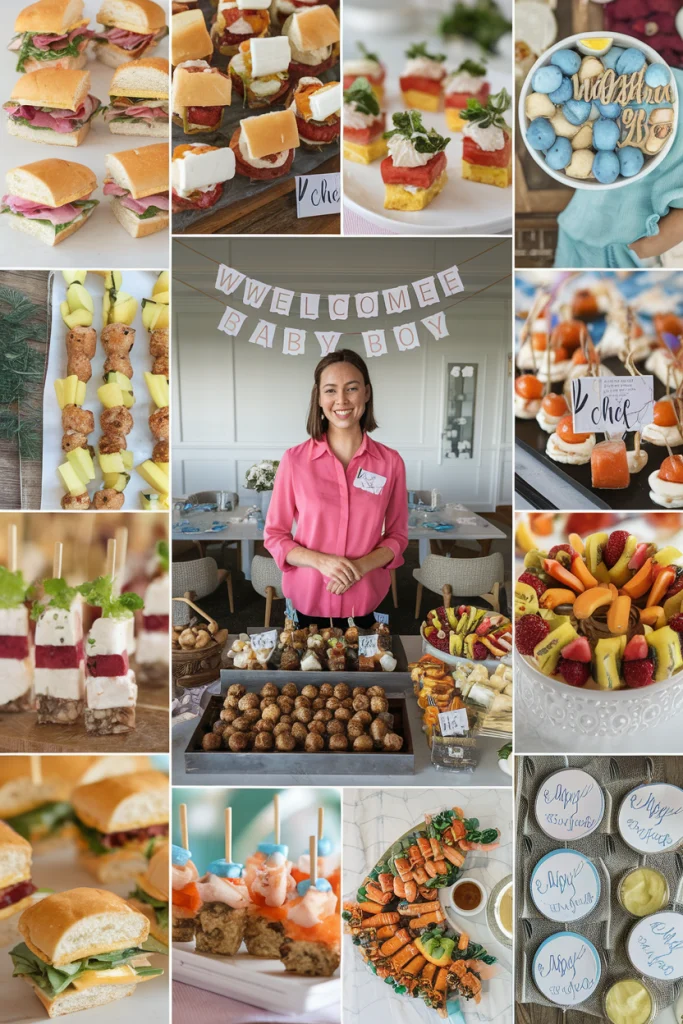
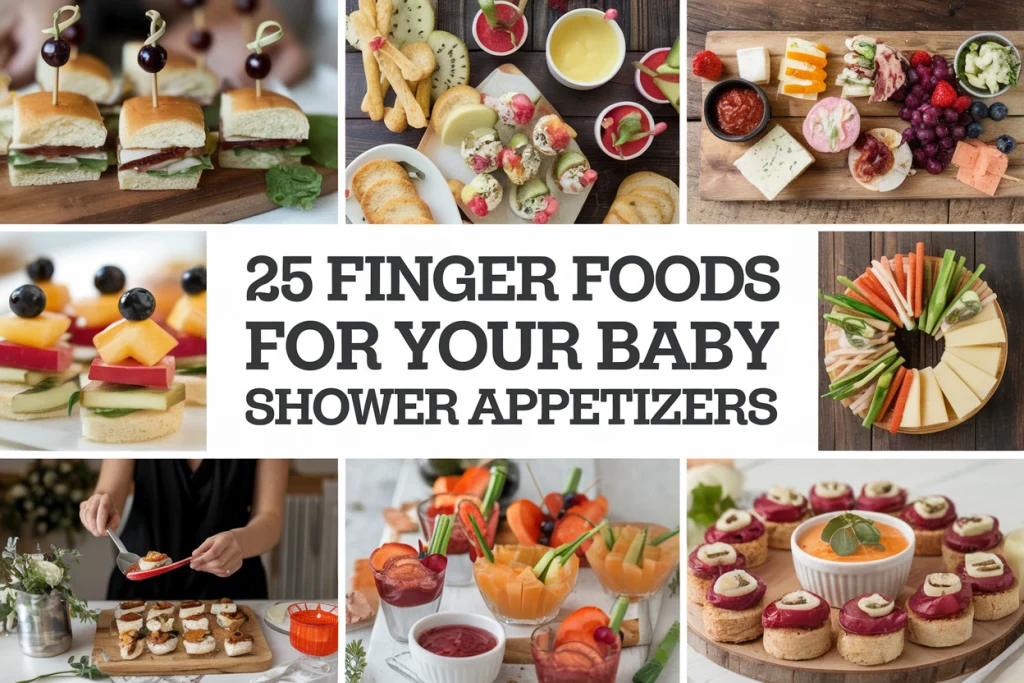
Planning a baby shower for a little boy? Snacks are a key part of any celebration! Here are 15 delightful and simple appetizer ideas that will please your guests and keep the festivities rolling. From savory bites to sweet treats, these options are perfect for the occasion and easy to prepare.
Affiliate Disclosure: "As an Amazon Associate I earn from qualifying purchases made from the images and links in this post. We are a participant in the Amazon Services LLC Associates Program, an affiliate advertising program designed to provide a means for us to earn fees by linking to Amazon.com and other affiliated sites."
Mini BBQ Meatball Skewers
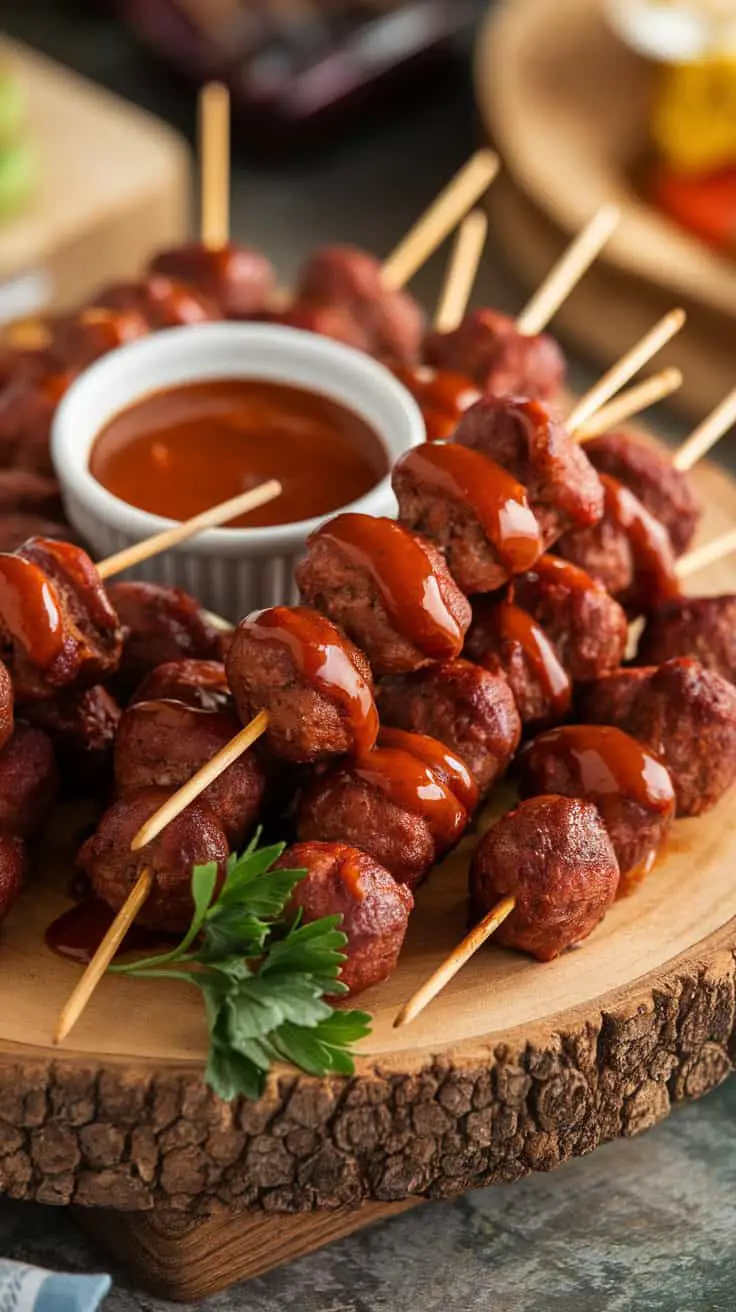
Mini BBQ meatball skewers are a real treat for any gathering. These bite-sized delights are perfect for parties or casual get-togethers. They bring a fun twist to traditional meatballs, making them easy to grab and enjoy.
The skewers are loaded with juicy meatballs drizzled with a rich BBQ sauce, adding just the right amount of sweetness and tang. Pair them with your favorite dipping sauce for extra flavor. The combination of texture and taste makes them a hit with both kids and adults.
Preparing these skewers is a breeze. Start with your favorite meatball recipe or use store-bought for convenience. Simply thread the meatballs onto skewers, brush them with BBQ sauce, and pop them in the oven or on the grill until golden. Serve them on a wooden platter for a rustic touch, and watch them disappear!
Ingredients Breakdown
Let’s dive into what makes these mini BBQ meatball skewers so irresistible. They’re flavorful, satisfying, and under 250 calories per serving—perfect for guilt-free snacking.
For the Meatballs:
- 1 lb lean ground beef or turkey (for a lighter option)
- 1/2 cup whole-wheat breadcrumbs (adds texture and keeps it light)
- 1 large egg (helps bind everything together)
- 1/4 cup grated Parmesan cheese (for a savory kick)
- 2 cloves garlic, minced (for a depth of flavor)
- 1 tsp onion powder (boosts the savory profile)
- 1 tsp smoked paprika (adds subtle smokiness)
- 1 tsp salt (balances the flavors)
- 1/2 tsp black pepper (for a bit of heat)
For the BBQ Glaze:
- 1/2 cup reduced-sugar barbecue sauce (adds sweet and tangy notes)
- 1 tbsp apple cider vinegar (for extra tang)
- 1 tbsp honey (balances acidity)
- 1 tsp Worcestershire sauce (enhances umami)
For the Skewers:
- Wooden or metal skewers (soak wooden ones if grilling)
- Fresh parsley or cilantro (optional garnish for color and freshness)
How to Make It:
- Mix the Meatballs: Combine ground meat, breadcrumbs, egg, Parmesan, garlic, onion powder, paprika, salt, and pepper in a large bowl. Mix gently to avoid overworking.
- Shape the Meatballs: Roll the mixture into small, bite-sized meatballs (about 1-inch in diameter). Place them on a lined baking sheet.
- Bake or Cook: Preheat the oven to 400°F (200°C). Bake the meatballs for 15-18 minutes or until cooked through. Alternatively, cook them in a skillet over medium heat until browned on all sides.
- Make the BBQ Glaze: While the meatballs are cooking, mix the BBQ sauce, apple cider vinegar, honey, and Worcestershire sauce in a small saucepan over low heat. Simmer until slightly thickened.
- Assemble the Skewers: Once the meatballs are ready, thread 3-4 meatballs onto each skewer. Brush generously with the prepared BBQ glaze.
- Grill or Broil (Optional): For extra smoky flavor, grill or broil the skewers for 2-3 minutes until the glaze caramelizes.
- Serve: Arrange the skewers on a serving platter. Sprinkle with fresh parsley or cilantro for garnish and serve with extra BBQ sauce on the side.
Why They’re a Hit:
- Flavor-Packed: Juicy meatballs with a sweet and smoky glaze.
- Easy to Grab: Perfect for parties or casual gatherings.
- Healthy Twist: Lean meat and reduced-sugar sauce keep calories in check.
These mini BBQ meatball skewers are the ultimate crowd-pleaser. With their perfect balance of savory, smoky, and sweet flavors, they’ll disappear in no time!
Baby Blue Deviled Eggs
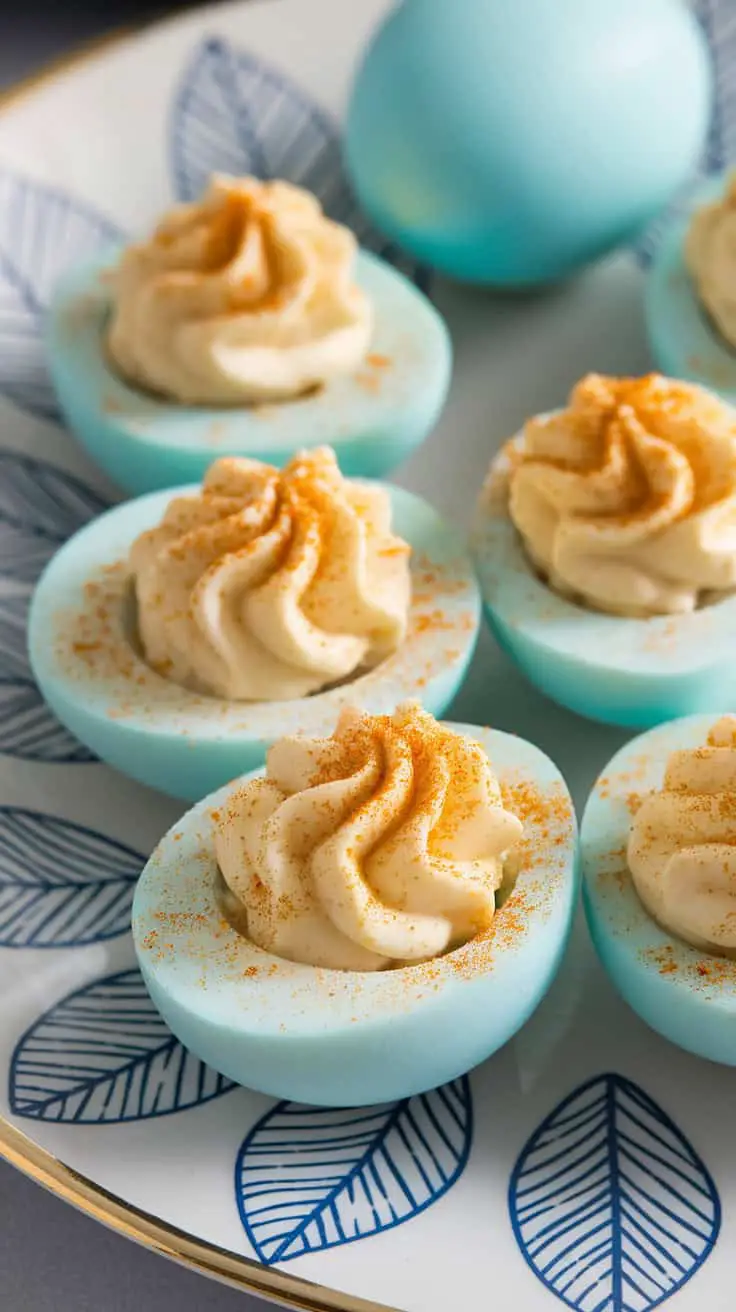
Baby Blue Deviled Eggs are a fun twist on the classic recipe. The vibrant blue color adds a playful touch to any gathering. These eggs are not just visually appealing; they also taste delicious!
To make these delightful bites, start by hard boiling your eggs. Once cooled, cut them in half and scoop out the yolks. Mix the yolks with mayo, mustard, and your favorite seasonings. The key is to get a creamy texture that’s easy to pipe back into the egg whites.
After filling the egg whites, you can pipe on the yolk mixture for that fancy look. A sprinkle of paprika or cayenne pepper on top adds just the right amount of flavor. Serve them chilled on a pretty platter, perhaps with some decorative elements to match the baby blue theme.
Ingredients Breakdown
Let’s dive into what makes these Baby Blue Deviled Eggs both delicious and fun! They’re under 250 calories per serving, so you can snack guilt-free.
For the Eggs:
- 6 large eggs (hard-boiled and peeled)
- 4 cups water (for dyeing the eggs)
- 1 tsp white vinegar (helps the color stick)
- Blue food coloring (gel or liquid for best results)
For the Filling:
- 3 tbsp light mayonnaise (for creaminess without extra calories)
- 1 tsp Dijon mustard (adds a tangy kick)
- 1 tsp white vinegar (for a touch of sharpness)
- 1/4 tsp salt (to balance the flavors)
- 1/8 tsp black pepper (for mild heat)
For Garnish:
- Paprika or cayenne pepper (optional but adds a smoky touch)
- Fresh herbs like chives or parsley (for extra color and freshness)
How to Make It:
- Prepare the Eggs: Hard-boil the eggs by placing them in a pot of cold water. Bring to a boil, then reduce the heat and simmer for 10 minutes. Transfer the eggs to an ice bath to cool.
- Dye the Eggs: Mix water, white vinegar, and blue food coloring in a large bowl. Submerge the peeled eggs for 1-2 hours, checking periodically for the desired shade of blue. Pat dry.
- Make the Filling: Slice the eggs in half lengthwise and remove the yolks. In a bowl, mash the yolks with mayonnaise, Dijon mustard, white vinegar, salt, and pepper until smooth.
- Fill the Eggs: Use a piping bag or small spoon to fill the egg white halves with the creamy yolk mixture.
- Garnish and Serve: Sprinkle with paprika or cayenne for added flavor and garnish with fresh herbs. Arrange on a decorative platter and serve chilled.
Why You’ll Love Them:
- Playful and Festive: The blue color makes them perfect for themed parties.
- Flavor-Packed: The tangy, creamy filling is the perfect complement to the mild egg whites.
- Low-Calorie Treat: Under 250 calories per serving, making them an ideal appetizer or snack.
These Baby Blue Deviled Eggs are a unique twist on a classic favorite. They’re fun, flavorful, and guaranteed to impress your guests!
Blue Cheese and Pear Crostini
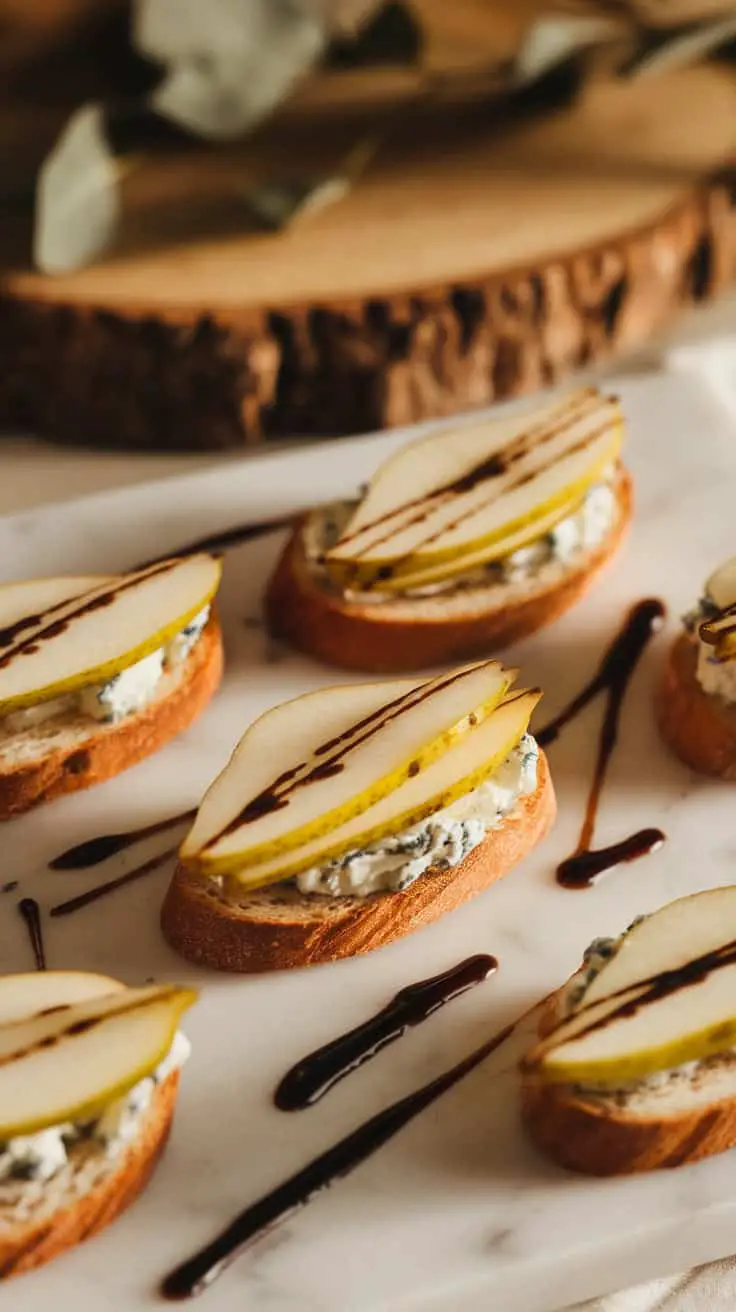
Blue cheese and pear crostini is a delightful appetizer that brings together bold flavors and fresh ingredients. The crunchy bread acts as the perfect base, while the creamy blue cheese adds a rich and tangy touch.
Sliced pears, with their natural sweetness, complement the sharpness of the cheese beautifully. The drizzled balsamic reduction enhances the dish with a hint of acidity, making every bite a burst of flavor.
This simple yet elegant treat is great for gatherings or a cozy night in. Just toast your bread, spread on the cheese, layer with pear slices, and finish with the balsamic drizzle. It’s a quick and easy recipe that never disappoints!
Ingredients Breakdown
Let’s build this irresistible Blue Cheese and Pear Crostini. Each bite is a balance of creamy, sweet, and tangy flavors that will elevate any gathering.
For the Crostini Base:
- 1 baguette, sliced into 1/2-inch rounds (crisp and sturdy base)
- 2 tbsp olive oil (for a golden, crunchy finish)
For the Toppings:
- 4 oz blue cheese, crumbled (bold and creamy)
- 2 ripe pears, thinly sliced (sweet and juicy)
- 1/4 cup walnuts, roughly chopped (optional, for added crunch and warmth)
For the Balsamic Reduction:
- 1/2 cup balsamic vinegar (rich and tangy)
- 1 tbsp honey (for balance and depth)
How to Make It:
- Prepare the Balsamic Reduction: In a small saucepan over medium heat, combine balsamic vinegar and honey. Simmer until reduced by half, about 10-12 minutes. It should be thick and syrupy. Set aside to cool.
- Toast the Crostini: Preheat the oven to 400°F (200°C). Arrange baguette slices on a baking sheet, brush lightly with olive oil, and toast for 6-8 minutes or until golden brown.
- Assemble the Crostini: Spread a generous layer of blue cheese on each crostini while still warm. Top with pear slices and sprinkle with walnuts if using.
- Drizzle and Serve: Just before serving, drizzle the balsamic reduction over the crostini. Serve immediately and enjoy!
Why It’s Amazing:
- Flavor Harmony: The creamy blue cheese, sweet pears, and tangy balsamic create a perfect balance.
- Texture Contrast: Crunchy bread, smooth cheese, and juicy pears offer satisfying bites.
- Elegant & Effortless: Simple ingredients transform into a visually stunning and flavorful appetizer.
These Blue Cheese and Pear Crostini are the perfect blend of sophistication and simplicity, making them an unforgettable appetizer for any occasion!
Mini Blueberry and Brie Tarts
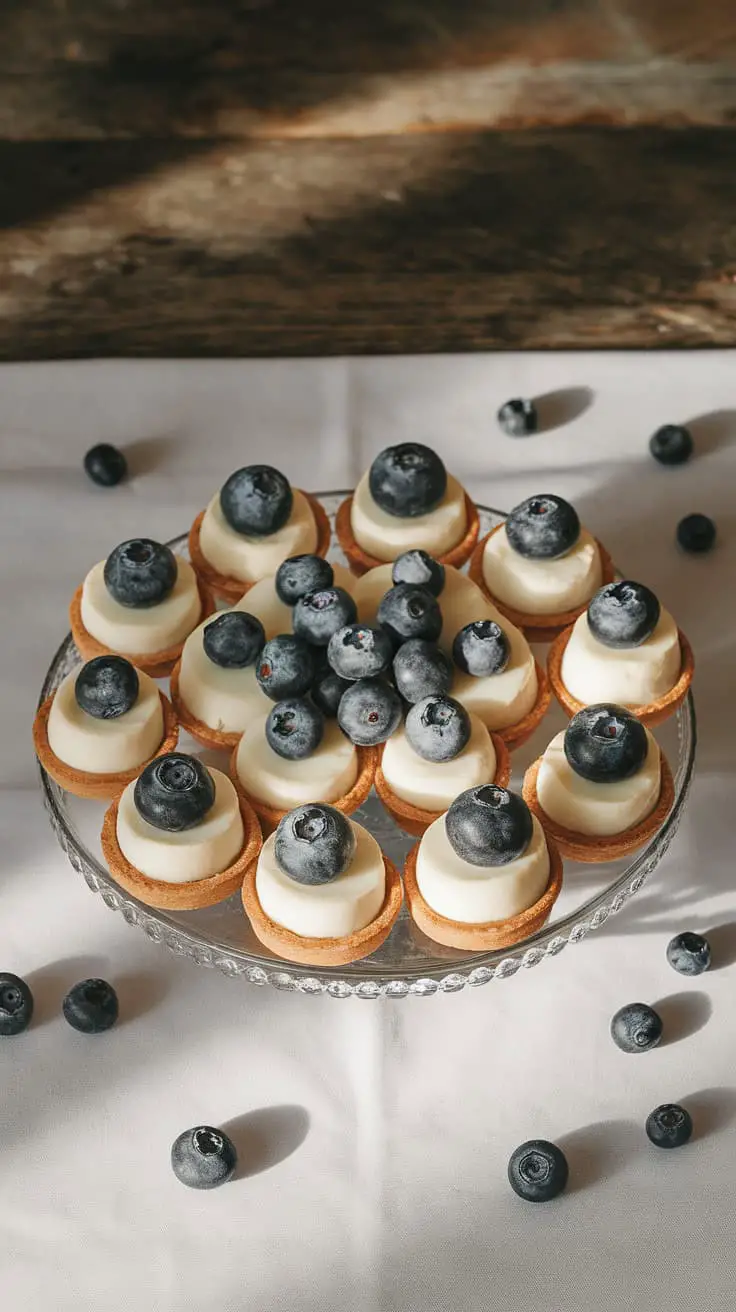
These mini blueberry and brie tarts are a delightful treat. Each tart features a creamy layer of brie topped with fresh blueberries. The golden crust provides the perfect crunch, making every bite a joy.
Blueberries add a burst of sweetness, balancing the rich flavor of brie. This combination is not only tasty but visually appealing too. Arrange them on a simple plate, and they become the star of any gathering.
Making these tarts is easy! Start with pre-made pastry shells, layer in the brie, and top with blueberries. Bake until the cheese is soft, and voilà! You have a gorgeous appetizer that everyone will love.
Ingredients Breakdown
These mini blueberry and brie tarts are simple yet packed with flavor. Let’s dive into what makes them irresistible while keeping them under 250 calories per serving.
For the Tarts:
- 12 pre-made mini phyllo shells (light and crispy base)
- 4 oz brie cheese, rind removed (rich and creamy core)
- 1/2 cup fresh blueberries (bursting with sweetness)
For the Glaze:
- 2 tbsp honey (natural sweetness and shine)
- 1 tsp balsamic vinegar (adds a tangy depth)
For Garnish:
- Fresh thyme leaves (optional, for an herby finish)
- Zest of one lemon (for a citrus kick)
How to Make It:
- Preheat the Oven: Set your oven to 375°F (190°C).
- Fill the Shells: Place a small slice of brie in each phyllo shell. Top with 2-3 blueberries.
- Bake: Arrange the filled shells on a baking sheet. Bake for 8-10 minutes or until the brie is melted and bubbly.
- Make the Glaze: While the tarts bake, combine honey and balsamic vinegar in a small saucepan over low heat. Stir until smooth and slightly thickened.
- Drizzle and Garnish: Remove the tarts from the oven. Drizzle with the glaze and sprinkle with thyme leaves and lemon zest if using.
Why They’re Amazing:
- Quick and Easy: Minimal prep and bake time.
- Sweet and Savory Combo: The creamy brie pairs perfectly with juicy blueberries.
- Visually Stunning: The golden shells and vibrant berries make them a feast for the eyes.
These mini tarts are the perfect mix of elegance and simplicity. Serve them at brunches, parties, or even as a fancy snack—you’ll impress everyone with these little bites of bliss!
Boy-Themed Blue Corn Nachos

Get ready to treat your taste buds with a fun twist on a classic snack! These boy-themed blue corn nachos are vibrant and packed with flavor. The deep blue color of the corn chips stands out, making them a hit for any gathering. They’re perfect for game day or a casual hangout with friends.
These nachos are layered with gooey cheese, zesty diced tomatoes, and spicy jalapeños. Each bite is a crunchy, cheesy explosion. For extra flavor, serve them with colorful dips like spicy salsa, creamy guacamole, and tangy queso. The bright dips complement the nachos beautifully, making the whole platter even more appealing.
To whip up this tasty dish, you’ll need blue corn tortilla chips, shredded cheese, canned diced tomatoes, and jalapeños for the toppings. Simply layer everything on a baking sheet and pop them in the oven until the cheese melts. Serve hot and watch them disappear!
Ingredients Breakdown
Let’s dive into what makes these boy-themed blue corn nachos a mouthwatering treat. Every ingredient plays its part in creating a colorful, flavorful snack that’s under 250 calories per serving.
For the Nachos:
- 4 cups blue corn tortilla chips (for a striking color and hearty crunch)
- 1 cup reduced-fat shredded cheddar cheese (melty and savory)
- 1/2 cup canned diced tomatoes, drained (adds freshness and zing)
- 1/4 cup pickled jalapeño slices (for a spicy kick)
- 1/4 cup black beans, rinsed and drained (optional, for added protein)
- 2 tbsp chopped green onions (for a pop of color and mild onion flavor)
- 2 tbsp chopped fresh cilantro (optional, for a fresh finish)
For the Dips (Optional but Delicious):
- Spicy Salsa: 1/2 cup store-bought or homemade salsa
- Creamy Guacamole: 1 avocado, mashed with lime juice, salt, and pepper
- Tangy Queso: 1/2 cup light queso dip, warmed
How to Make It:
- Preheat the Oven: Set your oven to 375°F (190°C) and line a baking sheet with parchment paper for easy cleanup.
- Layer the Chips: Spread the blue corn tortilla chips evenly on the baking sheet. Make sure they don’t overlap too much.
- Add Toppings: Sprinkle the shredded cheese generously over the chips. Add the diced tomatoes, jalapeño slices, black beans (if using), and green onions.
- Bake Until Melty: Bake for 8-10 minutes or until the cheese is bubbly and fully melted.
- Serve Hot: Carefully remove from the oven, sprinkle with chopped cilantro (if using), and transfer to a serving platter.
- Pair with Dips: Arrange small bowls of salsa, guacamole, and queso around the nachos for dipping.
Why They’re a Hit:
- Bold and Colorful: The blue corn chips make the nachos visually stunning.
- Cheesy and Crunchy: Every bite delivers satisfying textures.
- Customizable: Add or skip ingredients to suit your taste.
These nachos aren’t just a snack—they’re a flavorful experience perfect for game days, parties, or even casual family nights!
Tiny Turkey and Cheese Pinwheels
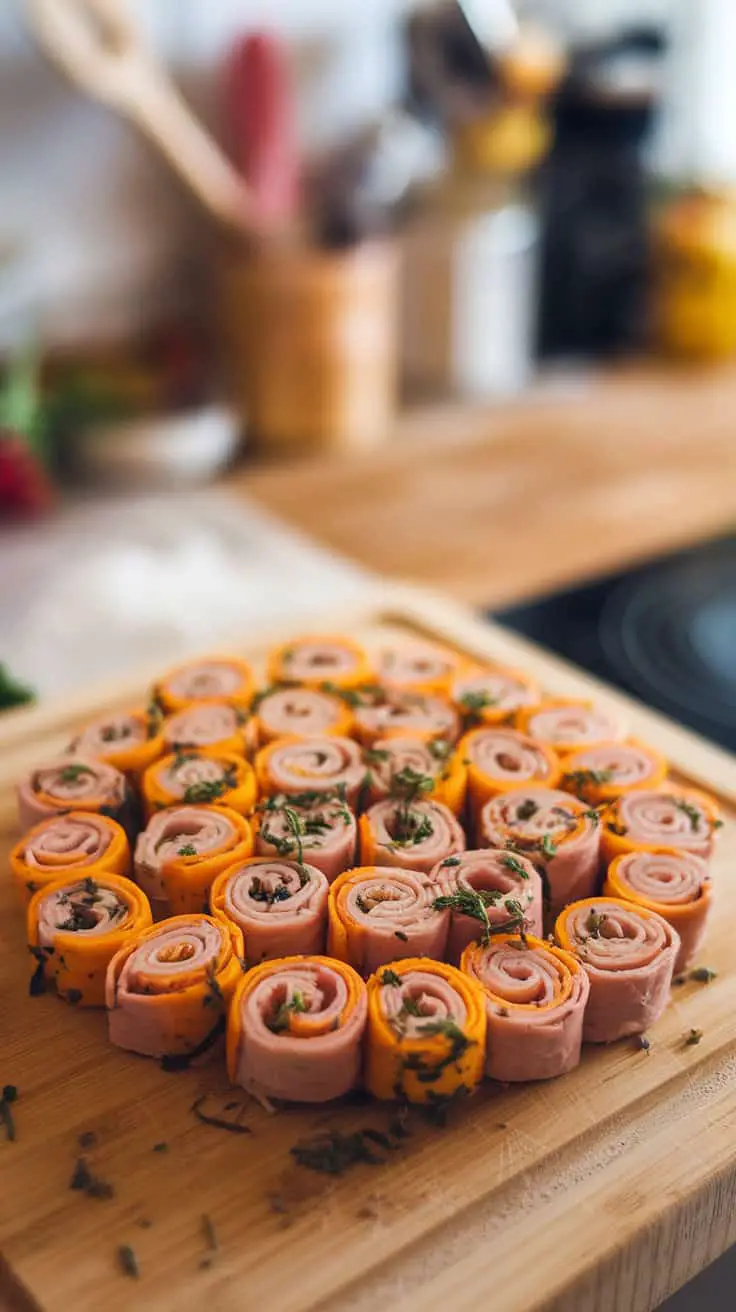
Tiny turkey and cheese pinwheels make a perfect snack or appetizer. The vibrant colors of the rolled-up turkey and cheese create an inviting look that’s hard to resist. You can see the delicious layers of tenderness and flavor, each pinwheel showcasing a mix of turkey and cheese, garnished with a sprinkle of herbs.
To make these tasty bites, you’ll need turkey slices, cheese, and some fresh herbs for garnish. Start by laying out the turkey slices flat on a surface. Add a slice of cheese on top and roll them up tightly. Once rolled, slice them into bite-sized pieces. The combination of flavors is fantastic!
These pinwheels are not just easy to prepare but also fun to eat. Ideal for parties, picnics, or even a quick lunch, they are a hit with both kids and adults. Serve them on a wooden board for a rustic touch, and watch them disappear!
What Will Baby Bee? Gender Reveal Cake
This adorable gender reveal cake is the perfect centerpiece for any baby shower. It features a fun bee theme that adds a playful touch to the celebration. The cake consists of two tiers, each adorned with honeycomb patterns and charming little bee decorations.
The top tier is a bright yellow, representing sweetness, while the bottom tier showcases a mix of soft pink and blue colors. This design beautifully hints at the big reveal, whether it’s a baby girl or boy. The playful bees buzzing around the cake enhance the joyful mood of the occasion.
For those searching for unique gender reveal cake ideas, this cake is a great inspiration. It combines fun colors and a cute theme, making it an eye-catching choice. Plus, it fits perfectly into various baby shower themes, from simple to more elaborate ones.
If you’re planning a gender reveal party, consider this bee gender reveal cake. It’s not just a treat; it’s a memorable way to share the exciting news with family and friends. Whether you’re leaning towards a neutral baby shower cake or a colorful design, this cake brings a delightful charm to the table.
Ingredients Breakdown
Let’s talk about what goes into making this delicious cake. It’s light, flavorful, and under 250 calories per serving—perfect for celebrating without overindulgence.
For the Cake:
- 1 1/2 cups almond flour (light and fluffy base)
- 1/2 cup oat flour (for extra fiber and texture)
- 1 tsp baking powder (for a good rise)
- 1/2 tsp baking soda (helps keep it light)
- 1/4 tsp salt (balances the sweetness)
- 3 large eggs (for structure and moisture)
- 1/2 cup unsweetened applesauce (natural sweetness without added sugar)
- 1/3 cup honey (for a touch of natural sweetness)
- 1 tsp vanilla extract (enhances the flavor)
- Food coloring: yellow, pink, and blue (for the fun reveal!)
For the Honey Cream Frosting:
- 1 cup low-fat Greek yogurt (creamy yet light)
- 1/2 cup reduced-fat cream cheese (for tang and stability)
- 2 tbsp honey (for a hint of sweetness)
- 1 tsp vanilla extract (rounds out the flavors)
For Decoration:
- Edible bee-shaped cake toppers (available in baking stores)
- Yellow, pink, and blue sprinkles (for added flair)
- Fondant honeycomb pieces (optional but adorable)
How to Make It:
- Mix the Batter: Whisk together the dry ingredients—almond flour, oat flour, baking powder, baking soda, and salt. In another bowl, beat the eggs, applesauce, honey, and vanilla extract until smooth. Slowly mix in the dry ingredients.
- Divide and Color: Split the batter into three bowls. Add food coloring to each—yellow, pink, and blue—and stir gently.
- Bake the Cakes: Pour each colored batter into separate greased cake pans. Bake at 350°F (175°C) for 20-25 minutes or until a toothpick comes out clean. Cool completely.
- Make the Frosting: Beat Greek yogurt, cream cheese, honey, and vanilla extract until smooth and creamy.
- Assemble the Cake: Stack the cooled cake layers with frosting between each layer. Frost the entire cake and smooth it out.
- Decorate: Add fondant honeycomb pieces, edible bee toppers, and sprinkles. Let your creativity shine!
Why It’s Amazing:
- Light and Moist: The almond and oat flour combo keeps it tender.
- Naturally Sweetened: Applesauce and honey bring sweetness without refined sugar.
- Wholesome Frosting: Greek yogurt and cream cheese keep the frosting creamy yet guilt-free.
This cake isn’t just cute—it’s a delicious, thoughtful way to celebrate life’s sweetest surprises!
Bite-Sized Caprese Salad Cups
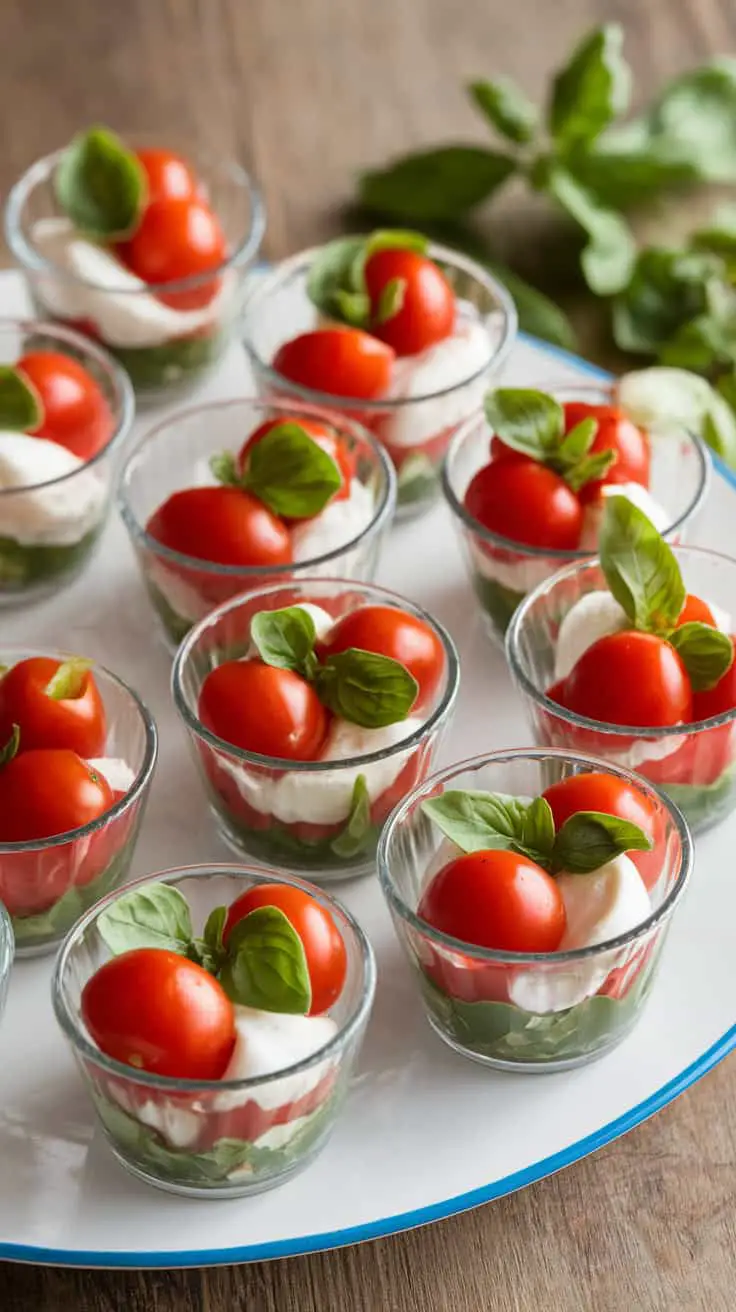
These bite-sized Caprese salad cups are a fun twist on a classic salad. They showcase layers of fresh ingredients in small, clear glass cups. Each cup features vibrant cherry tomatoes, creamy mozzarella, and fragrant basil leaves, making them as pleasing to the eye as they are to the palate.
The colors of red, white, and green not only represent the Italian flag but also create a festive appearance. Perfect for gatherings, these cups are easy to grab and enjoy. They provide a refreshing burst of flavor with every bite.
Making these cups is simple! Start by layering fresh basil leaves at the bottom, followed by diced mozzarella and cherry tomatoes. Drizzle with olive oil or balsamic vinegar for an added kick. Serve chilled and watch your guests enjoy this delightful treat.
Ingredients Breakdown
These Caprese salad cups are light, refreshing, and perfect for any gathering. They’re under 250 calories per serving, making them a guilt-free delight.
For the Salad Cups:
- 1 pint cherry tomatoes (sweet and juicy)
- 8 oz fresh mozzarella balls (ciliegine size for easy layering)
- 1 bunch fresh basil leaves (fragrant and flavorful)
- 2 tbsp extra virgin olive oil (for richness)
- 1 tbsp balsamic glaze (adds a tangy-sweet finish)
- Salt and freshly ground black pepper (to taste)
- Mini clear glass cups or small serving bowls (for presentation)
How to Make It:
- Prepare the Ingredients:
- Rinse cherry tomatoes and basil leaves.
- Cut cherry tomatoes in half for easier bites.
- Drain the mozzarella balls.
- Assemble the Cups:
- Place a fresh basil leaf at the bottom of each cup.
- Add a layer of mozzarella balls.
- Follow with a layer of halved cherry tomatoes.
- Repeat the layers if desired for a more substantial serving.
- Season and Drizzle:
- Lightly season each cup with salt and freshly ground black pepper.
- Drizzle olive oil and balsamic glaze on top.
- Serve and Enjoy:
- Serve immediately or chill for up to an hour before serving.
- Garnish with additional basil leaves for extra freshness.
Why They’re Amazing:
- Fresh and Simple: Only a few fresh ingredients create a burst of Italian-inspired flavor.
- Healthy and Light: These cups are naturally low in carbs and full of wholesome nutrients.
- Perfectly Portable: The individual servings make them ideal for parties, picnics, and gatherings.
These bite-sized Caprese salad cups are not just visually appealing but also packed with mouthwatering flavors. They’re guaranteed to be a crowd-pleaser at any event!
Savory Blue Cheese Stuffed Mushrooms
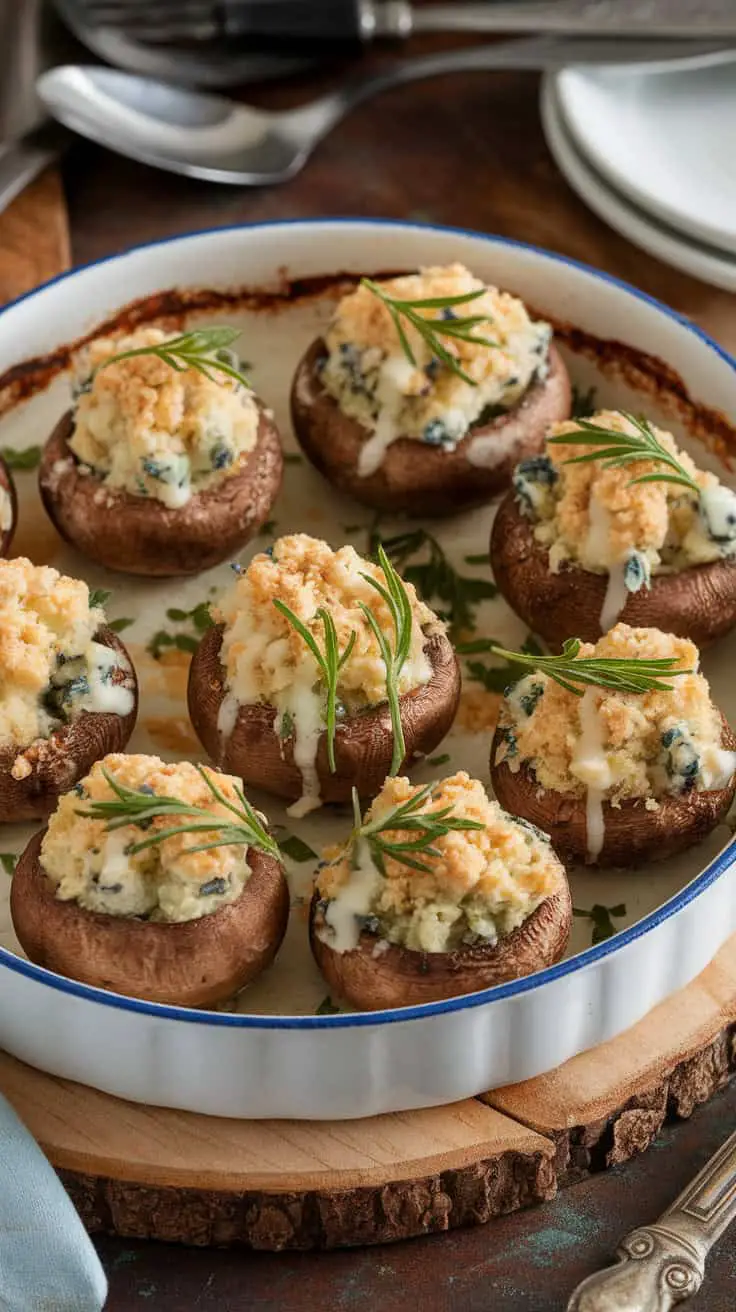
These blue cheese stuffed mushrooms are a delightful treat that’s perfect for any gathering. The mushrooms are plump and inviting, each filled generously with a creamy blue cheese mixture. A sprinkle of herbs adds a fresh touch, making them not just tasty but also visually appealing.
The golden-brown topping hints at a crispy texture, contrasting beautifully with the soft, rich filling. This dish is simple yet elegant, making it a go-to appetizer for dinner parties or holiday festivities. Plus, they are easy to prepare, ensuring you spend more time with your guests and less time in the kitchen!
To make these stuffed mushrooms, you’ll need large mushrooms, blue cheese, cream cheese, and some herbs for garnish. Just mix the cheeses, stuff the mushrooms, and bake until golden. Serve hot and watch them disappear!
Ingredients Breakdown
These savory blue cheese stuffed mushrooms are all about bold flavors and a creamy, satisfying bite. Let’s dive into what makes them irresistible, while keeping each serving under 250 calories.
For the Filling:
- 1/2 cup blue cheese (crumbled, for a sharp, tangy kick)
- 1/2 cup reduced-fat cream cheese (for a creamy, smooth texture)
- 1/4 cup grated Parmesan cheese (adds depth and umami)
- 2 cloves garlic (minced, for savory warmth)
- 2 tbsp chopped fresh parsley (for freshness and color)
- 1 tbsp chopped chives (optional, for extra zing)
- 1/2 tsp black pepper (for seasoning)
For the Mushrooms:
- 16 large white or cremini mushrooms (stems removed, cleaned, and patted dry)
- 1 tbsp olive oil (for brushing and enhancing flavor)
- Salt (to season the mushrooms lightly)
For Garnish:
- Fresh herbs like parsley or thyme (optional, for a decorative touch)
How to Make It:
- Prep the Mushrooms: Preheat the oven to 375°F (190°C). Lightly grease a baking dish. Gently remove the stems from the mushrooms and set the caps aside.
- Make the Filling: In a bowl, mix blue cheese, cream cheese, Parmesan, garlic, parsley, chives, and black pepper until well combined.
- Stuff the Mushrooms: Use a small spoon to generously fill each mushroom cap with the cheese mixture. Slightly mound the filling for extra deliciousness.
- Bake to Perfection: Arrange the stuffed mushrooms in the prepared baking dish. Lightly brush the tops with olive oil and sprinkle with a pinch of salt. Bake for 20-25 minutes or until the mushrooms are tender and the filling is golden brown.
- Serve and Enjoy: Garnish with fresh herbs before serving. Serve warm and watch them disappear!
Why They’re Amazing:
- Bold Flavor Combo: The blue cheese and garlic make a mouthwatering, savory filling.
- Rich and Creamy: The cheeses create a luscious, melt-in-your-mouth texture.
- Effortlessly Elegant: These stuffed mushrooms look gourmet but are incredibly simple to make.
These stuffed mushrooms are perfect for parties, date nights, or when you’re craving a flavorful appetizer that’s quick yet impressive. Enjoy the rich, cheesy goodness in every bite!
Baby Blue Macaron Bites
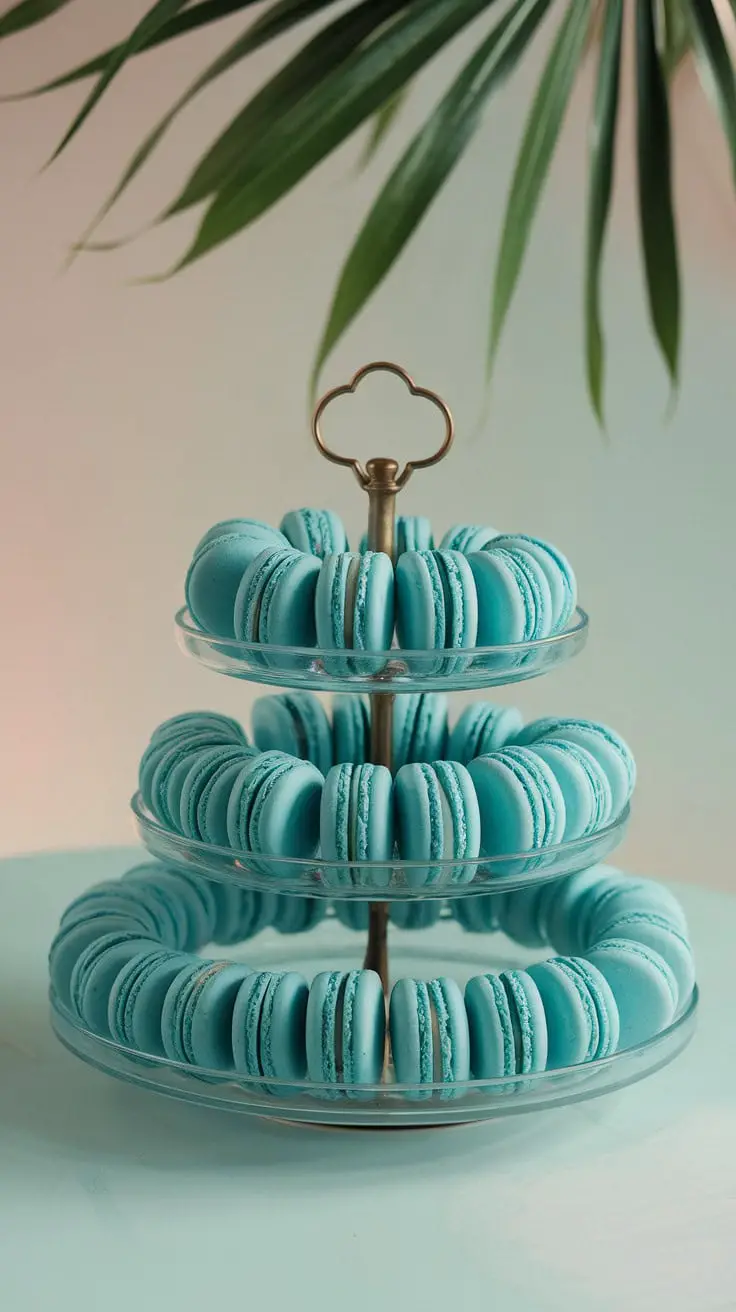
Take a look at these stunning baby blue macaron bites! They sit perfectly on a three-tiered stand, showcasing their vibrant color and delicate texture. Each macaron is a tiny masterpiece, with a smooth surface and a lovely filling that promises a burst of flavor with every bite.
The soft blue hue makes them eye-catching and perfect for any occasion, from tea parties to birthday celebrations. These treats are not just pleasing to the eyes; they also invite you to savor their delightful taste.
Making macarons can be a fun activity. Start with almond flour, powdered sugar, egg whites, and a touch of food coloring for that beautiful blue shade. After whipping the meringue to perfection, fold in the dry ingredients and pipe them onto baking sheets. Once baked, add your favorite filling—think buttercream or ganache—and sandwich them together.
These baby blue bites are sure to impress your friends and family. Enjoy them with a cup of tea or coffee, and let their charm brighten your day!
Ingredients Breakdown
Let’s talk about what goes into creating these elegant baby blue macaron bites. They’re as delicious as they are beautiful, and best of all, they stay under 250 calories per serving!
For the Macaron Shells:
- 1 3/4 cups almond flour (for a smooth, nutty base)
- 1 3/4 cups powdered sugar (for sweetness and structure)
- 3 large egg whites, room temperature (for that signature macaron texture)
- 1/4 cup granulated sugar (stabilizes the meringue)
- 1/2 tsp cream of tartar (helps maintain meringue stability)
- 1/2 tsp vanilla extract (for a subtle flavor boost)
- Blue gel food coloring (a little goes a long way!)
For the Filling:
- 1/2 cup unsalted butter, softened (for creaminess)
- 1 1/2 cups powdered sugar (for sweetness and thickness)
- 1 tsp vanilla extract (enhances the filling flavor)
- 2 tbsp heavy cream (adjust for desired consistency)
How to Make It:
- Make the Macaron Shells:
- Sift the almond flour and powdered sugar together to remove lumps and create a fine mixture.
- Beat the egg whites on medium speed until foamy. Add cream of tartar and continue beating until soft peaks form.
- Gradually add granulated sugar while beating on high speed until stiff, glossy peaks form.
- Add vanilla extract and a drop of blue gel food coloring. Mix gently until evenly colored.
- Fold the dry ingredients into the meringue using a spatula. Be gentle to avoid deflating the batter.
- Pipe the batter onto a baking sheet lined with parchment paper, forming small circles.
- Tap the baking sheet firmly on the counter to remove air bubbles.
- Let the macarons sit at room temperature for 30-45 minutes until a skin forms on the surface.
- Bake at 300°F (150°C) for 14-16 minutes, until firm but not browned.
- Prepare the Filling:
- Beat the softened butter until creamy.
- Add powdered sugar, vanilla extract, and heavy cream. Mix until smooth and fluffy.
- Assemble the Macarons:
- Match similar-sized shells.
- Pipe a small amount of filling onto the flat side of one shell.
- Gently press another shell on top to create a macaron sandwich.
Why They’re Amazing:
- Perfect Texture: Crispy outside, chewy inside.
- Delicate Sweetness: Balanced by the creamy filling.
- Visually Stunning: That soft baby blue color makes them irresistibly charming.
These baby blue macaron bites are an elegant treat that’s as enjoyable to make as they are to eat. Perfect for sharing—or savoring all on your own!
Mini Chicken and Waffle Sliders
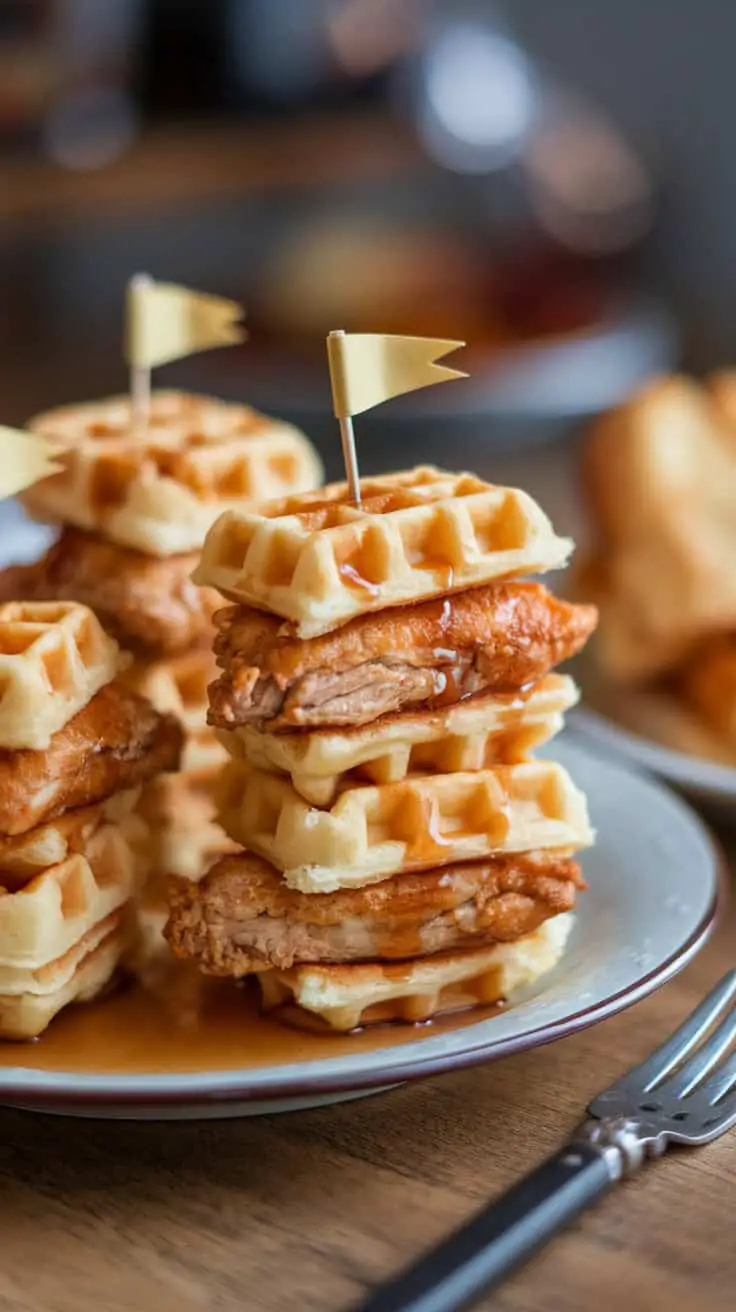
These mini chicken and waffle sliders are a fun twist on a classic dish. They feature crispy fried chicken nestled between two fluffy waffles, making for a perfect bite-sized treat.
The golden waffles are stacked high, showcasing their inviting texture. Each slider is topped with a tiny flag, adding a playful touch. A drizzle of syrup enhances the sweetness, complementing the savory chicken beautifully.
This dish is not just a feast for the eyes but also a delight for the taste buds. Perfect for parties or a cozy brunch, these sliders are sure to impress everyone at the table.
Ingredients Breakdown
Let’s dive into what makes these mini chicken and waffle sliders so irresistibly delicious while keeping them under 250 calories per serving.
For the Waffles:
- 1 cup whole wheat flour (adds fiber and heartiness)
- 1 tsp baking powder (for fluffy waffles)
- 1/4 tsp baking soda (helps with browning)
- 1/4 tsp salt (balances sweetness)
- 1 large egg (for structure)
- 1 cup unsweetened almond milk (low-calorie creaminess)
- 2 tbsp melted coconut oil (healthy fat for crisp edges)
- 1 tbsp honey (natural sweetness)
- 1 tsp vanilla extract (for depth of flavor)
For the Chicken:
- 1 lb boneless, skinless chicken breast (lean protein)
- 1/2 cup whole wheat breadcrumbs (for crunch)
- 1/4 cup panko breadcrumbs (extra crispiness)
- 1 tsp smoked paprika (for smoky flavor)
- 1/2 tsp garlic powder (savory kick)
- 1/2 tsp onion powder (enhances the chicken)
- 1/4 tsp cayenne pepper (optional for heat)
- Salt and pepper to taste (flavor balance)
- Cooking spray (for baking)
For Serving:
- Sugar-free maple syrup (for sweetness without extra calories)
- Mini cocktail flags (optional for presentation)
How to Make It:
- Make the Waffles: In a large bowl, whisk together whole wheat flour, baking powder, baking soda, and salt. In another bowl, beat the egg, almond milk, coconut oil, honey, and vanilla. Combine wet and dry ingredients, stirring gently until just mixed. Cook in a mini waffle maker until golden brown. Set aside.
- Prepare the Chicken: Preheat oven to 400°F (200°C). Slice chicken into bite-sized pieces. In a shallow dish, mix whole wheat breadcrumbs, panko, smoked paprika, garlic powder, onion powder, cayenne pepper, salt, and pepper. Coat chicken in breadcrumb mixture, pressing lightly. Place on a greased baking sheet and spray the tops with cooking spray. Bake for 20-25 minutes, flipping halfway.
- Assemble the Sliders: Layer a piece of crispy chicken between two mini waffles. Secure with a cocktail flag if desired.
- Serve and Enjoy: Drizzle with sugar-free maple syrup before serving for that perfect sweet and savory finish.
Why They’re Amazing:
- Balanced Flavors: Savory chicken meets sweet waffles for the ultimate combo.
- Crispy and Tender: The baked chicken stays juicy inside with a crunchy coating.
- Healthier Twist: Using whole wheat ingredients and sugar-free syrup keeps calories in check.
These mini chicken and waffle sliders are a fun, flavorful bite that’s guaranteed to make your gathering unforgettable!
Petite Spinach and Feta Puff Pastries
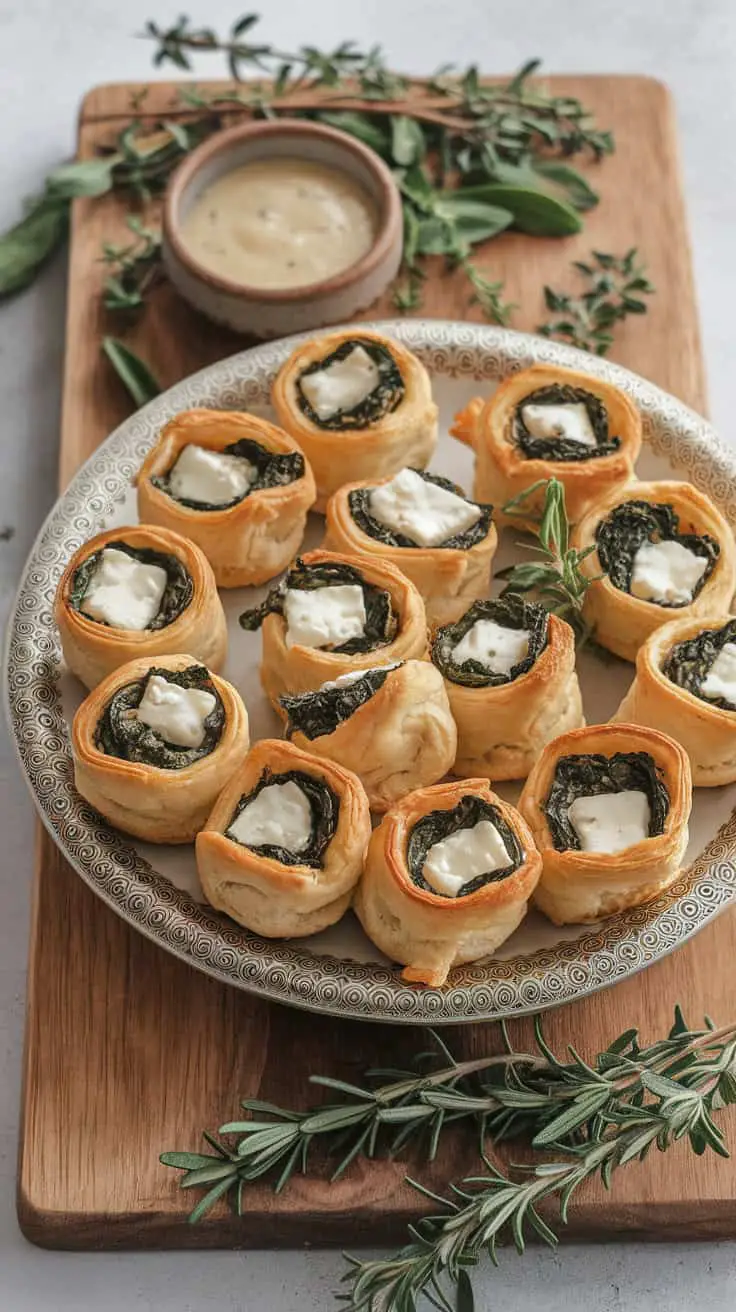
These petite spinach and feta puff pastries are perfect for any gathering. They look delightful, with golden, flaky pastry wrapped around a vibrant spinach filling and a touch of creamy feta on top. Each bite offers a savory treat that’s hard to resist.
To make these tasty bites, you’ll need a few simple ingredients: fresh spinach, feta cheese, puff pastry, and some herbs for extra flavor. It’s an easy recipe that can be whipped up quickly, making it a great choice for last-minute snacks or appetizers.
The preparation is straightforward. Start by sautéing the spinach until wilted, then mix it with crumbled feta and your choice of herbs. Roll out the puff pastry, cut it into squares, and fill each piece with the spinach mixture. Bake until golden brown, and you’ll have a platter of delicious treats to impress your guests!
Ingredients Breakdown
Let’s dive into what makes these pastries so irresistible. Every ingredient brings a unique touch to create a perfect balance of flavors.
For the Filling:
- 2 cups fresh spinach (packed, for a vibrant green filling)
- 1/2 cup crumbled feta cheese (adds creamy, salty goodness)
- 1 small onion, finely chopped (for extra savory depth)
- 2 garlic cloves, minced (enhances the flavor)
- 1 tbsp olive oil (for sautéing)
- 1 tsp dried dill or fresh dill (for a hint of herbaceous flavor)
- 1/2 tsp ground nutmeg (for a warm, subtle spice)
- Salt and pepper to taste (balances the overall flavor)
For the Pastry:
- 1 sheet puff pastry (thawed, for a crispy, golden shell)
- 1 egg, beaten (for an appealing glossy finish)
For Garnish:
- Fresh herbs like parsley or dill (optional, for added freshness)
- A small bowl of dipping sauce (such as tzatziki or herbed yogurt)
How to Make It:
- Prepare the Filling:
- Heat olive oil in a pan over medium heat.
- Add the onion and garlic, sautéing until soft and fragrant.
- Toss in the spinach and cook until wilted. Remove from heat.
- Stir in crumbled feta, dill, nutmeg, salt, and pepper.
- Allow the mixture to cool slightly.
- Assemble the Pastries:
- Preheat the oven to 400°F (200°C).
- Roll out the puff pastry on a lightly floured surface.
- Cut into squares (about 3×3 inches).
- Place a spoonful of the spinach mixture in the center of each square.
- Fold opposite corners together to form a triangle or pinch the edges for a rustic look.
- Brush the tops with the beaten egg.
- Bake to Perfection:
- Arrange the pastries on a baking sheet lined with parchment paper.
- Bake for 18-20 minutes or until puffed and golden brown.
- Serve and Enjoy:
- Arrange on a platter with dipping sauce and fresh herbs for garnish.
Why You’ll Love These Pastries:
- Flaky and Buttery: The puff pastry bakes into perfectly crispy layers.
- Savory and Satisfying: The spinach and feta filling is flavorful and hearty.
- Simple Yet Elegant: These pastries are easy to make but look impressively fancy.
They’re a delightful appetizer or snack, guaranteed to disappear in no time at your next gathering!
Blueberry Glazed Mini Donuts
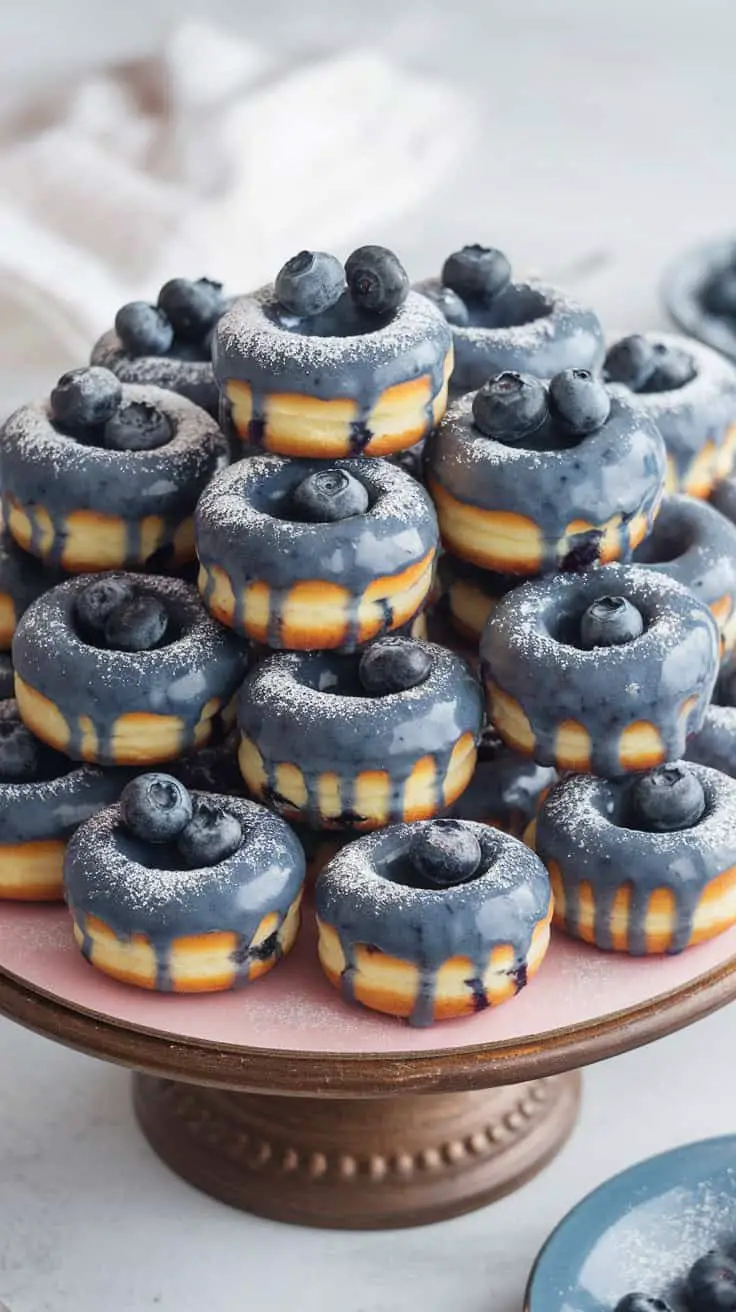
These blueberry glazed mini donuts are a delightful treat that catches the eye. Stacked high on a pretty pedestal, they showcase a beautiful blend of colors. The shiny blueberry glaze glistens under the light, making them look irresistible.
Each donut is topped with fresh blueberries, adding a pop of color and a burst of flavor. The contrast between the rich blue glaze and the soft, golden dough creates a mouthwatering sight. Dusting of powdered sugar adds a charming touch, enhancing their visual appeal.
Making these donuts at home can be a fun activity. All you need are some simple ingredients like flour, sugar, eggs, and blueberries. The process is straightforward, and soon enough, you’ll have a delicious batch perfect for any occasion.
Ingredients Breakdown
Let’s dive into the delicious ingredients that make these mini donuts a must-try. They’re light, flavorful, and under 250 calories per serving, making them a guilt-free indulgence.
For the Donuts:
- 1 cup all-purpose flour (for a soft and tender base)
- 1/2 cup whole wheat flour (adds fiber and depth)
- 1 tsp baking powder (for the perfect rise)
- 1/2 tsp baking soda (helps keep them light)
- 1/4 tsp salt (balances the sweetness)
- 1/3 cup granulated sugar (for sweetness)
- 1/4 cup unsweetened applesauce (adds moisture)
- 1/3 cup low-fat Greek yogurt (for a tender crumb)
- 1 large egg (for structure)
- 1 tsp vanilla extract (enhances the flavor)
- 1/2 cup fresh or frozen blueberries (for bursts of flavor)
For the Blueberry Glaze:
- 1 cup fresh blueberries (for a naturally sweet glaze)
- 1 cup powdered sugar (for smoothness)
- 1 tbsp lemon juice (for brightness)
- 1/2 tsp vanilla extract (for depth of flavor)
For Decoration:
- Fresh blueberries (for garnish)
- Powdered sugar (for a pretty dusting)
How to Make It:
- Prepare the Batter: Whisk together the flours, baking powder, baking soda, salt, and sugar in a large bowl. In a separate bowl, mix the applesauce, Greek yogurt, egg, and vanilla extract until smooth. Gently fold in the dry ingredients, followed by the blueberries.
- Bake the Donuts: Grease a mini donut pan and fill each cavity about 3/4 full. Bake at 350°F (175°C) for 10-12 minutes or until a toothpick comes out clean. Let them cool completely before glazing.
- Make the Blueberry Glaze: In a small saucepan, heat the blueberries and lemon juice over medium heat until they burst and form a syrup. Strain the mixture through a fine sieve to remove seeds. Whisk the strained juice with powdered sugar and vanilla extract until smooth.
- Glaze the Donuts: Dip each cooled donut into the blueberry glaze, allowing excess to drip off. Place them on a wire rack to set.
- Decorate: Arrange the donuts on a platter, top with fresh blueberries, and dust with powdered sugar for extra charm.
Why You’ll Love Them:
- Naturally Sweetened: Blueberries add natural sweetness and vibrant color.
- Tender and Light: Greek yogurt and applesauce keep the donuts soft and moist.
- Stunning Presentation: The shiny glaze and fresh blueberry topping create an eye-catching treat.
These mini donuts are the perfect blend of sweet, tangy, and tender—a true delight for any occasion!
Blueberry and Goat Cheese Bruschetta
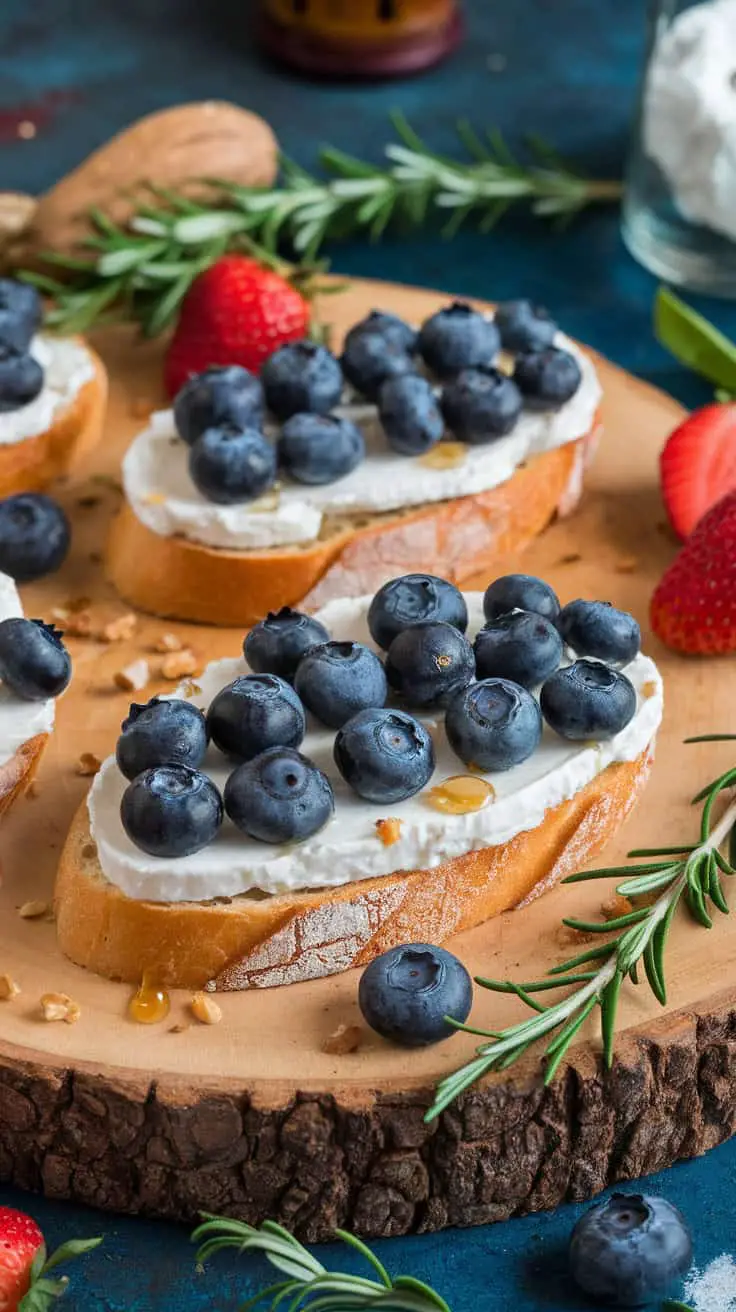
This Blueberry and Goat Cheese Bruschetta is a delightful treat perfect for any occasion. The image showcases toasted bread topped with creamy goat cheese and plump blueberries. It’s colorful and inviting, making it hard to resist.
The combination of sweet blueberries and tangy goat cheese creates a wonderful balance of flavors. A drizzle of honey adds just the right touch of sweetness. You can also see some fresh strawberries and sprigs of rosemary, which not only enhance the presentation but also bring in additional flavor notes.
Making this bruschetta is easy. Start with your favorite bread, toast it to a golden-brown, and spread a generous layer of goat cheese on top. Then, pile on those fresh blueberries and finish with a drizzle of honey. Serve it up as an appetizer, or enjoy it as a quick snack!
Ingredients Breakdown
Let’s dive into what makes this Blueberry and Goat Cheese Bruschetta so irresistible. It’s a simple yet elegant dish that’s under 250 calories per serving—perfect for entertaining or a quick snack.
For the Bruschetta:
- 1 small baguette or whole-grain bread (sliced into 1/2-inch thick pieces)
- 4 oz goat cheese (soft and tangy)
- 1 cup fresh blueberries (sweet and juicy)
- 2 tbsp honey (for a touch of natural sweetness)
- 1 tbsp olive oil (for a crispy toast)
- Pinch of sea salt (enhances the flavors)
For Garnish:
- Fresh rosemary sprigs (optional, for a herbal touch)
- Fresh strawberries (optional, for added color and flavor)
How to Make It:
- Toast the Bread: Preheat your oven to 400°F (200°C). Arrange the bread slices on a baking sheet and brush both sides lightly with olive oil. Bake for 8-10 minutes until golden and crispy.
- Spread the Cheese: Once the bread has cooled slightly, spread a generous layer of goat cheese on each slice.
- Add the Blueberries: Pile fresh blueberries on top of the goat cheese, pressing them in gently so they don’t roll off.
- Drizzle with Honey: Lightly drizzle honey over the bruschetta for a hint of sweetness.
- Garnish and Serve: Add rosemary sprigs and sliced strawberries for extra flair. Serve immediately and enjoy!
Why It’s Amazing:
- Sweet & Tangy Combo: The creamy goat cheese pairs perfectly with the juicy blueberries and sweet honey.
- Crunch & Creaminess: The crispy bread adds a satisfying crunch against the smooth cheese.
- Effortless Elegance: It’s easy to make but looks and tastes like a gourmet treat.
This bruschetta is more than a snack—it’s a beautifully balanced bite bursting with fresh, vibrant flavors that will impress any guest!
Crispy Parmesan Zucchini Chips
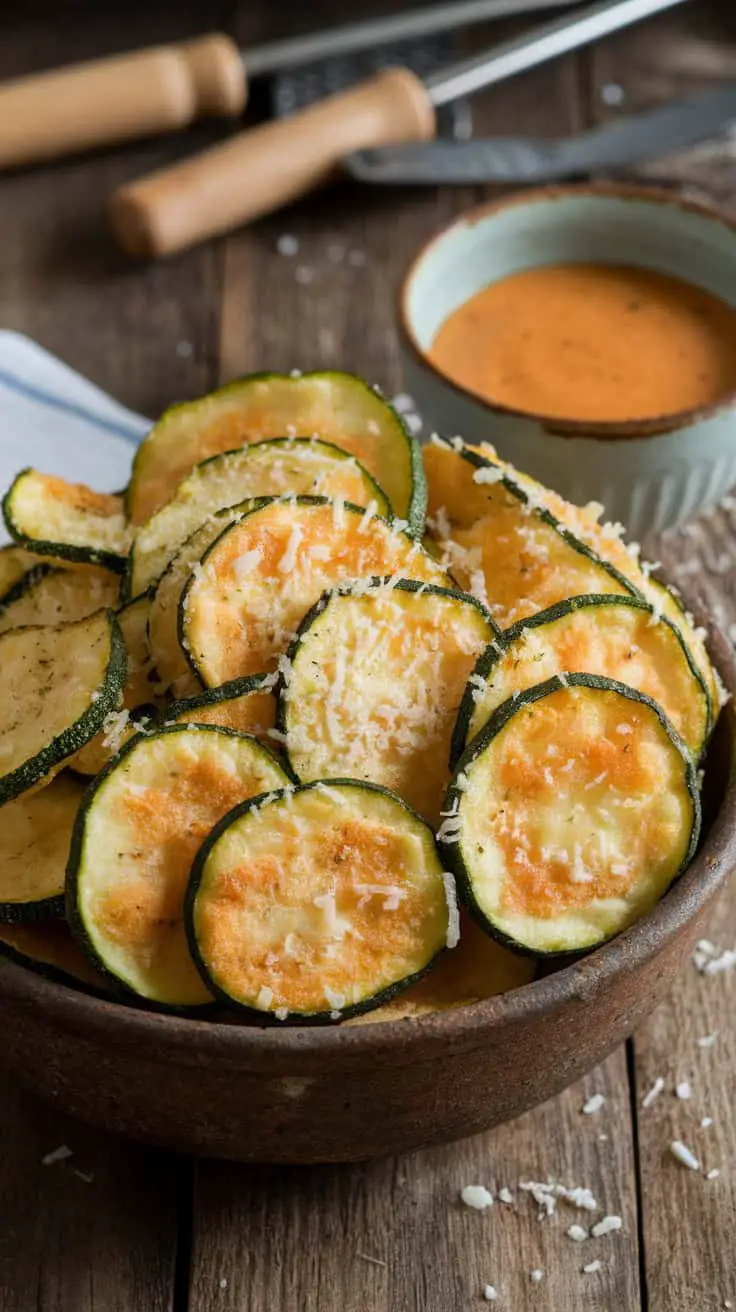
These crispy Parmesan zucchini chips are a delightful snack that everyone will love. They are golden brown, crunchy, and packed with flavor. The combination of zucchini and Parmesan cheese creates a mouthwatering treat that is hard to resist.
To make these chips, you’ll need just a few simple ingredients: fresh zucchini, grated Parmesan cheese, olive oil, and seasonings like salt and pepper. Start by slicing the zucchini into thin rounds, ensuring they cook evenly. Toss them in olive oil and sprinkle with cheese and seasonings for that extra kick.
Bake them until crispy, and watch them transform into delicious chips. Serve them with a tasty dip, like ranch or a spicy aioli, for an added burst of flavor. These chips are perfect for snacking, parties, or as a side dish with your meals.
Ingredients Breakdown
Let’s dive into what makes these crispy Parmesan zucchini chips so irresistible. They’re crunchy, cheesy, and under 250 calories per serving—perfect for guilt-free snacking.
For the Zucchini Chips:
- 2 medium zucchinis (thinly sliced into even rounds)
- 1/2 cup grated Parmesan cheese (for that savory, cheesy coating)
- 1/2 cup whole wheat breadcrumbs (for extra crunch)
- 1 tsp garlic powder (for a punch of flavor)
- 1 tsp Italian seasoning (adds a herby touch)
- 1/2 tsp salt (enhances the taste)
- 1/4 tsp black pepper (for mild heat)
- 2 large eggs (lightly beaten, helps the coating stick)
- Olive oil spray (for even baking crispiness)
For Dipping Sauce (Optional):
- 1/2 cup Greek yogurt (for creaminess)
- 1 tbsp lemon juice (for a citrus kick)
- 1 tsp garlic powder (for depth of flavor)
- Salt and pepper to taste
How to Make It:
- Prep the Zucchini: Slice the zucchinis into thin, even rounds about 1/4 inch thick. Pat them dry with paper towels to remove excess moisture.
- Prepare the Coating: In a shallow dish, mix the Parmesan cheese, breadcrumbs, garlic powder, Italian seasoning, salt, and pepper.
- Dip and Coat: Dip each zucchini slice into the beaten eggs, then coat with the Parmesan mixture. Press lightly to ensure even coverage.
- Arrange on Baking Sheet: Place the coated zucchini slices on a baking sheet lined with parchment paper. Lightly spray with olive oil for added crispiness.
- Bake to Perfection: Bake at 425°F (220°C) for 20-25 minutes, flipping halfway through. Look for a golden brown and crispy finish.
- Make the Dipping Sauce: While the chips are baking, mix Greek yogurt, lemon juice, garlic powder, salt, and pepper in a small bowl. Adjust seasonings to your taste.
- Serve and Enjoy: Once the zucchini chips are crispy and golden, let them cool slightly before serving with the dipping sauce.
Why They’re Amazing:
- Crispy & Flavorful: The perfect balance of cheese and seasonings.
- Low-Calorie Snack: Satisfies cravings without breaking the calorie bank.
- Healthy Dipping Sauce: Adds a refreshing tang while keeping things light.
These zucchini chips are the ultimate snack for any occasion—easy to make, fun to eat, and full of deliciousness!
Mini Blue Velvet Cupcakes with Cream Cheese Frosting
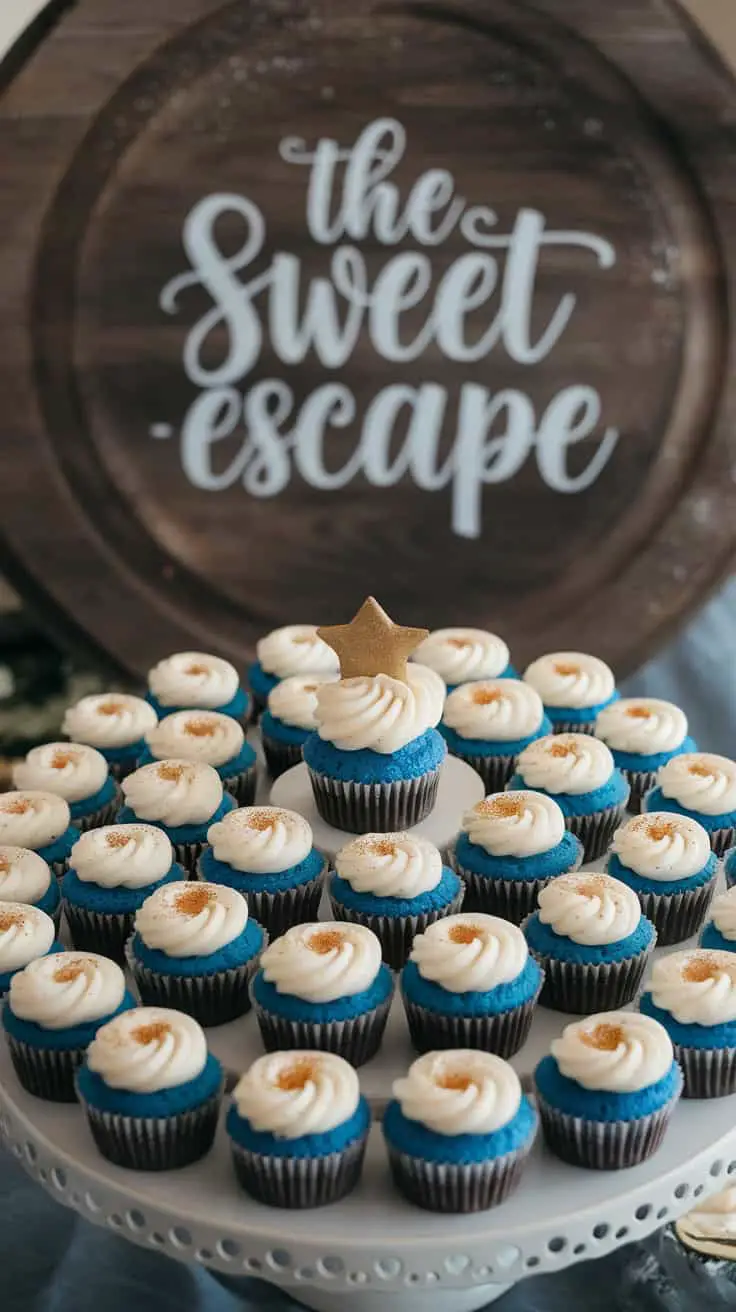
These mini blue velvet cupcakes are a delightful treat, perfect for any occasion. Their bright blue color is sure to catch the eye, making them a fun addition to your dessert table.
The cupcakes are topped with a generous swirl of cream cheese frosting that adds a creamy texture and tangy flavor. A sprinkle of gold dust makes the centerpiece cupcake truly shine.
Each mini cupcake is the right size for a quick bite, making them great for parties or gatherings. Their vibrant look and delicious taste are a win-win, and they’re sure to impress your guests.
To make these cupcakes, you’ll need ingredients like flour, cocoa powder, buttermilk, and blue food coloring. The steps are simple: mix the dry ingredients, then combine them with the wet, and bake! Finish with that luscious frosting for a treat everyone will love.
Ingredients Breakdown
Let’s dive into making these stunning mini blue velvet cupcakes with cream cheese frosting. They’re small but packed with flavor—and perfectly sized for any celebration.
For the Cupcakes:
- 1 1/2 cups all-purpose flour (for structure)
- 2 tbsp unsweetened cocoa powder (adds depth of flavor)
- 1 tsp baking powder (for a nice rise)
- 1/2 tsp baking soda (helps them stay light)
- 1/4 tsp salt (balances sweetness)
- 1/2 cup unsalted butter, softened (for richness)
- 3/4 cup granulated sugar (for sweetness)
- 2 large eggs (for stability and moisture)
- 1 tsp vanilla extract (enhances flavor)
- 1/2 cup buttermilk (keeps them tender and moist)
- 2 tsp blue food coloring (for that iconic color)
For the Cream Cheese Frosting:
- 8 oz reduced-fat cream cheese, softened (creamy and tangy)
- 1/2 cup unsalted butter, softened (smooth and rich)
- 2 cups powdered sugar (adds sweetness and stability)
- 1 tsp vanilla extract (for added depth)
For Decoration:
- Gold star sprinkles (for sparkle and flair)
- Edible gold dust (optional but stunning)
How to Make It:
- Prepare the Dry Ingredients: In a bowl, sift together the flour, cocoa powder, baking powder, baking soda, and salt. Set aside.
- Mix the Wet Ingredients: In a large mixing bowl, beat the softened butter and sugar until light and fluffy. Add eggs one at a time, mixing well after each addition. Stir in the vanilla extract.
- Combine and Color: Alternate adding the dry ingredients and buttermilk to the wet ingredients, starting and ending with the dry mix. Stir gently until combined. Add blue food coloring and mix until you reach the desired shade.
- Bake the Cupcakes: Line a mini cupcake tin with paper liners and fill each about 3/4 full. Bake at 350°F (175°C) for 15-18 minutes or until a toothpick inserted comes out clean. Cool completely.
- Make the Frosting: Beat the cream cheese and butter until smooth. Gradually add powdered sugar, beating until fluffy. Stir in vanilla extract.
- Decorate: Pipe the frosting onto the cooled cupcakes. Sprinkle with gold stars and a touch of edible gold dust for extra sparkle.
Why They’re Amazing:
- Rich and Moist: Buttermilk and cocoa powder create a velvety texture.
- Eye-Catching: The bold blue color makes these cupcakes a standout.
- Deliciously Balanced: The tangy cream cheese frosting pairs perfectly with the sweet, tender cupcakes.
These mini blue velvet cupcakes aren’t just treats—they’re edible works of art that taste as good as they look!
